2014 Seat Altea warning
[x] Cancel search: warningPage 158 of 321

156Seats and storage
–Extract the shelf from its slot, in its rest position and pull out-
wards. The storage compartment should remain closed.
To remove the storage compartment
– Pull outwards until the compartment is freed from the pivot
point ⇒ Fig. 124.
WARNING
Do not place heavy or hard objects on the rear shelf, because they will
endanger the vehicle occupants in case of sudden braking.
CAUTION
● Before closing the rear lid, ensure that the rear shelf is correctly fitted.
● An overloaded luggage compartment could mean that the rear shelf is
not correctly seated and it may be bent or damaged.
● If the luggage compartment is overloaded, remove the tray.
Note
● Ensure that, when placing items of clothing on the luggage compart-
ment cover, rear visibility is not reduced.
● If the vehicle is fitted with a storage compartment*, it should only be
used to store the emergency triangles* and light objects. Applies to the model: ALTEA XL / ALTEA FREETRACK
Retractable rear shelf
Fig. 125 Using the rear
shelf
Fig. 126 Removing the
rear shelf
Using the rear shelf
– Use the handle A
to pull the shelf back until you hear a “click”
⇒ Fig. 125.
Page 159 of 321

157
Seats and storage
– Press the area marked “PRESS”, and the cover is retrieved auto-
matically.
To remove the rear shelf
– Press the side pin in the direction of the arrow, lift the cover and
remove it ⇒ Fig. 126.
– Installation is done in the reverse order.
WARNING
Do not place heavy or hard objects on the rear shelf, because they will
endanger the vehicle occupants in case of sudden braking.
CAUTION
● Before closing the rear lid, ensure that the rear shelf is correctly fitted.
● An overloaded luggage compartment could mean that the rear shelf is
not correctly seated and it may be bent or damaged.
● If the luggage compartment is overloaded, remove the tray.
Note
● Ensure that, when placing items of clothing on the luggage compart-
ment cover, rear visibility is not reduced. Applies to the model: ALTEA XL / ALTEA FREETRACK
Partition net*
The net partition prevents loose objects in the luggage com-
partment from being thrown forward into the passenger
compartment (e.g. under sudden braking).
Fig. 127 Partition net
Fig. 128 Fastening rings
for the separation net
Safety FirstOperating instructionsPractical TipsTechnical Specifications
Page 162 of 321

160Air conditioning
Air distribution
Control 4
for setting the flow of air in the required direction.
– Air distribution towards the windscreen. If the windscreen air output is
on and the air recirculation mode is pressed, this remains active. When the
recirculation mode is on, if the air distribution towards the windscreen
mode is selected, the recirculation mode is deactivated. For safety reasons,
the air recirculation mode should not be connected.
– Air distribution to the upper body
– Air distribution to footwell
– Air distribution to the windscreen and the footwell
Blower
The air flow can be set at four speeds with the control 5
. The air flow
should always be set at the lowest speed when driving slowly.
WARNING
● For road safety all windows must be clear of ice, snow, and condensa-
tion. This is essential to ensure good visibility. Please familiarise your-
self with the correct operation of the heating and ventilation system, in-
cluding the anti-fog/defrost functions for the windscreens.
● In air recirculation mode, no cold air from the outside enters the vehi-
cle interior. The windows can quickly fog over if the heating is switched
off. Therefore, never leave the air recirculation mode switched on for a
long time (risk of accident).
Note
Please observe the general notes ⇒ page 169.
Page 163 of 321

161
Air conditioning
Climatic* Controls
Fig. 130 On the dash panel: Climatic controls
The Climatic or semi-automatic air conditioning system only works
when the engine is running and the blower is switched on.
– Use the knobs ⇒ Fig. 130 1
and 5 and control 6 to set the
temperature, air distribution and blower speed.
– To switch a function on or off, press the appropriate button 2
,
3 or 4. When the function is activated, the display window in
the lower corner of the button is lit.
Temperature selector ⇒ page 162
AC
button – Heating, ventilation and air-conditioning system on/off
⇒ page 162
button – Heated rear window The heating will be switched off auto-
matically approximately 20 minutes after switching on. It can also be
switched off beforehand by pushing the button.
1
2
3
Button
– Air recirculation mode ⇒ page 163
Air distribution control ⇒ page 162
Blower switch. There are four speed settings for the air flow. The air
flow should always be set at the lowest speed when driving slowly.
WARNING
For road safety all windows must be clear of ice, snow, and condensation.
This is essential to ensure good visibility. Please familiarise yourself with
the correct operation of the heating and ventilation system, including the
anti-fog/defrost functions for the windscreens.
Note
Please observe the general notes ⇒ page 169.
4
56
Safety FirstOperating instructionsPractical TipsTechnical Specifications
Page 166 of 321

164Air conditioning
WARNING
In air recirculation mode, no cold air from the outside enters the vehicle
interior. If the air conditioning system is switched off, the windows can
quickly mist over. Therefore, never leave the air recirculation mode
switched on for a long time (risk of accident).
2C-Climatronic* Controls
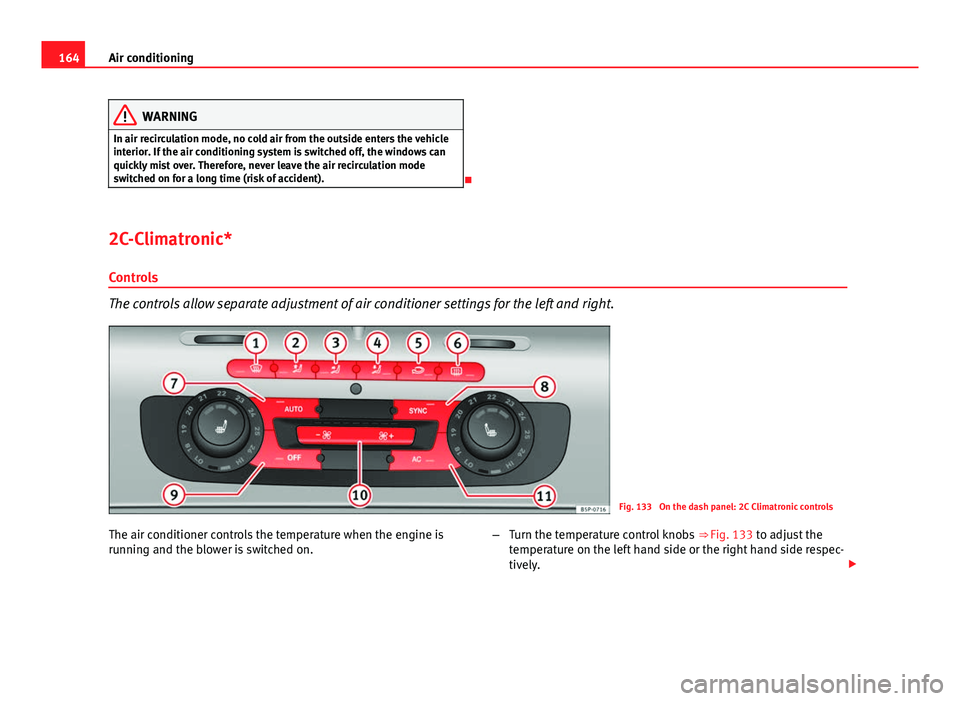
The controls allow separate adjustment of air conditioner settings for the left and right.
Fig. 133 On the dash panel: 2C Climatronic controls
The air conditioner controls the temperature when the engine is
running and the blower is switched on. –
Turn the temperature control knobs ⇒ Fig. 133 to adjust the
temperature on the left hand side or the right hand side respec-
tively.
Page 167 of 321

165
Air conditioning
– The functions will be switched on when its buttons are pressed.
When these functions are activated, they are indicated on the
radio display. In addition, all these functions are lit with LEDs.
Press the button again to switch off the function.
The temperature can be adjusted separately for the left and right sides of
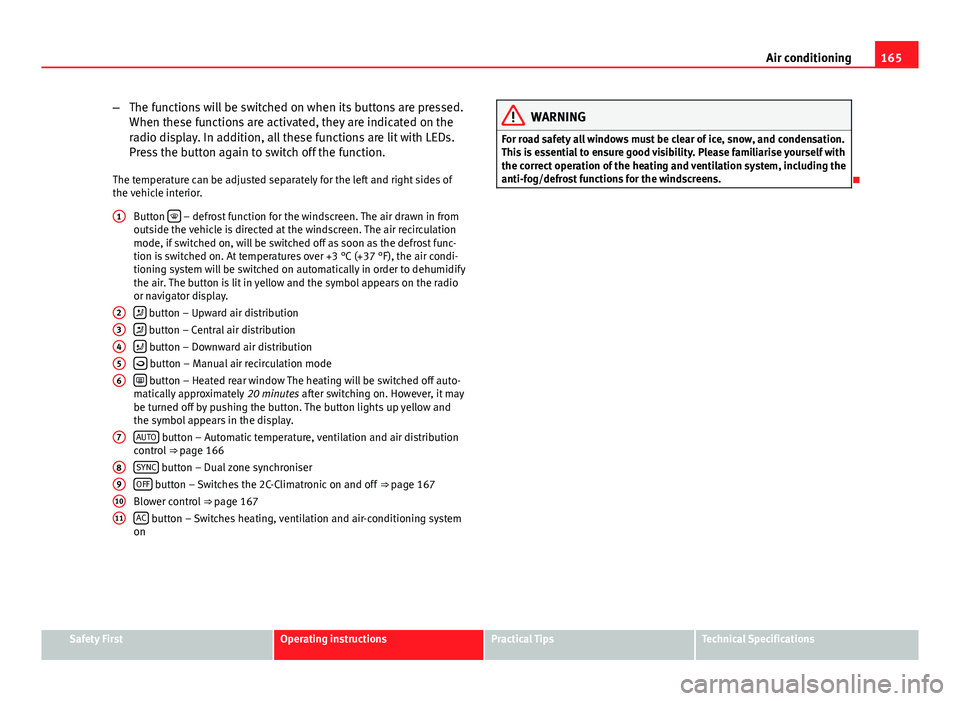
the vehicle interior. Button
– defrost function for the windscreen. The air drawn in from
outside the vehicle is directed at the windscreen. The air recirculation
mode, if switched on, will be switched off as soon as the defrost func-
tion is switched on. At temperatures over +3 °C (+37 °F), the air condi-
tioning system will be switched on automatically in order to dehumidify
the air. The button is lit in yellow and the symbol appears on the radio
or navigator display.
button – Upward air distribution
button – Central air distribution
button – Downward air distribution
button – Manual air recirculation mode
button – Heated rear window The heating will be switched off auto-
matically approximately 20 minutes after switching on. However, it may
be turned off by pushing the button. The button lights up yellow and
the symbol appears in the display.
AUTO
button – Automatic temperature, ventilation and air distribution
control ⇒ page 166
SYNC
button – Dual zone synchroniser
OFF button – Switches the 2C-Climatronic on and off ⇒ page 167
Blower control ⇒ page 167
AC
button – Switches heating, ventilation and air-conditioning system
on
1
23456
7
891011
WARNING
For road safety all windows must be clear of ice, snow, and condensation.
This is essential to ensure good visibility. Please familiarise yourself with
the correct operation of the heating and ventilation system, including the
anti-fog/defrost functions for the windscreens.
Safety FirstOperating instructionsPractical TipsTechnical Specifications
Page 171 of 321

169
Air conditioning
With high outside temperatures, the air recirculation increases the effective-
ness of the air conditioning system by cooling the air inside the vehicle
rather than the ambient air.
If the windscreen air output is on and the air recirculation mode is pressed,
this remains active. When the recirculation mode is on, if the air distribution
towards the windscreen mode is selected, the recirculation mode is deacti-
vated. For safety reasons, the air recirculation mode should not be connec-
ted.
WARNING
In air recirculation mode, no cold air from the outside enters the vehicle
interior. If the air conditioning system is switched off, the windows can
quickly mist over. Therefore, never leave the air recirculation mode
switched on for a long time (risk of accident).
General notes
Pollution filter
The pollution filter (a combined particulate filter and active carbon filter)
serves as a barrier against impurities in the outside air, including dust and
pollen.
For the air conditioner to work with maximum efficiency, the pollution filter
must be replaced at the intervals specified in the Service Plan.
If the filter loses efficiency prematurely due to use in areas reaching very
high pollution levels, the pollen filter must be changed more frequently
than stated in the Service Schedule.
Air conditioner
When the air conditioning system is switched on, not only the temperature,
but also the air humidity in the vehicle interior is reduced. This improves comfort for the vehicle occupants and prevents misting of the windows
when the ambient air humidity is high.
If the air conditioning system cannot be switched on this may be caused by
the following reasons:
●
The engine is not running.
● The AC
button is disconnected.
● The outside temperature is lower than approximately +3 °C (+37 °F).
● The air conditioning system compressor has been temporarily switched
off because the engine coolant temperature is too high.
● The air conditioner fuse is faulty.
● Another fault in the vehicle. Have the air conditioner checked by a speci-
alised workshop.
CAUTION
● If you suspect that the air conditioner is damaged, switch it off with but-
ton AC
to prevent further damage and have it checked by a specialised
workshop.
● Repairs to the air conditioner require specialist knowledge and special
tools. Therefore, we recommend you to take the vehicle to a specialised
workshop.
Note
● If the humidity and temperature outside the vehicle are high, condensa-
tion can drip off the evaporator in the cooling system and so forming a pud-
dle underneath the vehicle. This is completely normal and there is no need
to suspect a leak.
● Keep the air intake slots in front of the windscreen free of snow, ice and
leaves to ensure heating and cooling are not impaired, and to prevent the
windows from misting over.
● The air from the vents flows through the vehicle interior and is extracted
by slots designed for this purpose. Therefore, do not cover these slots with
items of clothing or other objects.
Safety FirstOperating instructionsPractical TipsTechnical Specifications
Page 173 of 321

171
Driving
Driving SteeringAdjusting the steering wheel position
The height and reach of the steering wheel can be freely ad-
justed to suit the driver.
Fig. 137 Adjusting the
steering wheel position
Fig. 138 Proper sitting
position for driver
– Adjust the driver seat to the correct position.
– Push the lever under the steering column ⇒ Fig. 137 down ⇒
.
– Adjust the steering wheel until the correct position is set
⇒ Fig. 138.
– Then push the lever up again firmly ⇒
.
WARNING
● Incorrect use of the steering column adjustment function and an in-
correct seating position can result in serious injury.
● To avoid accidents, the steering column should be adjusted only
when the vehicle is stationary.
Safety FirstOperating instructionsPractical TipsTechnical Specifications