Page 69 of 252

Uconnect® 3.0
Clock Setting
1. Press the Menu button at the bottom of the radio, and push the Enter/Browsebutton for System Settings. Next, select the Time and Format setting and then
select Set Time by pushing the Enter/Browse button.
2. Adjust the hours or minutes by turning the Tune/Scroll knob, then pressing the Enter/Browse button to move to the next entry. You can also select 12hr or 24hr
format by turning the Tune/Scroll knob, then pressing the Enter/Browse button on
the desired selection.
3. Once the time is set press the “Back” button to exit the time screen.
Audio
• Press the AUDIO button on the radio faceplate.
• The Audio Menu shows the following options for you to customize your audio settings.
Treble, Mid, Bass, Fade, Balance, Speed Adjusted Volume, Loudness and Auto
Volume Offset
• Select the desired setting to adjust, then push the ENTER/BROWSE button. Turn the TUNE/SCROLL knob to adjust the setting + or - 9. Press the “Back” button
when done.
ELECTRONICS
67
Page 72 of 252
Uconnect® 5.0
Clock Setting
1. To start the clock setting procedure, perform either of the following:• Press the MORE hard-key on the right side of the display, next press the “Time”soft-key and then press the “Set” soft-key.
• Press the SETTINGS hard-key on the right side of the display, then press the “Clock” soft-key. The Time setting screen is displayed and the clock can be
adjusted as described in the following procedure.
NOTE:
In the Clock Setting Menu you can also select Display Clock. Display Clock turns the
clock display in the status bar on or off.
2. Touch the “Up” or “Down” arrows to adjust the hours or minutes, next select the “AM” or “PM” soft-key. You can also select 12hr or 24hr format by touching the
desired soft-key.
3. Once the time is set press the “Done” soft-key to exit the time screen.
ELECTRONICS
70
Page 80 of 252

Uconnect® 8.4A
Uconnect® 8.4A AT A GLANCE
Displaying The Time
• If the time is not currently displayed on the radio or player main page, touch the“settings” soft-key or the “Apps” soft-key and then the “settings” soft-key. In the
Settings list, touch the “Clock” soft-key then touch the check box next to Show
Time in Status Bar.
Setting The Time
Model 8.4AN synchronizes time automatically via GPS, so it should not require any
time adjustment. If you do need to set the time manually, follow the instructions
below for Model 8.4A.
• For Model 8.4A, turn the unit on, then touch the time display at the top of the screen. Touch “Yes.”
• If the time is not displayed at the top of the screen, touch the “Controls” soft-key, or the “Apps” soft-key, and then the “settings” soft-key. In the Settings screen,
touch the “Clock” soft-key, then check or uncheck this option.
• Touch “+” or “–” next to Set Time Hours and Set Time Minutes to adjust the time.
• If these features are not available, uncheck the Sync with GPS box.
• Touch “X” to save your settings and exit out of the Clock Setting screen.
ELECTRONICS
78
Page 98 of 252

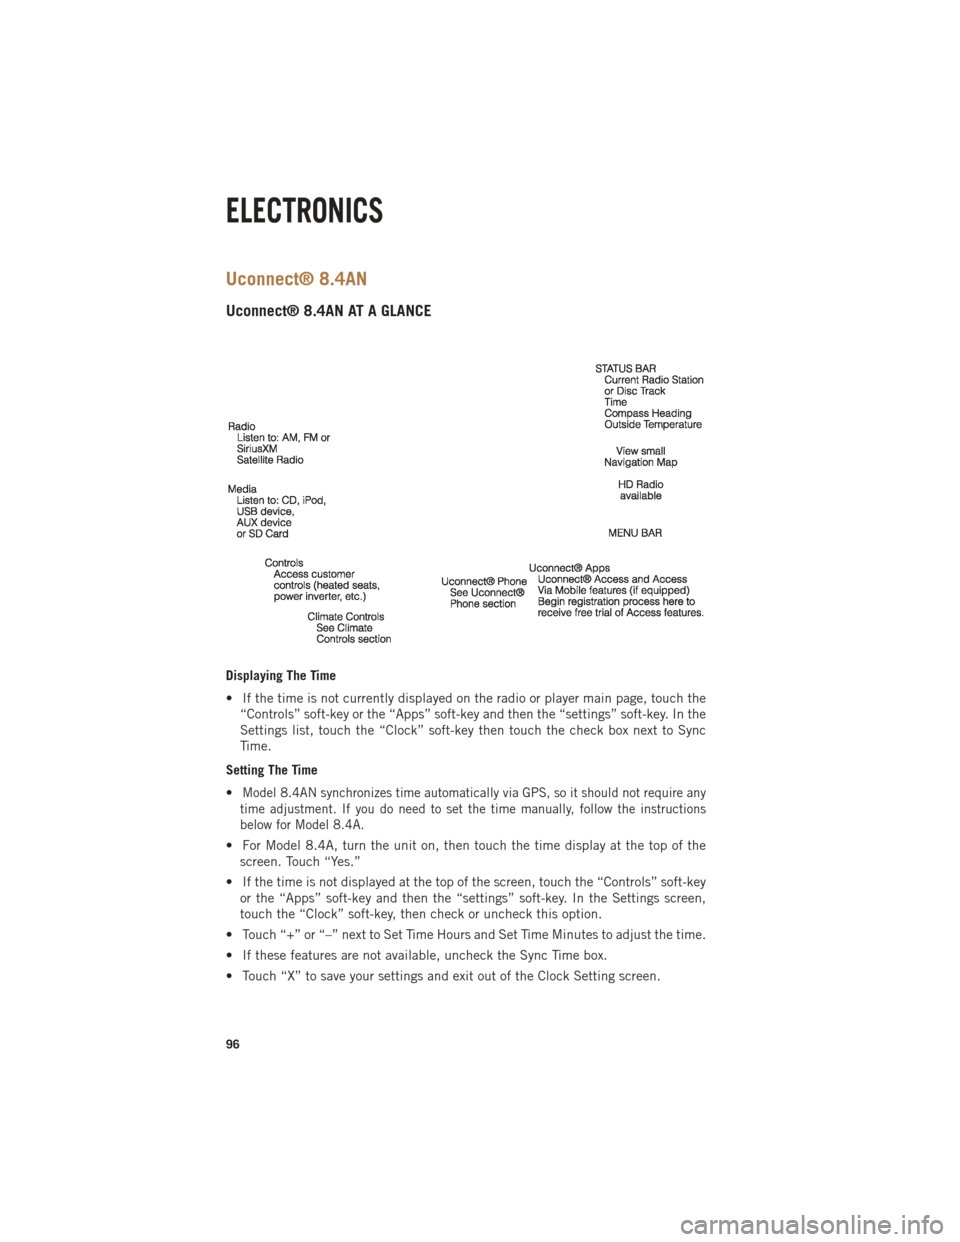
Uconnect® 8.4AN
Uconnect® 8.4AN AT A GLANCE
Displaying The Time
• If the time is not currently displayed on the radio or player main page, touch the“Controls” soft-key or the “Apps” soft-key and then the “settings” soft-key. In the
Settings list, touch the “Clock” soft-key then touch the check box next to Sync
Time.
Setting The Time
•
Model 8.4AN synchronizes time automatically via GPS, so it should not require any
time adjustment. If you do need to set the time manually, follow the instructions
below for Model 8.4A.
• For Model 8.4A, turn the unit on, then touch the time display at the top of the screen. Touch “Yes.”
• If the time is not displayed at the top of the screen, touch the “Controls” soft-key or the “Apps” soft-key and then the “settings” soft-key. In the Settings screen,
touch the “Clock” soft-key, then check or uncheck this option.
• Touch “+” or “–” next to Set Time Hours and Set Time Minutes to adjust the time.
• If these features are not available, uncheck the Sync Time box.
• Touch “X” to save your settings and exit out of the Clock Setting screen.
ELECTRONICS
96
Page 119 of 252

PROGRAMMABLE FEATURES
Programmable Features
The EVIC can be used to view or change the following settings. Press the UPor
DOWN
button until System Setup displays, then press the RIGHTbutton.
Scroll through the settings using the UP or DOWN buttons. Press the RIGHT
button to change the setting. Press the BACK/LEFTbutton to scroll back to a
previous menu or sub menu.
• Radio Info • Trip Info
• Fuel Economy Info • Tire Pressure
• Cruise Control Info • Vehicle Info
• Digital Vehicle Speed • Stored Warning Messages
• Stop/Start • Turn Menu OFF
• Screen Setup • Trailer Tow
Uconnect® Customer Programmable Features
The Uconnect®system allows you to access Customer Programmable feature settings
such as Display, Clock, Safety/Assistance, Lights, Doors & Locks, Auto-On Comfort &
Remote Start, Engine Off Operation, Compass Settings, Audio, Trailer Brake, Phone/
Bluetooth
®, Suspension and SiriusXM Setup and System Information through soft-keys.
•Press the SETTINGS button (Uconnect®5.0), or press the “Apps” button (Uconnect®
8.4) located near the bottom of the touchscreen, then press the “Settings” button on the
touchscreen to access the Settings screen. When making a selection, scroll up or down
until the preferred setting is highlighted, then press and release the preferred setting
until a check-mark appears next to the setting, showing that setting has been selected.
The following feature settings are available:
• Display • Clock
• Safety/Assistance • Doors & Locks
• Auto-On Comfort & Remote Start • Engine Off Options
• Phone/Bluetooth
®• Audio
• Lights • SiriusXM Setup
• Compass (Uconnect
®5.0) • Trailer Brake
• Suspension • System Information
• Units • Voice
NOTE:
Depending on the vehicles options, feature settings may vary.
ELECTRONICS
117