2014 Ram 1500 radio
[x] Cancel search: radioPage 116 of 252
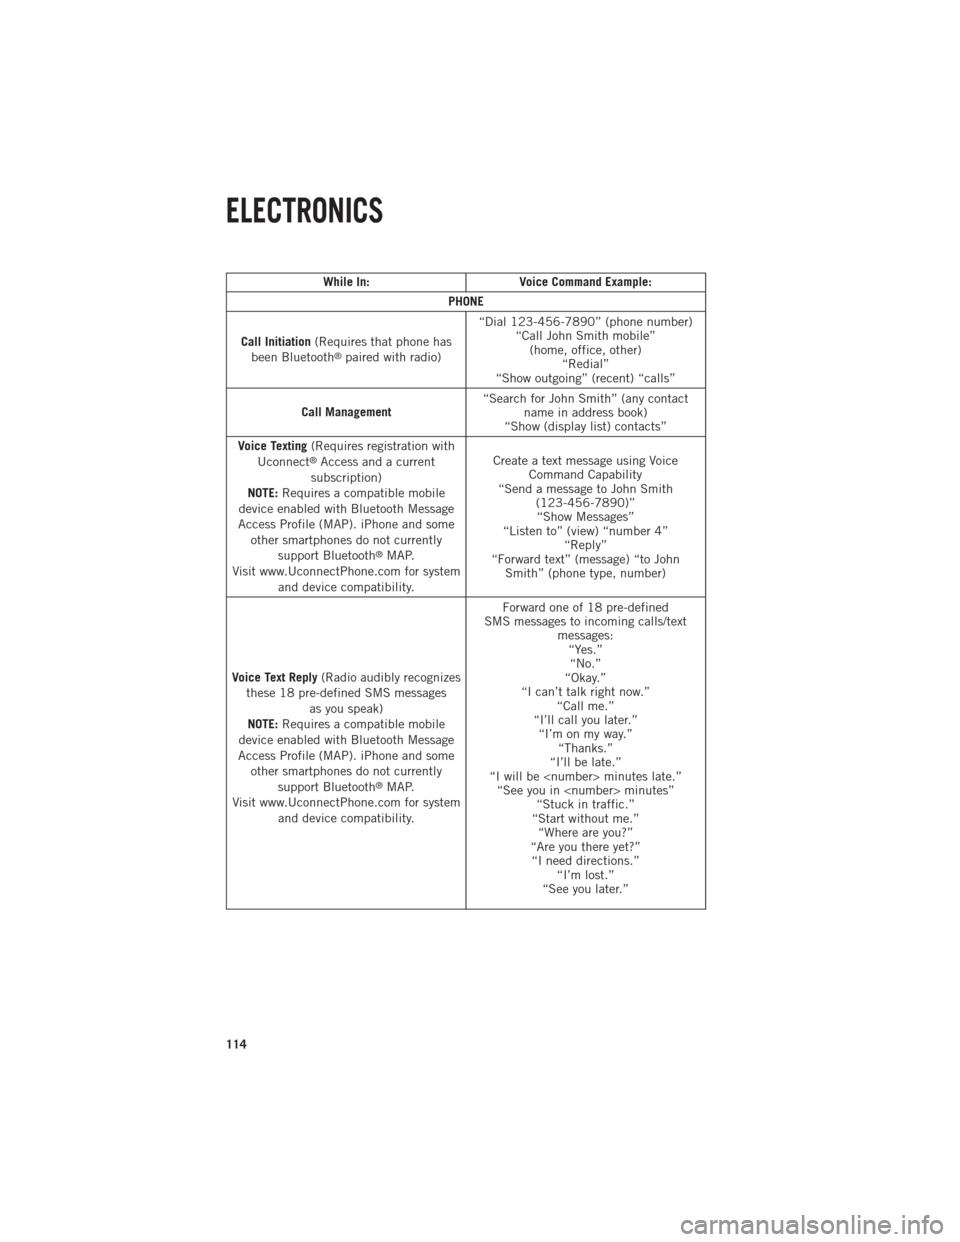
While In:Voice Command Example:
PHONE
Call Initiation (Requires that phone has
been Bluetooth
®paired with radio) “Dial 123-456-7890” (phone number)
“Call John Smith mobile”(home, office, other) “Redial”
“Show outgoing” (recent) “calls”
Call Management “Search for John Smith” (any contact
name in address book)
“Show (display list) contacts”
Voice Texting (Requires registration with
Uconnect
®Access and a current
subscription)
NOTE: Requires a compatible mobile
device enabled with Bluetooth Message
Access Profile (MAP). iPhone and some other smartphones do not currently support Bluetooth
®MAP.
Visit www.UconnectPhone.com for system and device compatibility. Create a text message using Voice
Command Capability
“Send a message to John Smith (123-456-7890)”“Show Messages”
“Listen to” (view) “number 4” “Reply”
“Forward text” (message) “to John Smith” (phone type, number)
Voice Text Reply (Radio audibly recognizes
these 18 pre-defined SMS messages as you speak)
NOTE: Requires a compatible mobile
device enabled with Bluetooth Message
Access Profile (MAP). iPhone and some other smartphones do not currently support Bluetooth
®MAP.
Visit www.UconnectPhone.com for system and device compatibility. Forward one of 18 pre-defined
SMS messages to incoming calls/text messages:“Yes.”“No.”
“Okay.”
“I can’t talk right now.” “Call me.”
“I’ll call you later.” “I’m on my way.” “Thanks.”
“I’ll be late.”
“I will be
“Start without me.” “Where are you?”
“Are you there yet?” “I need directions.” “I’m lost.”
“See you later.”
ELECTRONICS
114
Page 117 of 252
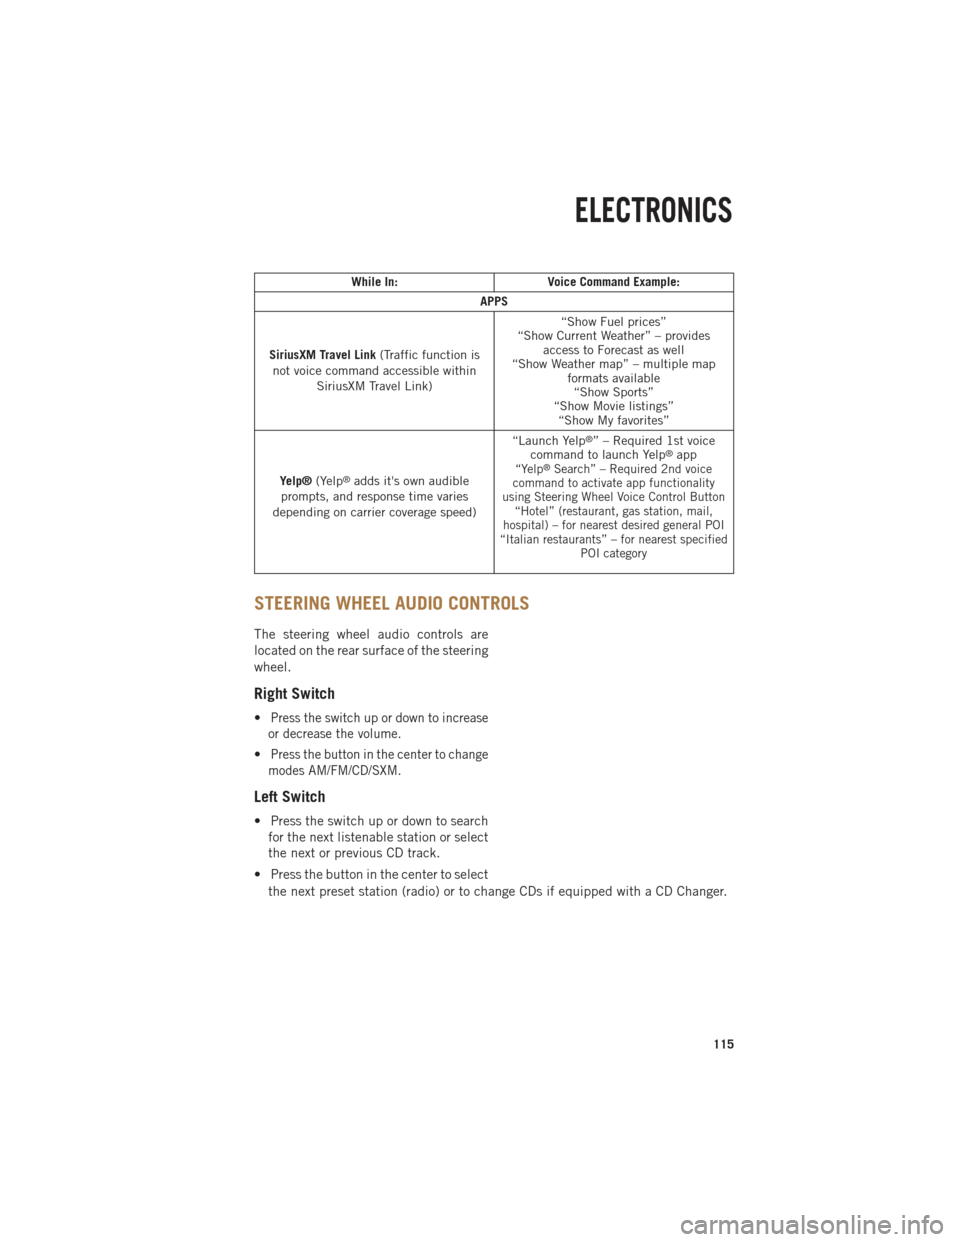
While In:Voice Command Example:
APPS
SiriusXM Travel Link (Traffic function is
not voice command accessible within SiriusXM Travel Link) “Show Fuel prices”
“Show Current Weather” – provides access to Forecast as well
“Show Weather map” – multiple map formats available“Show Sports”
“Show Movie listings” “Show My favorites”
Yelp® (Yelp
®adds it's own audible
prompts, and response time varies
depending on carrier coverage speed) “Launch Yelp
®” – Required 1st voice
command to launch Yelp®app“Yelp®Search” – Required 2nd voice
command to activate app functionality
using Steering Wheel Voice Control Button “Hotel” (restaurant, gas station, mail,
hospital) – for nearest desired general POI
“Italian restaurants” – for nearest specified POI category
STEERING WHEEL AUDIO CONTROLS
The steering wheel audio controls are
located on the rear surface of the steering
wheel.
Right Switch
•Press the switch up or down to increase
or decrease the volume.
•Press the button in the center to change
modes AM/FM/CD/SXM.
Left Switch
• Press the switch up or down to search for the next listenable station or select
the next or previous CD track.
• Press the button in the center to select the next preset station (radio) or to change CDs if equipped with a CD Changer.
ELECTRONICS
115
Page 119 of 252
PROGRAMMABLE FEATURES
Programmable Features
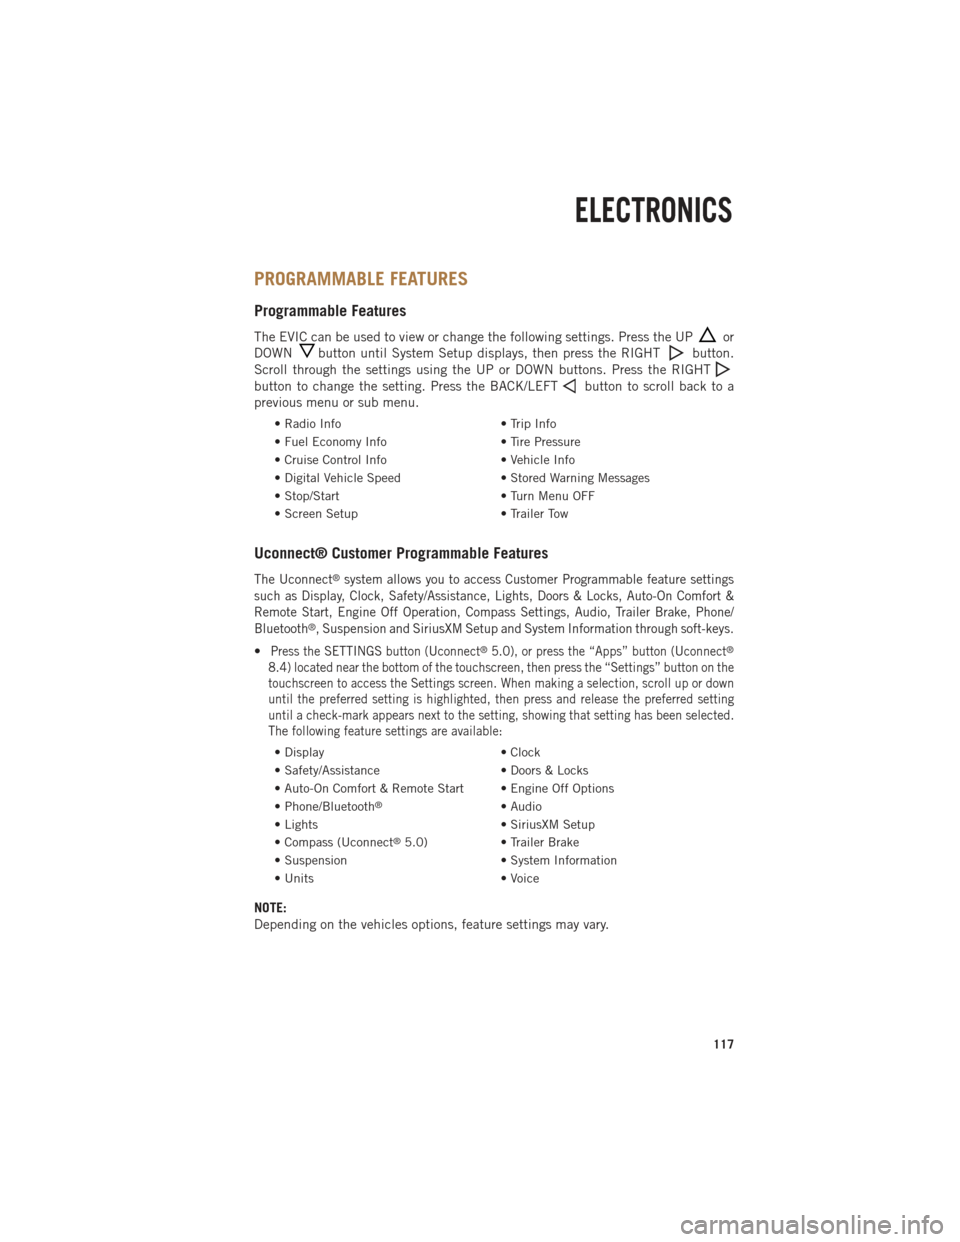
The EVIC can be used to view or change the following settings. Press the UPor
DOWN
button until System Setup displays, then press the RIGHTbutton.
Scroll through the settings using the UP or DOWN buttons. Press the RIGHT
button to change the setting. Press the BACK/LEFTbutton to scroll back to a
previous menu or sub menu.
• Radio Info • Trip Info
• Fuel Economy Info • Tire Pressure
• Cruise Control Info • Vehicle Info
• Digital Vehicle Speed • Stored Warning Messages
• Stop/Start • Turn Menu OFF
• Screen Setup • Trailer Tow
Uconnect® Customer Programmable Features
The Uconnect®system allows you to access Customer Programmable feature settings
such as Display, Clock, Safety/Assistance, Lights, Doors & Locks, Auto-On Comfort &
Remote Start, Engine Off Operation, Compass Settings, Audio, Trailer Brake, Phone/
Bluetooth
®, Suspension and SiriusXM Setup and System Information through soft-keys.
•Press the SETTINGS button (Uconnect®5.0), or press the “Apps” button (Uconnect®
8.4) located near the bottom of the touchscreen, then press the “Settings” button on the
touchscreen to access the Settings screen. When making a selection, scroll up or down
until the preferred setting is highlighted, then press and release the preferred setting
until a check-mark appears next to the setting, showing that setting has been selected.
The following feature settings are available:
• Display • Clock
• Safety/Assistance • Doors & Locks
• Auto-On Comfort & Remote Start • Engine Off Options
• Phone/Bluetooth
®• Audio
• Lights • SiriusXM Setup
• Compass (Uconnect
®5.0) • Trailer Brake
• Suspension • System Information
• Units • Voice
NOTE:
Depending on the vehicles options, feature settings may vary.
ELECTRONICS
117
Page 122 of 252

UNIVERSAL GARAGE DOOR OPENER (HomeLink®)
HomeLink®replaces up to three hand-held transmitters that operate devices such as
garage door openers, motorized gates, lighting or home security systems. The HomeLink®
unit is powered by your vehicles 12 Volt battery.
The HomeLink®buttons that are located in the overhead console or sunvisor
designate the three different HomeLink®channels.
The HomeLink
®indicator is located above the center button.
Before You Begin Programming
HomeLink®
Ensure that your vehicle is parked out-
side of the garage before you begin pro-
gramming.
For efficient programming and accurate
transmission of the radio-frequency sig-
nal, it is recommended that a new battery
be placed in the hand-held transmitter of
the device that is being programmed to
the HomeLink
®system.
Erase all channels before you begin pro-
gramming. To erase the channels, place
the ignition switch into the ON/RUN position, then press and hold the two outside
HomeLink
®buttons (I and III) for up to 20 seconds or until the red indicator flashes.
NOTE:
Erasing all channels should only be performed when programming HomeLink
®for
the first time. Do not erase channels when programming additional buttons.
If you have any problems, or require assistance, please call toll-free 1-800-355-3515
or, on the Internet at www.HomeLink.com for information or assistance.
ELECTRONICS
120
Page 140 of 252

TOW/HAUL MODE
• When driving in hilly areas, towing a trailer, carrying a heavy load, etc., andfrequent transmission shifting occurs, press the TOW/HAUL switch to select
TOW/HAUL mode. This will improve performance and reduce the potential for
transmission overheating or failure due to excessive shifting. When operating in
TOW/HAUL mode, transmission upshifts are delayed, and the transmission will
automatically downshift (for engine braking) during steady braking maneuvers.
• The “TOW/HAUL Indicator Light” will illuminate in the instrument cluster to
indicate that TOW/HAUL mode has
been activated. Pressing the switch a
second time restores normal operation.
If the TOW/HAUL mode is desired, the
switch must be pressed each time the
engine is started.
INTEGRATED TRAILER BRAKE MODULE
The Integrated Trailer Brake Controller allows you to automatically or manually
activate the Electric Trailer Brakes and Electric Over Hydraulic Trailer Brakes for a
better braking performance when towing a trailer.
NOTE:
The Integrated Trailer Brake Controller is located in the center stack below the
climate controls.
This module will have four different options depending on the type of trailer you want
to tow and can be selected through the 3.5” Electronic Vehicle Information Center
(EVIC) or touchscreen radio.
• Light Electric
• Heavy Electric
• Light EOH (Electric Over Hydraulic)
• Heavy EOH (Electric Over Hydraulic)
UTILITY
138
Page 141 of 252
Setting with the Uconnect® Touchscreen Radio
• To make the proper selection in the Uconnect
®touchscreen radio, press the More
hard-key (Uconnect®5.0) or the Apps soft-key (Uconnect®8.4), then press the
Settings soft-key to display the menu setting screen and press trailer brake. For
additional information, refer to your Owner’s Manual on the DVD.
Setting with a 3.5” EVIC
• Press the RIGHT arrow on the steering wheel to enter “VEHICLE SETTINGS.”
• Press the UP or DOWN buttons until Trailer Brake Type appears on the screen.
• Press the RIGHT arrow and then press the UP or DOWN buttons until the proper Trailer Brake Type appears on the screen. For additional information, refer to your
Owner’s Manual on the DVD.
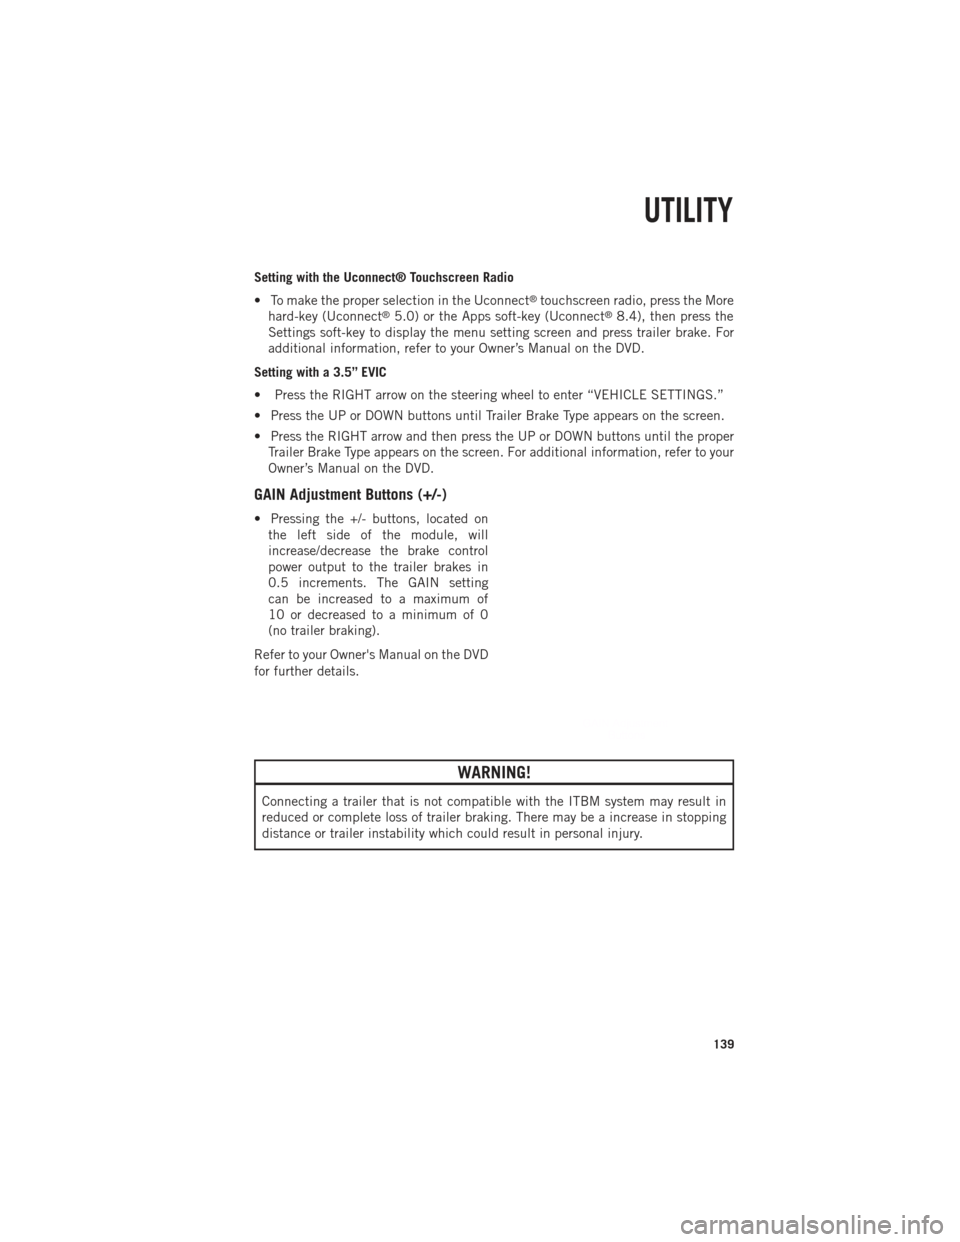
GAIN Adjustment Buttons (+/-)
• Pressing the +/- buttons, located onthe left side of the module, will
increase/decrease the brake control
power output to the trailer brakes in
0.5 increments. The GAIN setting
can be increased to a maximum of
10 or decreased to a minimum of 0
(no trailer braking).
Refer to your Owner's Manual on the DVD
for further details.
WARNING!
Connecting a trailer that is not compatible with the ITBM system may result in
reduced or complete loss of trailer braking. There may be a increase in stopping
distance or trailer instability which could result in personal injury.
UTILITY
139
Page 192 of 252

JUMP-STARTING
• If your vehicle has a discharged bat-tery it can be jump-started using a
set of jumper cables and a battery in
another vehicle or by using a portable
battery booster pack.
• Jump-starting can be dangerous if done improperly so please follow the
procedures in this section carefully.
NOTE:
When using a portable battery booster
pack follow the manufacturer’s operating
instructions and precautions.
Preparations For Jump-Start
• The battery in your vehicle is located in the front of the engine compartment, behind the left headlight assembly.
NOTE:
The positive battery post is covered with a protective cap. Lift up on the cap to gain
access to the positive battery post.
• Set the parking brake, shift the automatic transmission into PARK and turn the ignition to OFF.
• Turn off the heater, radio, and all unnecessary electrical accessories.
• If using another vehicle to jump-start the battery, park the vehicle within the jumper cables reach, set the parking brake and make sure the ignition is OFF.
Jump-Starting Procedure
1. Connect the positive (+)end of the jumper cable to the positive (+)post of the
vehicle with the discharged battery.
2. Connect the opposite end of the positive (+)jumper cable to the positive (+)post
of the booster battery.
3. Connect the negative (-)end of the jumper cable to the negative (-)post of the
booster battery.
4. Connect the opposite end of the negative (-)jumper cable to a good engine ground
(exposed metal part of the discharged vehicle’s engine) away from the battery and
the fuel injection system.
5. Start the engine in the vehicle that has the booster battery, let the engine idle a few minutes, and then start the engine in the vehicle with the discharged battery.
WHAT TO DO IN EMERGENCIES
190
Page 234 of 252
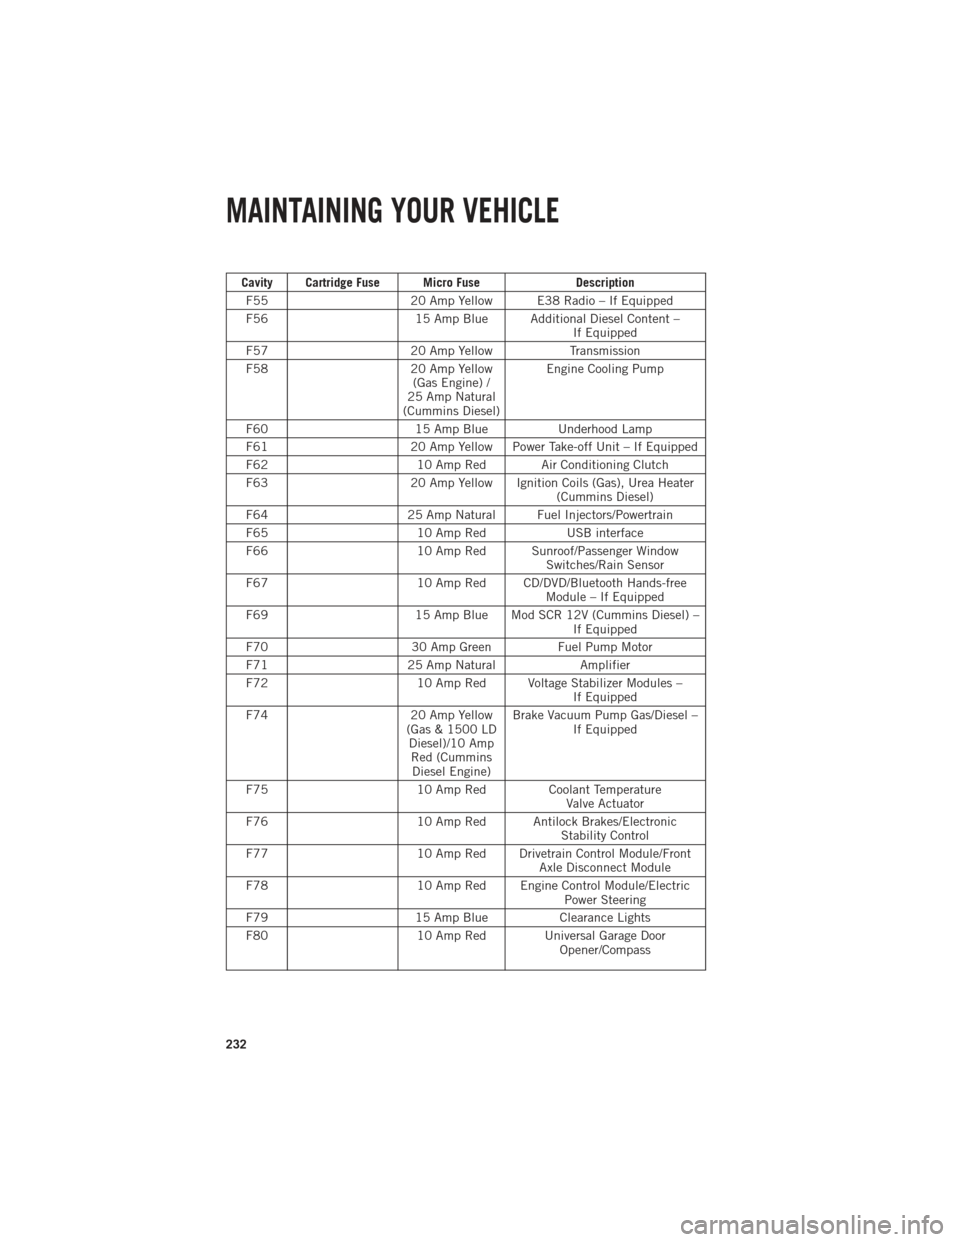
Cavity Cartridge Fuse Micro FuseDescription
F55 20 Amp Yellow E38 Radio – If Equipped
F56 15 Amp Blue Additional Diesel Content –
If Equipped
F57 20 Amp YellowTransmission
F58 20 Amp Yellow
(Gas Engine) /
25 Amp Natural
(Cummins Diesel) Engine Cooling Pump
F60 15 Amp BlueUnderhood Lamp
F61 20 Amp Yellow Power Take-off Unit – If Equipped
F62 10 Amp Red Air Conditioning Clutch
F63 20 Amp Yellow Ignition Coils (Gas), Urea Heater
(Cummins Diesel)
F64 25 Amp Natural Fuel Injectors/Powertrain
F65 10 Amp RedUSB interface
F66 10 Amp Red Sunroof/Passenger Window
Switches/Rain Sensor
F67 10 Amp Red CD/DVD/Bluetooth Hands-free
Module – If Equipped
F69 15 Amp Blue Mod SCR 12V (Cummins Diesel) –
If Equipped
F70 30 Amp GreenFuel Pump Motor
F71 25 Amp Natural Amplifier
F72 10 Amp Red Voltage Stabilizer Modules –
If Equipped
F74 20 Amp Yellow
(Gas & 1500 LD Diesel)/10 AmpRed (CumminsDiesel Engine) Brake Vacuum Pump Gas/Diesel –
If Equipped
F75 10 Amp Red Coolant Temperature
Valve Actuator
F76 10 Amp Red Antilock Brakes/Electronic
Stability Control
F77 10 Amp Red Drivetrain Control Module/Front
Axle Disconnect Module
F78 10 Amp Red Engine Control Module/Electric
Power Steering
F79 15 Amp BlueClearance Lights
F80 10 Amp Red Universal Garage Door
Opener/Compass
MAINTAINING YOUR VEHICLE
232