2014 Peugeot 508 ESP
[x] Cancel search: ESPPage 203 of 352
8
201
Practical information
Changing a fuse Procedure for replacing a failed fuse with a new fuse to rectify a failure of the corresponding function.
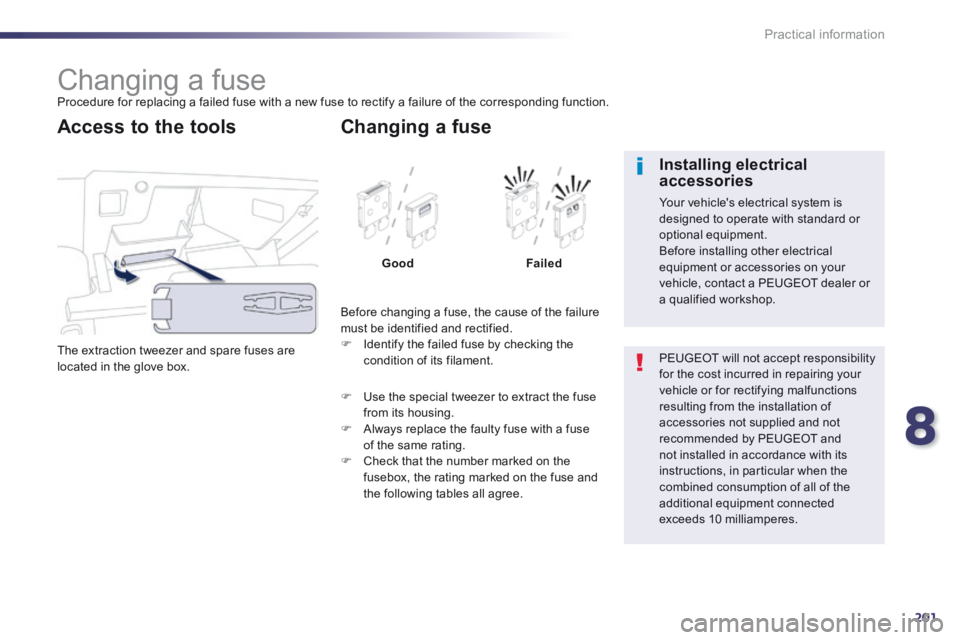
The extraction tweezer and spare fuses are located in the glove box.
Access to the tools
Before changing a fuse, the cause of the failure must be identified and rectified. Identify the failed fuse by checking the condition of its filament.
Changing a fuse
GoodFailed
Use the special tweezer to extract the fuse from its housing. Always replace the faulty fuse with a fuse of the same rating. Check that the number marked on the fusebox, the rating marked on the fuse and the following tables all agree.
PEUGEOT will not accept responsibility for the cost incurred in repairing your vehicle or for rectifying malfunctions resulting from the installation of accessories not supplied and not
recommended by PEUGEOT and not installed in accordance with its instructions, in particular when the combined consumption of all of the additional equipment connected exceeds 10 milliamperes.
Installing electrical accessories
Your vehicle's electrical system is designed to operate with standard or optional equipment. Before installing other electrical equipment or accessories on your vehicle, contact a PEUGEOT dealer or a qualified workshop.
Page 206 of 352
204
Practical information
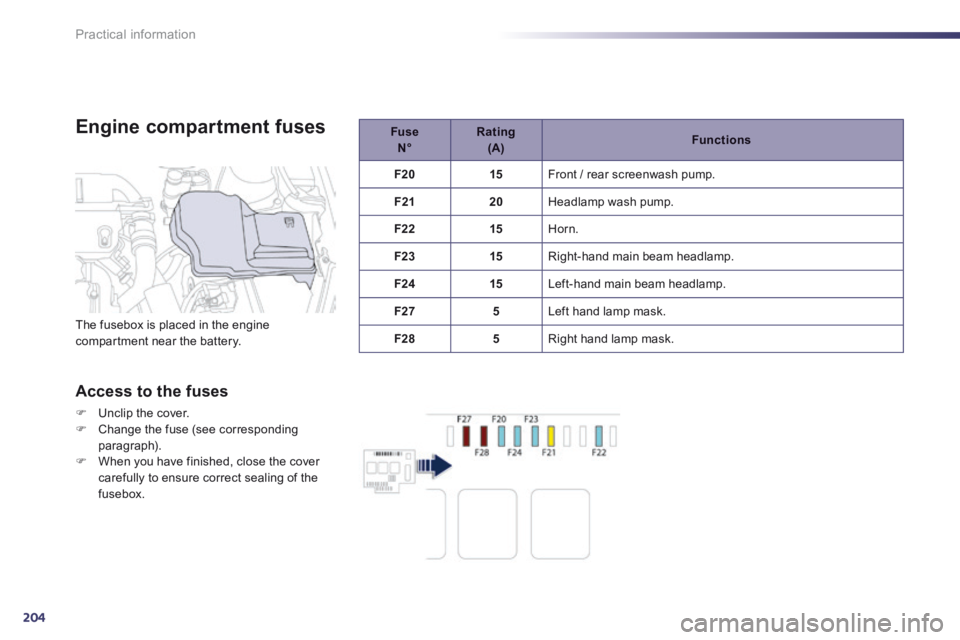
Engine compartment fuses Fuse N° Rating (A) Functions
F20 15 Front / rear screenwash pump.
F21 20 Headlamp wash pump.
F22 15 Horn.
F23 15 Right-hand main beam headlamp.
F24 15 Left-hand main beam headlamp.
F27 5 Left hand lamp mask.
F28 5 Right hand lamp mask. The fusebox is placed in the engine compartment near the battery.
Access to the fuses
Unclip the cover. Change the fuse (see corresponding paragraph). When you have finished, close the cover carefully to ensure correct sealing of the
fusebox.
Page 209 of 352
8
207
Practical information
The batteries contain harmful substances such as sulphuric acid and lead. They must be disposed of in accordance with regulations and must not, in any circumstances, be discarded with household waste. Take used remote control batteries and vehicle batteries to a special collection point.
Do not reverse the polarity and use only a 12 V charger. Do not disconnect the terminals while the engine is running. Do not charge the batteries without disconnecting the terminals first. Do not push the vehicle to start the engine if it is fitted with the 6 -speed electronic gearbox system or an
automatic gearbox.
It is advisable to disconnect the 12 V battery if the vehicle is to be left unused for more than one month.
Before disconnecting the battery
Wait 2 minutes after switching off the ignition before disconnecting the 12 V battery.
Close the windows and the doors before disconnecting the battery.
Following reconnection of the battery
Following reconnection of the 12 V battery, switch on the ignition and wait 1 minute before starting to permit initialisation of the electronic systems. However, if problems remain following this operation, contact a PEUGEOT dealer or a qualified workshop. Referring to the corresponding section, you must yourself reinitialise: - the remote control key, - the panoramic sunroof blind, - the GPS satellite navigation system.
Load reduction mode
System which manages the use of certain functions according to the level of charge remaining in the battery. When the vehicle is being driven, the load reduction function temporarily deactivates certain functions, such as the air conditioning, the heated rear screen... The deactivated functions are reactivated automatically as soon as conditions permit.
Page 211 of 352
8
209
Practical information
Changing a wiper blade
Before removing a front
wiper blade
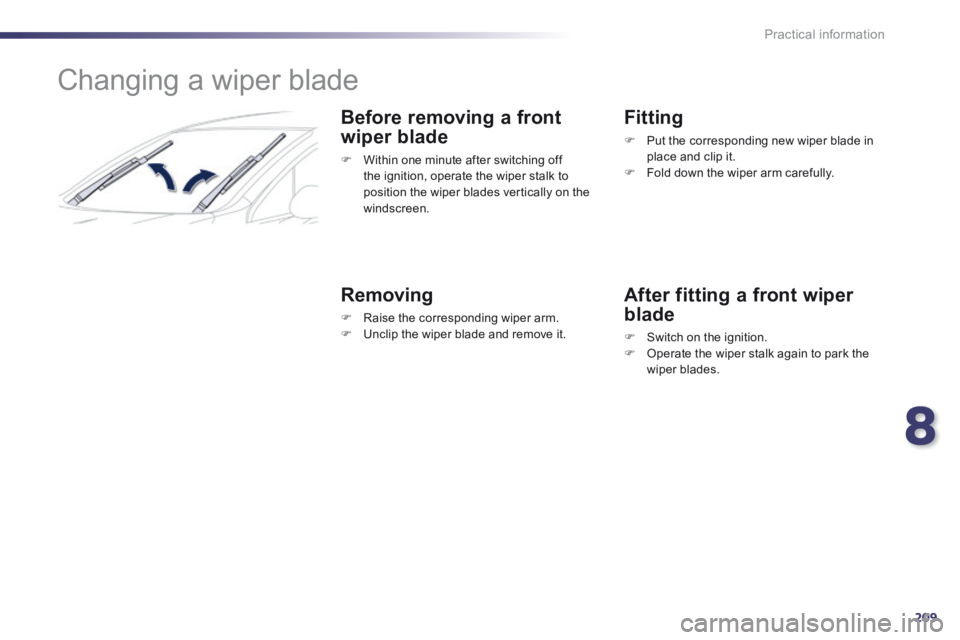
Within one minute after switching off the ignition, operate the wiper stalk to position the wiper blades vertically on the windscreen.
Removing
Raise the corresponding wiper arm. Unclip the wiper blade and remove it.
Fitting
Put the corresponding new wiper blade in place and clip it. Fold down the wiper arm carefully.
After fitting a front wiper
blade
Switch on the ignition. Operate the wiper stalk again to park the wiper blades.
Page 221 of 352
9
219
Checks
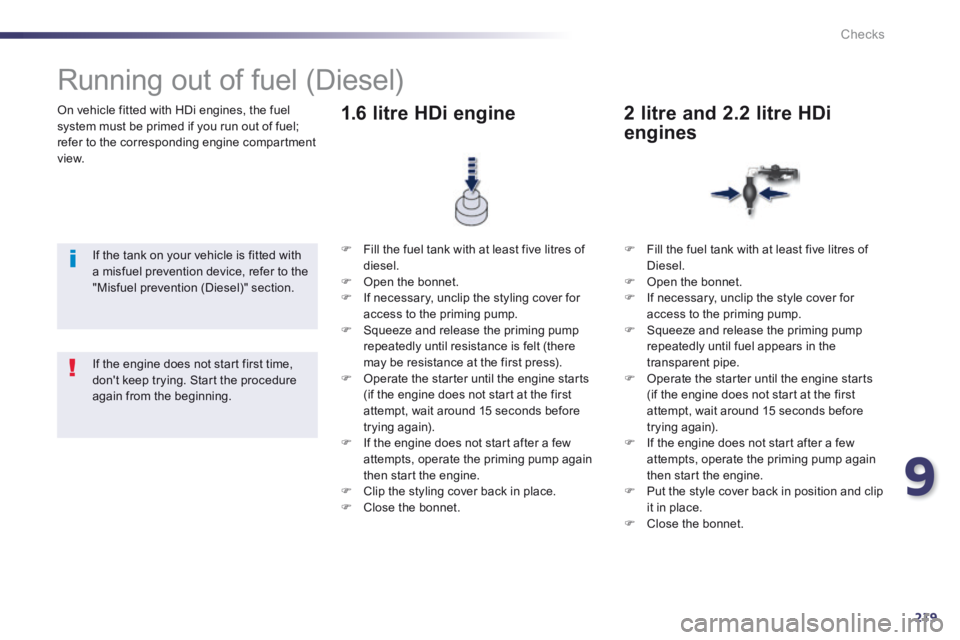
On vehicle fitted with HDi engines, the fuel system must be primed if you run out of fuel; refer to the corresponding engine compartment view.
Running out of fuel (Diesel)
If the tank on your vehicle is fitted with a misfuel prevention device, refer to the "Misfuel prevention (Diesel)" section.
Fill the fuel tank with at least five litres of diesel. Open the bonnet. If necessary, unclip the styling cover for access to the priming pump. Squeeze and release the priming pump repeatedly until resistance is felt (there may be resistance at the first press). Operate the starter until the engine starts (if the engine does not start at the first attempt, wait around 15 seconds before trying again). If the engine does not start after a few attempts, operate the priming pump again then start the engine. Clip the styling cover back in place. Close the bonnet.
1.6 litre HDi engine
Fill the fuel tank with at least five litres of Diesel. Open the bonnet. If necessary, unclip the style cover for access to the priming pump. Squeeze and release the priming pump repeatedly until fuel appears in the transparent pipe. Operate the starter until the engine starts (if the engine does not start at the first attempt, wait around 15 seconds before trying again). If the engine does not start after a few attempts, operate the priming pump again then start the engine. Put the style cover back in position and clip it in place. Close the bonnet.
2 litre and 2.2 litre HDi
engines
If the engine does not start first time, don't keep trying. Start the procedure again from the beginning.
Page 227 of 352
9
225
Checks
Checking levels
Take care when working under the bonnet, as certain areas of the engine may be extremely hot (risk of burns).
Engine oil level
The check is carried out either when the ignition is switched on using the oil level indicator in the instrument panel for vehicles with and electric oil level gauge, or using the dipstick.
To ensure that the reading is correct, your vehicle must be parked on a level sur face and the engine having been off for more than 30 minutes.
It is normal to top up the oil level between two services (or oil changes). PEUGEOT recommends that you check the level, and top up if necessary, every 3 000 miles (5 000 kms).
If a level drops significantly, have the corresponding system checked by a PEUGEOT dealer or a qualified workshop. Check all of these levels regularly, in line with the servicing booklet and the requirements of the warranty. Top them up if necessary, unless other wise indicated.
Checking using the dipstick
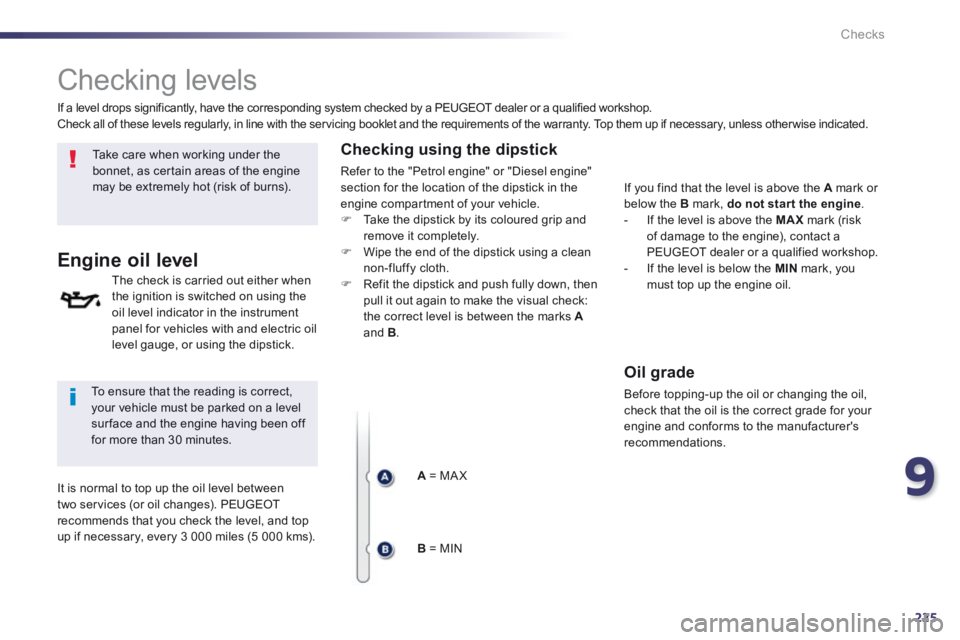
Refer to the "Petrol engine" or "Diesel engine" section for the location of the dipstick in the engine compartment of your vehicle. Take the dipstick by its coloured grip and remove it completely. Wipe the end of the dipstick using a clean non-fluffy cloth. Refit the dipstick and push fully down, then pull it out again to make the visual check: the correct level is between the marks Aand B .
A = MA X
B = MIN
If you find that the level is above the A mark or below the B mark, do not star t the engine . - If the level is above the MAX mark (risk of damage to the engine), contact a PEUGEOT dealer or a qualified workshop. - If the level is below the MIN mark, you must top up the engine oil.
Oil grade
Before topping-up the oil or changing the oil, check that the oil is the correct grade for your engine and conforms to the manufacturer's recommendations.
Page 232 of 352
230
Checks
AdBlue ® additive
for Blue HDi Diesel engines
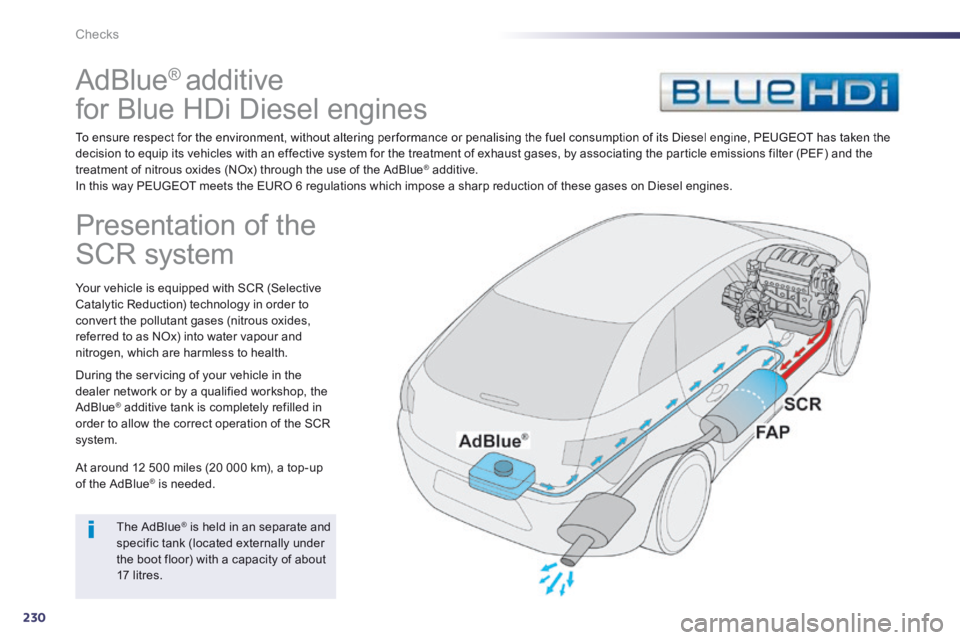
To ensure respect for the environment, without altering per formance or penalising the fuel consumption of its Diesel engine, PEUGEOT has taken the decision to equip its vehicles with an effective system for the treatment of exhaust gases, by associating the particle emissions filter (PEF) and the treatment of nitrous oxides (NOx) through the use of the AdBlue ® additive. ® additive. ®
In this way PEUGEOT meets the EURO 6 regulations which impose a sharp reduction of these gases on Diesel engines.
Presentation of the
SCR system
Your vehicle is equipped with SCR (Selective Catalytic Reduction) technology in order to convert the pollutant gases (nitrous oxides, referred to as NOx) into water vapour and nitrogen, which are harmless to health.
During the servicing of your vehicle in the dealer network or by a qualified workshop, the AdBlue ® additive tank is completely refilled in ® additive tank is completely refilled in ®
order to allow the correct operation of the SCR system.
At around 12 500 miles (20 000 km), a top-up of the AdBlue ® is needed. ® is needed. ®
The AdBlue ® is held in an separate and ® is held in an separate and ®
specific tank (located externally under the boot floor) with a capacity of about 17 litres.
Page 235 of 352
9
233
Checks
Precautions on use
The AdBlue ® additive fluid is not inflammable; ® additive fluid is not inflammable; ®
it is colourless and odourless (if kept in a cool area). For more information, refer to the label on the AdBlue ® c o n t a i n e r. Use only an additive that meets the ISO 22241 standard (AdBlue ® available from the ® available from the ®
franchised dealer network or a qualified wo r ks h o p).
Never dispose of the AdBlue ® container ® container ®
with the household waste. Place it in special waste bins provided for this purpose or take it to your dealer.
Do not keep a container of the AdBlue ® additive in the vehicle, so as ® additive in the vehicle, so as ®
to avoid the risk of deterioration of the product. For keeping and storing AdBlue ® , refer to the information on the container. Never mix the AdBlue ® additive with ® additive with ®
water. Never put AdBlue ® additive into the ® additive into the ®
Diesel fuel tank.
Do not inhale or ingest the product. The AdBlue ® additive is an irritant and ® additive is an irritant and ®
slightly corrosive. In the event of contact, it may cause injury to the skin, eyes or respiratory system. If the AdBlue ® additive has been in ® additive has been in ®
contact with the eyes or skin, wash immediately and abundantly with water for at least 15 minutes and contact a d o c t o r. For more information, refer to the label on the AdBlue ® c o n t a i n e r. ® c o n t a i n e r. ®