Page 103 of 352

4
101
Driving
Starting-switching off the engine With a manual gearbox , put the gear lever in neutral. With an electronic gear control gearbox , put the gear lever in N . With an automatic gearbox , put the gear lever in P or N .
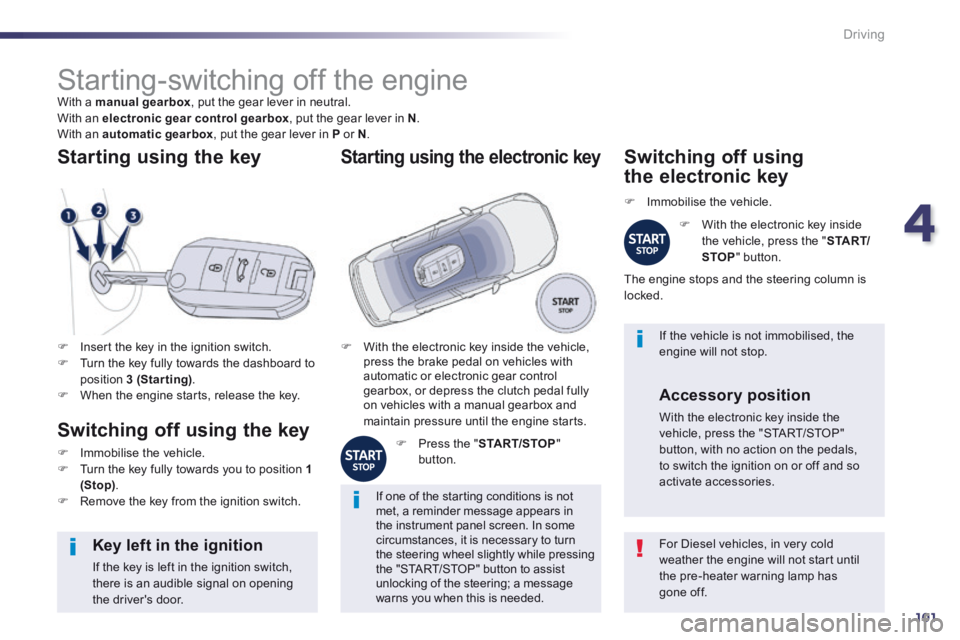
Insert the key in the ignition switch. Turn the key fully towards the dashboard to position 3 (Starting) . When the engine starts, release the key.
Starting using the key
Switching off using the key
Immobilise the vehicle. Turn the key fully towards you to position 1 (Stop) . Remove the key from the ignition switch.
For Diesel vehicles, in very cold weather the engine will not start until the pre-heater warning lamp has gone off.
Key left in the ignition
If the key is left in the ignition switch, there is an audible signal on opening the driver's door.
If one of the starting conditions is not met, a reminder message appears in the instrument panel screen. In some circumstances, it is necessary to turn the steering wheel slightly while pressing the "START/STOP" button to assist unlocking of the steering; a message warns you when this is needed.
If the vehicle is not immobilised, the engine will not stop. With the electronic key inside the vehicle, press the brake pedal on vehicles with automatic or electronic gear control gearbox, or depress the clutch pedal fully on vehicles with a manual gearbox and maintain pressure until the engine starts.
Starting using the electronic key
Press the " START/STOP " button.
Switching off using
the electronic key
Immobilise the vehicle.
With the electronic key inside the vehicle, press the " S TA R T/STOP " button.
The engine stops and the steering column is locked.
Accessory position
With the electronic key inside the vehicle, press the "START/STOP" button, with no action on the pedals, to switch the ignition on or off and so activate accessories.
Page 104 of 352

102
Driving
Anti-theft protection
Electronic engine immobiliser
The keys contain an electronic chip which has a secret code. When the ignition is switched on, this code must be recognised in order for starting to be possible. This electronic engine immobiliser locks the engine management system a few minutes after the ignition is switched off and prevents starting of the engine by anyone who does not have the key.
In the event of a malfunction, you are informed by a message in the instrument panel screen. In this case, your vehicle does not start; contact a PEUGEOT dealer as soon as possible.
Emergency starting with the electronic key
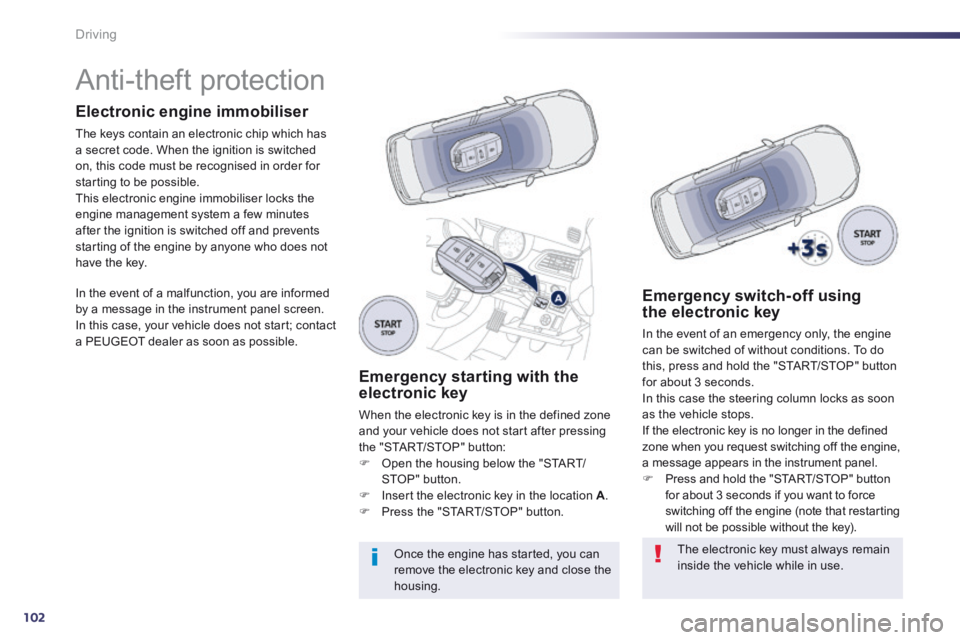
When the electronic key is in the defined zone and your vehicle does not start after pressing the "START/STOP" button: Open the housing below the "START/STOP" button. Insert the electronic key in the location A . Press the "START/STOP" button.
Once the engine has started, you can remove the electronic key and close the housing.
Emergency switch-off using the electronic key
In the event of an emergency only, the engine can be switched of without conditions. To do this, press and hold the "START/STOP" button for about 3 seconds. In this case the steering column locks as soon as the vehicle stops. If the electronic key is no longer in the defined zone when you request switching off the engine, a message appears in the instrument panel. Press and hold the "START/STOP" button for about 3 seconds if you want to force switching off the engine (note that restarting will not be possible without the key).
The electronic key must always remain inside the vehicle while in use.
Page 236 of 352

234
Checks
Topping up the AdBlue ® additive
For filling of the AdBlue ® tank, it ® tank, it ®
is recommended that you contact a franchised dealer or a qualified workshop. This refilling operation forms part of the routine servicing of your vehicle (refer to the servicing booklet). If the AdBlue ® additive is completely ® additive is completely ®
used up ("starting prevented" or "No start on 0 km" message), you will not be able to restart the vehicle. To allow starting, you can top-up yourself, adding at least 3.8 litres of the AdBlue ® additive (equivalent to around ® additive (equivalent to around ®
3 000 miles (5 000 km) of range for the AdBlue ® additive) before making an ® additive) before making an ®
appointment with a dealer as soon as possible to have the AdBlue ® tank filled. ® tank filled. ®
If you have to top-up yourself, ensure that the vehicle is on a flat and level sur face (not over a kerb or on a slope, ...) so as to ensure correct filling. Do not fill the tank when the ambient temperature is below -10°C.
As soon as the "UREA" warning lamp comes on, you must fill or top up the additive tank as soon as possible.
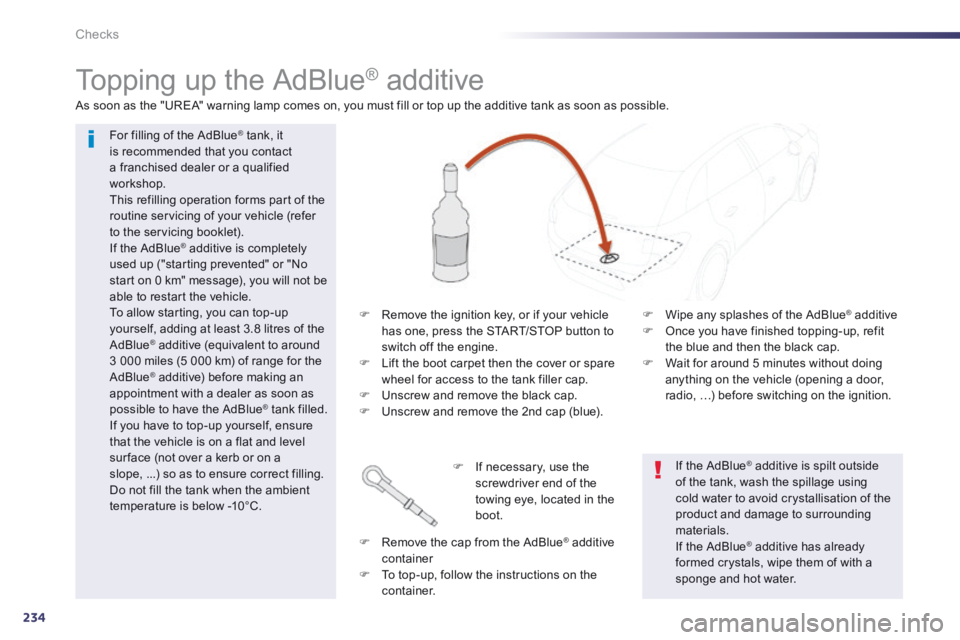
Remove the ignition key, or if your vehicle has one, press the START/STOP button to switch off the engine. Lift the boot carpet then the cover or spare wheel for access to the tank filler cap. Unscrew and remove the black cap. Unscrew and remove the 2nd cap (blue).
If necessary, use the screwdriver end of the towing eye, located in the boot.
Remove the cap from the AdBlue ® additive ® additive ®
container To top-up, follow the instructions on the
c o n t a i n e r.
If the AdBlue ® additive is spilt outside ® additive is spilt outside ®
of the tank, wash the spillage using cold water to avoid crystallisation of the product and damage to surrounding materials.
If the AdBlue ® additive has already ® additive has already ®
formed crystals, wipe them of with a sponge and hot water.
Wipe any splashes of the AdBlue ® additive ® additive ®
Once you have finished topping-up, refit the blue and then the black cap. Wait for around 5 minutes without doing anything on the vehicle (opening a door, radio, …) before switching on the ignition.
Page 347 of 352
.
345
Visual search
Instrument panels, screens 22, 34-35 - check / service indicator / trip distance recorder - lighting dimmer Warning lamps 23-32 Indicators 33 -37 Gear shift indicator 112
Hazard warning lamps 165
Colour screen 257, 298 -300 Screen C 310, 330 -331
Switch panels, buttons 8 Programmable heating 99-100
Steering wheel adjustment 76 Horn 166
Memorising speeds 127 Speed limiter 128 -129 Cruise control 130 -131
Lighting controls 136 -142 Direction indicators, parking 140, 165
Instruments and controls (cont.)
Head-up display 125 -126
Wiper controls 147-150 Trip computer 38 - 40
Ignition switch, switching on/off 101-102 Stop & Start 121-123 Electric parking brake 103 -109
Headlamp height adjustment 144