2014 Peugeot 508 ECO mode
[x] Cancel search: ECO modePage 70 of 352
68
Comfort
Electric adjustments
Switch on the ignition or start the engine if the vehicle has gone into economy mode.
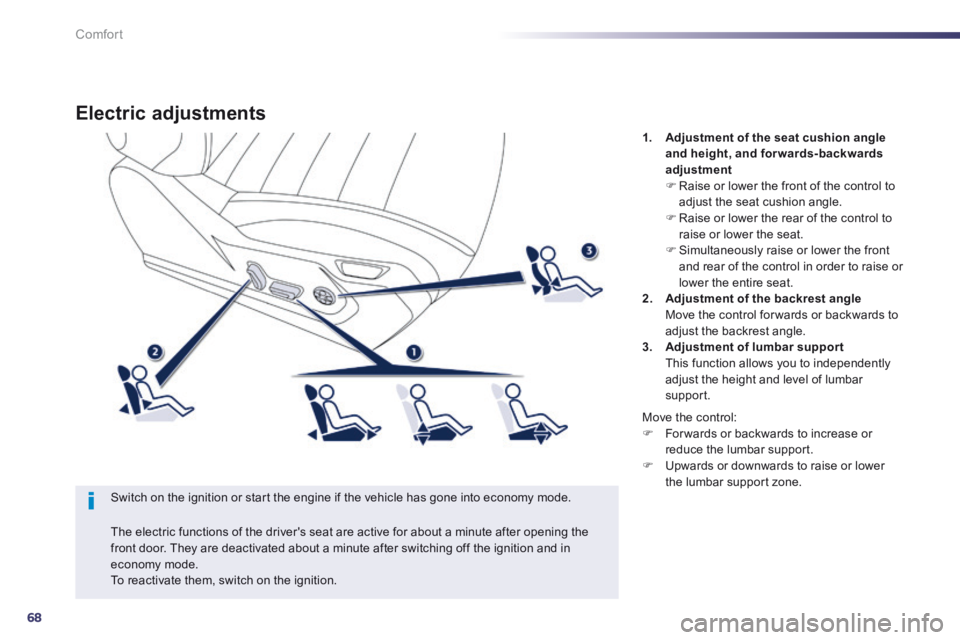
1. Adjustment of the seat cushion angle and height, and forwards-backwards adjustment Raise or lower the front of the control to adjust the seat cushion angle. Raise or lower the rear of the control to
raise or lower the seat. Simultaneously raise or lower the front and rear of the control in order to raise or lower the entire seat. 2. Adjustment of the backrest angle Move the control for wards or backwards to adjust the backrest angle. 3. Adjustment of lumbar support This function allows you to independently adjust the height and level of lumbar support.
The electric functions of the driver's seat are active for about a minute after opening the front door. They are deactivated about a minute after switching off the ignition and in economy mode. To reactivate them, switch on the ignition.
Move the control: For wards or backwards to increase or reduce the lumbar support. Upwards or downwards to raise or lower the lumbar support zone.
Page 92 of 352
90
Comfort
Dual-zone digital air conditioning
Automatic operation
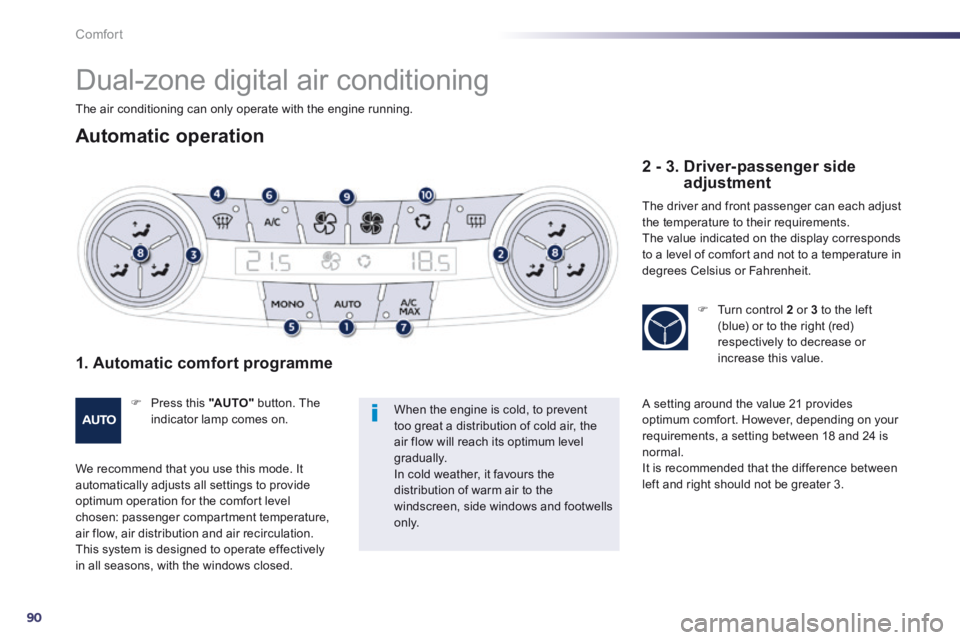
1. Automatic comfort programme
Press this "AUTO" button. The indicator lamp comes on.
We recommend that you use this mode. It automatically adjusts all settings to provide optimum operation for the comfort level chosen: passenger compartment temperature, air flow, air distribution and air recirculation. This system is designed to operate effectively in all seasons, with the windows closed.
When the engine is cold, to prevent too great a distribution of cold air, the air flow will reach its optimum level gradually. In cold weather, it favours the distribution of warm air to the windscreen, side windows and footwells o n l y.
2 - 3. Driver-passenger side adjustment
The driver and front passenger can each adjust the temperature to their requirements. The value indicated on the display corresponds to a level of comfort and not to a temperature in degrees Celsius or Fahrenheit.
Turn control 2 or 3 to the left (blue) or to the right (red) respectively to decrease or increase this value.
A setting around the value 21 provides optimum comfort. However, depending on your requirements, a setting between 18 and 24 is normal. It is recommended that the difference between left and right should not be greater 3.
The air conditioning can only operate with the engine running.
Page 95 of 352
3
93
Comfort
Quad-zone digital air conditioning
Automatic operation
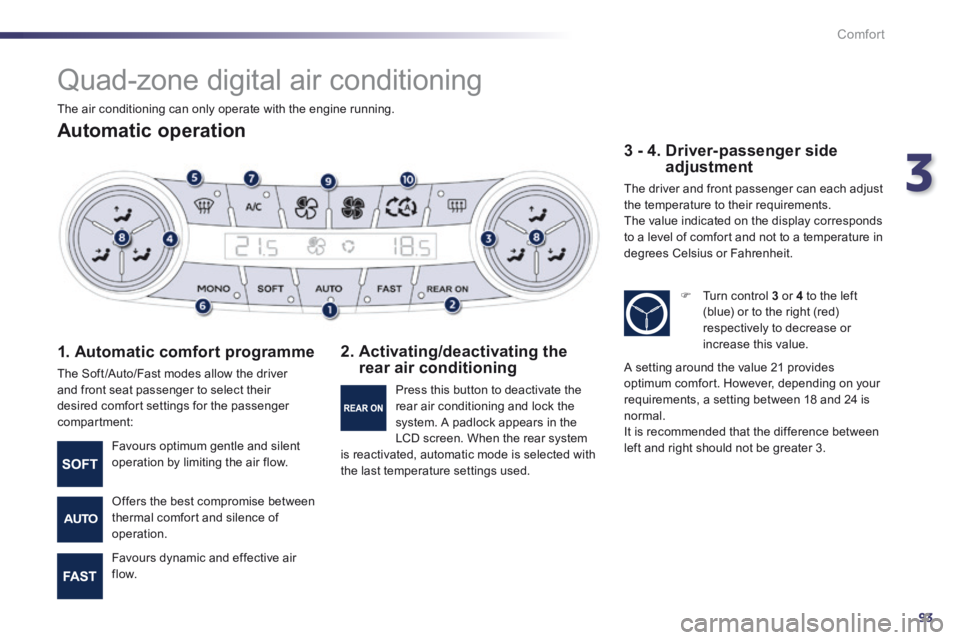
1. Automatic comfort programme
The Soft /Auto/Fast modes allow the driver and front seat passenger to select their desired comfort settings for the passenger compartment:
2. Activating/deactivating the rear air conditioning
3 - 4. Driver-passenger side adjustment
The driver and front passenger can each adjust the temperature to their requirements. The value indicated on the display corresponds to a level of comfort and not to a temperature in degrees Celsius or Fahrenheit.
Favours optimum gentle and silent operation by limiting the air flow.
Offers the best compromise between thermal comfort and silence of operation.
Favours dynamic and effective air f low.
Press this button to deactivate the rear air conditioning and lock the system. A padlock appears in the LCD screen. When the rear system is reactivated, automatic mode is selected with the last temperature settings used.
Turn control 3 or 4 to the left (blue) or to the right (red) respectively to decrease or increase this value.
A setting around the value 21 provides optimum comfort. However, depending on your requirements, a setting between 18 and 24 is normal. It is recommended that the difference between left and right should not be greater 3.
The air conditioning can only operate with the engine running.
Page 98 of 352
96
Comfort
Adjusting the rear passenger comfort level
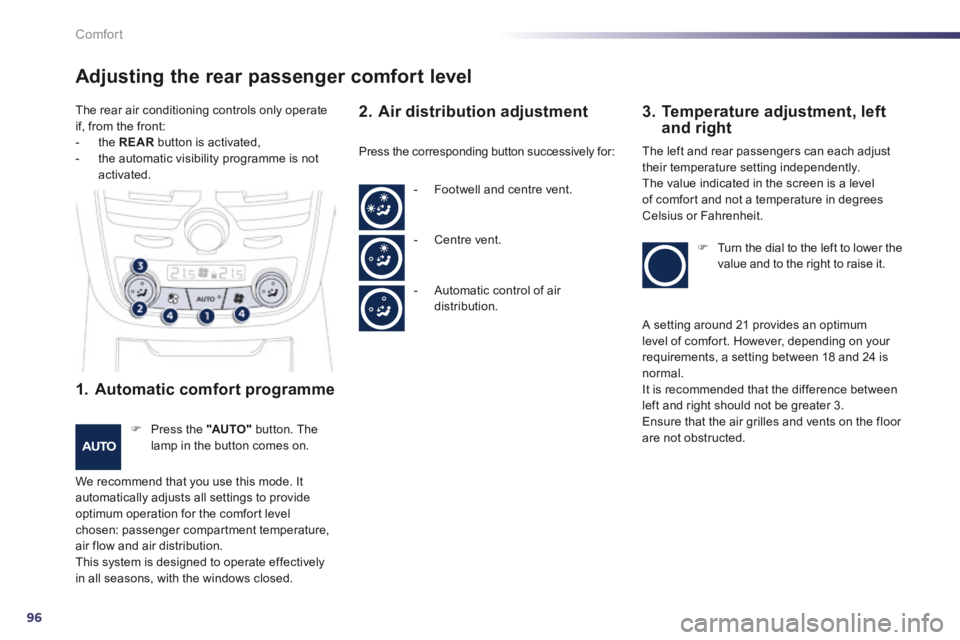
1. Automatic comfort programme
Press the "AUTO" button. The
lamp in the button comes on.
We recommend that you use this mode. It automatically adjusts all settings to provide optimum operation for the comfort level chosen: passenger compartment temperature, air flow and air distribution. This system is designed to operate effectively in all seasons, with the windows closed.
2. Air distribution adjustment 3. Temperature adjustment, left and right
Press the corresponding button successively for: The left and rear passengers can each adjust their temperature setting independently. The value indicated in the screen is a level of comfort and not a temperature in degrees Celsius or Fahrenheit.
Turn the dial to the left to lower the value and to the right to raise it.
- Footwell and centre vent.
- Centre vent.
- Automatic control of air distribution.
The rear air conditioning controls only operate if, from the front: - the REAR button is activated, - the automatic visibility programme is not activated.
A setting around 21 provides an optimum level of comfort. However, depending on your requirements, a setting between 18 and 24 is normal. It is recommended that the difference between left and right should not be greater 3. Ensure that the air grilles and vents on the floor are not obstructed.
Page 102 of 352
100
Comfort
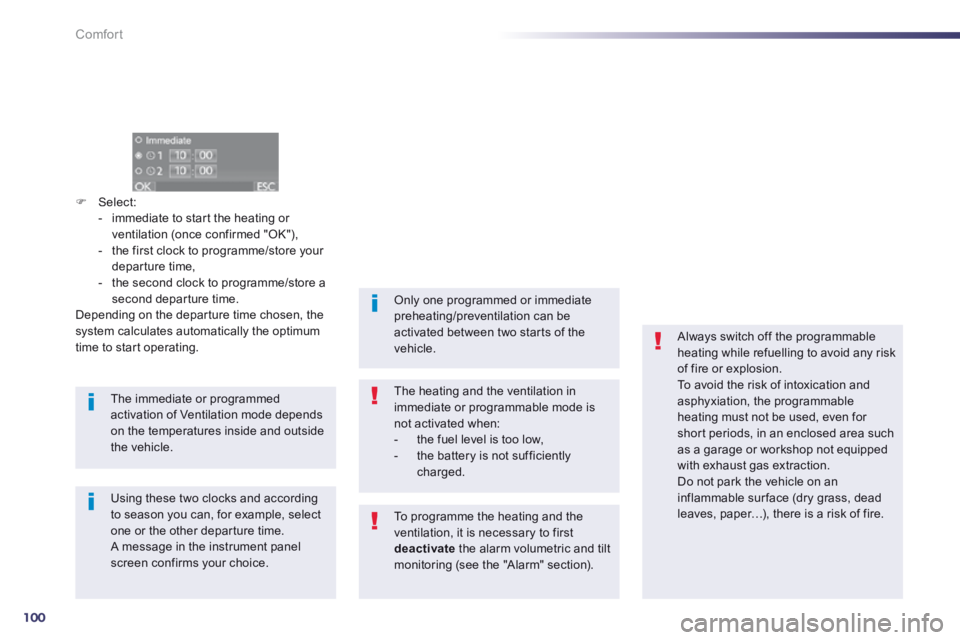
Select: - immediate to start the heating or ventilation (once confirmed "OK"), - the first clock to programme/store your departure time, - the second clock to programme/store a second departure time. Depending on the departure time chosen, the system calculates automatically the optimum time to start operating.
The immediate or programmed activation of Ventilation mode depends on the temperatures inside and outside the vehicle.
Always switch off the programmable heating while refuelling to avoid any risk of fire or explosion. To avoid the risk of intoxication and asphyxiation, the programmable heating must not be used, even for
short periods, in an enclosed area such as a garage or workshop not equipped with exhaust gas extraction. Do not park the vehicle on an inflammable sur face (dry grass, dead leaves, paper…), there is a risk of fire. Using these two clocks and according to season you can, for example, select one or the other departure time. A message in the instrument panel screen confirms your choice.
Only one programmed or immediate preheating/preventilation can be activated between two starts of the vehicle.
The heating and the ventilation in immediate or programmable mode is not activated when: - the fuel level is too low, - the battery is not sufficiently charged.
To programme the heating and the ventilation, it is necessary to first deactivate the alarm volumetric and tilt monitoring (see the "Alarm" section).
Page 105 of 352
4
103
Driving
It is recommended that you do not apply the parking brake in very cold conditions (ice) and during towing (breakdown, caravan...). Deactivate the automatic functions and release the parking brake manually.
Before leaving the vehicle, check that parking brake warning lamps in the instrument panel and the control lever Aare on, not flashing.
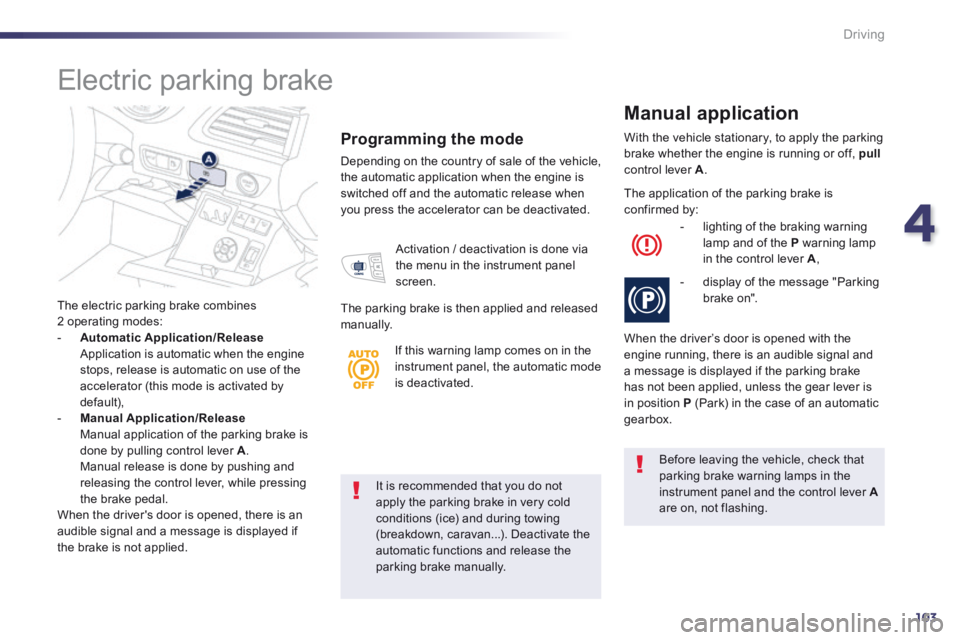
The electric parking brake combines 2 operating modes: - Automatic Application/Release Application is automatic when the engine stops, release is automatic on use of the accelerator (this mode is activated by default), - Manual Application/Release
Manual application of the parking brake is done by pulling control lever A. Manual release is done by pushing and releasing the control lever, while pressing the brake pedal. When the driver's door is opened, there is an audible signal and a message is displayed if the brake is not applied.
Programming the mode
Depending on the country of sale of the vehicle, the automatic application when the engine is switched off and the automatic release when you press the accelerator can be deactivated.
With the vehicle stationary, to apply the parking brake whether the engine is running or off, pullcontrol lever A .
Manual application
Activation / deactivation is done via the menu in the instrument panel screen.
The parking brake is then applied and released manually.
The application of the parking brake is confirmed by:
- lighting of the braking warning lamp and of the P warning lamp in the control lever A ,
- display of the message "Parking brake on".
When the driver’s door is opened with the engine running, there is an audible signal and a message is displayed if the parking brake has not been applied, unless the gear lever is in position P (Park) in the case of an automatic gearbox.
Electric parking brake
If this warning lamp comes on in the instrument panel, the automatic mode is deactivated.
Page 114 of 352
112
Driving
Gear shift indicator * System which reduces fuel consumption by advising the driver to change up on vehicles fitted with a manual gearbox.
Operation
The system intervenes only when driving economically. Depending on the driving situation and your vehicle's equipment, the system may advise you to skip one or more gears. You can follow this instruction without engaging the intermediate gears. The gear engagement recommendations must not be considered compulsory. In fact, the configuration of the road, the amount of traffic and safety remain determining factors when choosing the best gear. Therefore, the driver remains responsible for deciding whether or not to follow the advice given by the system. This function cannot be deactivated.
* According to engine.
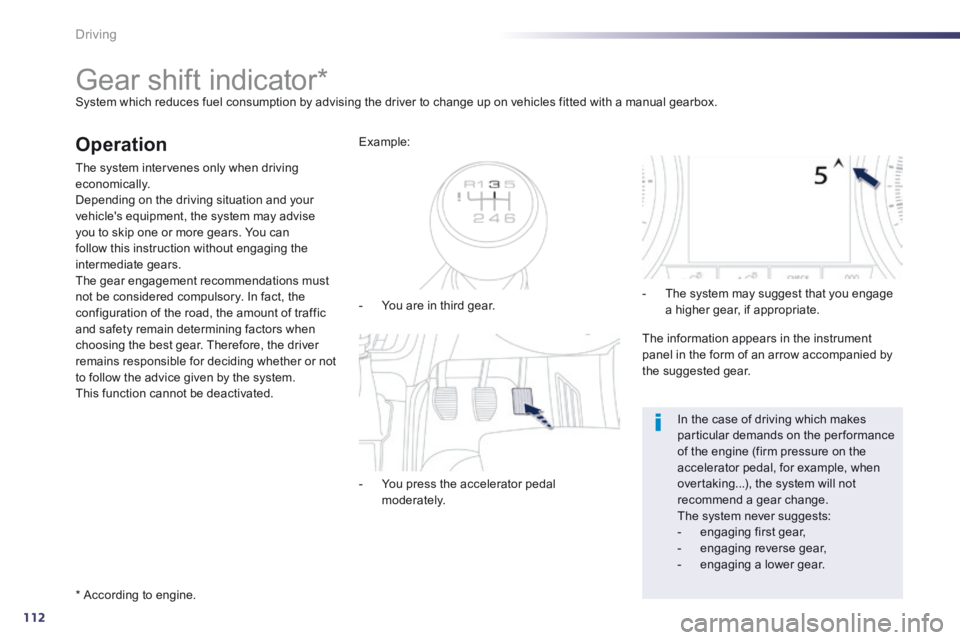
- You are in third gear.
Example:
- You press the accelerator pedal moderately.
- The system may suggest that you engage a higher gear, if appropriate.
The information appears in the instrument panel in the form of an arrow accompanied by the suggested gear.
In the case of driving which makes particular demands on the performance of the engine (firm pressure on the accelerator pedal, for example, when overtaking...), the system will not recommend a gear change. The system never suggests: - engaging first gear, - engaging reverse gear, - engaging a lower gear.
Page 118 of 352
116
Driving
Manual operation
Select position M for sequential changing of the six gears. Pull the lever towards the + sign to change up a gear. Push the lever towards the - sign to change down a gear. It is only possible to change from one gear to another if the vehicle speed and engine speed permit; otherwise, the gearbox will operate temporarily in automatic mode.
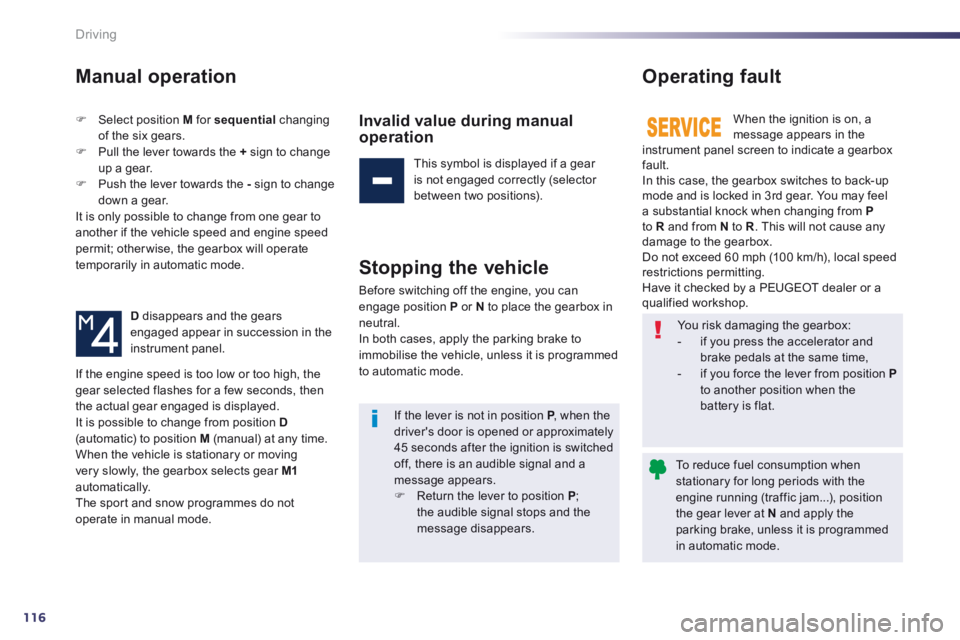
D disappears and the gears engaged appear in succession in the instrument panel.
Invalid value during manual operation
This symbol is displayed if a gear is not engaged correctly (selector between two positions).
Stopping the vehicle
Before switching off the engine, you can engage position P or N to place the gearbox in neutral. In both cases, apply the parking brake to immobilise the vehicle, unless it is programmed to automatic mode.
Operating fault
When the ignition is on, a message appears in the instrument panel screen to indicate a gearbox fault. In this case, the gearbox switches to back-up mode and is locked in 3rd gear. You may feel a substantial knock when changing from Pto R and from N to R . This will not cause any damage to the gearbox. Do not exceed 60 mph (100 km/h), local speed restrictions permitting. Have it checked by a PEUGEOT dealer or a qualified workshop.
If the engine speed is too low or too high, the gear selected flashes for a few seconds, then the actual gear engaged is displayed. It is possible to change from position D
(automatic) to position M (manual) at any time. When the vehicle is stationary or moving very slowly, the gearbox selects gear M1automatically. The sport and snow programmes do not operate in manual mode.
You risk damaging the gearbox: - if you press the accelerator and brake pedals at the same time, - if you force the lever from position Pto another position when the battery is flat. If the lever is not in position P , when the P , when the Pdriver's door is opened or approximately 45 seconds after the ignition is switched off, there is an audible signal and a message appears. Return the lever to position P ; the audible signal stops and the message disappears.
To reduce fuel consumption when stationary for long periods with the engine running (traffic jam...), position the gear lever at N and apply the parking brake, unless it is programmed in automatic mode.