Page 112 of 256
110
Seat belts
Front seat belts
Fastening
F Pull the strap, then insert the tongue in the buckle.
F
C
heck that the seat belt is fastened
correctly by pulling the strap.
th
e front seat belts are fitted with a
pretensioning and force limiting system.th
is system improves safety in the front
seats in the event of a front or side impact.
Depending on the severity of the impact, the
pretensioning system instantly tightens the seat
belts against the body of the occupants.
the
pretensioning seat belts are active when
the ignition is on.
th
e force limiter reduces the pressure of the
seat belt on the chest of the occupant, so
improving their protection.
Rear seat belts
the rear seats are each fitted with a three-point
seat belt.
Unfastening
F Press the red button on the buckle.
F gu ide the seat belt as it reels in.
Safety
Page 115 of 256

113
Airbags
System designed to contribute towards the
safety of the occupants in the event of violent
collisions. t
h
e airbags supplement the action
of the force-limiting seat belts.
If a collision occurs, the electronic detectors
record and analyse the front and side impacts
sustained in the impact detection zones:
-
i
n the case of a serious impact, the airbags
are deployed instantly and contribute
towards better protection of the occupants
of the vehicle; immediately after the impact,
the airbags deflate rapidly so that they
do not hinder visibility or the exit of the
occupants,
-
i
n the case of a minor or rear impact or in
certain roll-over conditions, the airbags
may not be deployed; the seat belt alone
contributes towards providing your
protection in these situations.
The airbags do not operate when the
ignition is switched off.
th
e deployment of an airbag is
accompanied by a slight emission
of smoke and a noise, due to the
detonation of the pyrotechnic charge
incorporated in the system.
th
is smoke is not harmful, but sensitive
individuals may experience slight
irritation.
th
e detonation noise associated with
the deployment of an airbag may result
in a slight loss of hearing for a short
time.
th
is equipment will only deploy once.
If a second impact occurs (during the
same or a subsequent accident), the
airbag will not be deployed again.
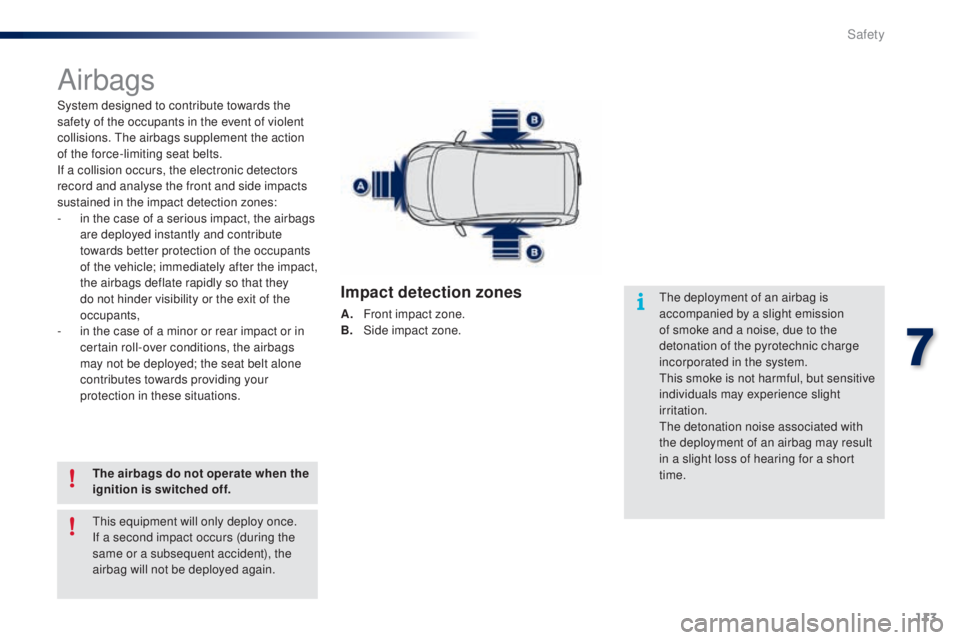
Impact detection zones
A. Front impact zone.
B. S ide impact zone.
7
Safety
Page 116 of 256

114
Deactivating the passenger's
front airbag
Only the passenger's front airbag can be
deactivated.
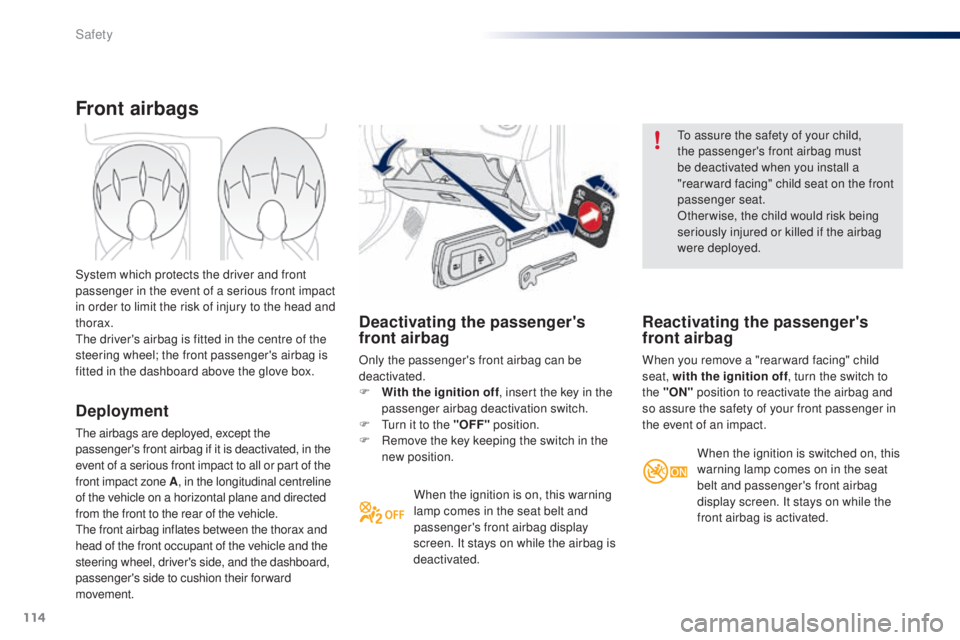
F
W
ith the ignition off , insert the key in the
passenger airbag deactivation switch.
F
t
u
rn it to the "OFF" position.
F
R
emove the key keeping the switch in the
new position.
When the ignition is on, this warning
lamp comes in the seat belt and
passenger's front airbag display
screen. It stays on while the airbag is
deactivated.
to a
ssure the safety of your child,
the passenger's front airbag must
be deactivated when you install a
"rear ward facing" child seat on the front
passenger seat.
Otherwise, the child would risk being
seriously injured or killed if the airbag
were deployed.
Reactivating the passenger's
front airbag
When you remove a "rear ward facing" child
seat, with the ignition off , turn the switch to
the "ON" position to reactivate the airbag and
so assure the safety of your front passenger in
the event of an impact.
Front airbags
Deployment
the airbags are deployed, except the
passenger's front airbag if it is deactivated, in the
event of a serious front impact to all or part of the
front impact zone A , in the longitudinal centreline
of the vehicle on a horizontal plane and directed
from the front to the rear of the vehicle.
th
e front airbag inflates between the thorax and
head of the front occupant of the vehicle and the
steering wheel, driver's side, and the dashboard,
passenger's side to cushion their forward
movement. System which protects the driver and front
passenger in the event of a serious front impact
in order to limit the risk of injury to the head and
thorax.
th
e driver's airbag is fitted in the centre of the
steering wheel; the front passenger's airbag is
fitted in the dashboard above the glove box.
When the ignition is switched on, this
warning lamp comes on in the seat
belt and passenger's front airbag
display screen. It stays on while the
front airbag is activated.
Safety
Page 135 of 256
133
Child lock
this prevents the opening of the rear doors
from the inside.
th
e controls are located on the edge of each
rear door.
F
L
ower the control.
Check the status of this safety device before
switching on the ignition.
th
is system is independent of the central
locking.
8
Child safety
Page 136 of 256

134
Fuel tank
Low fuel levelRefuelling
When the low fuel level is reached,
this warning lamp comes on and the
last bar flashes, accompanied by an
audible signal.
You have approximately 5 litres remaining.
In certain driving conditions and depending on
the engine, the distance which can be travelled
with the fuel remaining may be less than
30
miles (50 km).
When the frequency of the flashing increases,
you have approximately 3 litres remaining .
to r
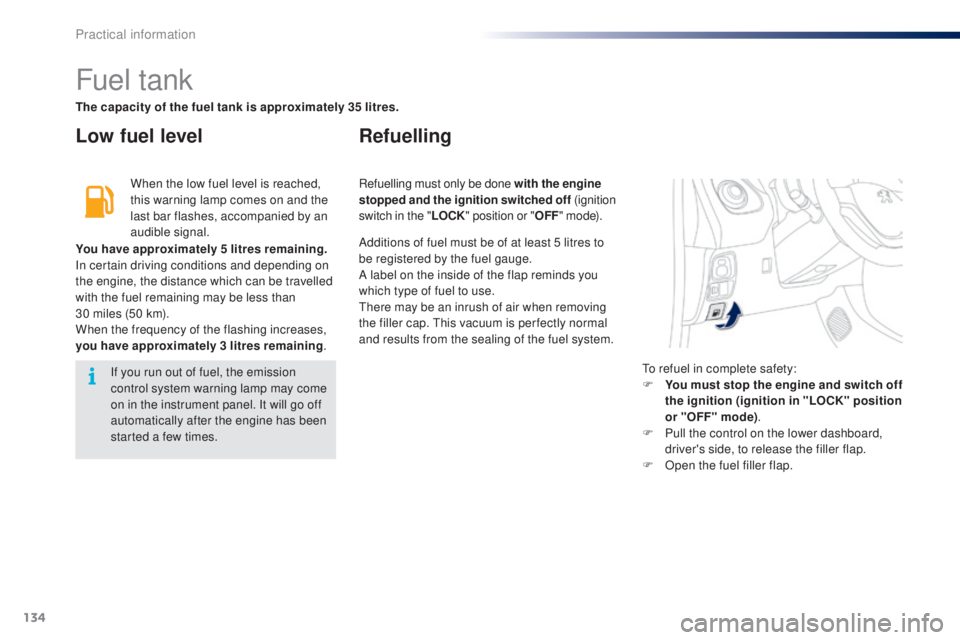
efuel in complete safety:
F
Y
ou must stop the engine and switch off
the ignition (ignition in "LOCK" position
or "OFF" mode) .
F
P
ull the control on the lower dashboard,
driver's side, to release the filler flap.
F
O
pen the fuel filler flap.
If you run out of fuel, the emission
control system warning lamp may come
on in the instrument panel. It will go off
automatically after the engine has been
started a few times. Refuelling must only be done with the engine
stopped and the ignition switched off
(ignition
switch in the " LOCK" position or " OFF" m o d e).
The capacity of the fuel tank is approximately 35 litres.
Additions of fuel must be of at least 5 litres to
be registered by the fuel gauge.
A label on the inside of the flap reminds you
which type of fuel to use.
th
ere may be an inrush of air when removing
the filler cap.
t
h
is vacuum is per fectly normal
and results from the sealing of the fuel system.
Practical information
Page 139 of 256
137
F uncoil the pipe stowed under the compressor.
F
C
onnect the pipe from the compressor to
the sealant cartridge.
F
t
u
rn the the sealant cartridge and secure it
in the cut-out provided on the compressor.
Repair procedure
Avoid removing any foreign bodies
which have penetrated into the tyre. F
R
emove the valve cap from the tyre to be
repaired, and place it in a clean area.
F
C
onnect the hose from the sealant
cartridge to the valve of the tyre to be
repaired and tighten firmly.
F
S
witch off the ignition.
F
S
ecure the speed limit sticker inside the
vehicle.
9
Practical information
Page 140 of 256

138
F Check that the compressor switch is at the "O " position).
F
u
n
coil fully the electric cable, stowed under
the compressor.
F
C
onnect compressor's plug to the vehicle's
12 V socket.
F
S
witch on the ignition.
ta
ke care, the sealant product
is harmful (e.g. ethylene-glycol,
colophony...) if swallowed and causes
irritation to the eyes.
Keep this product out of the reach of
children.
th
e use-by date is marked on the
cartridge.
After use, do not discard the
cartridge by the roadside, take it to a
P
e
uge
Ot
dealer or an authorised
waste disposal site.
Don't forget to obtain a new sealant
cartridge, available from a P
e
uge
Ot
dealer or a qualified workshop. If after around 5 to 7 minutes the
pressure is not attained, this indicates
that the tyre is not repairable; contact
a P
e
uge
Ot
dealer or a qualified
workshop for assistance.
F S tart the compressor by placing the switch
at the " I" position and leave it running until
the tyre pressure reaches 2.0 bar.
t
h
e sealant product is injected into the tyre
under pressure; do not disconnect the pipe
from the valve during this operation (risk of
splashing and stains).
Practical information
Page 141 of 256
139
F Place the switch in the "O" position.
F R emove the kit.
F
D
rive immediately for approximately
three miles (five kilometres), at reduced
speed (between 15 and 35 mph (20 and
60
km/h)), to plug the puncture.
F
S
top to check the repair and the tyre
pressure using the kit.
Checking / adjusting tyre pressures
F Check that the compressor switch is at the "O " position.
F
u
n
coil fully the electric cable, stowed under
the compressor.
F
C
onnect the compressor's plug to the
vehicle's 12 V socket.
F
S
witch on the ignition.
You can also use the compressor, without
injecting sealant, to check and if necessary
adjust the tyre pressures
F
R
emove the valve cap from the tyre and
place it in a clean area.
F
u
n
coil the pipe stowed under the
compressor.
F
S
crew the pipe onto the valve and tighten
f i r m l y.
9
Practical information