Page 143 of 256
141
Changing a wheel
F As far as possible, immobilise the vehicle on level, stable, non-slippery ground.
F
A
pply the parking brake, switch off the
ignition (" OFF" mode for vehicles fitted
with "Keyless
e
n
try and Starting") and
engage first gear or reverse for the manual
gearbox, position N for the
etg electronic
gearbox.
Parking the vehicle
Procedure for replacing a wheel by the spare wheel using the tools supplied with the vehicle.
F
I
f necessary, chock the wheel diagonally
opposite the wheel to be changed.
F
Y
ou must ensure that the occupants leave
the vehicle and wait in a safe location.
9
Practical information
Page 148 of 256

146
Snow chains
In wintry conditions, snow chains improve traction as well as the behaviour of the vehicle when
braking.
Advice on installation
F If you have to fit the chains during a journey, stop the vehicle on a flat sur face
on the side of the road.
F
A
pply the parking brake and position any
wheel chocks to prevent movement of your
vehicle.
F
F
it the chains following the instructions
provided by the manufacturer.
F
M
ove off gently and drive for a few
moments, without exceeding 30 mph
(50
km/h).
F
S
top your vehicle and check that the snow
chains are correctly tightened.
ta
ke account of the legislation in force
in your country on the use of snow
chains and the maximum running speed
authorised.
th
e snow chains must be fitted only
to the front wheels.
th
ey must never
be fitted to "space-saver" type spare
wheels.
Avoid driving with snow chains on roads
that have been cleared of snow, to
avoid damaging your vehicle's tyres and
the road sur face. If your vehicle is fitted
with alloy wheels, check that no part of
the chain or its fixings is in contact with
the wheel rim.
us
e only the chains designed to be fitted to the
type of wheel fitted to your vehicle:
Original tyre size Maximum link size.
165/65 R14 9 mm
165/60 R15
For more information on snow chains,
contact a P
e
uge
Ot
dealer or a
qualified workshop.
It is strongly recommended that before
you leave, you practise fitting the snow
chains on a level and dry sur face.
Practical information
Page 163 of 256

161
12 V battery
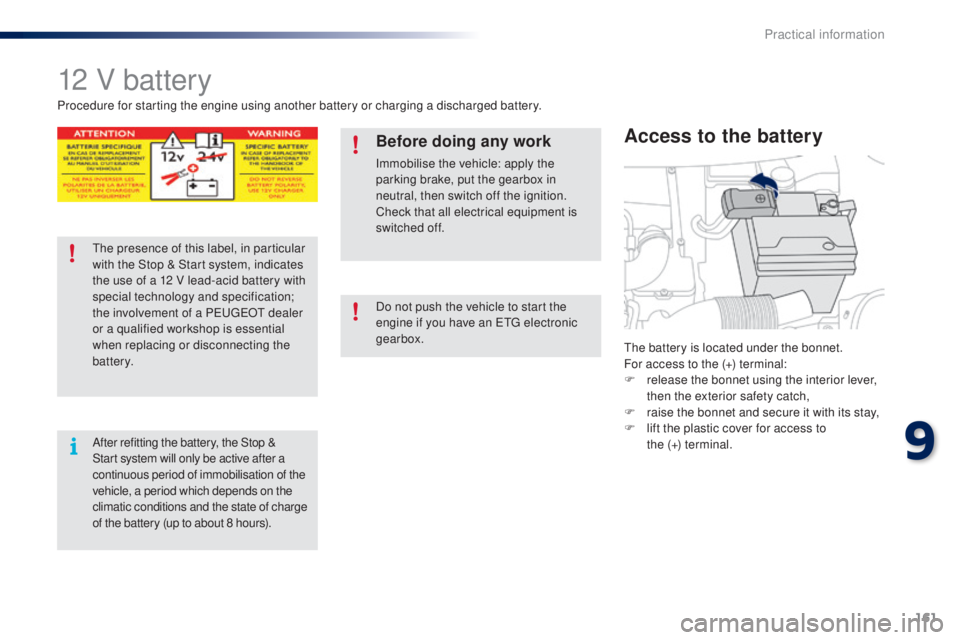
the battery is located under the bonnet.
For access to the (+) terminal:
F
r
elease the bonnet using the interior lever,
then the exterior safety catch,
F
r
aise the bonnet and secure it with its stay,
F
l
ift the plastic cover for access to
the (+)
terminal.
Access to the battery
Procedure for starting the engine using another battery or charging a discharged battery.
Before doing any work
Immobilise the vehicle: apply the
parking brake, put the gearbox in
neutral, then switch off the ignition.
Check that all electrical equipment is
switched off.
th
e presence of this label, in particular
with the Stop & Start system, indicates
the use of a 12 V lead-acid battery with
special technology and specification;
the involvement of a P
e
uge
Ot
dealer
or a qualified workshop is essential
when replacing or disconnecting the
battery.
After refitting the battery, the Stop &
Start system will only be active after a
continuous period of immobilisation of the
vehicle, a period which depends on the
climatic conditions and the state of charge
of the battery (up to about 8 hours). Do not push the vehicle to start the
engine if you have an
etg electronic
gearbox.
9
Practical information
Page 167 of 256

165
towing the vehicle
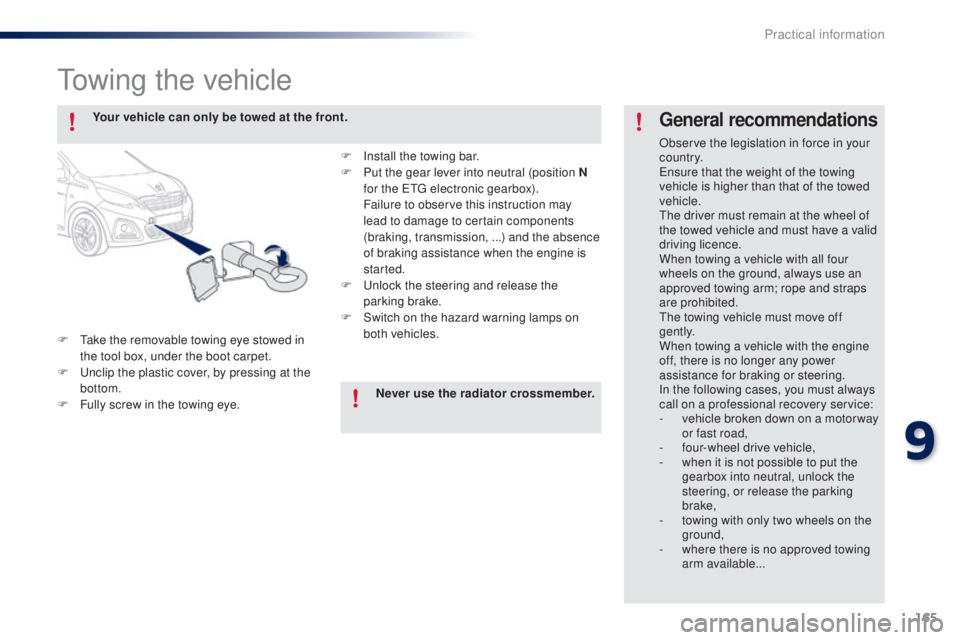
F take the removable towing eye stowed in the tool box, under the boot carpet.
F
u
n
clip the plastic cover, by pressing at the
bottom.
F
F
ully screw in the towing eye.
General recommendations
Observe the legislation in force in your
c o unt r y.
en
sure that the weight of the towing
vehicle is higher than that of the towed
vehicle.
th
e driver must remain at the wheel of
the towed vehicle and must have a valid
driving licence.
When towing a vehicle with all four
wheels on the ground, always use an
approved towing arm; rope and straps
are prohibited.
th
e towing vehicle must move off
g e nt l y.
When towing a vehicle with the engine
off, there is no longer any power
assistance for braking or steering.
In the following cases, you must always
call on a professional recovery service:
-
v
ehicle broken down on a motor way
or fast road,
-
f
our-wheel drive vehicle,
-
w
hen it is not possible to put the
gearbox into neutral, unlock the
steering, or release the parking
brake,
-
t
owing with only two wheels on the
ground,
-
w
here there is no approved towing
arm available...
Your vehicle can only be towed at the front.
F
I
nstall the towing bar.
F
P
ut the gear lever into neutral (position N
for the
etg
electronic gearbox).
F
ailure to observe this instruction may
lead to damage to certain components
(braking, transmission, ...) and the absence
of braking assistance when the engine is
started.
F
u
n
lock the steering and release the
parking brake.
F
S
witch on the hazard warning lamps on
both vehicles.
Never use the radiator crossmember.
9
Practical information
Page 169 of 256

167
Accessories
A wide range of accessories and genuine parts is available from the PeugeOt dealer network.th
ese accessories and parts are all suitable for your vehicle and benefit from Pe ugeOt' s recommendation and warranty.
"Comfort":
air deflectors, insulated module,
sun blinds, scented air freshener, portable
ashtray, coat hanger fitted to head restraint,
reading lamp, front and rear parking sensors,
centre armrest, cigarette lighter...
"Transport solutions":
boot carpet, boot liner,
boot net, transverse roof bars, bicycle carrier,
ski carrier, roof boxes, boot dividers, ... "Security and safety":
anti-theft alarm,
vehicle tracking system, snow chains, wheel
non-slip covers, wheel security bolts, child
seats, first aid kit, warning triangle, high
visibility vest, breathalyzer, fire extinguisher,
pet seat belt, foglamp kit, seat belt cutter/glass
hammer, ... "Protection":
mats, mud flaps, vehicle cover,
seat covers, bumper protectors, ...
to p
revent the mat from becoming caught
under the pedals:
-
e
nsure that the mat is secured correctly,
-
n
ever fit one mat on top of another.
"Style":
ligne S body kit, ligne S personalised
mats, aluminium gear lever knob, alloy wheels,
exterior personalisation stickers, chrome side
mouldings, chrome mirror shells, chrome
door handles, door sill finishers, personalised
remote control shells, ...
9
Practical information
Page 178 of 256

176
ETG electronic gearbox
the etg gearbox does not require
any maintenance (no oil change).
Refer to the warranty and
maintenance record for information
on when this unit should be checked.
Brake wear depends on the style
of driving, particularly in the case
of vehicles used in town, over short
distances. It may be necessary to
Brake pads
For information on checking brake
disc wear, contact a Pe ugeOt
dealer or a qualified workshop.
Brake disc wearOnly use products recommended by
Pe ugeOt or products of equivalent
quality and specification.
In order to optimise the operation of
units as important as those in the
braking system, P
e
uge
Ot
selects and
offers very specific products.
After washing the vehicle, dampness,
or in wintry conditions, ice can form
on the brake discs and pads: braking
efficiency may be reduced. Make light
brake applications to dry and defrost
the brakes.
Parking brake
If excessive travel or a loss of
effectiveness of this system is
noticed, the parking brake must
be checked, even between two
services.
Checking this system must be done by a
P
e
uge
Ot
dealer or a qualified workshop.
have the condition of the brakes checked, even
between vehicle services.
un
less there is a leak in the circuit, a drop in
the brake fluid level indicates that the brake
pads are worn.
Checks
Page 227 of 256

03
MODE
MODE
225
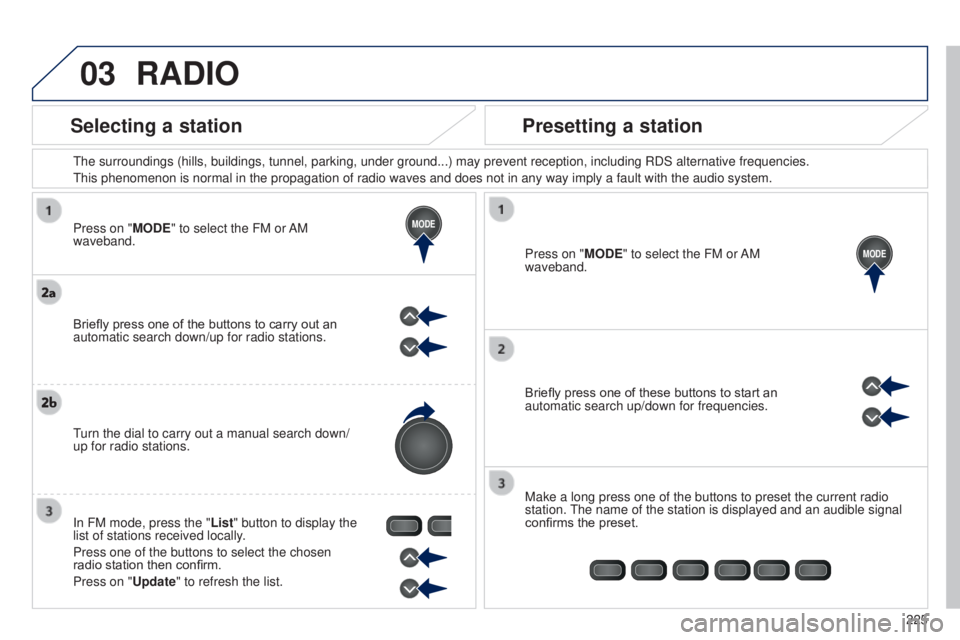
Press on "MODE" to select the FM or AM
waveband.
t
he surroundings (hills, buildings, tunnel, parking, under ground...) m\
ay prevent reception, including RDS alternative frequencies.
t
his phenomenon is normal in the propagation of radio waves and does not \
in any way imply a fault with the audio system.
Press on "MODE" to select the FM or AM
waveband.
Briefly press one of these buttons to start an
automatic search up/down for frequencies.
Make a long press one of the buttons to preset the current radio
station.
t
he name of the station is displayed and an audible signal
confirms the preset.
Briefly press one of the buttons to carry out an
automatic search down/up for radio stations.
turn the dial to carry out a manual search down/
up for radio stations.
In FM mode, press the "
List" button to display the
list of stations received locally.
Press one of the buttons to select the chosen
radio station then confirm.
Press on "Update" to refresh the list.
RADIO
Selecting a station Presetting a station
B3_en_Chap12b_Autoradio-toyota-2_ed01-2014
Page 241 of 256
239
Dashboard fuses 152-156
Instruments and controls
Opening the bonnet 1 70
Door mirrors
5
1
el
ectric windows
4
2
Courtesy lamp
1
01
Control for electric fabric roof
4
2
Rear view mirror
5
2
Sun visors
6
5
Manual parking brake
7
6Heating, ventilation
5
3-55
Manual air conditioning
5
6-57
Automatic air conditioning
5
8 - 61
Windscreen demist / defrost
6
2
Rear screen demist / defrost
6
3
7-inch touch screen
1
81-220
Setting the time
2
9
Radio
221-236
Setting the time
2
8
Manual gearbox
7
6
e
tg
el
ectronic gearbox
7
7-80
ge
ar shift indicator
8
1
Stop & Start
8
3 - 85
Hill start assist
8
2
12 V accessory socket
6 5uS
B port 6 6
Jack auxiliary socket
6
6
B3_en_Chap13_recherche-visuelle_ed01-2014
.
Visual search