2014 OPEL INSIGNIA turn signal
[x] Cancel search: turn signalPage 110 of 321

108Instruments and controls
Vehicle personalisation 3 118.
Memorised settings 3 23.
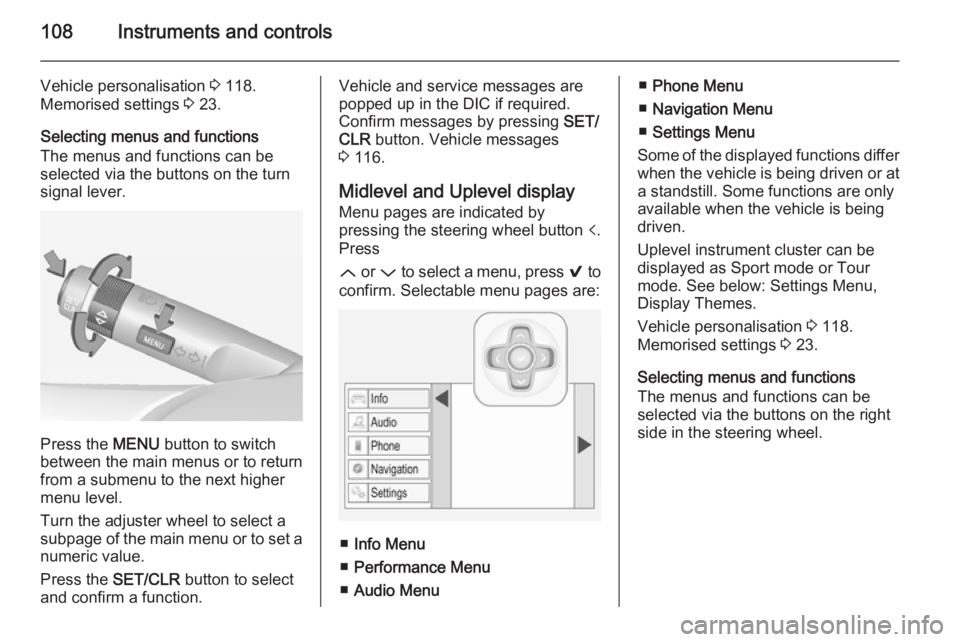
Selecting menus and functions
The menus and functions can be selected via the buttons on the turnsignal lever.
Press the MENU button to switch
between the main menus or to return
from a submenu to the next higher
menu level.
Turn the adjuster wheel to select a
subpage of the main menu or to set a
numeric value.
Press the SET/CLR button to select
and confirm a function.
Vehicle and service messages are
popped up in the DIC if required.
Confirm messages by pressing SET/
CLR button. Vehicle messages
3 116.
Midlevel and Uplevel display Menu pages are indicated by
pressing the steering wheel button p.
Press
Q or P to select a menu, press 9 to
confirm. Selectable menu pages are:
■ Info Menu
■ Performance Menu
■ Audio Menu
■Phone Menu
■ Navigation Menu
■ Settings Menu
Some of the displayed functions differ
when the vehicle is being driven or at a standstill. Some functions are onlyavailable when the vehicle is being
driven.
Uplevel instrument cluster can be
displayed as Sport mode or Tour
mode. See below: Settings Menu,
Display Themes.
Vehicle personalisation 3 118.
Memorised settings 3 23.
Selecting menus and functions
The menus and functions can be
selected via the buttons on the right
side in the steering wheel.
Page 118 of 321

116Instruments and controls
Valet mode
Some functions of the Driver
Information Centre and the Colour-
Info-Display can be limited for some
drivers.
Activation or deactivation of valet
mode can be set in the menu
Settings in the vehicle personalisation
menu.
Vehicle personalisation 3 118.
For more information see
Infotainment system manual.
Smartphone controller The smartphone controller allows a
smartphone to access vehicle data
via WLAN or Bluetooth connection.
This data can then be displayed and analysed on the smartphone.Vehicle messages
Messages are indicated in the Driver
Information Centre (DIC), in some
cases together with a warning and
signal buzzer.
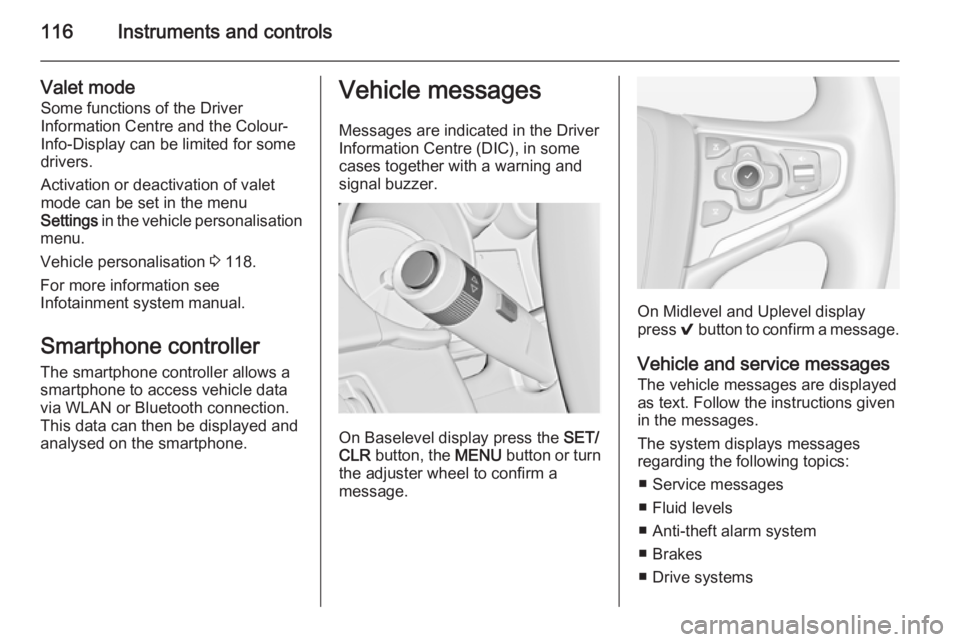
On Baselevel display press the SET/
CLR button, the MENU button or turn
the adjuster wheel to confirm a
message.
On Midlevel and Uplevel display
press 9 button to confirm a message.
Vehicle and service messages
The vehicle messages are displayed
as text. Follow the instructions given
in the messages.
The system displays messages
regarding the following topics:
■ Service messages
■ Fluid levels
■ Anti-theft alarm system
■ Brakes
■ Drive systems
Page 128 of 321

126Lighting
Playstreet lightingActivated automatically at low speed
up to approx. 30 km/h. The light beam is turned at an angle of 8° to the
roadside.
Town lighting Activated automatically at a speed
range between approx. 40 and
55 km/h and when street lights are
detected by the light sensor. The light
range is reduced by an extended light
distribution.
Country lighting
Activated automatically at a speed
range between approx. 55 and
115 km/h. The beam of light and the
brightness is different between the
left and the right side.
Motorway lighting
Activated automatically at a speed
above approx. 115 km/h and minimal
steering movements. It switches on
after a delay or immediately when the
vehicle is powerfully accelerated. The light beam is longer and brighter.Adverse weather lighting
Activated automatically up to a speed of approx. 70 km/h, when the rain
sensor recognizes condensation or
the wiper operates continuously. The
range, distribution and light intensity
is regulated variably depending on visibility.
Dynamic curve lighting
The light beam pivots based on
steering wheel angle and speed,
improving lighting in curves.
Control indicator f 3 106.
Corner lighting
On tight bends or when turning off,
depending on the steering angle or
the turn signal light, an additional left
or right reflector is switched on which illuminates the road at a right angle to
the direction of travel. It is activated
up to a speed of 40 km/h.
Control indicator f 3 106.
Reversing function If the headlights are on and reverse
gear is engaged, both corner lights
are switched on. They remain
illuminated for 20 seconds after disengaging reverse gear or until
driving faster than 7 km/h in a forward
gear.
Page 130 of 321

128Lighting
Fault in Adaptive forward
lighting system When the system detects a failure in
the Adaptive forward lighting system,
the system moves to a preset position to avoid dazzling of oncoming traffic.
If this is not possible, the affected
headlight will be automatically
switched off. In any case, one
headlight will stay on. A warning is
displayed in the Driver Information
Centre.
Hazard warning flashers
Operated with the ¨ button.
In the event of an accident with airbag
deployment the hazard warning
flashers are activated automatically.
Turn and lane-change
signalslever up=right turn signallever down=left turn signal
If the lever is moved past the
resistance point, the turn signal is
switched on constantly. When the
steering wheel moves back, the turn
signal is automatically deactivated.
For three flashes, e.g. when changing lanes, press the lever until resistance
is felt and then release.
With a trailer connected, turn signal
flashes six times when pressing the
lever until resistance is felt and then
releasing.
Move the lever to the resistance point
and hold for longer indication.
Switch the turn signal off manually by moving the lever to its original
position.
Front fog lights
Operated with the > button.
Page 131 of 321

Lighting129
Light switch in position AUTO:
switching on front fog lights will switch headlights on automatically.
Rear fog lights
Operated with the r button.
Light switch in position AUTO:
switching on rear fog light will switch
headlights on automatically.
Light switch in position 8: rear fog
light can only be switched on with
front fog lights.
The vehicle rear fog light is
deactivated when towing.
Parking lights
When the vehicle is parked, the
parking lights on one side can be
activated:
1. Switch off ignition.
2. Move turn signal lever all the way up (right parking lights) or down
(left parking lights).
Confirmed by a signal and the
corresponding turn signal control
indicator.
Reversing lights
The reversing light comes on when
the ignition is on and reverse gear is
selected.
Misted light covers The inside of the light housing may
mist up briefly in poor, wet and cold weather conditions, in heavy rain or
after washing. The mist disappears
quickly by itself; to help switch on the
headlights.
Page 134 of 321

132Lighting
Vehicle personalisation 3 118.
The settings can be saved for the key
being used 3 23.
The following lights will additionally
switch on when the driver's door is
opened:
■ All switches
■ Driver Information Centre
■ Door pocket lights
Exit lighting
The following lights switch on if the
key is removed from the ignition
switch:
■ Interior lights
■ Instrument panel light
■ Puddle lights
They will switch off automatically after
a delay. This function works only in
the dark. Theatre lighting is activated
if the driver's door is opened during
this time.
Headlights, tail lights and number plate lights illuminate the surrounding area for an adjustable time after
leaving the vehicle.
Switching on 1. Switch off ignition.
2. Remove ignition key.
3. Open driver's door.
4. Pull turn signal lever.
5. Close driver's door.
If the driver's door is not closed the
lights switch off after two minutes.
Exit lighting is switched off
immediately if the turn signal lever is pulled while the driver's door is open.
This function can be activated or
deactivated in the Vehicle
personalisation.
Select the relevant setting in Settings,
I Vehicle in the Colour-Info-Display.
Colour-Info-Display 3 114.
Vehicle personalisation 3 118.
The settings can be saved for the key
being used 3 23.
Battery discharge
protection
Vehicle battery state of charge
function
The function guarantees longest vehicle battery life via a generatorwith controllable power output and
optimised power distribution.
To prevent discharge of the vehicle
battery when driving, the following
systems are reduced automatically in two stages and finally switched off:
Page 186 of 321

184Driving and operating
Deactivation
The system can be deactivated.
Press button V repeatedly
until Forward Collision Alert Off
appears in the Driver Information
Centre.
General information for both
variants of forward collision alert9 Warning
Forward collision alert is just a
warning system and does not
apply the brakes. When
approaching a vehicle ahead too
rapidly, it may not provide you
enough time to avoid a collision.
The driver accepts full
responsibility for the appropriate
following distance based on traffic, weather and visibility conditions.
The complete attention of the
driver is always required while
driving. The driver must always be
ready to take action and apply the
brakes.
System limitations
The system is designed to warn only for vehicles, but may react also to
other metallic objects.
In the following cases, forward
collision alert may not detect a vehicle ahead or sensor performance may be limited:
■ on winding roads,
■ when weather limits visibility, e.g. fog, rain, or snow,
■ when the sensor is blocked by snow, ice, slush, mud, dirt, or
windscreen damage.
Following distance
indication
The following distance indication
displays the distance to a preceding
moving vehicle. The system uses,
depending on the vehicle equipment,
either the radar behind the radiator
grille or the front camera in the
windscreen to detect the distance of
a vehicle directly ahead in your path. It is active at speeds above 40 km/h.When a preceding vehicle is detected
ahead, the distance is indicated in
seconds, displayed on a page in the
Driver Information Centre 3 107.
On Baselevel display set Settings
X with the Menu button and
select Following distance indication
via the adjuster wheel on the turn signal lever 3 107.
On Midlevel or Uplevel display, select
Info menu and press o to
select Following distance indication
3 107.
The minimum indicated distance is
0.5 seconds.
Page 192 of 321

190Driving and operating
A successful parking manoeuvre is
indicated by a confirmation symbol.
Always pay attention to the sound of
the front-rear parking assist.
Continuous sound means that the
distance to an obstacle is less than approx. 30 cm.
Changing the parking side
The system is configured to detect
parking slots on the passenger side.
To detect parking slots on the driver
side, press button ( for approx.
2 seconds.
Display priorities
After activating the advanced parking assist, a message appears in the
Driver Information Centre. Advanced
parking assist indication in the Driver
Information Centre can be inhibited
by vehicle messages with a higher
priority. After approving the message
by pressing the SET/CLR button on
the turn signal lever or the 9 button
in the steering wheel controls,
advanced parking assist instructions
appear again and the parking
manoeuvre can be continued.
Deactivation
The system is deactivated by:
■ pressing the ( button
■ parking manoeuvre successfully ended
■ driving faster than 30 km/h
■ switching off the ignition
Deactivation by the driver or by the system during manoeuvring will beindicated by Parking Deactivated in
the Driver Information Centre.Fault
A message appears in the Driver
Information Centre when:
■ there is a fault in the system
■ the driver did not successfully complete the parking manoeuvre
■ the system is not operational
If an object is detected during parking instructions, Stop is indicated in the
Driver Information Centre. Removing
the object will resume the parking
manoeuvre. If the object is not
removed, the system will be