2014 OPEL INSIGNIA service
[x] Cancel search: servicePage 110 of 321

108Instruments and controls
Vehicle personalisation 3 118.
Memorised settings 3 23.
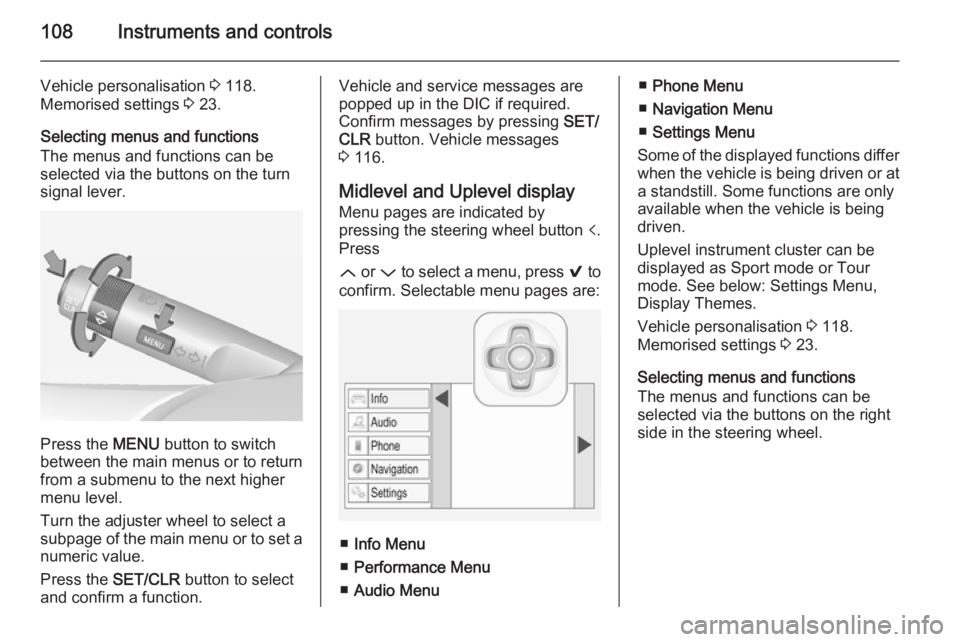
Selecting menus and functions
The menus and functions can be selected via the buttons on the turnsignal lever.
Press the MENU button to switch
between the main menus or to return
from a submenu to the next higher
menu level.
Turn the adjuster wheel to select a
subpage of the main menu or to set a
numeric value.
Press the SET/CLR button to select
and confirm a function.
Vehicle and service messages are
popped up in the DIC if required.
Confirm messages by pressing SET/
CLR button. Vehicle messages
3 116.
Midlevel and Uplevel display Menu pages are indicated by
pressing the steering wheel button p.
Press
Q or P to select a menu, press 9 to
confirm. Selectable menu pages are:
■ Info Menu
■ Performance Menu
■ Audio Menu
■Phone Menu
■ Navigation Menu
■ Settings Menu
Some of the displayed functions differ
when the vehicle is being driven or at a standstill. Some functions are onlyavailable when the vehicle is being
driven.
Uplevel instrument cluster can be
displayed as Sport mode or Tour
mode. See below: Settings Menu,
Display Themes.
Vehicle personalisation 3 118.
Memorised settings 3 23.
Selecting menus and functions
The menus and functions can be
selected via the buttons on the right
side in the steering wheel.
Page 111 of 321

Instruments and controls109
Press p to open main menu page.
Select a main menu page with Q or
P .
Confirm a main menu page with 9.
Once a main menu page is selected, press Q or P to select subpages.
Press q to open a next folder of the
selected subpage.
Press Q or P to select functions or
to set a numeric value if required.
Press 9 to select and confirm a
function.
If the Driver Information Centre (DIC) requests the driver to confirm a
function or message by pressing H
(Select), confirm by pressing 9.
Once a main menu page is selected,
this selection remains stored until
another main menu page is selected.
This means once the Info Menu page
is selected, you can change the
subpages just by pressing P or Q.
Vehicle and service messages are
popped up in the DIC if required.
Confirm messages by pressing the 9 button. Vehicle messages 3 116.
Info Menu Following there is the list of all
possible Info Menu pages. Some may
not be available for your particular
vehicle. Depending on the display
some functions are symbolised.
Turn the adjuster wheel or press Q
or P to select a page:
■ Trip odometer 1/A Average consumptionAverage speed
■ Trip odometer 2/B Average consumption
Average speed
■ Digital speed
■ Fuel range
■ Fuel range LPG version
■ Instantaneous consumption
■ Remaining oil life
■ Tyre pressure
■ Gasoline fuel level LPG fuel level
■ Timer
■ Used fuel
■ Traffic sign assistant
■ Following distance
■ Coolant temperature
■ Battery voltage
■ Eco page: Top consumers
■ Economy trend
■ Eco index
■ Blank page
Page 118 of 321

116Instruments and controls
Valet mode
Some functions of the Driver
Information Centre and the Colour-
Info-Display can be limited for some
drivers.
Activation or deactivation of valet
mode can be set in the menu
Settings in the vehicle personalisation
menu.
Vehicle personalisation 3 118.
For more information see
Infotainment system manual.
Smartphone controller The smartphone controller allows a
smartphone to access vehicle data
via WLAN or Bluetooth connection.
This data can then be displayed and analysed on the smartphone.Vehicle messages
Messages are indicated in the Driver
Information Centre (DIC), in some
cases together with a warning and
signal buzzer.
On Baselevel display press the SET/
CLR button, the MENU button or turn
the adjuster wheel to confirm a
message.
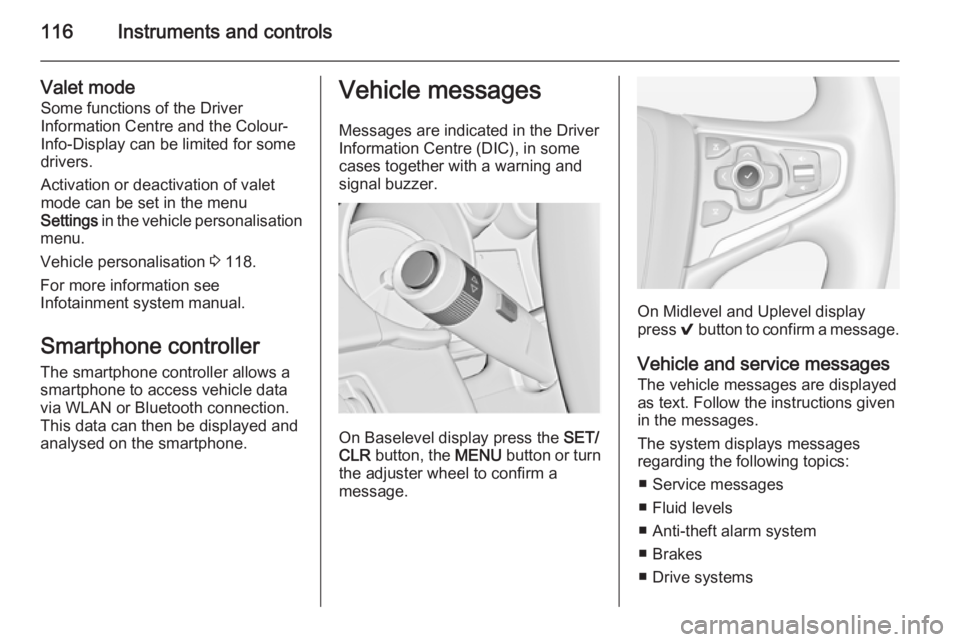
On Midlevel and Uplevel display
press 9 button to confirm a message.
Vehicle and service messages
The vehicle messages are displayed
as text. Follow the instructions given
in the messages.
The system displays messages
regarding the following topics:
■ Service messages
■ Fluid levels
■ Anti-theft alarm system
■ Brakes
■ Drive systems
Page 149 of 321

Climate control147
Active carbon filterIn addition to the particle filter, theactive carbon filter reduces odours.
Filter replacement must be carried out
during a regular service.
Air conditioning regular
operation In order to ensure continuously
efficient performance, it is
recommended that air coditioning
should be operated for a few minutes once a month, irrespective of the
weather and time of year.
Service
For optimal cooling performance, it is recommended to annually check the
climate control system, starting
three years after initial vehicle
registration, including:
■ Functionality and pressure test■ Heating functionality
■ Leakage check
■ Check of drive belts■ Cleaning of condenser and evaporator drainage
■ Performance check
Page 154 of 321

152Driving and operating
Automatic transmission: operate
brake pedal and move selector lever
to P or N.
Do not operate accelerator pedal.
Press and release Engine Start/Stop
button: an automatic procedure
operates the starter with a short delay
until the engine is running, see
Automatic Starter Control.
Before restarting or to switch off the
engine, press Engine Start/Stop
button once more.
During an Autostop, the engine can
be started by depressing the clutch
pedal 3 153.Starting the vehicle at low
temperatures
Starting the engine without additional
heaters is possible down to -25 °С for diesel engines and -30 °C for petrol
engines. Required is an engine oil
with the correct viscosity, the correct
fuel, performed services and a
sufficiently charged vehicle battery.
With temperatures below -30 °C the
automatic transmission requires a
warming phase of approx. 5 minutes.
The selector lever must be in position
P .
Automatic Starter Control
This function controls the engine
starting procedure. The driver does
not have to hold the key in position 3
or to hold Engine Start/Stop button
pressed. Once applied, the system
will go on starting automatically until
the engine is running. Because of the checking procedure, the engine startsrunning after a short delay.Possible reasons for a non-startingengine:
■ Clutch pedal not operated (manual transmission)
■ Brake pedal not operated or selector lever not in P or N
(automatic transmission)
■ Timeout occurred
Turbo engine warm-up Upon start-up, engine available
torque may be limited for a short time, especially when the engine
temperature is cold. The limitation is
to allow the lubrication system to fully
protect the engine.
Overrun cut-off The fuel supply is automatically cut off
during overrun, i.e. when the vehicle
is driven with a gear engaged but accelerator is released.
Page 165 of 321

Driving and operating163Drive systems
All-wheel drive The All-wheel drive system enhances
driving characteristics and stability,
and helps to achieve the best
possible driveability regardless of
ground surface. The system is always
active and cannot be deactivated.
The torque is distributed steplessly
between the wheels of the front and rear axle, depending on the driving
conditions. Additionally the torque
between the rear wheels is distributed depending on the surface.
For optimum system performance,
the vehicle's tyres should not have
varying degrees of wear.
If a service message is displayed in
the Driver Information Centre, the
system may have limited functionality
(or be completely disabled in some
cases, i.e. the vehicle switches to
Front-wheel drive). Seek the
assistance of a workshop.
Towing the vehicle 3 254.Brakes
The brake system comprises twoindependent brake circuits.
If a brake circuit fails, the vehicle can
still be braked using the other brake
circuit. However, braking effect is
achieved only when the brake pedal
is depressed firmly. Considerably
more force is needed for this. The
braking distance is extended. Seek the assistance of a workshop before
continuing your journey.
When the engine is not running, the
support of the brake servo unit
disappears once the brake pedal has
been depressed once or twice.
Braking effect is not reduced, but
braking requires significantly greater
force. It is especially important to bear this in mind when being towed.
Control indicator R 3 102.
Antilock brake system
Antilock brake system (ABS)
prevents the wheels from locking.ABS starts to regulate brake pressure as soon as a wheel shows a tendency to lock. The vehicle remains
steerable, even during hard braking.
ABS control is made apparent
through a pulse in the brake pedal
and the noise of the regulation
process.
For optimum braking, keep the brake
pedal fully depressed throughout the
braking process, despite the fact that the pedal is pulsating. Do not reduce
the pressure on the pedal.
After starting off, the system performs a self-test which may be audible.
Control indicator u 3 103.
Adaptive brake light During full braking, all three brakelights flash for the duration of ABS
control.
Page 188 of 321

186Driving and operatingpedestrians or animals. After a
sudden lane change, the system
needs a certain time to detect the
next preceding vehicle.
The complete attention of the
driver is always required while
driving. The driver shall always be ready to take action and apply the brakes and steer to avoid
collisions. The system is designed
to work with all occupants wearing their seat belts.
System limitations
The active emergency braking has
limited or no function during rain,
snow or heavy dirt, as the radar
sensor can be covered by a water
film, dust, ice or snow. In case of
sensor blockage, clean the sensor
cover.
In some cases, the active emergency braking system may provide a short
automatic braking in situations that
seem to be unnecessary, for instance
due to traffic signs in a curve or due
to vehicles in another lane. This is
normal operation, the vehicle does
not need service. Firmly apply the
accelerator pedal to override the
automatic braking.
Settings Settings can be changed in the
vehicle personalisation menu in the
Colour-Info-Display.
Select the relevant setting in Settings,
I Vehicle in the Colour-Info-Display.
Colour-Info-Display 3 114.
Vehicle personalisation 3 118.
Fault
In the event of a system service
requirement, a message is displayed
in the Driver Information Centre.
If the system does not work as it
should do, vehicle messages are
displayed in the Driver Information
Centre.
Vehicle messages 3 116.
Page 196 of 321

194Driving and operating
Detection zones
The system sensors cover a zone of
approx. 3.5 metres parallel on both
vehicle sides and approx. 3 metres
rearwards on side blind zone alert
(A) and approx. 70 metres rearwards
on lane change alert (B) on parallel
lanes. The zones start at each
exterior mirror. The height of the zone
is approx. between 0.5 metres and
2 metres off the ground.
Deactivation
Activation or deactivation of the lane
change alert can be set in the vehicle personalisation menu in the Colour-
Info-Display.
Select the relevant setting in Settings,
I Vehicle in the Colour-Info-Display.
Colour-Info-Display 3 114.
Vehicle personalisation 3 118.
The system is deactivated if the
vehicle is towing a trailer.
Deactivation is indicated by a
message in the Driver Information
Centre (DIC).
Note
After use, the system requires a
calibration. For optimal
performance, drive as soon as
possible on a straight highway road
with roadside objects, e.g. guardrails
and barriers for some distance.
Fault Occasional missed alerts can occurunder normal circumstances and will
increase in wet conditions or in sharp
curves. Otherwise the system maylight up due to guardrails, signs, trees,
shrubs or other immobile objects.
This is normal operation and the
system does not need to be serviced.
Lane change alert may not operate
when the left or right corners of the
rear bumper are covered with mud,
dirt, snow, ice, slush, or in heavy
rainstorms. Cleaning instructions
3 257.
In the event of a fault in the system or if the system does not work due to
temporary conditions, a message is
displayed in the Driver Information
Centre (DIC). Seek the assistance of
a workshop.
Rear view camera
The rear view camera assists the
driver when reversing, by displaying a view of the area behind the vehicle.
The view of the camera is displayed
in the Colour-Info-Display.