Page 370 of 455
BRAKE FLUID
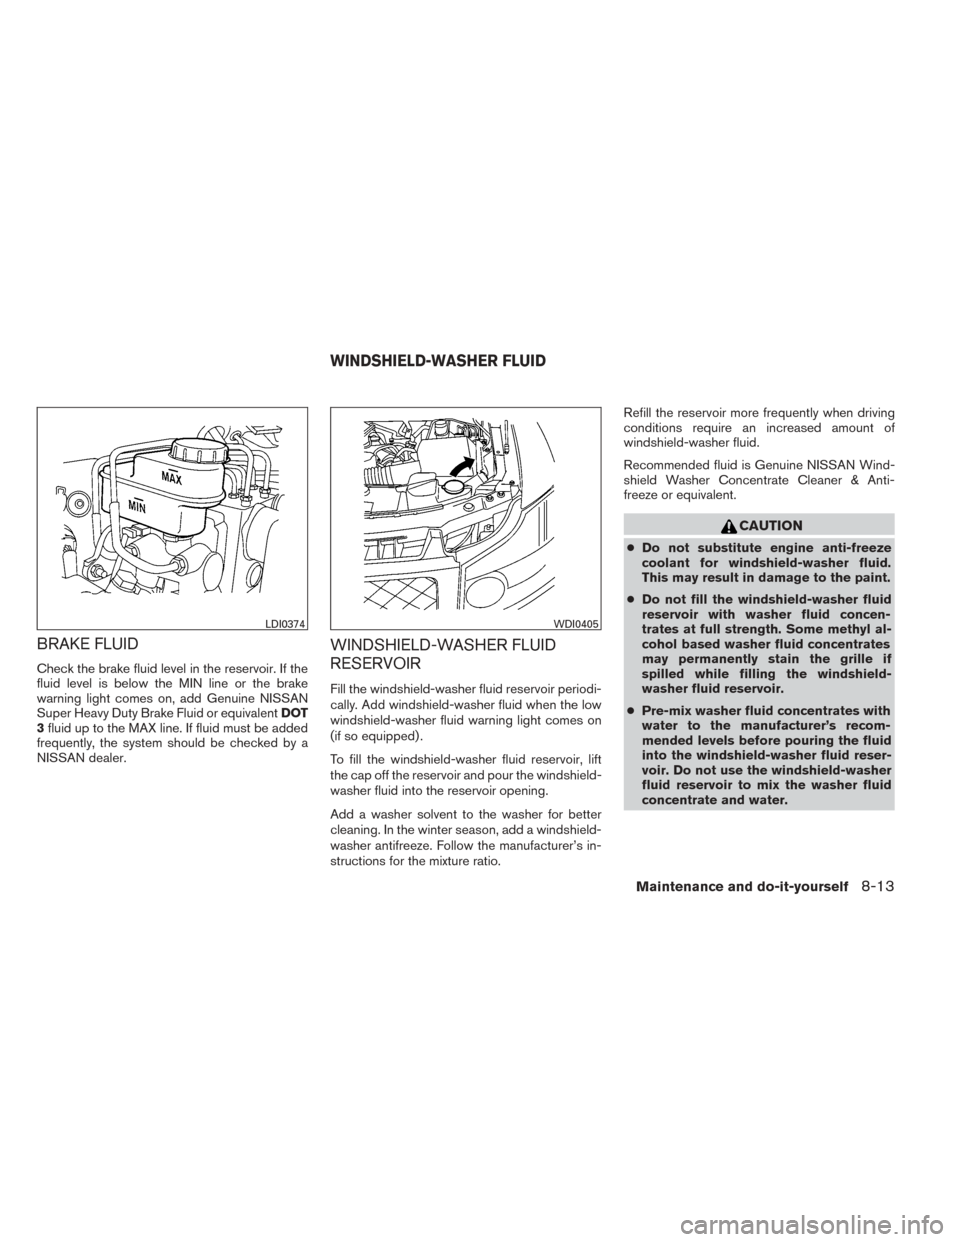
Check the brake fluid level in the reservoir. If the
fluid level is below the MIN line or the brake
warning light comes on, add Genuine NISSAN
Super Heavy Duty Brake Fluid or equivalentDOT
3 fluid up to the MAX line. If fluid must be added
frequently, the system should be checked by a
NISSAN dealer.
WINDSHIELD-WASHER FLUID
RESERVOIR
Fill the windshield-washer fluid reservoir periodi-
cally. Add windshield-washer fluid when the low
windshield-washer fluid warning light comes on
(if so equipped) .
To fill the windshield-washer fluid reservoir, lift
the cap off the reservoir and pour the windshield-
washer fluid into the reservoir opening.
Add a washer solvent to the washer for better
cleaning. In the winter season, add a windshield-
washer antifreeze. Follow the manufacturer’s in-
structions for the mixture ratio. Refill the reservoir more frequently when driving
conditions require an increased amount of
windshield-washer fluid.
Recommended fluid is Genuine NISSAN Wind-
shield Washer Concentrate Cleaner & Anti-
freeze or equivalent.
CAUTION
●
Do not substitute engine anti-freeze
coolant for windshield-washer fluid.
This may result in damage to the paint.
● Do not fill the windshield-washer fluid
reservoir with washer fluid concen-
trates at full strength. Some methyl al-
cohol based washer fluid concentrates
may permanently stain the grille if
spilled while filling the windshield-
washer fluid reservoir.
● Pre-mix washer fluid concentrates with
water to the manufacturer’s recom-
mended levels before pouring the fluid
into the windshield-washer fluid reser-
voir. Do not use the windshield-washer
fluid reservoir to mix the washer fluid
concentrate and water.
LDI0374WDI0405
WINDSHIELD-WASHER FLUID
Maintenance and do-it-yourself8-13
Page 378 of 455
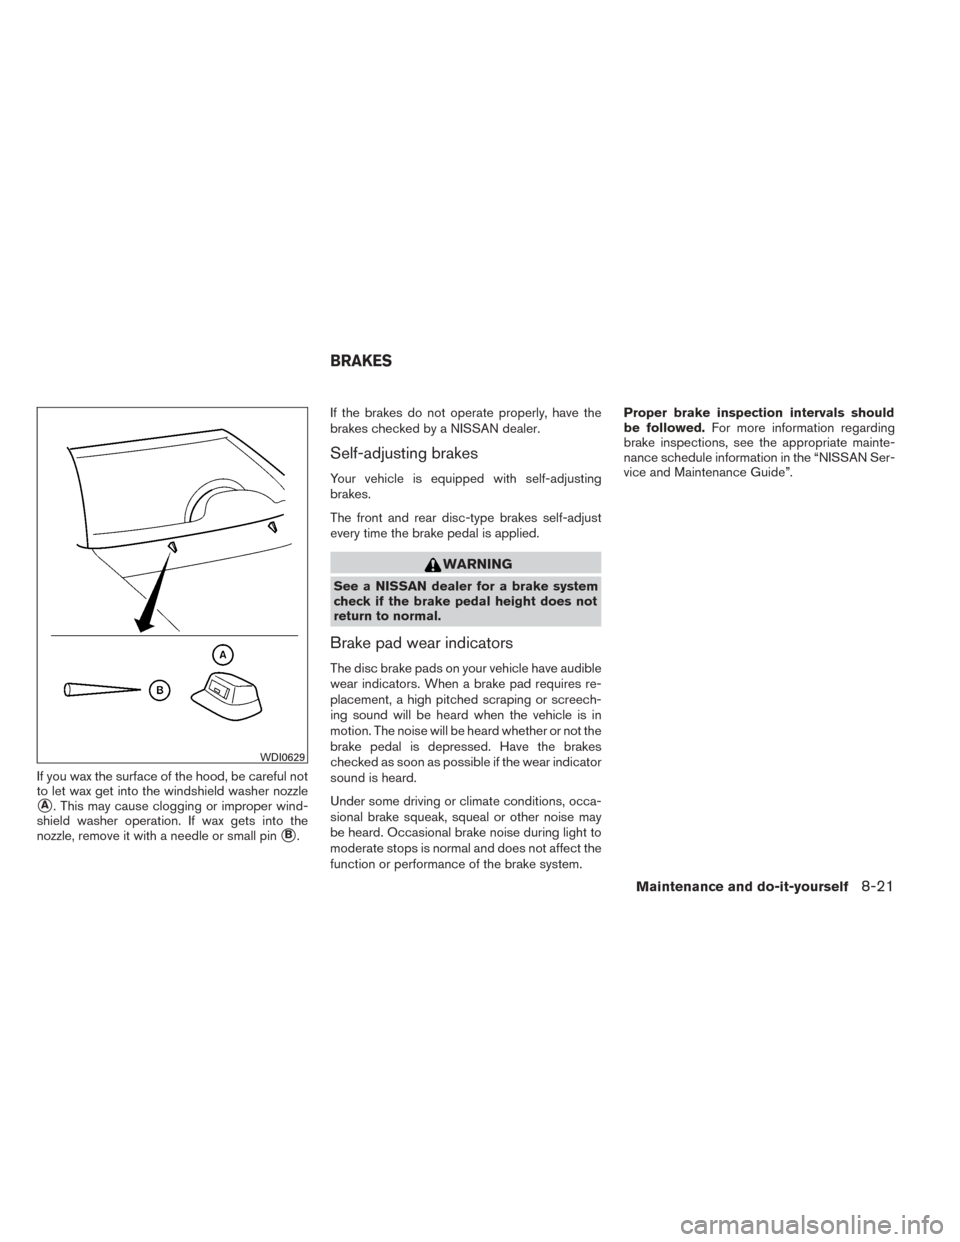
If you wax the surface of the hood, be careful not
to let wax get into the windshield washer nozzle
�A. This may cause clogging or improper wind-
shield washer operation. If wax gets into the
nozzle, remove it with a needle or small pin
�B. If the brakes do not operate properly, have the
brakes checked by a NISSAN dealer.
Self-adjusting brakes
Your vehicle is equipped with self-adjusting
brakes.
The front and rear disc-type brakes self-adjust
every time the brake pedal is applied.
WARNING
See a NISSAN dealer for a brake system
check if the brake pedal height does not
return to normal.
Brake pad wear indicators
The disc brake pads on your vehicle have audible
wear indicators. When a brake pad requires re-
placement, a high pitched scraping or screech-
ing sound will be heard when the vehicle is in
motion. The noise will be heard whether or not the
brake pedal is depressed. Have the brakes
checked as soon as possible if the wear indicator
sound is heard.
Under some driving or climate conditions, occa-
sional brake squeak, squeal or other noise may
be heard. Occasional brake noise during light to
moderate stops is normal and does not affect the
function or performance of the brake system. Proper brake inspection intervals should
be followed.
For more information regarding
brake inspections, see the appropriate mainte-
nance schedule information in the “NISSAN Ser-
vice and Maintenance Guide”.
WDI0629
BRAKES
Maintenance and do-it-yourself8-21
Page 379 of 455
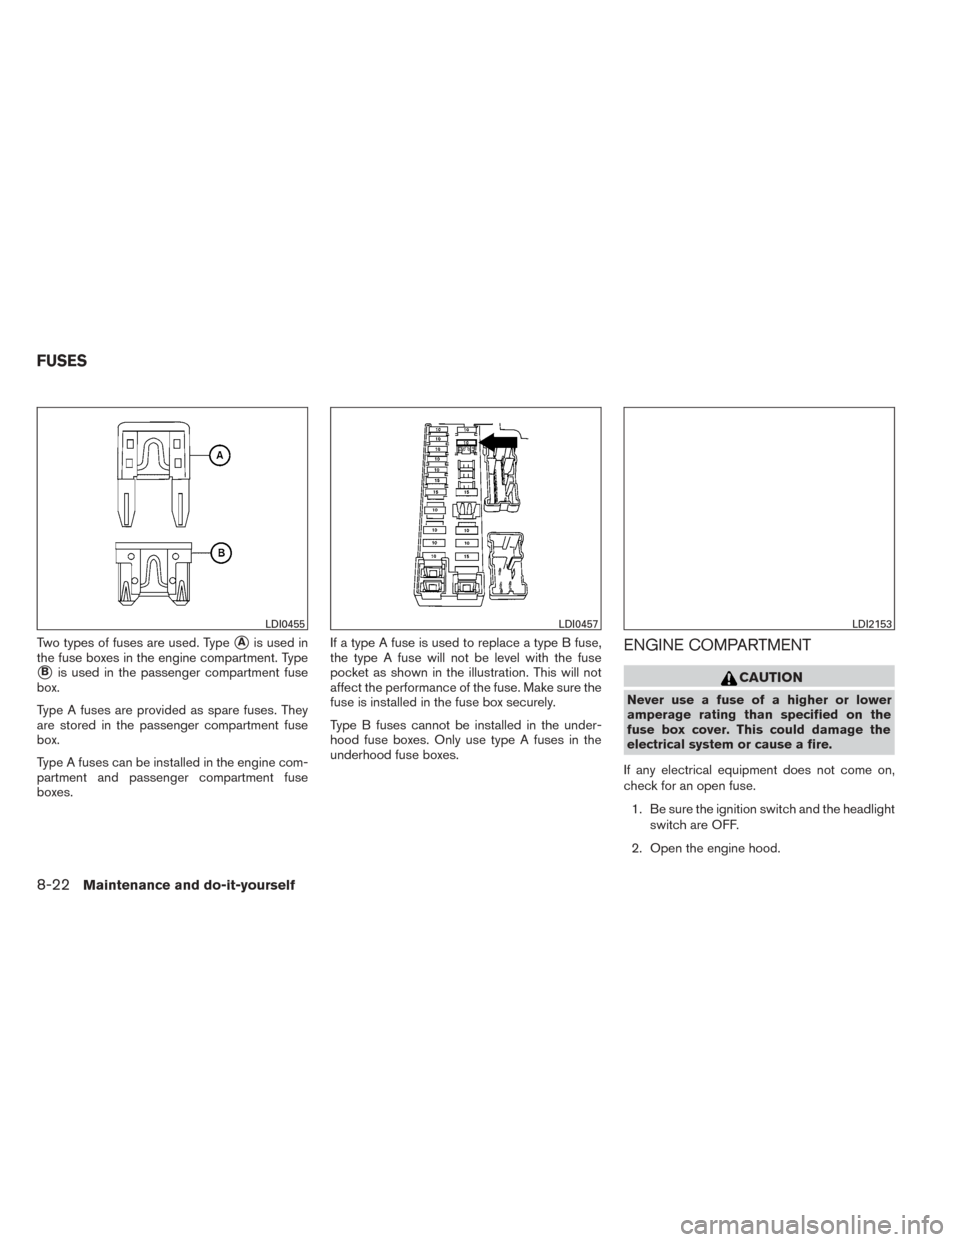
Two types of fuses are used. Type�Ais used in
the fuse boxes in the engine compartment. Type
�Bis used in the passenger compartment fuse
box.
Type A fuses are provided as spare fuses. They
are stored in the passenger compartment fuse
box.
Type A fuses can be installed in the engine com-
partment and passenger compartment fuse
boxes. If a type A fuse is used to replace a type B fuse,
the type A fuse will not be level with the fuse
pocket as shown in the illustration. This will not
affect the performance of the fuse. Make sure the
fuse is installed in the fuse box securely.
Type B fuses cannot be installed in the under-
hood fuse boxes. Only use type A fuses in the
underhood fuse boxes.
ENGINE COMPARTMENT
CAUTION
Never use a fuse of a higher or lower
amperage rating than specified on the
fuse box cover. This could damage the
electrical system or cause a fire.
If any electrical equipment does not come on,
check for an open fuse. 1. Be sure the ignition switch and the headlight switch are OFF.
2. Open the engine hood.
LDI0455LDI0457LDI2153
FUSES
8-22Maintenance and do-it-yourself
Page 381 of 455
PASSENGER COMPARTMENT
CAUTION
Never use a fuse of a higher or lower
amperage rating than specified on the
fuse box cover. This could damage the
electrical system or cause a fire.
If any electrical equipment does not operate,
check for an open fuse. 1. Be sure the ignition switch and the headlight switch are OFF.
2. Open the glove box to access the fuse box cover. 3. Pull the fuse box cover to remove.
4. Remove the fuse with the fuse puller.
5. If the fuse is open
�A, replace it with an
equivalent good fuse
�B.
6. Push the fuse box cover to install.
7. If a new fuse also opens, have the electrical system checked and repaired by a NISSAN
dealer.
LDI0618
Type A
WDI0452
8-24Maintenance and do-it-yourself
Page 382 of 455
Extended storage switch
If any electrical equipment does not operate,
remove the extended storage switch and check
for an open fuse.
NOTE:
The extended storage switch is used for
long term vehicle storage. Even if the ex-
tended storage switch is broken it is not
necessary to replace it. Replace only the
open fuse in the switch with a new fuse.How to replace the extended storage switch:
1. To remove the extended storage switch, be sure the ignition switch is in the OFF or
LOCK position.
2. Be sure the headlight switch is in the OFF position.
3. Remove the fuse box cover.
4. Pinch the locking tabs
�1found on each
side of the storage switch.
5. Pull the storage switch straight out from the fuse box
�2.
Type B
LDI0456LDI2035
Maintenance and do-it-yourself8-25
Page 384 of 455
●Do not touch the internal circuit and electric
terminals as it could cause a malfunction.
● When changing the battery, do not let dust
or oil get on the keyfob.
● There is danger of explosion if a lithium bat-
tery is incorrectly replaced. Replace only
with the same or equivalent type.
Recommended battery: CR2025 or equivalent.
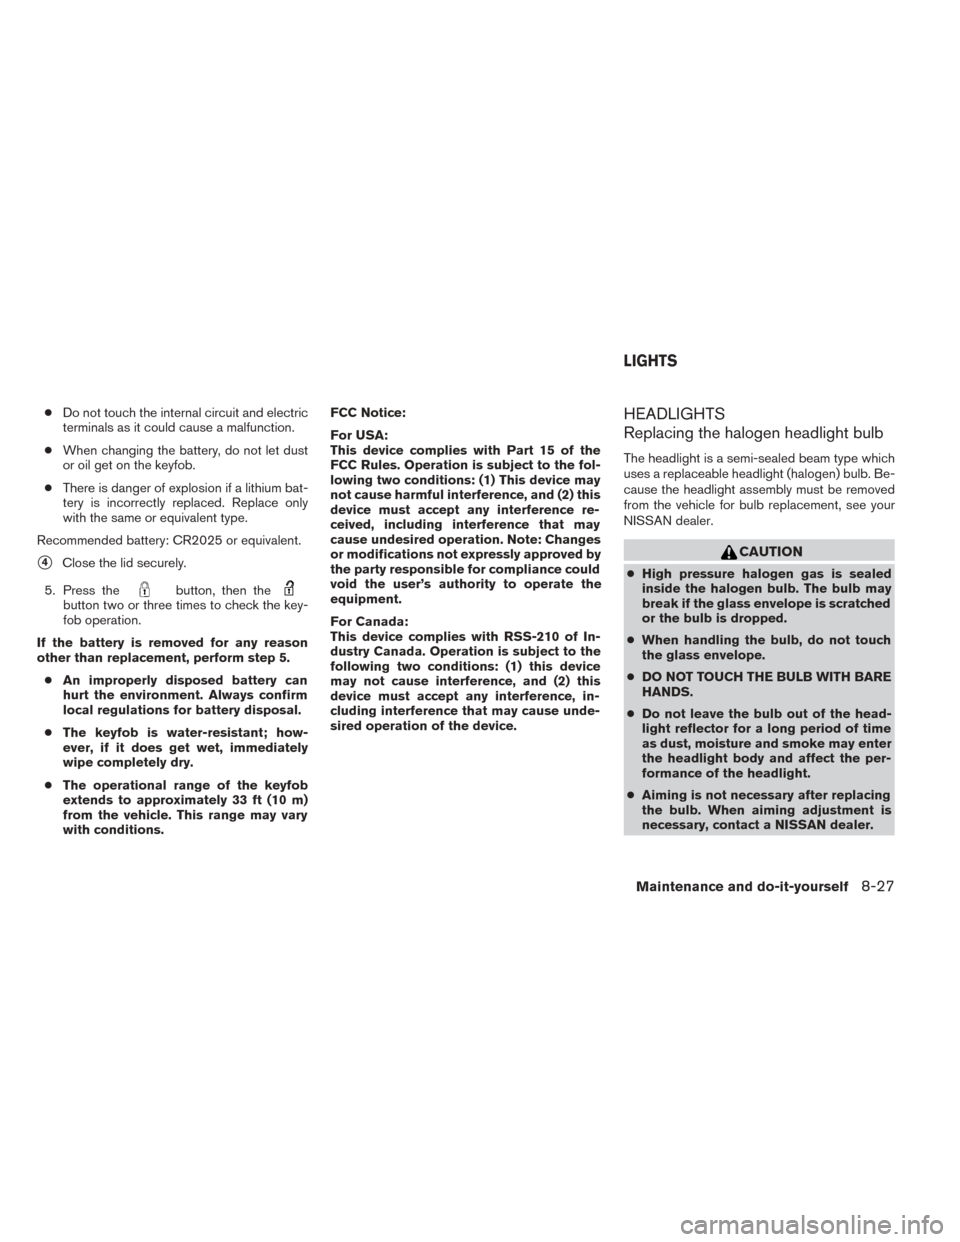
�4Close the lid securely.
5. Press the
button, then thebutton two or three times to check the key-
fob operation.
If the battery is removed for any reason
other than replacement, perform step 5. ● An improperly disposed battery can
hurt the environment. Always confirm
local regulations for battery disposal.
● The keyfob is water-resistant; how-
ever, if it does get wet, immediately
wipe completely dry.
● The operational range of the keyfob
extends to approximately 33 ft (10 m)
from the vehicle. This range may vary
with conditions. FCC Notice:
For USA:
This device complies with Part 15 of the
FCC Rules. Operation is subject to the fol-
lowing two conditions: (1) This device may
not cause harmful interference, and (2) this
device must accept any interference re-
ceived, including interference that may
cause undesired operation. Note: Changes
or modifications not expressly approved by
the party responsible for compliance could
void the user’s authority to operate the
equipment.
For Canada:
This device complies with RSS-210 of In-
dustry Canada. Operation is subject to the
following two conditions: (1) this device
may not cause interference, and (2) this
device must accept any interference, in-
cluding interference that may cause unde-
sired operation of the device.
HEADLIGHTS
Replacing the halogen headlight bulb
The headlight is a semi-sealed beam type which
uses a replaceable headlight (halogen) bulb. Be-
cause the headlight assembly must be removed
from the vehicle for bulb replacement, see your
NISSAN dealer.
CAUTION
●
High pressure halogen gas is sealed
inside the halogen bulb. The bulb may
break if the glass envelope is scratched
or the bulb is dropped.
● When handling the bulb, do not touch
the glass envelope.
● DO NOT TOUCH THE BULB WITH BARE
HANDS.
● Do not leave the bulb out of the head-
light reflector for a long period of time
as dust, moisture and smoke may enter
the headlight body and affect the per-
formance of the headlight.
● Aiming is not necessary after replacing
the bulb. When aiming adjustment is
necessary, contact a NISSAN dealer.
LIGHTS
Maintenance and do-it-yourself8-27
Page 385 of 455
NOTE:
Use the same number and wattage as
shown in the chart.
Fog may temporarily form inside the lens of the
exterior lights in the rain or in a car wash. A
temperature difference between the inside and
the outside of the lens causes the fog. This is not
a malfunction. If large drops of water collect
inside the lens, contact a NISSAN dealer.
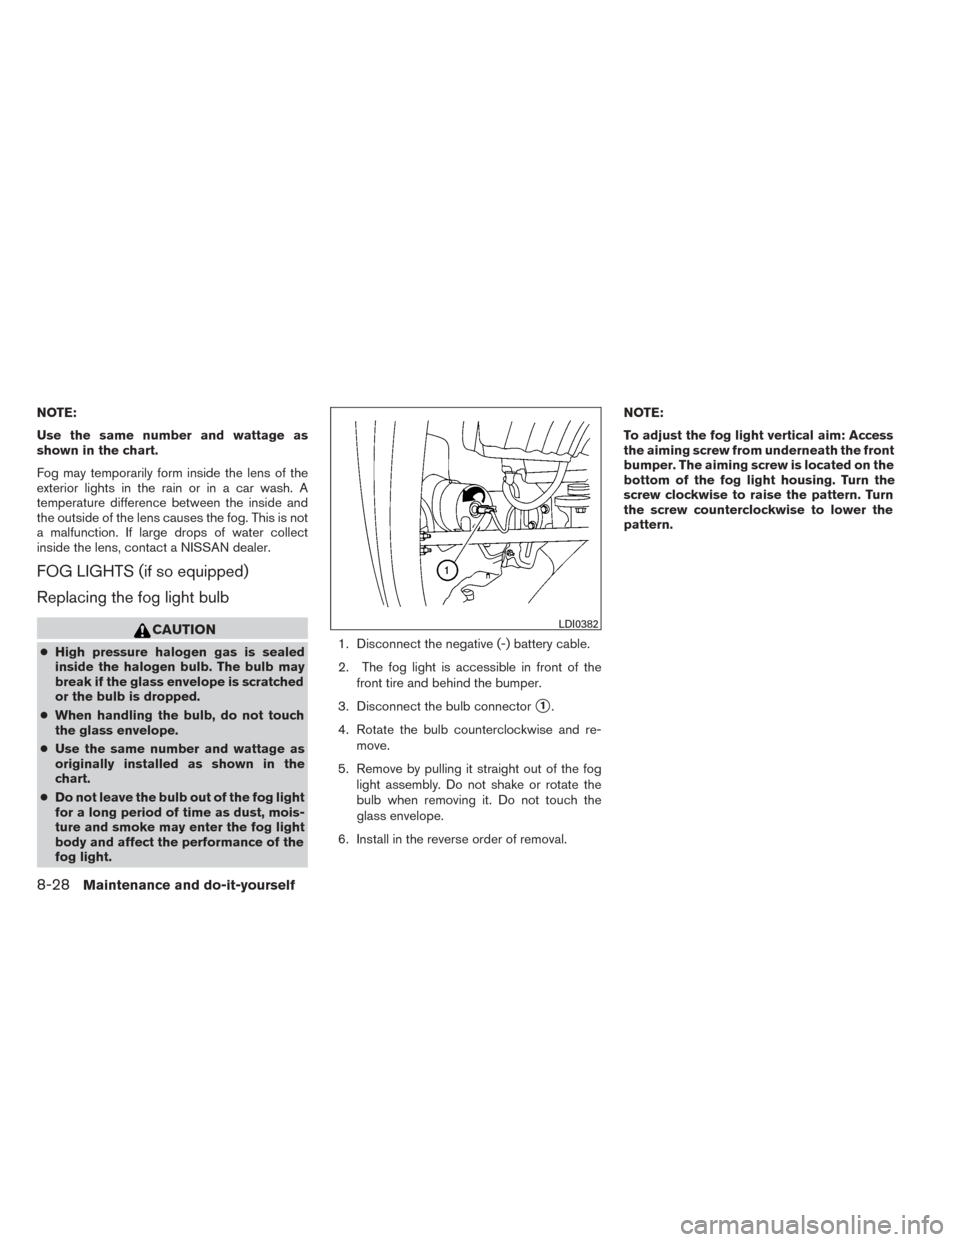
FOG LIGHTS (if so equipped)
Replacing the fog light bulb
CAUTION
●High pressure halogen gas is sealed
inside the halogen bulb. The bulb may
break if the glass envelope is scratched
or the bulb is dropped.
● When handling the bulb, do not touch
the glass envelope.
● Use the same number and wattage as
originally installed as shown in the
chart.
● Do not leave the bulb out of the fog light
for a long period of time as dust, mois-
ture and smoke may enter the fog light
body and affect the performance of the
fog light. 1. Disconnect the negative (-) battery cable.
2. The fog light is accessible in front of the
front tire and behind the bumper.
3. Disconnect the bulb connector
�1.
4. Rotate the bulb counterclockwise and re- move.
5. Remove by pulling it straight out of the fog light assembly. Do not shake or rotate the
bulb when removing it. Do not touch the
glass envelope.
6. Install in the reverse order of removal. NOTE:
To adjust the fog light vertical aim: Access
the aiming screw from underneath the front
bumper. The aiming screw is located on the
bottom of the fog light housing. Turn the
screw clockwise to raise the pattern. Turn
the screw counterclockwise to lower the
pattern.
LDI0382
8-28Maintenance and do-it-yourself
Page 386 of 455
EXTERIOR AND INTERIOR LIGHTS
ItemWattage (W)Bulb No.
Headlight assembly High 659005 (HB3)
Low 559006 (HB4)
Park/Turn 28/83457K
Sidemarker 3.8194
Side turn signal light* (if so equipped) —LED
Front fog light (if so equipped) 27.5880
Puddle light (if so equipped) 9906LF
Room/map lights (front) 6–
Personal lights 8AL67
Vanity mirror light (if so equipped) 1.8–
Step light (if so equipped) 3.8194
High-mounted stop light/cargo lights* 12.8912LF
Rear combination light Tail/Stop 27/83157K
Backup (reversing) 18921LF
Turn 273156K
Tailgate light (if so equipped) 18921
License plate light 5W5W
* See a NISSAN dealer for replacement.
Always check with the Parts Department at a NISSAN dealer for the latest parts information.
Maintenance and do-it-yourself8-29