Page 336 of 388
 dis")
If the brakes do not operate properly, have the
brakes checked by a NISSAN dealer.
Self-adjusting brakes
Your vehicle is equipped with self-adjusting
brakes.
The front (and rear– if so equipped) disc-type
brakes self-adjust every time the brake pedal is
applied. The rear drum-type brakes (if so
equipped) self-adjust every time the parking
brake is applied.
WARNING
See a NISSAN dealer for a brake system
check if the brake pedal height does not
return to normal.
Brake pad wear indicators
The disc brake pads on your vehicle have audible
wear indicators. When a brake pad requires re-
placement, a high pitched scraping or screech-
ing sound will be heard when the vehicle is in
motion. The noise will be heard whether or not the
brake pedal is depressed. Have the brakes
checked as soon as possible if the wear indicator
sound is heard.Under some driving or climate conditions, occa-
sional brake squeak, squeal or other noise may
be heard. Occasional brake noise during light to
moderate stops is normal and does not affect the
function or performance of the brake system.
Proper brake inspection intervals should
be followed.
For more information regarding
brake inspections, see the appropriate mainte-
nance schedule information in the “NISSAN Ser-
vice and Maintenance Guide”.
Two types of fuses are used. Type
�Ais used in
the fuse boxes in the engine compartment. Type
�Bis used in the passenger compartment fuse
box.
Type A fuses are provided as spare fuses. They
are stored in the passenger compartment fuse
box.
Type A fuses can be installed in the engine com-
partment and passenger compartment fuse
boxes.
LDI0455
BRAKES FUSES
Maintenance and do-it-yourself8-21
Page 337 of 388
If a type A fuse is used to replace a type B fuse,
the type A fuse will not be level with the fuse
pocket as shown in the illustration. This will not
affect the performance of the fuse. Make sure the
fuse is installed in the fuse box securely.
Type B fuses cannot be installed in the under-
hood fuse boxes. Only use type A fuses in the
underhood fuse boxes.ENGINE COMPARTMENT
CAUTION
Never use a fuse of a higher or lower
amperage rating than specified on the
fuse box cover. This could damage the
electrical system or cause a fire.
If any electrical equipment does not come on,
check for an open fuse. 1. Be sure the ignition switch and the headlight switch are OFF.
2. Open the engine hood. 3. Remove the fuse box cover by pushing the
tab
�Aand lifting the cover up.
4. Remove the fuse with the fuse puller, which is located in the center of the fuse block in
the passenger compartment.
LDI0457LDI2172
8-22Maintenance and do-it-yourself
Page 338 of 388
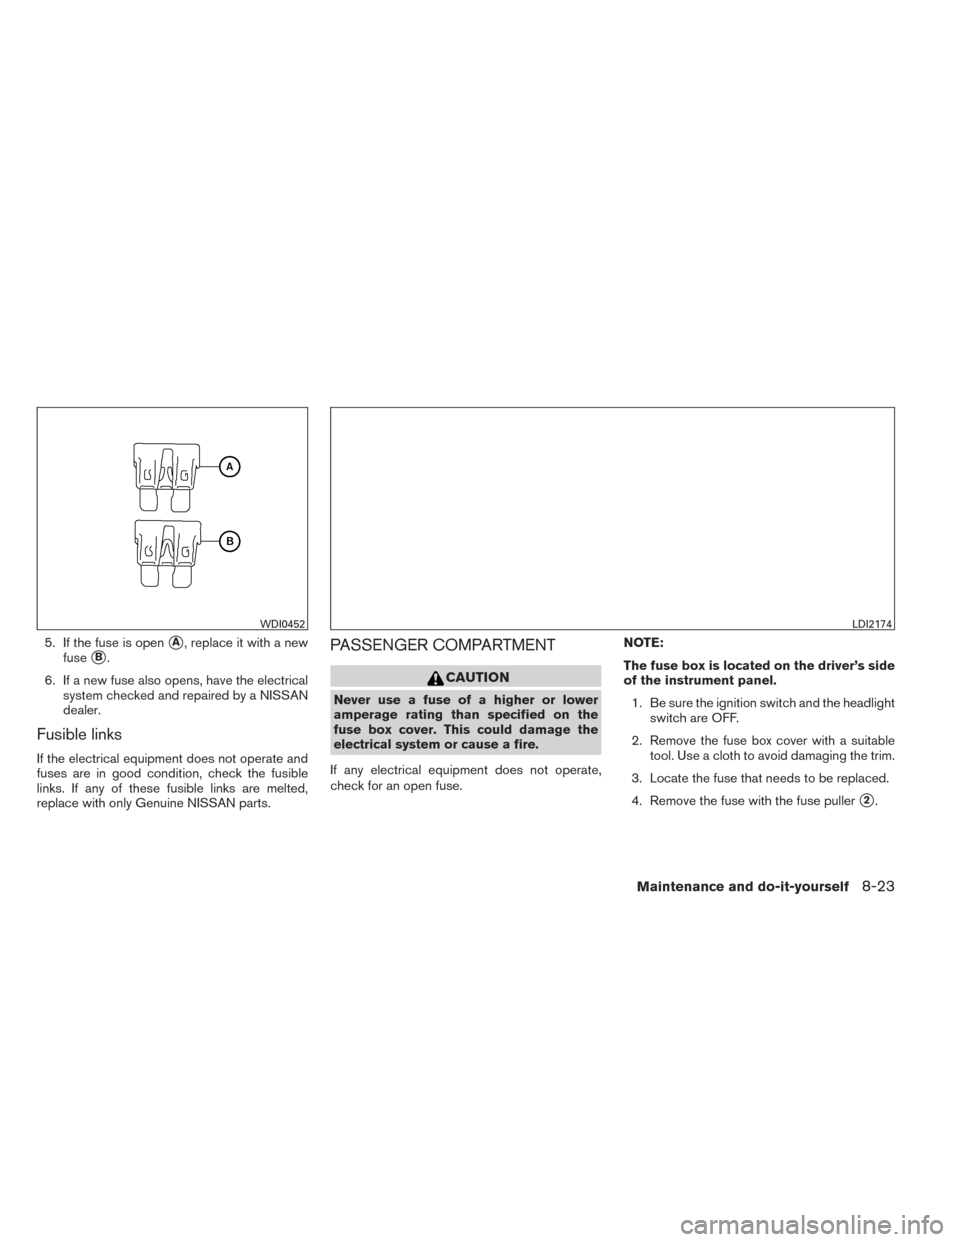
5. If the fuse is open�A, replace it with a new
fuse
�B.
6. If a new fuse also opens, have the electrical system checked and repaired by a NISSAN
dealer.
Fusible links
If the electrical equipment does not operate and
fuses are in good condition, check the fusible
links. If any of these fusible links are melted,
replace with only Genuine NISSAN parts.
PASSENGER COMPARTMENT
CAUTION
Never use a fuse of a higher or lower
amperage rating than specified on the
fuse box cover. This could damage the
electrical system or cause a fire.
If any electrical equipment does not operate,
check for an open fuse. NOTE:
The fuse box is located on the driver’s side
of the instrument panel.
1. Be sure the ignition switch and the headlight switch are OFF.
2. Remove the fuse box cover with a suitable tool. Use a cloth to avoid damaging the trim.
3. Locate the fuse that needs to be replaced.
4. Remove the fuse with the fuse puller
�2.
WDI0452LDI2174
Maintenance and do-it-yourself8-23
Page 339 of 388
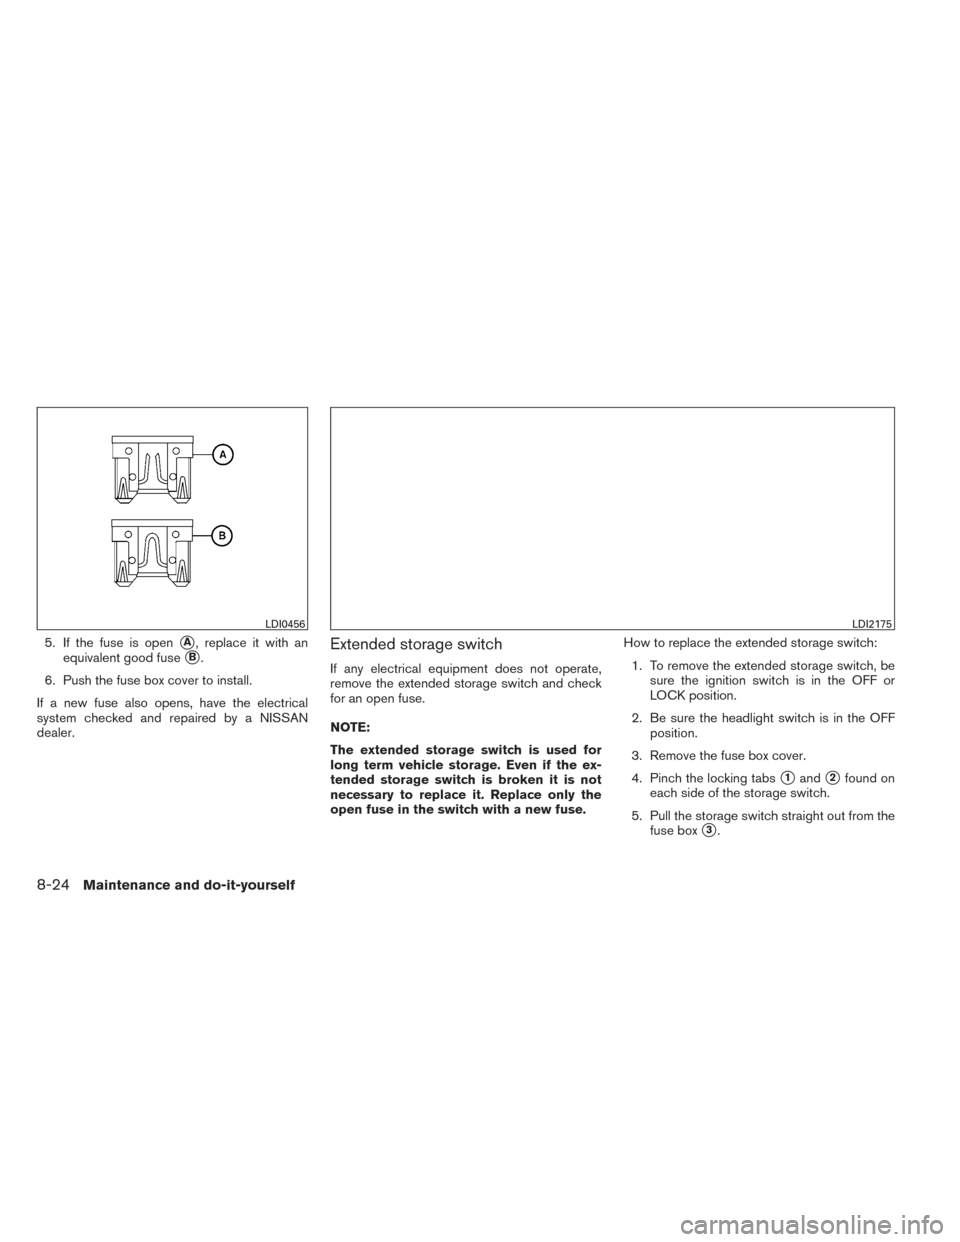
5. If the fuse is open�A, replace it with an
equivalent good fuse
�B.
6. Push the fuse box cover to install.
If a new fuse also opens, have the electrical
system checked and repaired by a NISSAN
dealer.Extended storage switch
If any electrical equipment does not operate,
remove the extended storage switch and check
for an open fuse.
NOTE:
The extended storage switch is used for
long term vehicle storage. Even if the ex-
tended storage switch is broken it is not
necessary to replace it. Replace only the
open fuse in the switch with a new fuse. How to replace the extended storage switch:
1. To remove the extended storage switch, be sure the ignition switch is in the OFF or
LOCK position.
2. Be sure the headlight switch is in the OFF position.
3. Remove the fuse box cover.
4. Pinch the locking tabs
�1and�2found on
each side of the storage switch.
5. Pull the storage switch straight out from the fuse box
�3.
LDI0456LDI2175
8-24Maintenance and do-it-yourself
Page 343 of 388
 bulb. Be-
cause the headlight assembly must be removed
from the ve")
HEADLIGHTS
Replacing the halogen headlight bulb
The headlight is a semi-sealed beam type which
uses a replaceable headlight (halogen) bulb. Be-
cause the headlight assembly must be removed
from the vehicle for bulb replacement, see your
NISSAN dealer.
CAUTION
●Aiming is not necessary after replacing
the bulb. When aiming adjustment is
necessary, contact a NISSAN dealer.
● Do not leave the headlight assembly
open without a bulb installed for a long
period of time. Dust, moisture, smoke,
etc. entering the headlight body may
affect bulb performance. Remove the
bulb from the headlight assembly just
before a replacement bulb is installed.
● Only touch the base when handling the
bulb. Never touch the glass envelope.
Touching the glass could significantly
affect bulb life and/or headlight
performance.
● High pressure halogen gas is sealed
inside the halogen bulb. The bulb may
break if the glass envelope is scratched
or the bulb is dropped. ●
Use the same number and wattage as
shown in the chart.
Fog may temporarily form inside the lens of the
exterior lights in the rain or in a car wash. A
temperature difference between the inside and
the outside of the lens causes the fog. This is not
a malfunction. If large drops of water collect
inside the lens, contact a NISSAN dealer.
LIGHTS
8-28Maintenance and do-it-yourself
Page 344 of 388
FOG LIGHTS (if so equipped)
Replacing the fog light bulb
1. Disconnect the negative battery cable.
2. Remove the fasteners
�A; carefully pull back
the front fender protector .
3. Rotate the bulb
�Bcounterclockwise and
pull out to remove.
LDI2179
Maintenance and do-it-yourself8-29
Page 345 of 388
EXTERIOR AND INTERIOR LIGHTS
ItemWattage (W)Bulb No.*
Headlight assembly* Low 55H11
High 65H9
Turn 28WY28/8W
Park ——
Side marker 3.8194
Front fog light* (if so equipped) 55H11
Front map lights* ——
Room light 8AL19
Trunk light 3.4158
High-mounted stop light* Inside ——
Spoiler (if so equipped) ——
Rear combination light* Turn signal light 21WY21W
Stop/Tail ——
Backup (reversing) 16W16W
Rear side marker ——
License plate light* 5W5W
* Always check with the Parts Department at a NISSAN dealer for the latest parts information.
LDI2173
8-30Maintenance and do-it-yourself
Page 346 of 388
1. Map light
2. Interior light
3. Door mirror turn signal light
4. Headlight assembly
5. Fog light (if so equipped)
6. High-mount stop light
7. Trunk light
8. License plate light
9. Rear combination light
Indicates bulb removal
Indicates bulb replacement
Replacement procedures
All other lights are either type A, B, C or D. When
replacing a bulb, first remove the lens and/or
cover.
WDI0257
Maintenance and do-it-yourself8-31

Bulb No.*
Headlight assembly* Low 55H11
High 65H9
Turn 28WY28/8W
Park ——
Side marker 3.8194
Front fog light* (if so equipped) 55H11
Front map lights* �")

6. High-mount stop light
7. Trunk light
8. License plate light
9. Rear combination l")