2014 NISSAN ROGUE ECO mode
[x] Cancel search: ECO modePage 101 of 442
For additional information, see “Security sys-
tems” in this section.
Slip indicator light
This indicator will blink when the VDC system is
operating, thus alerting the driver to the fact that
the road surface is slippery and the vehicle is
nearing its traction limits.
You may feel or hear the system working; this is
normal.
The light will blink for a few seconds after the
VDC system stops limiting wheel spin.
The
indicator light also comes on when
you place the ignition switch in the ON position.
The light will turn off after approximately 2 sec-
onds if the system is operational. If the light does
not come on have the system checked by a
NISSAN dealer.
SPORT mode indicator light (if
so equipped)
This light illuminates and then turns off when the
ignition switch is placed into the ON position, and
when the overdrive off mode off is selected.
For additional information, see “Continuously
Variable Transmission (CVT)” in the “Starting and
driving” section of this manual.
Turn signal/hazard indicator
lights
The appropriate light flashes when the turn signal
switch is activated.
Both lights flash when the hazard switch is turned
on.
Vehicle Dynamic Control(VDC) off indicator light
This indicator light comes on when the Vehicle
Dynamic Control off switch is pushed to OFF.
This indicates the Vehicle Dynamic Control sys-
tem is not operating.
Push the Vehicle Dynamic Control off switch
again or restart the engine and the system will
operate normally. See “Vehicle Dynamic Control
(VDC) system” in the “Starting and driving” sec-
tion of this manual.
The Vehicle Dynamic Control light also comes on
when you place the ignition switch in the ON
position. The light will turn off after about 2 sec-
onds if the system is operational. If the light stays
on or comes on along with the
indicator
light while you are driving, have the Vehicle Dy-
namic Control system checked by a NISSAN
dealer. While the Vehicle Dynamic Control system is
operating, you might feel slight vibration or hear
the system working when starting the vehicle or
accelerating, but this is normal.
AUDIBLE REMINDERS
Brake pad wear warning
The disc brake pads have audible wear warnings.
When a disc brake pad requires replacement, it
makes a high pitched scraping sound when the
vehicle is in motion, whether or not the brake
pedal is depressed. Have the brakes checked as
soon as possible if the warning sound is heard.
Key reminder chime
A chime sounds if the driver’s door is opened
while the ignition switch is placed in the ACC (if
so equipped) or OFF position or placed in the
OFF or LOCK position with the Intelligent Key left
in the vehicle. Make sure the ignition switch is
placed in the LOCK position, and take the Intelli-
gent Key with you when leaving the vehicle.
Light reminder chime
With the ignition switch placed in the OFF posi-
tion, a chime sounds when the driver’s door is
opened if the headlights or parking lights are on.
Turn the headlight control switch off before leav-
ing the vehicle.
2-16Instruments and controls
Page 103 of 442
3.— go back to the previous menu
The ENTER and
buttons also control audio
and control panel functions. For additional infor-
mation see, “Steering wheel switch for audio
control” in “Monitor, climate, audio, phone and
voice recognition systems” section.
STARTUP DISPLAY
When the vehicle in placed in the ON or ACC (if
so equipped) position the screens that display in
the vehicle information include:
● Active system status (if so equipped)
● Trip computer
● Tire pressure information
● Fuel economy
● Warnings
● Outside air temperature
● Odometer/Twin Trip Odometer
Warnings will only display if there are any pres-
ent, for more information on warnings and indica-
tors see, “Vehicle information display warnings
and indicators” in this section.
To control what items display in the vehicle infor-
mation display, see “Main menu selection” in this
section.
SETTINGS
The setting mode allows you to change the infor-
mation displayed in the vehicle information display:
● Driver Assistance
● Clock
● Meter Settings
● Vehicle Settings
● Maintenance
● Alarm
● Unit
● Language
● Factory Reset
Driver Assistance
To change the status, warnings or turn on or off
any of the systems/warnings displayed in the
“Driver Assistance” menu:
Use the
button to select and the ENTER
button to change a menu item:
● Driving Aids (if so equipped)
– Forward (FCW) On/Off
– Lane (LDW) On/Off
– Blind Spot (BSW) On/Off ●
Parking Aids (if so equipped)
– Moving Object On/Off
● Chassis Control
– Trace Control – See “Active Trace Con- trol” in “Starting and Operating” for more
information.
– Engine Brake – See “Active Engine Brake” in “Starting and Operating” for
more information.
To change the status, warnings or turn on or off
any of the systems/warnings displayed in the
“Driver Assistance” menu:
Use the
button to select and the ENTER
button to change a menu item:
● Driving Aids (if so equipped)
– Forward (FCW) On/Off
– Lane (LDW) On/Off
– Blind Spot (BSW) On/Off
● Parking Aids (if so equipped)
– Moving Object On/Off
2-18Instruments and controls
Page 106 of 442
Current fuel consumption:
The current fuel consumption mode shows the
current fuel consumption.
Average fuel consumption:
The average fuel consumption mode shows the
average fuel consumption since the last reset.
Resetting is done by pushing the
button
for longer than one second.
The display is updated every 30 seconds. At
about the first 1/3 mile (500 m) after a reset, the
display shows “_ _”.
2. Average speed (MPH or km/h)
The average speed mode shows the average
vehicle speed since the last reset. Resetting is
done by pushing the
button for longer than
one second.
The display is updated every 30 seconds. At
about the first 1/3 mile (500 m) after a reset, the
display shows “_ _”.
3. Elapsed time and trip odometer (mile or
km)
Elapsed time:
The elapsed time mode shows the time since the
last reset. Resetting is done by pushing the
button for longer than one second.
(The trip odometer is also reset at same time.)
Trip odometer:
The trip odometer mode shows the total distance
the vehicle has been driven since the last reset.
Resetting is done by pushing the
button
for longer than one second. (The elapsed time is
also reset at same time.)
4. Distance to empty (dte – mile or km)
The distance to empty (dte) mode provides you
with an estimation of the distance that can be
driven before refueling. The dte is constantly be-
ing calculated, based on the amount of fuel in the
fuel tank and the actual fuel consumption.
The display is updated approximately every
30 seconds.
The dte mode includes a low range warning
feature. If the fuel level is low, the warning is
displayed on the screen.
When the fuel level drops even lower, the dte
display wil change to “_ _”.
● If the amount of fuel added is small, the
display just before the ignition switch is
pushed to the OFF position may continue to
be displayed. ●
When driving uphill or rounding curves, the
fuel in the tank shifts, which may momentarily
change the display.
5. Navigation (if so equipped)
When the route guidance is set in the navigation
system, this item shows the navigation route in-
formation.
6. Audio
The audio mode shows the status of audio infor-
mation.
7. Driving aids (if so equipped)
The driving aids mode shows the operating con-
dition for the following systems. ● Lane Departure Warning (LDW)
● Blind Spot Warning (BSW)
● Forward Collision Warning (FCW)
See “Blind Spot Warning (BSW)/Lane Depar-
ture Warning (LDW)” and “Forward Collision
Warning (FCW)” in “Starting and Driving” for
more information.
8. Tire pressure
The tire pressure mode shows the pressure of all
four tires while the vehicle is driven. The axle
between the tires will also display the recom-
mended tire pressure.
Instruments and controls2-21
Page 107 of 442
When the “Tire Pressure Low Add Air” or “Flat
Tire Visit Dealer” warning appears, the display
can be switched to the tire pressure mode by
pushing the
button.
The tire pressure unit can be changed in the
TPMS setting under the Settings menu on the
Vehicle Information Display. See “Vehicle Infor-
mation Display” in “Instruments and Controls” for
more information.
9. Chassis control
When the Active Trace Control, Active Engine
Brake, or the Active Ride Control is operated, it
shows the operating condition. It also shows
operating condition of Hill Start Assist or the Hill
Descent Control. See “Active Trace Control, Ac-
tive Engine Brake, Active Ride Control, Hill Start
Assist or the Hill Descent Control” in “Starting
and Driving” for more information.
Vehicle Settings
The vehicle settings allows the customer to
change settings for interior lights, turn signals,
intelligent key settings, unlock settings and other
vehicle settings.
The vehicle settings can be changed using
the
,, and the ENTER buttons. Welcome light (if so equipped)
The welcome light can be set to be ON or OFF.
From the Vehicle Settings menu, select “Wel-
come Light”. Use the ENTER button to turn this
feature ON or OFF.
Auto Room Lamp
The interior lights can be set to be ON or OFF if
any door is unlocked. From the Vehicle Settings
menu, select “Auto Room Light”. Use the ENTER
button to turn this feature ON or OFF.
Light Sensitivity (if so equipped)
The light sensitivity can be set to illuminate earlier
based on the brightness outside the vehicle.
From the Vehicle Settings menu, select “Light
Sensitivity”. Use the ENTER button to change the
sensitivity.
Light Off Delay (if so equipped)
The duration of the automatic headlights can be
changed from 0 to 180 seconds. From the Ve-
hicle Settings menu, select “Light Off Delay”. Use
the ENTER button to change the duration.
3 Flash Pass
The 3 flash pass can be set to be ON or OFF.
From the Vehicle Settings menu, select “3 Flash
Pass”. Use the ENTER button to turn this feature
ON or OFF. I-Key Door Lock
When this item is turned on, the request switch
on the door is activated. From the Vehicle Set-
tings menu, select “I-Key Door Unlock”. Use the
ENTER button to activate this function.
Selective-Unlock
When this item is turned on, only the driver’s door
is unlocked first after the door unlock operation.
When the door handle request switch on the
driver’s or front passenger’s side door is pushed
to be unlocked, only the corresponding door is
unlocked first. All the doors can be unlocked if the
door unlock operation is performed again within
1 minute. When this item is turned to off, all the
doors will be unlocked after the door unlock
operation is performed once. From the Vehicle
Settings menu, select “Selective Unlock”. Use
the ENTER button to activate this function.
Answer back horn
When the answer back horn is on, the horn will
chirp and the hazard indicators will flash once
when locking the vehicle with the Intelligent Key.
Speed Dependent
The speed dependent feature can be set to be
ON or OFF. From the Vehicle Settings menu,
select “Speed Dependent”. Use the ENTER but-
ton to turn this feature ON or OFF.
2-22Instruments and controls
Page 125 of 442
The vehicle should be driven with the Vehicle
Dynamic Control (VDC) system on for most driv-
ing conditions.
If the vehicle is stuck in mud or snow, the VDC
system reduces the engine output to reduce
wheel spin. The engine speed will be reduced
even if the accelerator is depressed to the floor. If
maximum engine power is needed to free a stuck
vehicle, turn the VDC system off.
To turn off the VDC system, push the VDC OFF
switch. The
indicator will come on.
Push the VDC OFF switch again or restart the
engine to turn on the system. For additional infor-
mation, refer to “Vehicle Dynamic Control (VDC)
system” in the “Starting and driving” section. The all-wheel drive (AWD) lock switch is located
on the instrument panel. The AWD LOCK indica-
tor light will illuminate when the switch is turned
on. Refer to “Warning/Indicator lights and au-
dible reminders” in this section for more informa-
tion.
Each time you push the switch, the AWD mode
will switch: AUTO
→LOCK→AUTO. Adjusts the engine and transmission points to
enhance performance. Press the SPORT button
on the instrument panel to activate. “SPORT”
appears in the speedometer for 2 seconds.
NOTE:
In the SPORT mode, fuel economy may be
reduced.
LIC2315LIC2645LIC2417
VEHICLE DYNAMIC CONTROL (VDC)
OFF SWITCH
ALL-WHEEL DRIVE (AWD) LOCK
SWITCH (if so equipped)SPORT MODE SWITCH (if so
equipped)
2-40Instruments and controls
Page 145 of 442
PROGRAMMING TROUBLE-
DIAGNOSIS
If the HomeLink® does not quickly learn the
hand-held transmitter information:● replace the hand-held transmitter batteries
with new batteries.
● position the hand-held transmitter with its
battery area facing away from the
HomeLink® surface.
● press and hold both the HomeLink® and
hand-held transmitter buttons without inter-
ruption.
● position the hand-held transmitter1-3in
(26 - 76 mm) away from the HomeLink®
surface. Hold the transmitter in that position
for up to 15 seconds. If HomeLink® is not
programmed within that time, try holding the
transmitter in another position – keeping the
indicator light in view at all times.
If you have any questions or are having difficulty
programming your HomeLink® buttons, refer to
the HomeLink® web site at: www.homelink.com
or call 1-800-355-3515.
CLEARING THE PROGRAMMED
INFORMATION
The following procedure clears the programmed
information from both buttons. Individual buttons
cannot be cleared. However, individual buttons
can be reprogrammed. See “Reprogramming a
single HomeLink® button” in this section.
To clear all programming: 1. Press and hold the two outer HomeLink® buttons until the indicator light begins to
flash in approximately 10 seconds. Do not
hold for longer than 20 seconds.
2. Release both buttons.
HomeLink® is now in the programming mode
and can be programmed at any time beginning
with “Programming HomeLink®” - Step 1.
REPROGRAMMING A SINGLE
HOMELINK® BUTTON
To reprogram a HomeLink® Universal Trans-
ceiver button, complete the following: 1. Press and hold the desired HomeLink® but- ton. DO NOT release the button. 2. The indicator light will begin to flash after
20 seconds. Without releasing the
HomeLink® button, proceed with “Pro-
gramming HomeLink®” - Step 1.
For questions or comments, contact HomeLink®
at: www.homelink.com or 1–800–355–3515
(except Mexico) .
The HomeLink® Universal Transceiver button
has now been reprogrammed. The new device
can be activated by pushing the HomeLink®
button that was just programmed. This procedure
will not affect any other programmed HomeLink®
buttons.
IF YOUR VEHICLE IS STOLEN
If your vehicle is stolen, you should change the
codes of any non-rolling code device that has
been programmed into HomeLink®. Consult the
Owner’s Manual of each device or call the manu-
facturer or dealer of those devices for additional
information.
When your vehicle is recovered, you will
need to reprogram the HomeLink® Univer-
sal Transceiver with your new transmitter
information.
2-60Instruments and controls
Page 157 of 442
Using the interior light
Press thebutton on the keyfob once to
turn on the interior lights.
For additional information, refer to “Interior light”
in the “Instruments and controls” section in this
manual.
Answer back horn feature
If desired, the answer back horn feature can be
deactivated using the keyfob. When deactivated
and the LOCK
button is pushed the
hazard indicator flashes twice and when the
UNLOCK
button is pushed, neither the
hazard indicator nor the horn operates. NOTE:
If you change the answer back horn and
light flash feature with the keyfob, the ve-
hicle information display screen will show
the current mode after the ignition switch
has been cycled from the OFF to the ON
position. The vehicle information display
screen can also be used to change the
answer back horn mode. See “Answer back
horn” in the “Instruments and controls”
section.
To deactivate:
Press and hold the
andbuttonsfor at least 2 seconds.
The hazard warning lights will flash 3 times to
confirm that the answer back horn feature has
been deactivated.
To activate: Press and hold the
andbuttonsfor at least 2 seconds once
more.
The hazard warning lights will flash once and the
horn will sound once to confirm that the horn
beep feature has been reactivated.
Deactivating the horn beep feature does not si-
lence the horn if the alarm is triggered.
LPD2196
3-10Pre-driving checks and adjustments
Page 167 of 442
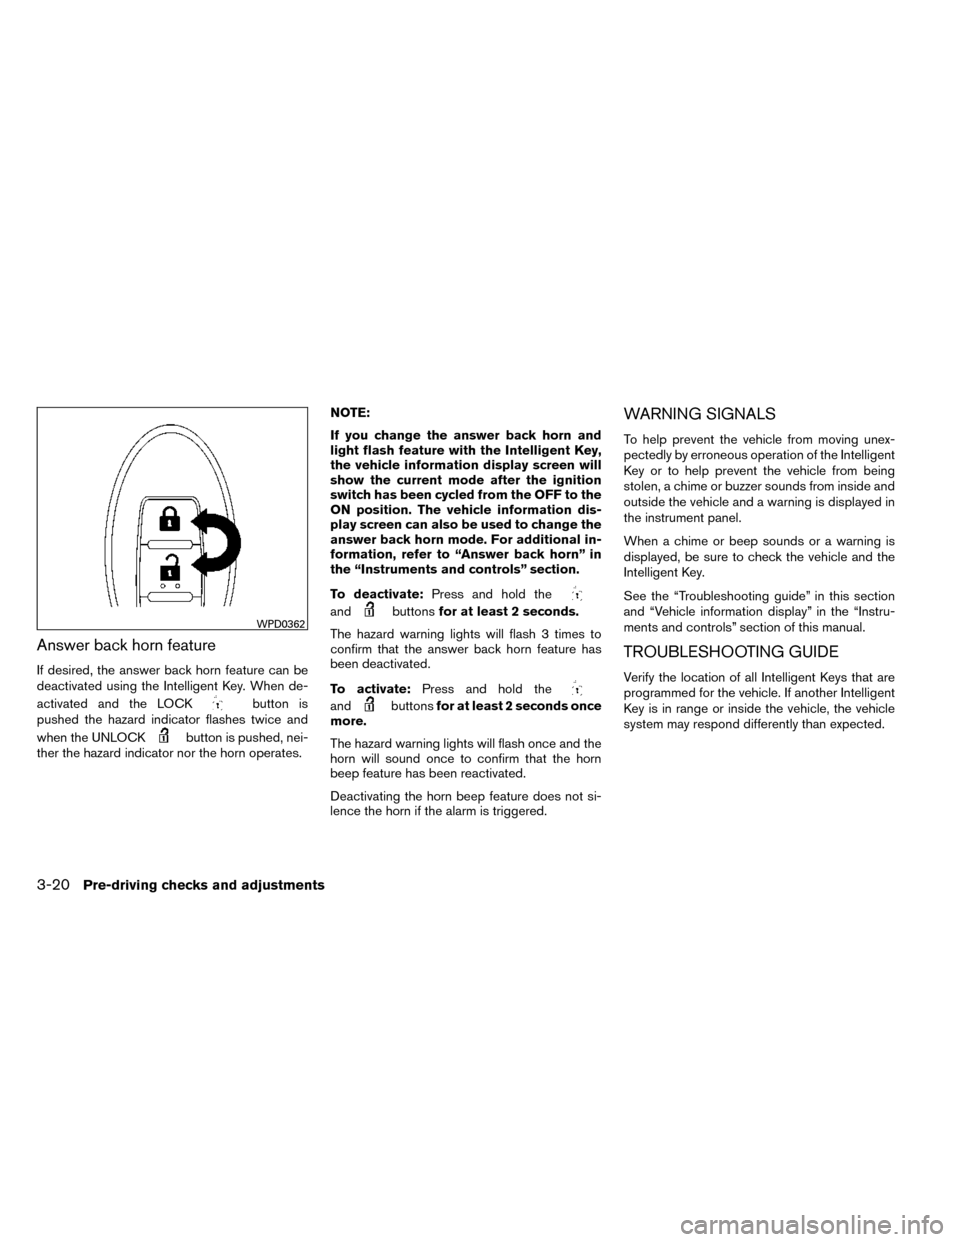
Answer back horn feature
If desired, the answer back horn feature can be
deactivated using the Intelligent Key. When de-
activated and the LOCK
button is
pushed the hazard indicator flashes twice and
when the UNLOCK
button is pushed, nei-
ther the hazard indicator nor the horn operates. NOTE:
If you change the answer back horn and
light flash feature with the Intelligent Key,
the vehicle information display screen will
show the current mode after the ignition
switch has been cycled from the OFF to the
ON position. The vehicle information dis-
play screen can also be used to change the
answer back horn mode. For additional in-
formation, refer to “Answer back horn” in
the “Instruments and controls” section.
To deactivate:
Press and hold the
andbuttonsfor at least 2 seconds.
The hazard warning lights will flash 3 times to
confirm that the answer back horn feature has
been deactivated.
To activate: Press and hold the
andbuttonsfor at least 2 seconds once
more.
The hazard warning lights will flash once and the
horn will sound once to confirm that the horn
beep feature has been reactivated.
Deactivating the horn beep feature does not si-
lence the horn if the alarm is triggered.
WARNING SIGNALS
To help prevent the vehicle from moving unex-
pectedly by erroneous operation of the Intelligent
Key or to help prevent the vehicle from being
stolen, a chime or buzzer sounds from inside and
outside the vehicle and a warning is displayed in
the instrument panel.
When a chime or beep sounds or a warning is
displayed, be sure to check the vehicle and the
Intelligent Key.
See the “Troubleshooting guide” in this section
and “Vehicle information display” in the “Instru-
ments and controls” section of this manual.
TROUBLESHOOTING GUIDE
Verify the location of all Intelligent Keys that are
programmed for the vehicle. If another Intelligent
Key is in range or inside the vehicle, the vehicle
system may respond differently than expected.
WPD0362
3-20Pre-driving checks and adjustments