2014 NISSAN QUEST manual radio set
[x] Cancel search: manual radio setPage 184 of 482
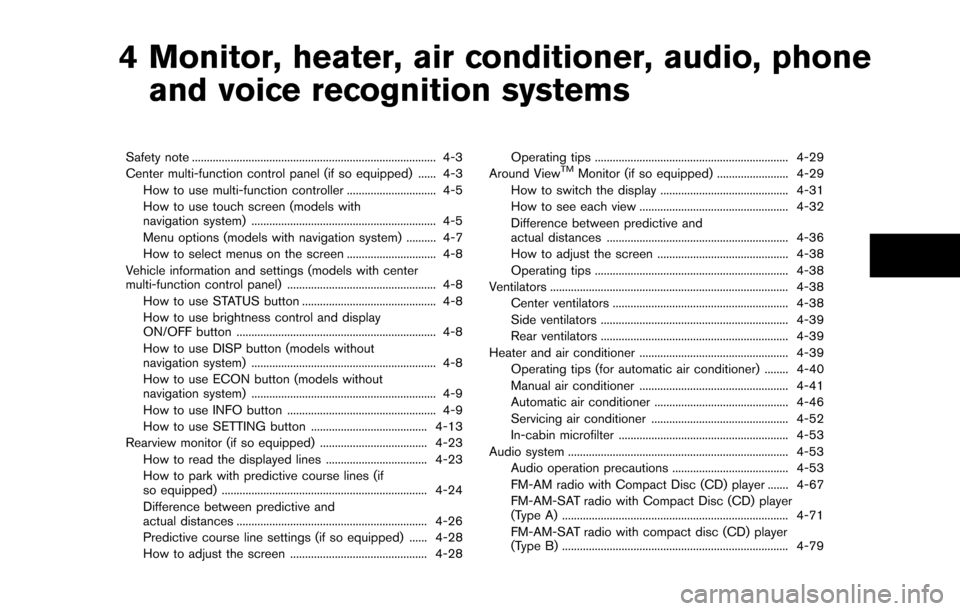
4 Monitor, heater, air conditioner, audio, phoneand voice recognition systems
Safety note ........................................................................\
.......... 4-3
Center multi-function control panel (if so equipped) ...... 4-3
How to use multi-function controller .............................. 4-5
How to use touch screen (models with
navigation system) .............................................................. 4-5
Menu options (models with navigation system) .......... 4-7
How to select menus on the screen .............................. 4-8
Vehicle information and settings (models with center
multi-function control panel) .................................................. 4-8 How to use STATUS button ............................................. 4-8
How to use brightness control and display
ON/OFF button ................................................................... 4-8
How to use DISP button (models without
navigation system) .............................................................. 4-8
How to use ECON button (models without
navigation system) .............................................................. 4-9
How to use INFO button .................................................. 4-9
How to use SETTING button ....................................... 4-13
Rearview monitor (if so equipped) .................................... 4-23
How to read the displayed lines .................................. 4-23
How to park with predictive course lines (if
so equipped) ..................................................................... 4-24
Difference between predictive and
actual distances ................................................................ 4-26
Predictive course line settings (if so equipped) ...... 4-28
How to adjust the screen .............................................. 4-28 Operating tips ................................................................. 4-29
Around ViewTMMonitor (if so equipped) ........................ 4-29
How to switch the display ........................................... 4-31
How to see each view .................................................. 4-32
Difference between predictive and
actual distances ............................................................. 4-36
How to adjust the screen ............................................ 4-38
Operating tips ................................................................. 4-38
Ventilators ........................................................................\
........ 4-38 Center ventilators ........................................................... 4-38
Side ventilators ............................................................... 4-39
Rear ventilators ............................................................... 4-39
Heater and air conditioner .................................................. 4-39
Operating tips (for automatic air conditioner) ........ 4-40
Manual air conditioner .................................................. 4-41
Automatic air conditioner ............................................. 4-46
Servicing air conditioner .............................................. 4-52
In-cabin microfilter ......................................................... 4-53
Audio system ........................................................................\
.. 4-53
Audio operation precautions ....................................... 4-53
FM-AM radio with Compact Disc (CD) player ....... 4-67
FM-AM-SAT radio with Compact Disc (CD) player
(Type A) ........................................................................\
.... 4-71
FM-AM-SAT radio with compact disc (CD) player
(Type B) ........................................................................\
.... 4-79
Page 251 of 482
4-68Monitor, heater, air conditioner, audio, phone and voice recognition systems
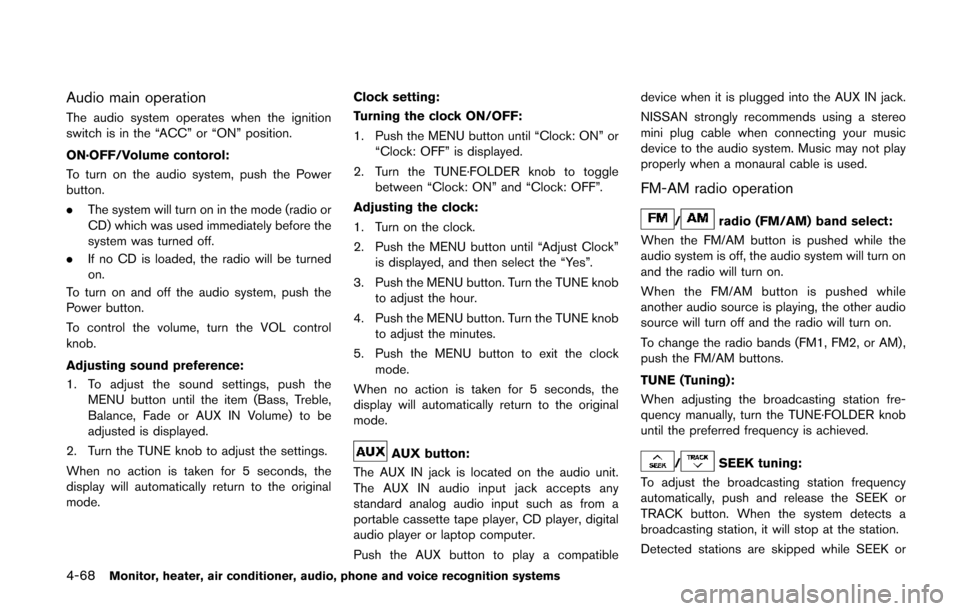
Audio main operation
The audio system operates when the ignition
switch is in the “ACC” or “ON” position.
ON·OFF/Volume contorol:
To turn on the audio system, push the Power
button.
.The system will turn on in the mode (radio or
CD) which was used immediately before the
system was turned off.
. If no CD is loaded, the radio will be turned
on.
To turn on and off the audio system, push the
Power button.
To control the volume, turn the VOL control
knob.
Adjusting sound preference:
1. To adjust the sound settings, push the MENU button until the item (Bass, Treble,
Balance, Fade or AUX IN Volume) to be
adjusted is displayed.
2. Turn the TUNE knob to adjust the settings.
When no action is taken for 5 seconds, the
display will automatically return to the original
mode. Clock setting:
Turning the clock ON/OFF:
1. Push the MENU button until “Clock: ON” or “Clock: OFF” is displayed.
2. Turn the TUNE·FOLDER knob to toggle between “Clock: ON” and “Clock: OFF”.
Adjusting the clock:
1. Turn on the clock.
2. Push the MENU button until “Adjust Clock” is displayed, and then select the “Yes”.
3. Push the MENU button. Turn the TUNE knob to adjust the hour.
4. Push the MENU button. Turn the TUNE knob to adjust the minutes.
5. Push the MENU button to exit the clock mode.
When no action is taken for 5 seconds, the
display will automatically return to the original
mode.
AUX button:
The AUX IN jack is located on the audio unit.
The AUX IN audio input jack accepts any
standard analog audio input such as from a
portable cassette tape player, CD player, digital
audio player or laptop computer.
Push the AUX button to play a compatible device when it is plugged into the AUX IN jack.
NISSAN strongly recommends using a stereo
mini plug cable when connecting your music
device to the audio system. Music may not play
properly when a monaural cable is used.
FM-AM radio operation
/radio (FM/AM) band select:
When the FM/AM button is pushed while the
audio system is off, the audio system will turn on
and the radio will turn on.
When the FM/AM button is pushed while
another audio source is playing, the other audio
source will turn off and the radio will turn on.
To change the radio bands (FM1, FM2, or AM) ,
push the FM/AM buttons.
TUNE (Tuning):
When adjusting the broadcasting station fre-
quency manually, turn the TUNE·FOLDER knob
until the preferred frequency is achieved.
/SEEK tuning:
To adjust the broadcasting station frequency
automatically, push and release the SEEK or
TRACK button. When the system detects a
broadcasting station, it will stop at the station.
Detected stations are skipped while SEEK or
Page 256 of 482
the ENTER button. You can toggle between
ON and OFF using the TUNE·SCROLL
control knob.
. RDS Display
When this has been set to ON, RDS (radio
data system) information will be shown on
the display. Select RDS Display and then
push the ENTER button. You can toggle
between ON and OFF using the TUNE·SC-
ROLL control knob.
. iPod Menu language
The iPod menu language can be set to
English, French or Spanish.
Select iPod menu language and then push
the ENTER button. Use the TUNE·SCROLL
control knob to select the preferred lan-
guage.
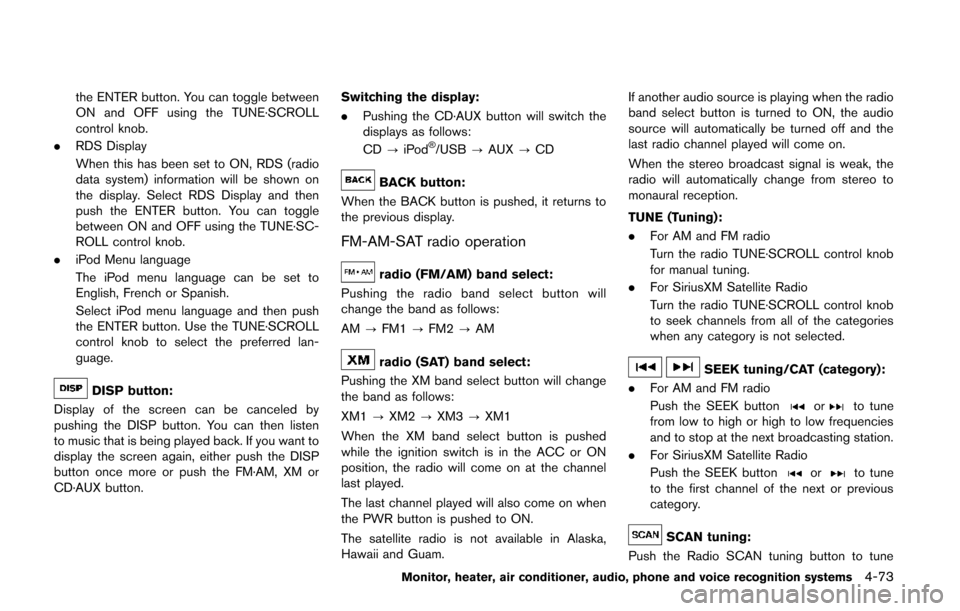
DISP button:
Display of the screen can be canceled by
pushing the DISP button. You can then listen
to music that is being played back. If you want to
display the screen again, either push the DISP
button once more or push the FM·AM, XM or
CD·AUX button. Switching the display:
.
Pushing the CD·AUX button will switch the
displays as follows:
CD ?iPod
®/USB ?AUX ?CD
BACK button:
When the BACK button is pushed, it returns to
the previous display.
FM-AM-SAT radio operation
radio (FM/AM) band select:
Pushing the radio band select button will
change the band as follows:
AM ?FM1 ?FM2 ?AM
radio (SAT) band select:
Pushing the XM band select button will change
the band as follows:
XM1 ?XM2 ?XM3 ?XM1
When the XM band select button is pushed
while the ignition switch is in the ACC or ON
position, the radio will come on at the channel
last played.
The last channel played will also come on when
the PWR button is pushed to ON.
The satellite radio is not available in Alaska,
Hawaii and Guam. If another audio source is playing when the radio
band select button is turned to ON, the audio
source will automatically be turned off and the
last radio channel played will come on.
When the stereo broadcast signal is weak, the
radio will automatically change from stereo to
monaural reception.
TUNE (Tuning):
. For AM and FM radio
Turn the radio TUNE·SCROLL control knob
for manual tuning.
. For SiriusXM Satellite Radio
Turn the radio TUNE·SCROLL control knob
to seek channels from all of the categories
when any category is not selected.SEEK tuning/CAT (category):
. For AM and FM radio
Push the SEEK button
orto tune
from low to high or high to low frequencies
and to stop at the next broadcasting station.
. For SiriusXM Satellite Radio
Push the SEEK button
orto tune
to the first channel of the next or previous
category.
SCAN tuning:
Push the Radio SCAN tuning button to tune
Monitor, heater, air conditioner, audio, phone and voice recognition systems4-73
Page 263 of 482
4-80Monitor, heater, air conditioner, audio, phone and voice recognition systems
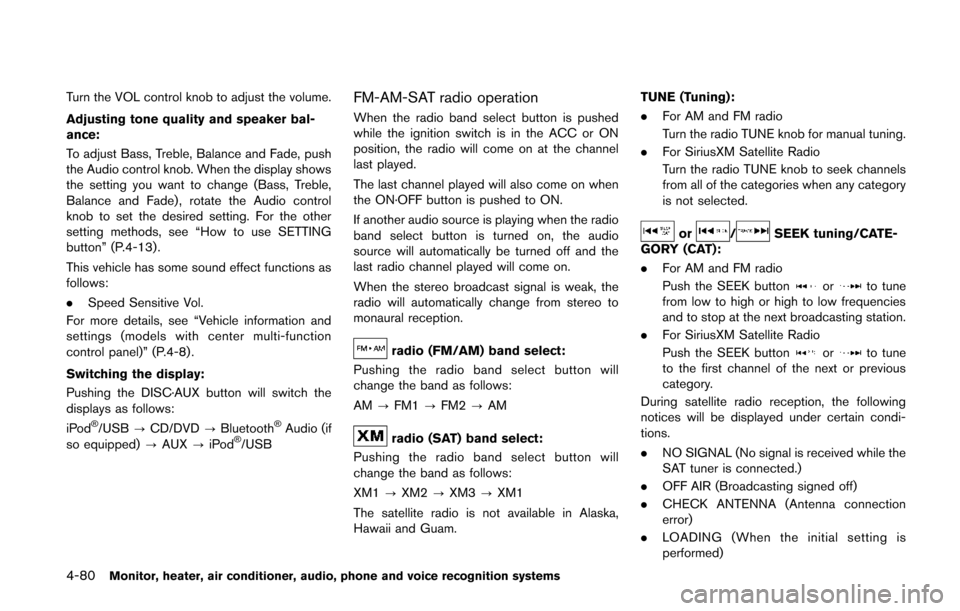
Turn the VOL control knob to adjust the volume.
Adjusting tone quality and speaker bal-
ance:
To adjust Bass, Treble, Balance and Fade, push
the Audio control knob. When the display shows
the setting you want to change (Bass, Treble,
Balance and Fade) , rotate the Audio control
knob to set the desired setting. For the other
setting methods, see “How to use SETTING
button” (P.4-13).
This vehicle has some sound effect functions as
follows:
.Speed Sensitive Vol.
For more details, see “Vehicle information and
settings (models with center multi-function
control panel)” (P.4-8) .
Switching the display:
Pushing the DISC·AUX button will switch the
displays as follows:
iPod
®/USB ?CD/DVD ?Bluetooth®Audio (if
so equipped) ?AUX ?iPod®/USB
FM-AM-SAT radio operation
When the radio band select button is pushed
while the ignition switch is in the ACC or ON
position, the radio will come on at the channel
last played.
The last channel played will also come on when
the ON·OFF button is pushed to ON.
If another audio source is playing when the radio
band select button is turned on, the audio
source will automatically be turned off and the
last radio channel played will come on.
When the stereo broadcast signal is weak, the
radio will automatically change from stereo to
monaural reception.
radio (FM/AM) band select:
Pushing the radio band select button will
change the band as follows:
AM ?FM1 ?FM2 ?AM
radio (SAT) band select:
Pushing the radio band select button will
change the band as follows:
XM1 ?XM2 ?XM3 ?XM1
The satellite radio is not available in Alaska,
Hawaii and Guam. TUNE (Tuning):
. For AM and FM radio
Turn the radio TUNE knob for manual tuning.
. For SiriusXM Satellite Radio
Turn the radio TUNE knob to seek channels
from all of the categories when any category
is not selected.
or/SEEK tuning/CATE-
GORY (CAT):
. For AM and FM radio
Push the SEEK button
orto tune
from low to high or high to low frequencies
and to stop at the next broadcasting station.
. For SiriusXM Satellite Radio
Push the SEEK button
orto tune
to the first channel of the next or previous
category.
During satellite radio reception, the following
notices will be displayed under certain condi-
tions.
. NO SIGNAL (No signal is received while the
SAT tuner is connected.)
. OFF AIR (Broadcasting signed off)
. CHECK ANTENNA (Antenna connection
error)
. LOADING (When the initial setting is
performed)
Page 298 of 482
.Set up the wireless connection between a
compatible cellular phone and the in-vehicle
phone module before using the Bluetooth
®
Hands-Free Phone System.
. Some Bluetooth®enabled cellular phones
may not be recognized by the in-vehicle
phone module. Please visit
www.nissanusa.com/bluetooth for a recom-
mended phone list.
. You will not be able to use a hands-free
phone under the following conditions:
— Your vehicle is outside of the telephone
service area.
— Your vehicle is in an area where it is difficult to receive radio waves; such as in
a tunnel, in an underground parking
garage, behind a tall building or in a
mountainous area.
— Your cellular phone is locked in order not to be dialed.
. When the radio wave reception is not good
or ambient sound is too loud, it may be
difficult to hear the other person’s voice
during a call.
. Immediately after the ignition switch is
pushed to the ON position, it may be
impossible to receive a call for a short
period of time. .
Do not place the cellular phone in an area
surrounded by metal or far away from the in-
vehicle phone module to prevent tone quality
degradation and wireless connection dis-
ruption.
. While a cellular phone is connected through
the Bluetooth
®wireless connection, the
battery power of the cellular phone may
discharge quicker than usual.
. If the Bluetooth
®Hands-Free Phone System
seems to be malfunctioning, please visit
www.nissanusa.com/bluetooth for trouble-
shooting help.
. Some cellular phones or other devices may
cause interference or a buzzing noise to
come from the audio system speakers.
Storing the device in a different location
may reduce or eliminate the noise.
. Refer to the cellular phone Owner’s Manual
regarding the telephone pairing procedure
specific to your phone, battery charging,
cellular phone antenna, etc.
. The antenna display on the monitor will not
coincide with the antenna display of some
cellular phones.
. Keep the interior of the vehicle as quiet as
possible to hear the caller’s voice clearly as
well as to minimize its echoes. .
If reception between callers is unclear,
adjusting the incoming or outgoing call
volume may improve the clarity.
REGULATORY INFORMATION
FCC Regulatory information
.CAUTION: To maintain compliance with
FCC’s RF exposure guidelines, use only
the supplied antenna. Unauthorized antenna,
modification, or attachments could damage
the transmitter and may violate FCC regula-
tions.
. Operation is subject to the following two
conditions:
1. this device may not cause interference and
2. this device must accept any interference, including interference that may cause un-
desired operation of the device
IC Regulatory information
.Operation is subject to the following two
conditions: (1) this device may not cause
interference, and (2) this device must accept
any interference, including interference that
may cause undesired operation of the
device.
. This Class B digital apparatus meets all
requirements of the Canadian Interference-
Causing Equipment Regulations.
Monitor, heater, air conditioner, audio, phone and voice recognition systems4-115
Page 478 of 482
FM-AM radio with Compact Disc
(CD) player ............................................................ 4-71
FM-AM-SAT radio with Compact Disc
(CD) player ............................................................ 4-79
Rapid air pressure loss................................................ 5-7
Readiness for inspection/maintenance
(I/M) test........................................................................ 9-27
Rear personal lights.................................................... 2-56
Rear window and outside mirror
defroster switch........................................................... 2-32
Rear window wiper and washer switch ................ 2-31
Rearview monitor......................................................... 4-23
Recorders, Event data ............................................... 9-27
Registering your vehicle in another country........... 9-8
Remote controller (DVD) ....................................... 4-112
Remote keyless entry system................................... 3-21
Reporting safety defects (US only)........................ 9-26
Rollover............................................................................ 5-6
Roof, Roof rack............................................................ 2-49
S
Safety Child seat belts .................................................... 1-24
Reporting safety defects (US only)................. 9-26
Towing safety......................................................... 9-20
Satellite radio operation ............................................ 4-80
Seat adjustment Front manual seat adjustment.............................. 1-3
Front power seat adjustment ............................... 1-3
Front seats................................................................ 1-3
Seat belt(s) Child safety............................................................ 1-24
Infants...................................................................... 1-25
Injured persons..................................................... 1-17
Larger children...................................................... 1-26
Precautions on seat belt usage........................ 1-15 Pregnant women .................................................. 1-17
Seat belt cleaning................................................... 7-6
Seat belt extenders.............................................. 1-23
Seat belt hooks .................................................... 1-23
Seat belt maintenance........................................ 1-24
Seat belt warning light and chime................... 2-15
Seat belts............................................................... 1-15
Seat belts with pretensioners........................... 1-58
Shoulder belt height adjustment...................... 1-23
Small children........................................................ 1-25
Three-point type................................................... 1-17
Seat(s) Driver-side memory.............................................. 3-37
Heated seats......................................................... 2-38
Seats .......................................................................... 1-2
Security system (NISSAN Vehicle Immobilizer
System) , Engine start................................................. 2-29
Security system, Vehicle security system ............. 2-28
Servicing air conditioner............................................ 4-52
SETTING button.......................................................... 4-13
Shift lever Shift lock release.................................................. 5-16
Shift lock release, Transmission .............................. 5-16
Shifting, CVT (Continuously
Variable Transmission) ............................................... 5-13
Shoulder belt height adjustment............................. 1-23
Sliding doors.................................................................. 3-7
SOURCE select switch.......................................... 4-101
Spare tire.............................................................. 8-39, 9-7
Spark plugs .................................................................. 8-16
Speedometer.................................................................. 2-6
Starting Before starting the engine................................. 5-12
Jump starting......................................................... 6-10
Precautions when starting and driving .............. 5-2
Push starting ......................................................... 6-12
Starting the engine .............................................. 5-12 STATUS button.............................................................. 4-8
Status light, Front passenger air bag .................... 1-53
Steering
Power steering fluid............................................. 8-11
Steering-wheel-mounted controls
for audio ............................................................... 4-100
Tilt/telescopic steering........................................ 3-32
Storage .......................................................................... 2-43
Sun visors ..................................................................... 3-33
Sunglasses holder ...................................................... 2-45
Supplemental air bag warning labels..................... 1-59
Supplemental air bag warning light............ 1-59, 2-15
Supplemental restraint system................................. 1-46 Precautions on supplemental
restraint system..................................................... 1-46
Switch Autolight switch.................................................... 2-34
Fog light switch.................................................... 2-38
Hazard warning flasher switch............................. 6-2
Headlight aiming control .................................... 2-36
Headlight switch................................................... 2-33
Overdrive OFF switch......................................... 5-15
Power door lock switch......................................... 3-6
Rear window and outside mirror
defroster switch.................................................... 2-32
Turn signal switch ................................................ 2-37
Vehicle dynamic control (VDC) off switch..... 2-40
T
Tachometer ..................................................................... 2-7
Temperature display.................................................... 2-25
Temperature gauge, Engine coolant
temperature gauge........................................................ 2-7
Theft (NISSAN Vehicle Immobilizer System) ,
Engine start................................................................... 2-29
Three-way catalyst........................................................ 5-3
10-5