2014 NISSAN QUEST change time
[x] Cancel search: change timePage 234 of 482
Rear air conditioning system
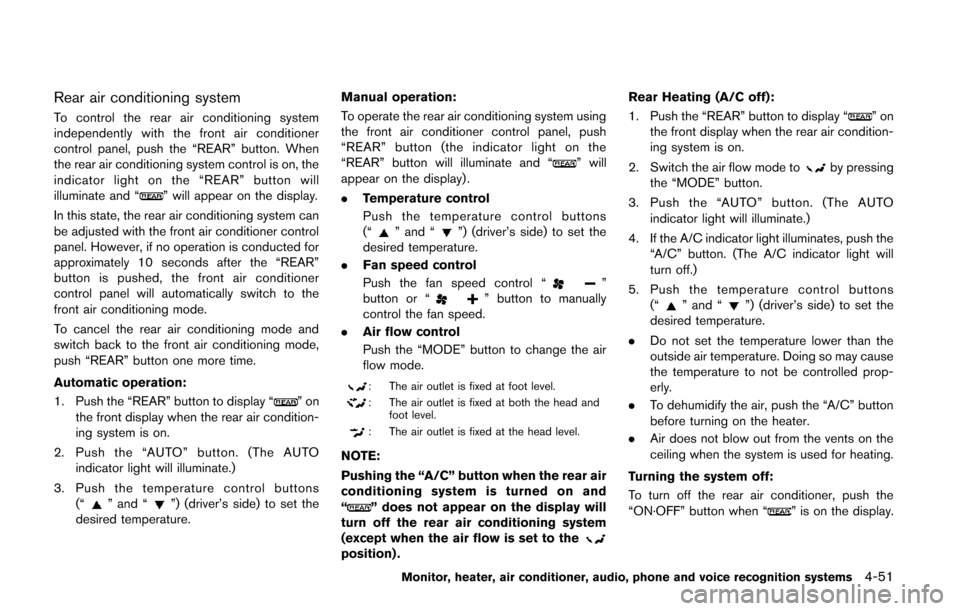
To control the rear air conditioning system
independently with the front air conditioner
control panel, push the “REAR” button. When
the rear air conditioning system control is on, the
indicator light on the “REAR” button will
illuminate and “
” will appear on the display.
In this state, the rear air conditioning system can
be adjusted with the front air conditioner control
panel. However, if no operation is conducted for
approximately 10 seconds after the “REAR”
button is pushed, the front air conditioner
control panel will automatically switch to the
front air conditioning mode.
To cancel the rear air conditioning mode and
switch back to the front air conditioning mode,
push “REAR” button one more time.
Automatic operation:
1. Push the “REAR” button to display “
”on
the front display when the rear air condition-
ing system is on.
2. Push the “AUTO” button. (The AUTO indicator light will illuminate.)
3. Push the temperature control buttons (“
” and “”) (driver’s side) to set the
desired temperature. Manual operation:
To operate the rear air conditioning system using
the front air conditioner control panel, push
“REAR” button (the indicator light on the
“REAR” button will illuminate and “
” will
appear on the display) .
. Temperature control
Push the temperature control buttons
(“
” and “”) (driver’s side) to set the
desired temperature.
. Fan speed control
Push the fan speed control “
”
button or “” button to manually
control the fan speed.
. Air flow control
Push the “MODE” button to change the air
flow mode.
: The air outlet is fixed at foot level.
: The air outlet is fixed at both the head and
foot level.
: The air outlet is fixed at the head level.
NOTE:
Pushing the “A/C” button when the rear air
conditioning system is turned on and
“
” does not appear on the display will
turn off the rear air conditioning system
(except when the air flow is set to the
position) . Rear Heating (A/C off):
1. Push the “REAR” button to display “
”on
the front display when the rear air condition-
ing system is on.
2. Switch the air flow mode to
by pressing
the “MODE” button.
3. Push the “AUTO” button. (The AUTO indicator light will illuminate.)
4. If the A/C indicator light illuminates, push the “A/C” button. (The A/C indicator light will
turn off.)
5. Push the temperature control buttons (“
” and “”) (driver’s side) to set the
desired temperature.
. Do not set the temperature lower than the
outside air temperature. Doing so may cause
the temperature to not be controlled prop-
erly.
. To dehumidify the air, push the “A/C” button
before turning on the heater.
. Air does not blow out from the vents on the
ceiling when the system is used for heating.
Turning the system off:
To turn off the rear air conditioner, push the
“ON·OFF” button when “
” is on the display.
Monitor, heater, air conditioner, audio, phone and voice recognition systems4-51
Page 238 of 482
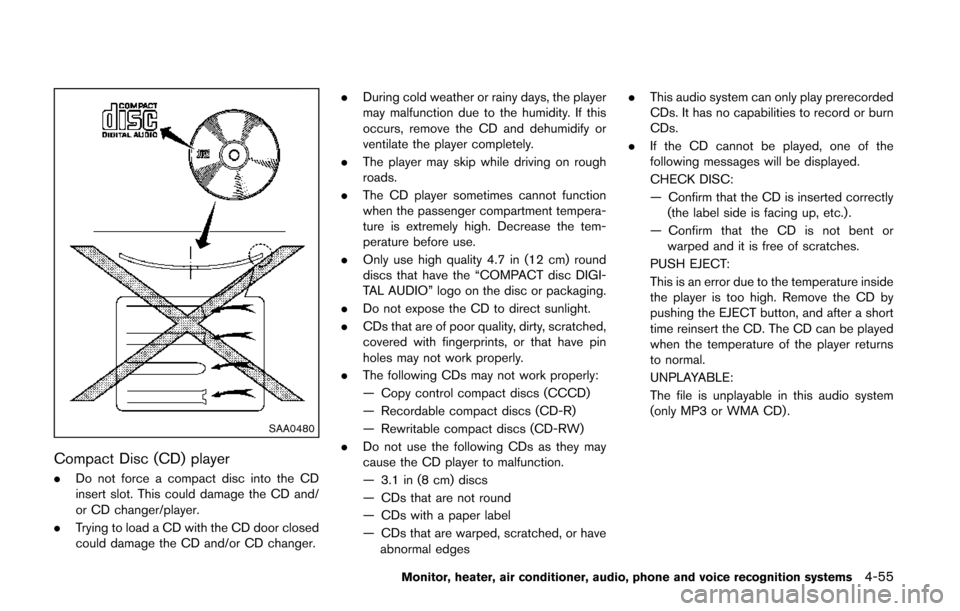
SAA0480
Compact Disc (CD) player
.Do not force a compact disc into the CD
insert slot. This could damage the CD and/
or CD changer/player.
. Trying to load a CD with the CD door closed
could damage the CD and/or CD changer. .
During cold weather or rainy days, the player
may malfunction due to the humidity. If this
occurs, remove the CD and dehumidify or
ventilate the player completely.
. The player may skip while driving on rough
roads.
. The CD player sometimes cannot function
when the passenger compartment tempera-
ture is extremely high. Decrease the tem-
perature before use.
. Only use high quality 4.7 in (12 cm) round
discs that have the “COMPACT disc DIGI-
TAL AUDIO” logo on the disc or packaging.
. Do not expose the CD to direct sunlight.
. CDs that are of poor quality, dirty, scratched,
covered with fingerprints, or that have pin
holes may not work properly.
. The following CDs may not work properly:
— Copy control compact discs (CCCD)
— Recordable compact discs (CD-R)
— Rewritable compact discs (CD-RW)
. Do not use the following CDs as they may
cause the CD player to malfunction.
— 3.1 in (8 cm) discs
— CDs that are not round
— CDs with a paper label
— CDs that are warped, scratched, or have
abnormal edges .
This audio system can only play prerecorded
CDs. It has no capabilities to record or burn
CDs.
. If the CD cannot be played, one of the
following messages will be displayed.
CHECK DISC:
— Confirm that the CD is inserted correctly
(the label side is facing up, etc.).
— Confirm that the CD is not bent or warped and it is free of scratches.
PUSH EJECT:
This is an error due to the temperature inside
the player is too high. Remove the CD by
pushing the EJECT button, and after a short
time reinsert the CD. The CD can be played
when the temperature of the player returns
to normal.
UNPLAYABLE:
The file is unplayable in this audio system
(only MP3 or WMA CD) .
Monitor, heater, air conditioner, audio, phone and voice recognition systems4-55
Page 252 of 482
TRACK button is pushed and held.
SCAN tuning:
When the SCAN button is pushed, the system
will seek and stop at the detected broadcasting
station for 5 seconds, and then it will start to
seek for the next broadcasting station.
Push the SCAN button in this 5-second period
to stop seeking.
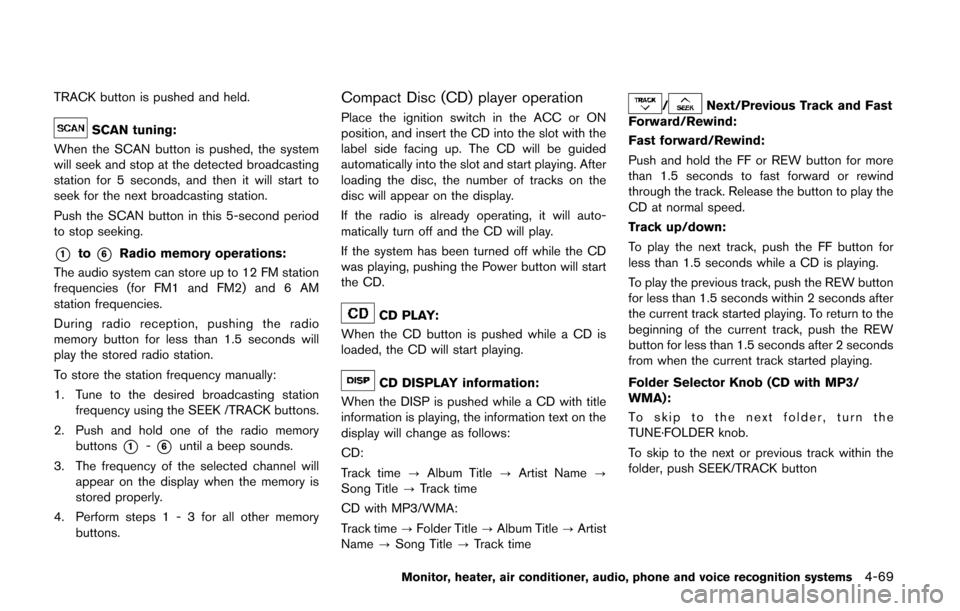
*1to*6Radio memory operations:
The audio system can store up to 12 FM station
frequencies (for FM1 and FM2) and 6 AM
station frequencies.
During radio reception, pushing the radio
memory button for less than 1.5 seconds will
play the stored radio station.
To store the station frequency manually:
1. Tune to the desired broadcasting station frequency using the SEEK /TRACK buttons.
2. Push and hold one of the radio memory buttons
*1-*6until a beep sounds.
3. The frequency of the selected channel will appear on the display when the memory is
stored properly.
4. Perform steps 1 - 3 for all other memory buttons.
Compact Disc (CD) player operation
Place the ignition switch in the ACC or ON
position, and insert the CD into the slot with the
label side facing up. The CD will be guided
automatically into the slot and start playing. After
loading the disc, the number of tracks on the
disc will appear on the display.
If the radio is already operating, it will auto-
matically turn off and the CD will play.
If the system has been turned off while the CD
was playing, pushing the Power button will start
the CD.
CD PLAY:
When the CD button is pushed while a CD is
loaded, the CD will start playing.
CD DISPLAY information:
When the DISP is pushed while a CD with title
information is playing, the information text on the
display will change as follows:
CD:
Track time ?Album Title ?Artist Name ?
Song Title ?Track time
CD with MP3/WMA:
Track time ?Folder Title ?Album Title ?Artist
Name ?Song Title ?Track time
/Next/Previous Track and Fast
Forward/Rewind:
Fast forward/Rewind:
Push and hold the FF or REW button for more
than 1.5 seconds to fast forward or rewind
through the track. Release the button to play the
CD at normal speed.
Track up/down:
To play the next track, push the FF button for
less than 1.5 seconds while a CD is playing.
To play the previous track, push the REW button
for less than 1.5 seconds within 2 seconds after
the current track started playing. To return to the
beginning of the current track, push the REW
button for less than 1.5 seconds after 2 seconds
from when the current track started playing.
Folder Selector Knob (CD with MP3/
WMA):
To skip to the next folder, turn the
TUNE·FOLDER knob.
To skip to the next or previous track within the
folder, push SEEK/TRACK button
Monitor, heater, air conditioner, audio, phone and voice recognition systems4-69
Page 266 of 482
When theorbutton is pushed for less
than 1.5 seconds while the CD is being played,
the next track or the beginning of the current
track on the CD will be played.
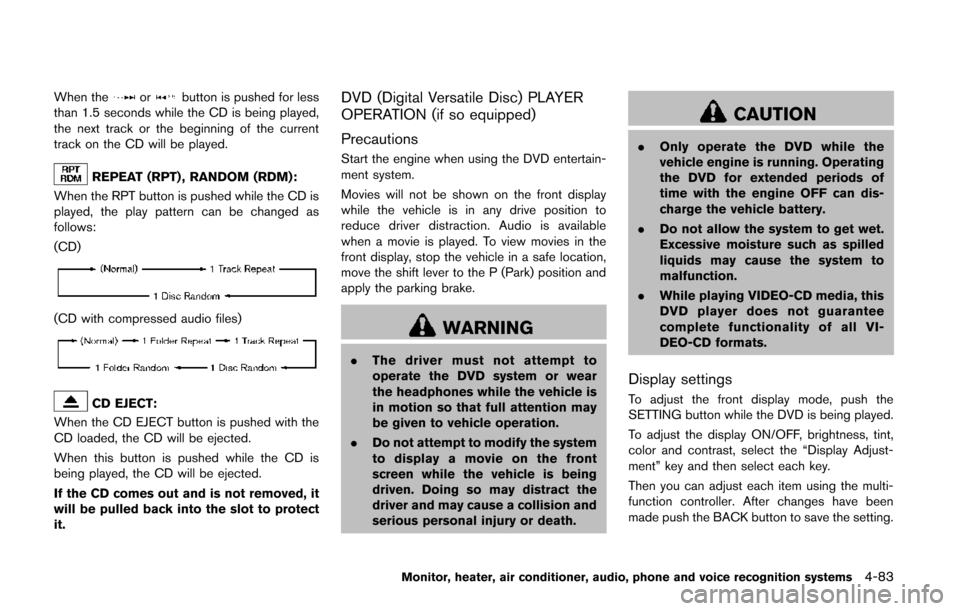
REPEAT (RPT) , RANDOM (RDM):
When the RPT button is pushed while the CD is
played, the play pattern can be changed as
follows:
(CD)
(CD with compressed audio files)
CD EJECT:
When the CD EJECT button is pushed with the
CD loaded, the CD will be ejected.
When this button is pushed while the CD is
being played, the CD will be ejected.
If the CD comes out and is not removed, it
will be pulled back into the slot to protect
it.
DVD (Digital Versatile Disc) PLAYER
OPERATION (if so equipped)
Precautions
Start the engine when using the DVD entertain-
ment system.
Movies will not be shown on the front display
while the vehicle is in any drive position to
reduce driver distraction. Audio is available
when a movie is played. To view movies in the
front display, stop the vehicle in a safe location,
move the shift lever to the P (Park) position and
apply the parking brake.
WARNING
. The driver must not attempt to
operate the DVD system or wear
the headphones while the vehicle is
in motion so that full attention may
be given to vehicle operation.
. Do not attempt to modify the system
to display a movie on the front
screen while the vehicle is being
driven. Doing so may distract the
driver and may cause a collision and
serious personal injury or death.
CAUTION
. Only operate the DVD while the
vehicle engine is running. Operating
the DVD for extended periods of
time with the engine OFF can dis-
charge the vehicle battery.
. Do not allow the system to get wet.
Excessive moisture such as spilled
liquids may cause the system to
malfunction.
. While playing VIDEO-CD media, this
DVD player does not guarantee
complete functionality of all VI-
DEO-CD formats.
Display settings
To adjust the front display mode, push the
SETTING button while the DVD is being played.
To adjust the display ON/OFF, brightness, tint,
color and contrast, select the “Display Adjust-
ment” key and then select each key.
Then you can adjust each item using the multi-
function controller. After changes have been
made push the BACK button to save the setting.
Monitor, heater, air conditioner, audio, phone and voice recognition systems4-83
Page 268 of 482
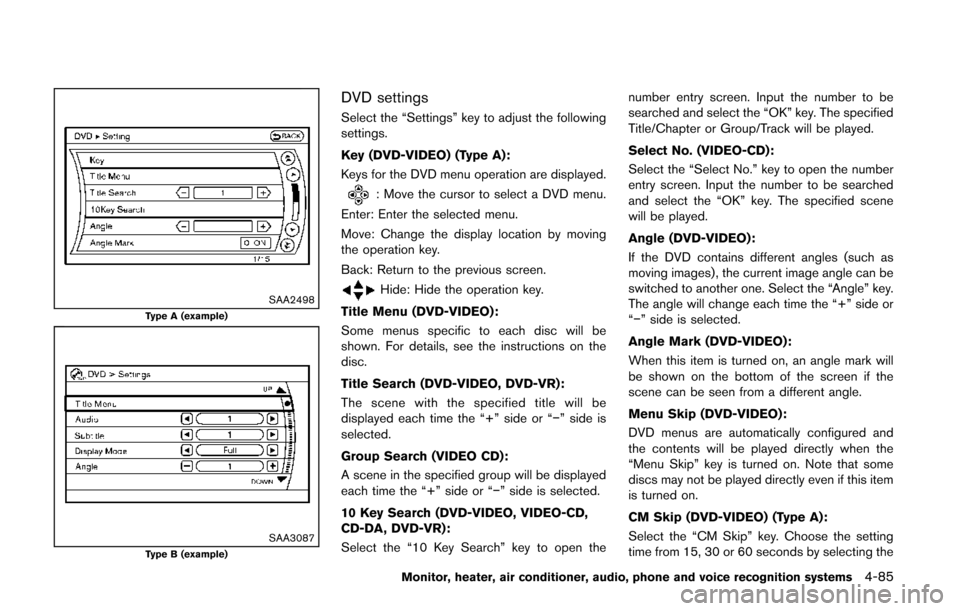
SAA2498Type A (example)
SAA3087Type B (example)
DVD settings
Select the “Settings” key to adjust the following
settings.
Key (DVD-VIDEO) (Type A):
Keys for the DVD menu operation are displayed.
: Move the cursor to select a DVD menu.
Enter: Enter the selected menu.
Move: Change the display location by moving
the operation key.
Back: Return to the previous screen.
Hide: Hide the operation key.
Title Menu (DVD-VIDEO):
Some menus specific to each disc will be
shown. For details, see the instructions on the
disc.
Title Search (DVD-VIDEO, DVD-VR):
The scene with the specified title will be
displayed each time the “+” side or “−” side is
selected.
Group Search (VIDEO CD):
A scene in the specified group will be displayed
each time the “+” side or “−” side is selected.
10 Key Search (DVD-VIDEO, VIDEO-CD,
CD-DA, DVD-VR):
Select the “10 Key Search” key to open the number entry screen. Input the number to be
searched and select the “OK” key. The specified
Title/Chapter or Group/Track will be played.
Select No. (VIDEO-CD):
Select the “Select No.” key to open the number
entry screen. Input the number to be searched
and select the “OK” key. The specified scene
will be played.
Angle (DVD-VIDEO):
If the DVD contains different angles (such as
moving images), the current image angle can be
switched to another one. Select the “Angle” key.
The angle will change each time the “+” side or
“−” side is selected.
Angle Mark (DVD-VIDEO):
When this item is turned on, an angle mark will
be shown on the bottom of the screen if the
scene can be seen from a different angle.
Menu Skip (DVD-VIDEO):
DVD menus are automatically configured and
the contents will be played directly when the
“Menu Skip” key is turned on. Note that some
discs may not be played directly even if this item
is turned on.
CM Skip (DVD-VIDEO) (Type A):
Select the “CM Skip” key. Choose the setting
time from 15, 30 or 60 seconds by selecting the
Monitor, heater, air conditioner, audio, phone and voice recognition systems4-85
Page 290 of 482
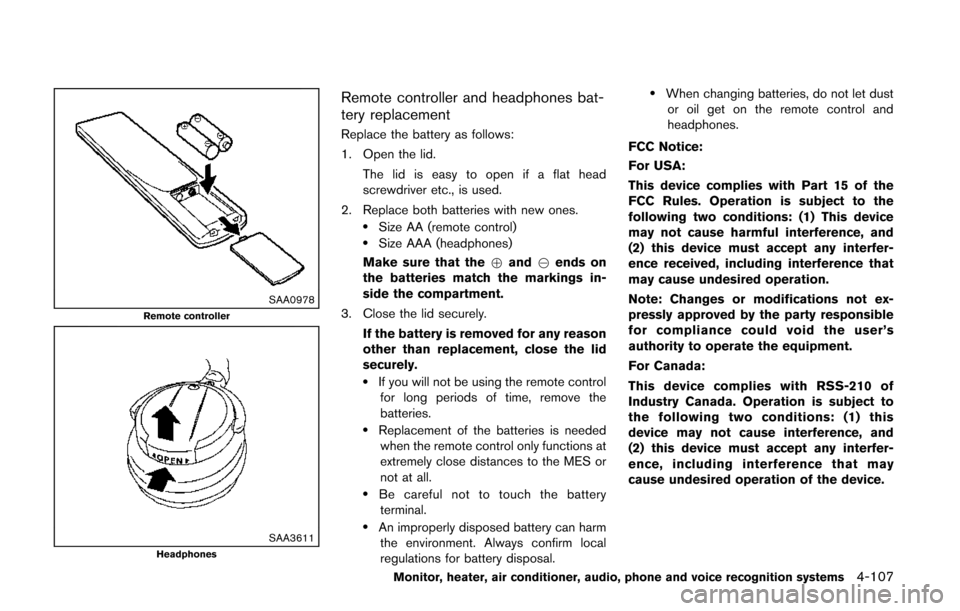
SAA0978Remote controller
SAA3611Headphones
Remote controller and headphones bat-
tery replacement
Replace the battery as follows:
1. Open the lid.The lid is easy to open if a flat head
screwdriver etc., is used.
2. Replace both batteries with new ones.
.Size AA (remote control).Size AAA (headphones)
Make sure that the +and 7ends on
the batteries match the markings in-
side the compartment.
3. Close the lid securely.
If the battery is removed for any reason
other than replacement, close the lid
securely.
.If you will not be using the remote controlfor long periods of time, remove the
batteries.
.Replacement of the batteries is neededwhen the remote control only functions at
extremely close distances to the MES or
not at all.
.Be careful not to touch the batteryterminal.
.An improperly disposed battery can harm the environment. Always confirm local
regulations for battery disposal.
.When changing batteries, do not let dustor oil get on the remote control and
headphones.
FCC Notice:
For USA:
This device complies with Part 15 of the
FCC Rules. Operation is subject to the
following two conditions: (1) This device
may not cause harmful interference, and
(2) this device must accept any interfer-
ence received, including interference that
may cause undesired operation.
Note: Changes or modifications not ex-
pressly approved by the party responsible
for compliance could void the user’s
authority to operate the equipment.
For Canada:
This device complies with RSS-210 of
Industry Canada. Operation is subject to
the following two conditions: (1) this
device may not cause interference, and
(2) this device must accept any interfer-
ence, including interference that may
cause undesired operation of the device.
Monitor, heater, air conditioner, audio, phone and voice recognition systems4-107
Page 292 of 482
PLAYING A DVD
DISC·AUX button
Park the vehicle in a safe location for the
front seat occupants to operate the DVD
drive while watching the images.
Insert a DVD into the CD/DVD slot with the
labeled side up. The DVD will be guided
automatically into the slot. When ejecting the
DVD, push the EJECT button.
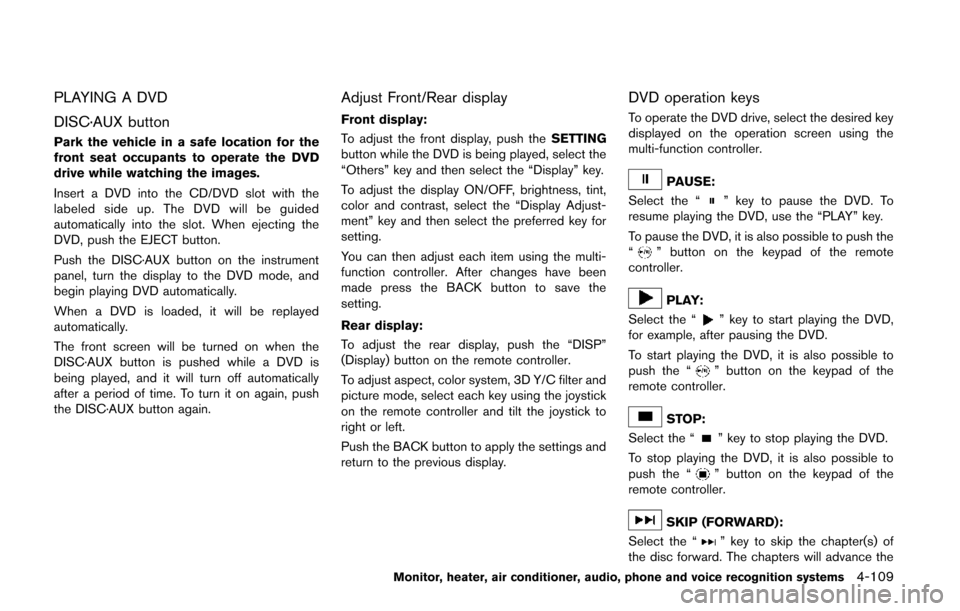
Push the DISC·AUX button on the instrument
panel, turn the display to the DVD mode, and
begin playing DVD automatically.
When a DVD is loaded, it will be replayed
automatically.
The front screen will be turned on when the
DISC·AUX button is pushed while a DVD is
being played, and it will turn off automatically
after a period of time. To turn it on again, push
the DISC·AUX button again.
Adjust Front/Rear display
Front display:
To adjust the front display, push theSETTING
button while the DVD is being played, select the
“Others” key and then select the “Display” key.
To adjust the display ON/OFF, brightness, tint,
color and contrast, select the “Display Adjust-
ment” key and then select the preferred key for
setting.
You can then adjust each item using the multi-
function controller. After changes have been
made press the BACK button to save the
setting.
Rear display:
To adjust the rear display, push the “DISP”
(Display) button on the remote controller.
To adjust aspect, color system, 3D Y/C filter and
picture mode, select each key using the joystick
on the remote controller and tilt the joystick to
right or left.
Push the BACK button to apply the settings and
return to the previous display.
DVD operation keys
To operate the DVD drive, select the desired key
displayed on the operation screen using the
multi-function controller.
PAUSE:
Select the “
” key to pause the DVD. To
resume playing the DVD, use the “PLAY” key.
To pause the DVD, it is also possible to push the
“
” button on the keypad of the remote
controller.
PLAY:
Select the “
” key to start playing the DVD,
for example, after pausing the DVD.
To start playing the DVD, it is also possible to
push the “
” button on the keypad of the
remote controller.
STOP:
Select the “
” key to stop playing the DVD.
To stop playing the DVD, it is also possible to
push the “
” button on the keypad of the
remote controller.
SKIP (FORWARD):
Select the “
” key to skip the chapter(s) of
the disc forward. The chapters will advance the
Monitor, heater, air conditioner, audio, phone and voice recognition systems4-109
Page 294 of 482
Setting keys
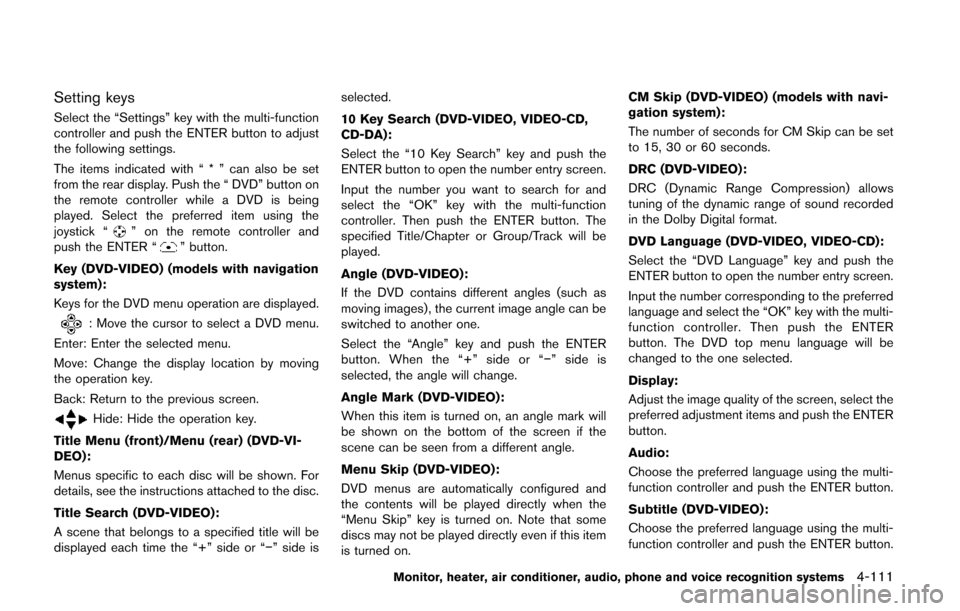
Select the “Settings” key with the multi-function
controller and push the ENTER button to adjust
the following settings.
The items indicated with “ * ” can also be set
from the rear display. Push the “ DVD” button on
the remote controller while a DVD is being
played. Select the preferred item using the
joystick “
” on the remote controller and
push the ENTER “” button.
Key (DVD-VIDEO) (models with navigation
system):
Keys for the DVD menu operation are displayed.
: Move the cursor to select a DVD menu.
Enter: Enter the selected menu.
Move: Change the display location by moving
the operation key.
Back: Return to the previous screen.
Hide: Hide the operation key.
Title Menu (front)/Menu (rear) (DVD-VI-
DEO):
Menus specific to each disc will be shown. For
details, see the instructions attached to the disc.
Title Search (DVD-VIDEO):
A scene that belongs to a specified title will be
displayed each time the “+” side or “−” side is selected.
10 Key Search (DVD-VIDEO, VIDEO-CD,
CD-DA):
Select the “10 Key Search” key and push the
ENTER button to open the number entry screen.
Input the number you want to search for and
select the “OK” key with the multi-function
controller. Then push the ENTER button. The
specified Title/Chapter or Group/Track will be
played.
Angle (DVD-VIDEO):
If the DVD contains different angles (such as
moving images), the current image angle can be
switched to another one.
Select the “Angle” key and push the ENTER
button. When the “+” side or “−
” side is
selected, the angle will change.
Angle Mark (DVD-VIDEO):
When this item is turned on, an angle mark will
be shown on the bottom of the screen if the
scene can be seen from a different angle.
Menu Skip (DVD-VIDEO):
DVD menus are automatically configured and
the contents will be played directly when the
“Menu Skip” key is turned on. Note that some
discs may not be played directly even if this item
is turned on. CM Skip (DVD-VIDEO) (models with navi-
gation system):
The number of seconds for CM Skip can be set
to 15, 30 or 60 seconds.
DRC (DVD-VIDEO):
DRC (Dynamic Range Compression) allows
tuning of the dynamic range of sound recorded
in the Dolby Digital format.
DVD Language (DVD-VIDEO, VIDEO-CD):
Select the “DVD Language” key and push the
ENTER button to open the number entry screen.
Input the number corresponding to the preferred
language and select the “OK” key with the multi-
function controller. Then push the ENTER
button. The DVD top menu language will be
changed to the one selected.
Display:
Adjust the image quality of the screen, select the
preferred adjustment items and push the ENTER
button.
Audio:
Choose the preferred language using the multi-
function controller and push the ENTER button.
Subtitle (DVD-VIDEO):
Choose the preferred language using the multi-
function controller and push the ENTER button.
Monitor, heater, air conditioner, audio, phone and voice recognition systems4-111