2014 NISSAN QUEST light
[x] Cancel search: lightPage 233 of 482
4-50Monitor, heater, air conditioner, audio, phone and voice recognition systems
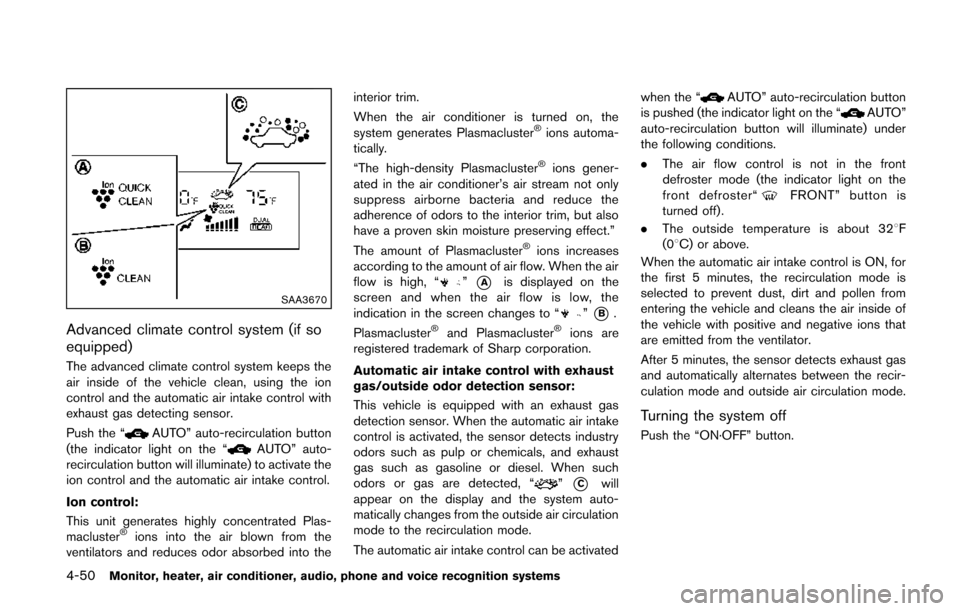
SAA3670
Advanced climate control system (if so
equipped)
The advanced climate control system keeps the
air inside of the vehicle clean, using the ion
control and the automatic air intake control with
exhaust gas detecting sensor.
Push the “
AUTO” auto-recirculation button
(the indicator light on the “AUTO” auto-
recirculation button will illuminate) to activate the
ion control and the automatic air intake control.
Ion control:
This unit generates highly concentrated Plas-
macluster
®ions into the air blown from the
ventilators and reduces odor absorbed into the interior trim.
When the air conditioner is turned on, the
system generates Plasmacluster
®ions automa-
tically.
“The high-density Plasmacluster
®ions gener-
ated in the air conditioner’s air stream not only
suppress airborne bacteria and reduce the
adherence of odors to the interior trim, but also
have a proven skin moisture preserving effect.”
The amount of Plasmacluster
®ions increases
according to the amount of air flow. When the air
flow is high, “
”*Ais displayed on the
screen and when the air flow is low, the
indication in the screen changes to “
”*B.
Plasmacluster®and Plasmacluster®ions are
registered trademark of Sharp corporation.
Automatic air intake control with exhaust
gas/outside odor detection sensor:
This vehicle is equipped with an exhaust gas
detection sensor. When the automatic air intake
control is activated, the sensor detects industry
odors such as pulp or chemicals, and exhaust
gas such as gasoline or diesel. When such
odors or gas are detected, “
”*Cwill
appear on the display and the system auto-
matically changes from the outside air circulation
mode to the recirculation mode.
The automatic air intake control can be activated when the “
AUTO” auto-recirculation button
is pushed (the indicator light on the “AUTO”
auto-recirculation button will illuminate) under
the following conditions.
. The air flow control is not in the front
defroster mode (the indicator light on the
front defroster“
FRONT” button is
turned off).
. The outside temperature is about 328 F
(08C) or above.
When the automatic air intake control is ON, for
the first 5 minutes, the recirculation mode is
selected to prevent dust, dirt and pollen from
entering the vehicle and cleans the air inside of
the vehicle with positive and negative ions that
are emitted from the ventilator.
After 5 minutes, the sensor detects exhaust gas
and automatically alternates between the recir-
culation mode and outside air circulation mode.
Turning the system off
Push the “ON·OFF” button.
Page 234 of 482
Rear air conditioning system
To control the rear air conditioning system
independently with the front air conditioner
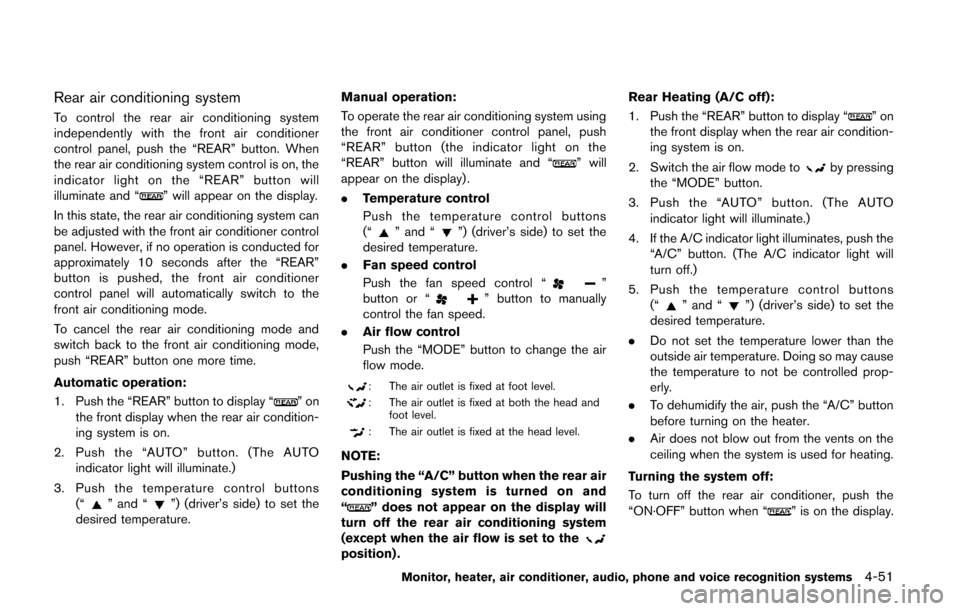
control panel, push the “REAR” button. When
the rear air conditioning system control is on, the
indicator light on the “REAR” button will
illuminate and “
” will appear on the display.
In this state, the rear air conditioning system can
be adjusted with the front air conditioner control
panel. However, if no operation is conducted for
approximately 10 seconds after the “REAR”
button is pushed, the front air conditioner
control panel will automatically switch to the
front air conditioning mode.
To cancel the rear air conditioning mode and
switch back to the front air conditioning mode,
push “REAR” button one more time.
Automatic operation:
1. Push the “REAR” button to display “
”on
the front display when the rear air condition-
ing system is on.
2. Push the “AUTO” button. (The AUTO indicator light will illuminate.)
3. Push the temperature control buttons (“
” and “”) (driver’s side) to set the
desired temperature. Manual operation:
To operate the rear air conditioning system using
the front air conditioner control panel, push
“REAR” button (the indicator light on the
“REAR” button will illuminate and “
” will
appear on the display) .
. Temperature control
Push the temperature control buttons
(“
” and “”) (driver’s side) to set the
desired temperature.
. Fan speed control
Push the fan speed control “
”
button or “” button to manually
control the fan speed.
. Air flow control
Push the “MODE” button to change the air
flow mode.
: The air outlet is fixed at foot level.
: The air outlet is fixed at both the head and
foot level.
: The air outlet is fixed at the head level.
NOTE:
Pushing the “A/C” button when the rear air
conditioning system is turned on and
“
” does not appear on the display will
turn off the rear air conditioning system
(except when the air flow is set to the
position) . Rear Heating (A/C off):
1. Push the “REAR” button to display “
”on
the front display when the rear air condition-
ing system is on.
2. Switch the air flow mode to
by pressing
the “MODE” button.
3. Push the “AUTO” button. (The AUTO indicator light will illuminate.)
4. If the A/C indicator light illuminates, push the “A/C” button. (The A/C indicator light will
turn off.)
5. Push the temperature control buttons (“
” and “”) (driver’s side) to set the
desired temperature.
. Do not set the temperature lower than the
outside air temperature. Doing so may cause
the temperature to not be controlled prop-
erly.
. To dehumidify the air, push the “A/C” button
before turning on the heater.
. Air does not blow out from the vents on the
ceiling when the system is used for heating.
Turning the system off:
To turn off the rear air conditioner, push the
“ON·OFF” button when “
” is on the display.
Monitor, heater, air conditioner, audio, phone and voice recognition systems4-51
Page 237 of 482
4-54Monitor, heater, air conditioner, audio, phone and voice recognition systems
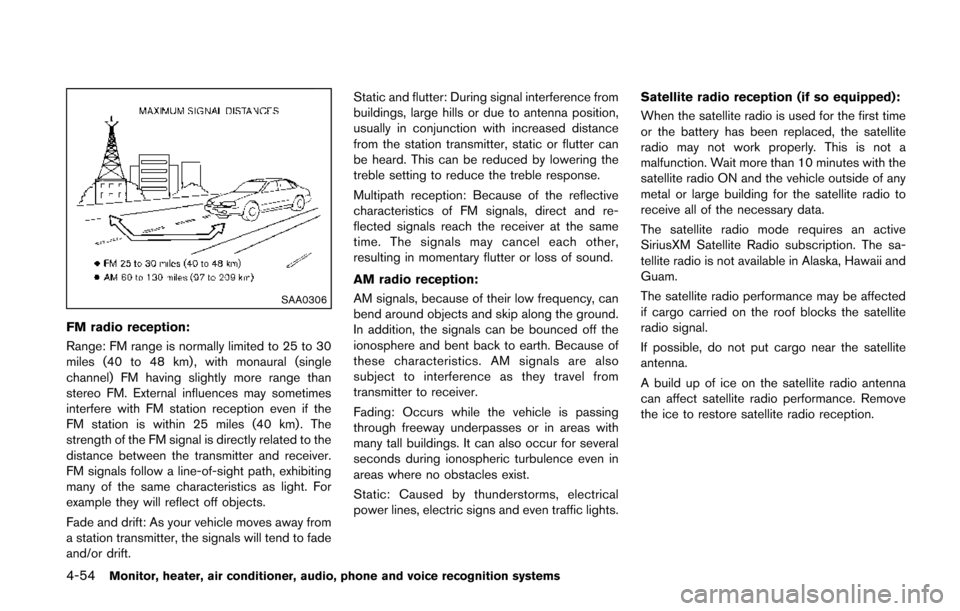
SAA0306
FM radio reception:
Range: FM range is normally limited to 25 to 30
miles (40 to 48 km) , with monaural (single
channel) FM having slightly more range than
stereo FM. External influences may sometimes
interfere with FM station reception even if the
FM station is within 25 miles (40 km). The
strength of the FM signal is directly related to the
distance between the transmitter and receiver.
FM signals follow a line-of-sight path, exhibiting
many of the same characteristics as light. For
example they will reflect off objects.
Fade and drift: As your vehicle moves away from
a station transmitter, the signals will tend to fade
and/or drift.Static and flutter: During signal interference from
buildings, large hills or due to antenna position,
usually in conjunction with increased distance
from the station transmitter, static or flutter can
be heard. This can be reduced by lowering the
treble setting to reduce the treble response.
Multipath reception: Because of the reflective
characteristics of FM signals, direct and re-
flected signals reach the receiver at the same
time. The signals may cancel each other,
resulting in momentary flutter or loss of sound.
AM radio reception:
AM signals, because of their low frequency, can
bend around objects and skip along the ground.
In addition, the signals can be bounced off the
ionosphere and bent back to earth. Because of
these characteristics. AM signals are also
subject to interference as they travel from
transmitter to receiver.
Fading: Occurs while the vehicle is passing
through freeway underpasses or in areas with
many tall buildings. It can also occur for several
seconds during ionospheric turbulence even in
areas where no obstacles exist.
Static: Caused by thunderstorms, electrical
power lines, electric signs and even traffic lights. Satellite radio reception (if so equipped):
When the satellite radio is used for the first time
or the battery has been replaced, the satellite
radio may not work properly. This is not a
malfunction. Wait more than 10 minutes with the
satellite radio ON and the vehicle outside of any
metal or large building for the satellite radio to
receive all of the necessary data.
The satellite radio mode requires an active
SiriusXM Satellite Radio subscription. The sa-
tellite radio is not available in Alaska, Hawaii and
Guam.
The satellite radio performance may be affected
if cargo carried on the roof blocks the satellite
radio signal.
If possible, do not put cargo near the satellite
antenna.
A build up of ice on the satellite radio antenna
can affect satellite radio performance. Remove
the ice to restore satellite radio reception.
Page 238 of 482
SAA0480
Compact Disc (CD) player
.Do not force a compact disc into the CD
insert slot. This could damage the CD and/
or CD changer/player.
. Trying to load a CD with the CD door closed
could damage the CD and/or CD changer. .
During cold weather or rainy days, the player
may malfunction due to the humidity. If this
occurs, remove the CD and dehumidify or
ventilate the player completely.
. The player may skip while driving on rough
roads.
. The CD player sometimes cannot function
when the passenger compartment tempera-
ture is extremely high. Decrease the tem-
perature before use.
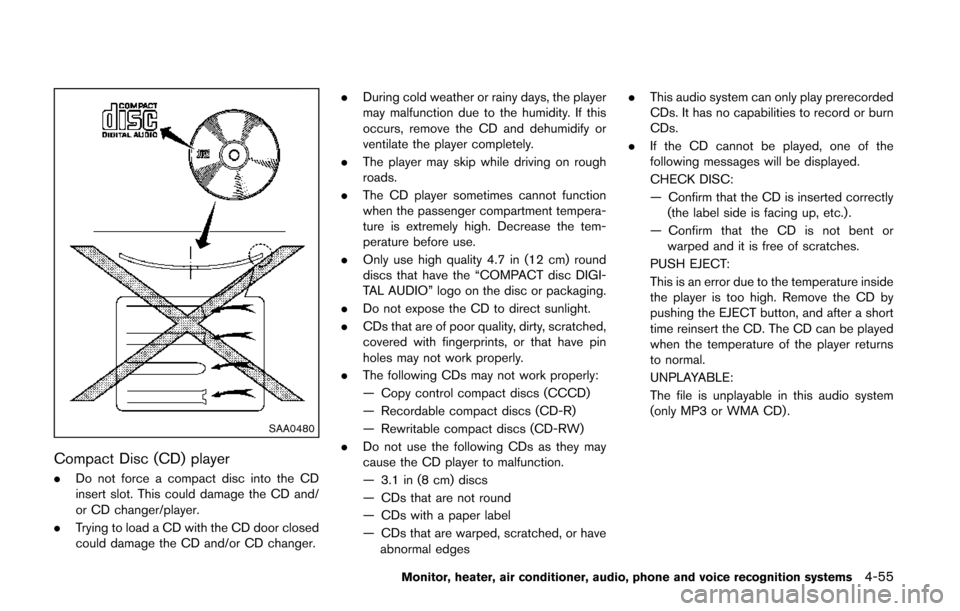
. Only use high quality 4.7 in (12 cm) round
discs that have the “COMPACT disc DIGI-
TAL AUDIO” logo on the disc or packaging.
. Do not expose the CD to direct sunlight.
. CDs that are of poor quality, dirty, scratched,
covered with fingerprints, or that have pin
holes may not work properly.
. The following CDs may not work properly:
— Copy control compact discs (CCCD)
— Recordable compact discs (CD-R)
— Rewritable compact discs (CD-RW)
. Do not use the following CDs as they may
cause the CD player to malfunction.
— 3.1 in (8 cm) discs
— CDs that are not round
— CDs with a paper label
— CDs that are warped, scratched, or have
abnormal edges .
This audio system can only play prerecorded
CDs. It has no capabilities to record or burn
CDs.
. If the CD cannot be played, one of the
following messages will be displayed.
CHECK DISC:
— Confirm that the CD is inserted correctly
(the label side is facing up, etc.).
— Confirm that the CD is not bent or warped and it is free of scratches.
PUSH EJECT:
This is an error due to the temperature inside
the player is too high. Remove the CD by
pushing the EJECT button, and after a short
time reinsert the CD. The CD can be played
when the temperature of the player returns
to normal.
UNPLAYABLE:
The file is unplayable in this audio system
(only MP3 or WMA CD) .
Monitor, heater, air conditioner, audio, phone and voice recognition systems4-55
Page 239 of 482
4-56Monitor, heater, air conditioner, audio, phone and voice recognition systems
LHA0484
DVD (Digital Versatile Disc) player (if so
equipped)
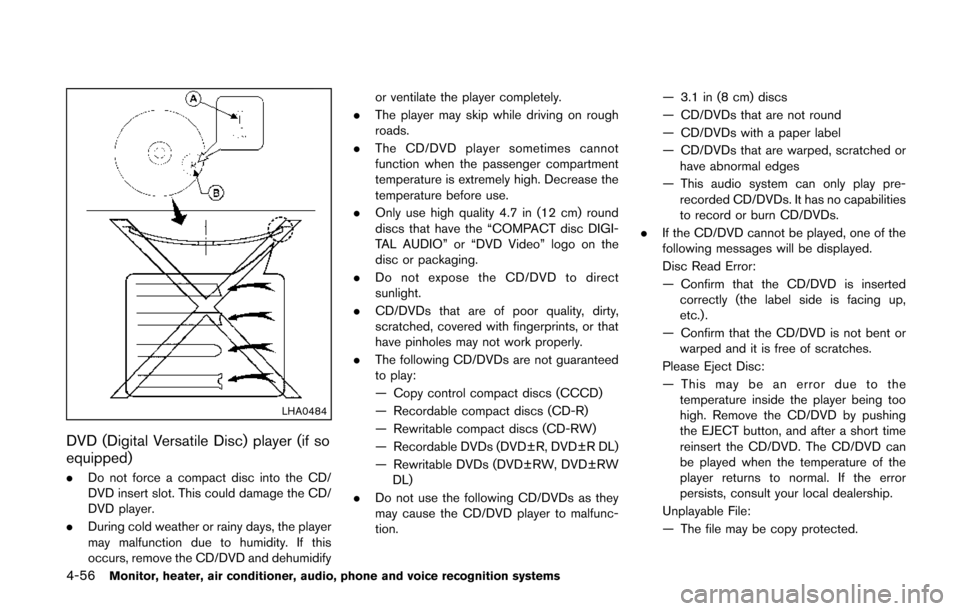
.Do not force a compact disc into the CD/
DVD insert slot. This could damage the CD/
DVD player.
. During cold weather or rainy days, the player
may malfunction due to humidity. If this
occurs, remove the CD/DVD and dehumidify or ventilate the player completely.
. The player may skip while driving on rough
roads.
. The CD/DVD player sometimes cannot
function when the passenger compartment
temperature is extremely high. Decrease the
temperature before use.
. Only use high quality 4.7 in (12 cm) round
discs that have the “COMPACT disc DIGI-
TAL AUDIO” or “DVD Video” logo on the
disc or packaging.
. Do not expose the CD/DVD to direct
sunlight.
. CD/DVDs that are of poor quality, dirty,
scratched, covered with fingerprints, or that
have pinholes may not work properly.
. The following CD/DVDs are not guaranteed
to play:
— Copy control compact discs (CCCD)
— Recordable compact discs (CD-R)
— Rewritable compact discs (CD-RW)
— Recordable DVDs (DVD±R, DVD±R DL)
— Rewritable DVDs (DVD±RW, DVD±RW
DL)
. Do not use the following CD/DVDs as they
may cause the CD/DVD player to malfunc-
tion. — 3.1 in (8 cm) discs
— CD/DVDs that are not round
— CD/DVDs with a paper label
— CD/DVDs that are warped, scratched or
have abnormal edges
— This audio system can only play pre- recorded CD/DVDs. It has no capabilities
to record or burn CD/DVDs.
. If the CD/DVD cannot be played, one of the
following messages will be displayed.
Disc Read Error:
— Confirm that the CD/DVD is inserted
correctly (the label side is facing up,
etc.).
— Confirm that the CD/DVD is not bent or warped and it is free of scratches.
Please Eject Disc:
— This may be an error due to the temperature inside the player being too
high. Remove the CD/DVD by pushing
the EJECT button, and after a short time
reinsert the CD/DVD. The CD/DVD can
be played when the temperature of the
player returns to normal. If the error
persists, consult your local dealership.
Unplayable File:
— The file may be copy protected.
Page 282 of 482
AUX Menu
When the “Menu” key on the display is selected
while in the AUX mode, the menu screen will be
displayed.
Display Mode:
Choose the display mode from the following
items.
.Normal
. Wide
. Cinema
Volume Settings (models with navigation
system):
Choose the volume setting from the following
items.
. Low
. Medium
. High
Display (models with navigation system):
Adjust the image quality of the screen, select the
preferred adjustment items.
SAA0451
CD/DVD/USB MEMORY CARE AND
CLEANING
CD/DVD
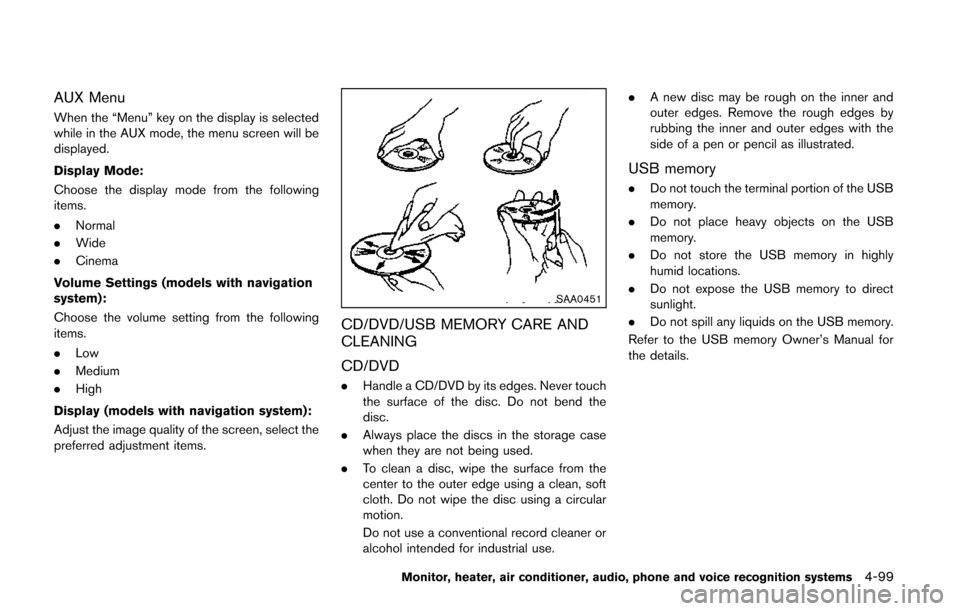
. Handle a CD/DVD by its edges. Never touch
the surface of the disc. Do not bend the
disc.
. Always place the discs in the storage case
when they are not being used.
. To clean a disc, wipe the surface from the
center to the outer edge using a clean, soft
cloth. Do not wipe the disc using a circular
motion.
Do not use a conventional record cleaner or
alcohol intended for industrial use. .
A new disc may be rough on the inner and
outer edges. Remove the rough edges by
rubbing the inner and outer edges with the
side of a pen or pencil as illustrated.
USB memory
.Do not touch the terminal portion of the USB
memory.
. Do not place heavy objects on the USB
memory.
. Do not store the USB memory in highly
humid locations.
. Do not expose the USB memory to direct
sunlight.
. Do not spill any liquids on the USB memory.
Refer to the USB memory Owner’s Manual for
the details.
Monitor, heater, air conditioner, audio, phone and voice recognition systems4-99
Page 284 of 482
.Pushing the menu control switch will show
the XM Menu.
iPod
®(if so equipped):
. Tilting up/down for less than 1.5 seconds
will skip up/down to the next or previous
track.
. Tilting up/down for more than 1.5 seconds
will skip to the next or previous playlist.
. Pushing the menu control switch will show
the iPod Menu.
CD:
. Tilting up/down for less than 1.5 seconds
will skip up/down to the next or previous
track.
. Tilting up/down for more than 1.5 seconds
will skip up/down to the next or previous
folder number (if playing compressed audio
files) .
. Pushing the menu control switch will show
the CD Menu.
DVD (if so equipped):
. Tilting up/down for less than 1.5 seconds
will skip up/down to the next or previous
track.
. Tilting up/down for more than 1.5 seconds
will skip up/down to the next or previous
title. .
Pushing the menu control switch will select
an item from the DVD display.
. When the transparent operation menu ap-
pears, the switch will control the menu.
USB (if so equipped):
. Tilting up/down for less than 1.5 seconds
will skip up/down to the next or previous
track.
. Tilting up/down for more than 1.5 seconds
will skip up/down to the next or previous
folder number
. Pushing the menu control switch will show
the USB Menu.
Bluetooth
®Audio (models with navigation
system):
. Tilting up/down for less than 1.5 seconds
will skip up/down to the next or previous
track.
BACK switch (models with navi-
gation system)
Push this switch to go back to the previous
screen or cancel the selection if it is not
completed.
Volume control switches
Push the upper (+) or lower (−) side switch to
increase or decrease the volume.
SOURCE select switch
Push the source select switch to change the
mode to available audio source.
ANTENNA
Window antenna
The antenna pattern is printed inside the rear
side window.
CAUTION
. Do not place metalized film near the
rear side window glass or attach any
metal parts to it. This may cause
poor reception or noise.
. When cleaning the inside of the rear
side window, be careful not to
scratch or damage the rear side
window antenna. Lightly wipe along
the antenna with a dampened soft
cloth.
Monitor, heater, air conditioner, audio, phone and voice recognition systems4-101
Page 296 of 482
controller and tilt the joystick to the right or left.
Push the BACK button on the remote controller
to apply the settings and return to the previous
display.
To return the adjustment levels to the default
value, select “Execute” next to “Initialization”
using the joystick on the remote controller and
push the ENTER
button. The “Execute” key
is deactivated when the picture mode settings
are already in the default value.
Color System:
To choose the color system, select from
“NTSC”, “PAL”, “PAL-60”, “PAL-M”, “PAL-N” or
“AUTO” using the joystick on the remote
controller and tilt the joystick to the right or left.
3D Y/C filter:
Set to ON/OFF using the joystick on the remote
controller. When turned on, small characters
and an outline of the shapes will be displayed
more clearly than when turned off.
CARE AND MAINTENANCE
Use a lightly dampened, lint free cloth to clean
the surfaces of your Mobile Entertainment
System (DVD player face, screen, remote
controller, etc.) .
CAUTION
. Do not use any solvents or cleaning
solutions when cleaning the video
system.
. Do not use excessive force on the
monitor screen.
. Avoid touching or scratching the
monitor screen as it may become
dirty or damaged.
. Do not attempt to operate the
system in extreme temperature con-
ditions [below −48F( −208 C) and
above 1588F (708C)].
. Do not attempt to operate the
system in extreme humidity condi-
tions (less than 10% or more than
75%) . When installing a car phone or a CB radio in
your vehicle, be sure to observe the following
cautions, otherwise the new equipment may
adversely affect the electronic control modules
and electronic control system harness.
WARNING
.
A cellular phone should not be used
for any purpose while driving so full
attention may be given to vehicle
operation. Some jurisdictions prohi-
bit the use of cellular phones while
driving.
. If you must make a call while your
vehicle is in motion, the hands-free
cellular phone operational mode (if
so equipped) is highly recom-
mended. Exercise extreme caution
at all times so full attention may be
given to vehicle operation.
. If a conversation in a moving vehicle
requires you to take notes, pull off
the road to a safe location and stop
your vehicle before doing so.
Monitor, heater, air conditioner, audio, phone and voice recognition systems4-113
CAR PHONE OR CB RADIO