2014 NISSAN PATHFINDER HYBRID turn signal
[x] Cancel search: turn signalPage 319 of 571
The sunload sensor, located on the top driver’s
side of the instrument panel, helps the system
maintain a constant temperature. Do not put any-
thing on or around this sensor.The air conditioner system in your NISSAN ve-
hicle is charged with a refrigerant designed with
the environment in mind.
This refrigerant does not harm the earth’s
ozone layer.
Special charging equipment and lubricant is re-
quired when servicing your NISSAN air condi-
tioner. Using improper refrigerants or lubricants
will cause severe damage to your air conditioner
system. See “Air conditioner system refrigerant
and oil recommendations” in the “Technical and
consumer information” section of this manual.
A NISSAN dealer is able to service your “environ-
mentally friendly” air conditioning system.
WARNING
The air conditioner system contains re-
frigerant under high pressure. To avoid
personal injury, any air conditioner ser-
vice should be done only by an experi-
enced technician with proper equipment.
RADIO
Place the ignition switch in the ACC or ON
position and press the VOL (volume)/ON·OFF
(power) knob to turn the radio on. If you listen to
the radio with the engine not running, the ignition
switch should be placed in the ACC position.
Radio reception is affected by station signal
strength, distance from radio transmitter, build-
ings, bridges, mountains and other external influ-
ences. Intermittent changes in reception quality
normally are caused by these external influences.
Using a cellular phone in or near the ve-
hicle may influence radio reception quality.
Radio reception
Your NISSAN radio system is equipped with
state-of-the-art electronic circuits to enhance ra-
dio reception. These circuits are designed to
extend reception range, and to enhance the qual-
ity of that reception.
However, there are some general characteristics
of both FM and AM radio signals that can affect
radio reception quality in a moving vehicle, even
when the finest equipment is used. These char-
acteristics are completely normal in a given re-
ception area and do not indicate any malfunction
in your NISSAN radio system.
LHA2473
SERVICING AIR CONDITIONER AUDIO SYSTEM
Monitor, climate, audio, phone and voice recognition systems4-49
Page 337 of 571
FM/AM radio operation
FM/AM band select:
Pressing the AM·FM button will change the band
as follows:
AM→FM1 →FM2 →AM
When the AM·FM button is pressed while the
ignition switch is in the ACC or ON position, the
radio will come on at the station last played.
The last station played will also come on when
the VOL/ON·OFF control knob is pressed ON.
If a compact disc is playing when the AM·FM
button is pressed, the compact disc will auto-
matically be turned off and the last radio station
played will come on.
The FM stereo indicator ST will illuminate during
FM stereo reception. When the stereo broadcast
signal is weak, the radio will automatically change
from stereo to monaural reception.
TUNE/FOLDER (Tuning) knob:
To manually tune the radio, turn the
TUNE/FOLDER knob to the right or left.
SEEK/CAT and TRACK tuning buttons:
Press the SEEK/CAT
button or the
TRACK
button to tune from high to low or
low to high frequencies and stop at the next
broadcasting station.
SCAN tuning:
Press the SCAN button to stop at each broad-
casting station for 5 seconds. Pressing the
SCAN button again during this 5-second period
will stop scan tuning and the radio will remain
tuned to that station. If the SCAN button is not
pressed within 5 seconds, scan tuning moves to
the next station.
1 to 6 Station memory operations:
Twelve stations can be set for the FM band (6 for
FM1, 6 for FM2) and six stations can be set for
the AM band.
1. Choose the radio band AM, FM1 or FM2 using the AM·FM select button.
2. Tune to the desired station using manual, SEEK or SCAN tuning. Press and hold any
of the desired station memory buttons (1 –
6) until a beep sound is heard. 3. The channel indicator will then come on and
the sound will resume. Programming is now
complete.
4. Other buttons can be set in the same man- ner.
If the battery cable is disconnected or if the fuse
opens, the radio memory will be canceled. In that
case, reset the desired stations.
Compact disc (CD) changer operation
Place the ignition switch in the ACC or ON
position and press the LOAD button, then press
one of the CD insert (1 – 6) slots. Insert the
compact disc into the slot with the label side
facing up. The compact disc will be guided auto-
matically into the slot and start playing.
If the radio is already operating, it will automati-
cally turn off and the compact disc will play.
If the system has been turned off while a compact
disc was playing, pressing the VOL/ON·OFF
control knob will start the compact disc.
LOAD button:
To insert a CD in the CD changer, press the
LOAD button for less than 1.5 seconds. Select
the loading slot by pressing the CD insert select
button (1 – 6) , then insert the CD.
Monitor, climate, audio, phone and voice recognition systems4-67
Page 342 of 571
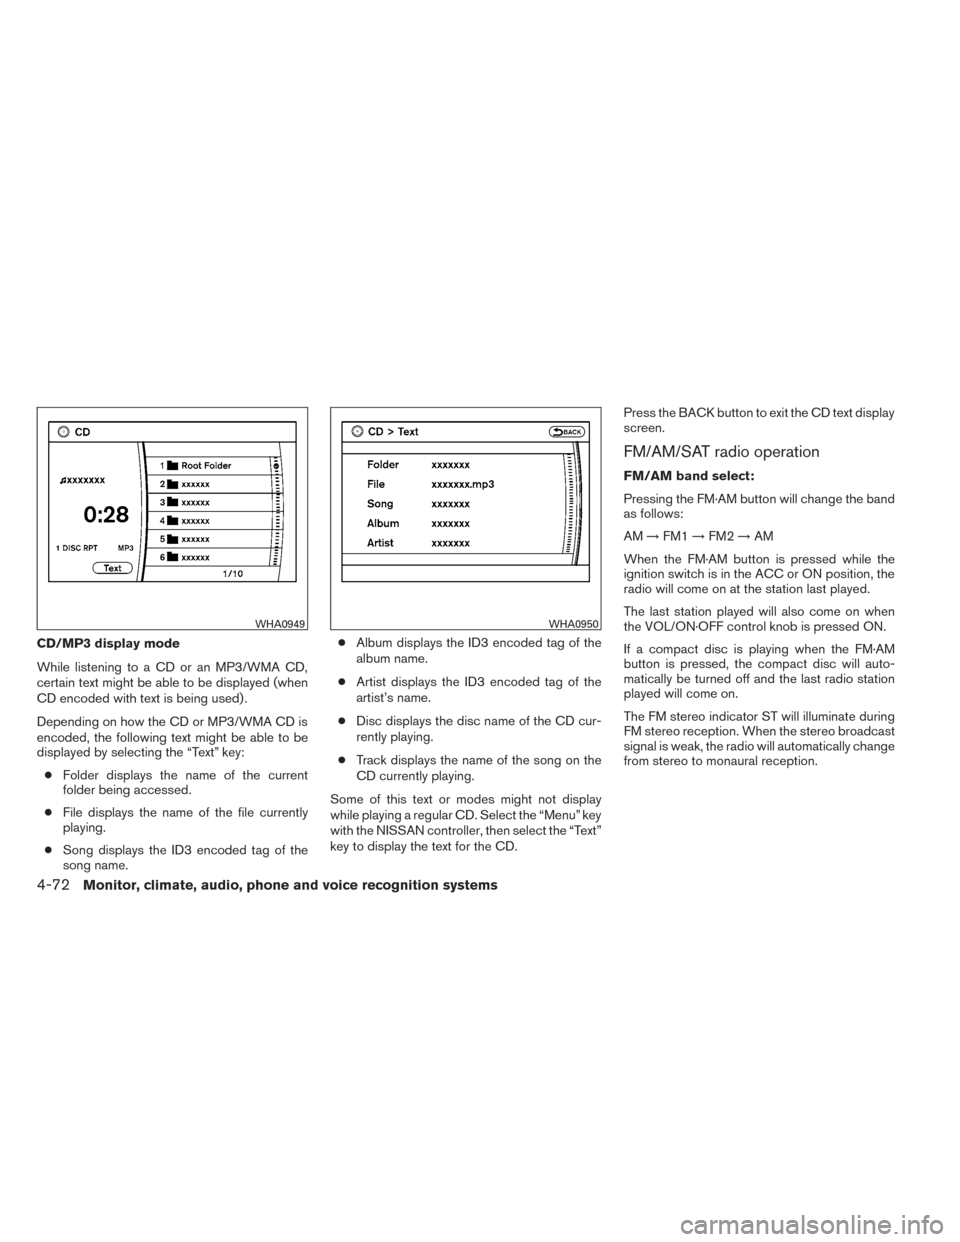
CD/MP3 display mode
While listening to a CD or an MP3/WMA CD,
certain text might be able to be displayed (when
CD encoded with text is being used) .
Depending on how the CD or MP3/WMA CD is
encoded, the following text might be able to be
displayed by selecting the “Text” key:● Folder displays the name of the current
folder being accessed.
● File displays the name of the file currently
playing.
● Song displays the ID3 encoded tag of the
song name. ●
Album displays the ID3 encoded tag of the
album name.
● Artist displays the ID3 encoded tag of the
artist’s name.
● Disc displays the disc name of the CD cur-
rently playing.
● Track displays the name of the song on the
CD currently playing.
Some of this text or modes might not display
while playing a regular CD. Select the “Menu” key
with the NISSAN controller, then select the “Text”
key to display the text for the CD. Press the BACK button to exit the CD text display
screen.
FM/AM/SAT radio operation
FM/AM band select:
Pressing the FM·AM button will change the band
as follows:
AM
→FM1 →FM2 →AM
When the FM·AM button is pressed while the
ignition switch is in the ACC or ON position, the
radio will come on at the station last played.
The last station played will also come on when
the VOL/ON·OFF control knob is pressed ON.
If a compact disc is playing when the FM·AM
button is pressed, the compact disc will auto-
matically be turned off and the last radio station
played will come on.
The FM stereo indicator ST will illuminate during
FM stereo reception. When the stereo broadcast
signal is weak, the radio will automatically change
from stereo to monaural reception.
WHA0949WHA0950
4-72Monitor, climate, audio, phone and voice recognition systems
Page 349 of 571
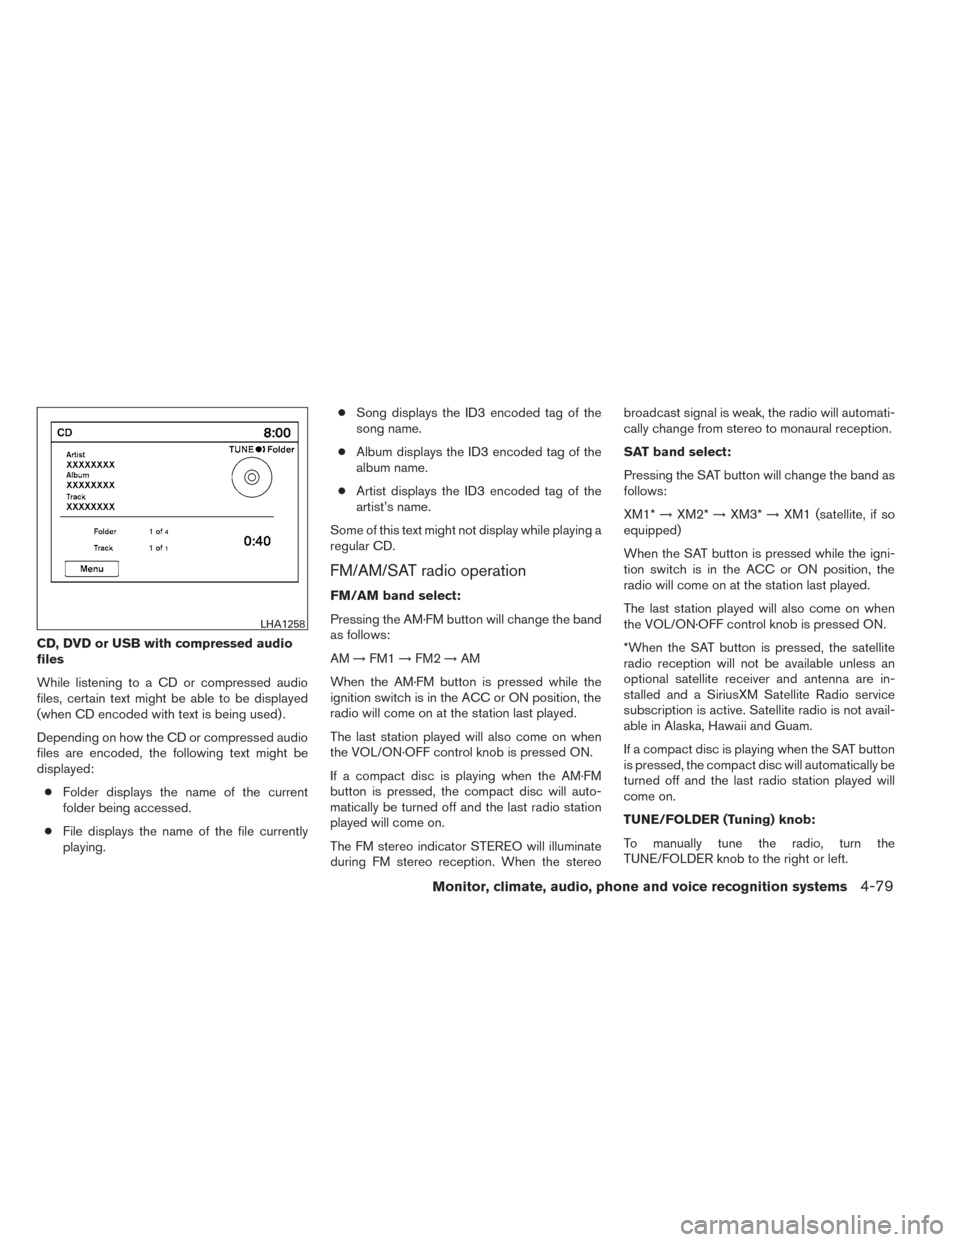
CD, DVD or USB with compressed audio
files
While listening to a CD or compressed audio
files, certain text might be able to be displayed
(when CD encoded with text is being used) .
Depending on how the CD or compressed audio
files are encoded, the following text might be
displayed:● Folder displays the name of the current
folder being accessed.
● File displays the name of the file currently
playing. ●
Song displays the ID3 encoded tag of the
song name.
● Album displays the ID3 encoded tag of the
album name.
● Artist displays the ID3 encoded tag of the
artist’s name.
Some of this text might not display while playing a
regular CD.
FM/AM/SAT radio operation
FM/AM band select:
Pressing the AM·FM button will change the band
as follows:
AM →FM1 →FM2 →AM
When the AM·FM button is pressed while the
ignition switch is in the ACC or ON position, the
radio will come on at the station last played.
The last station played will also come on when
the VOL/ON·OFF control knob is pressed ON.
If a compact disc is playing when the AM·FM
button is pressed, the compact disc will auto-
matically be turned off and the last radio station
played will come on.
The FM stereo indicator STEREO will illuminate
during FM stereo reception. When the stereo broadcast signal is weak, the radio will automati-
cally change from stereo to monaural reception.
SAT band select:
Pressing the SAT button will change the band as
follows:
XM1*
→XM2* →XM3* →XM1 (satellite, if so
equipped)
When the SAT button is pressed while the igni-
tion switch is in the ACC or ON position, the
radio will come on at the station last played.
The last station played will also come on when
the VOL/ON·OFF control knob is pressed ON.
*When the SAT button is pressed, the satellite
radio reception will not be available unless an
optional satellite receiver and antenna are in-
stalled and a SiriusXM Satellite Radio service
subscription is active. Satellite radio is not avail-
able in Alaska, Hawaii and Guam.
If a compact disc is playing when the SAT button
is pressed, the compact disc will automatically be
turned off and the last radio station played will
come on.
TUNE/FOLDER (Tuning) knob:
To manually tune the radio, turn the
TUNE/FOLDER knob to the right or left.
LHA1258
Monitor, climate, audio, phone and voice recognition systems4-79
Page 389 of 571
phone module when the ignition switch is placed
in the ON position with the previously connected
cellular phone turned on and carried in the ve-
hicle.
You can connect up to 5 different Bluetooth®
cellular phones to the in-vehicle phone module.
However, you can talk on only one cellular phone
at a time.
Before using the Bluetooth® Hands-Free Phone
System, refer to the following notes.● Set up the wireless connection between a
compatible cellular phone and the in-vehicle
phone module before using the hands-free
phone system.
●
Some Bluetooth® enabled cellular phones may
not be recognized by the in-vehicle phone mod-
ule. Please visit www.nissanusa.com/bluetooth
for a recommended phone list and connecting
instructions.
● You will not be able to use a hands-free
phone under the following conditions:
– Your vehicle is outside of the cellular ser- vice area. – Your vehicle is in an area where it is
difficult to receive a cellular signal; such
as in a tunnel, in an underground parking
garage, near a tall building or in a moun-
tainous area.
– Your cellular phone is locked to prevent it from being dialed.
● When the radio wave condition is not ideal
or ambient sound is too loud, it may be
difficult to hear the other person’s voice dur-
ing a call.
● Do not place the cellular phone in an area
surrounded by metal or far away from the
in-vehicle phone module to prevent tone
quality degradation and wireless connection
disruption.
● While a cellular phone is connected through
the Bluetooth® wireless connection, the
battery power of the cellular phone may dis-
charge quicker than usual. The Bluetooth®
Hands-Free Phone System cannot charge
cellular phones.
● If the hands-free phone system seems to be
malfunctioning, see “Troubleshooting guide”
in this section. You can also visit
www.nissanusa.com/bluetooth for trouble-
shooting help. ●
Some cellular phones or other devices may
cause interference or a buzzing noise to
come from the audio system speakers. Stor-
ing the device in a different location may
reduce or eliminate the noise.
● Refer to the cellular phone Owner’s Manual
regarding the telephone charges, cellular
phone antenna and body, etc.
REGULATORY INFORMATION
FCC Regulatory information
– CAUTION: To maintain compliance with FCC’s RF exposure guidelines, use only the
supplied antenna. Unauthorized antenna,
modification, or attachments could damage
the transmitter and may violate FCC regula-
tions.
– Operation is subject to the following two con- ditions:
1. This device may not cause interference and
2. this device must accept any interference, including interference that may cause unde-
sired operation of the device.
Monitor, climate, audio, phone and voice recognition systems4-119
Page 402 of 571
phone module when the ignition switch is placed
in the ON position with the connected cellular
phone turned on and carried in the vehicle.
You can register up to 5 different Bluetooth®
cellular phones to the in-vehicle phone module.
However, you can talk on only one cellular phone
at a time.
NISSAN Voice Recognition system supports the
phone commands, so dialing a phone number
using your voice is possible. For more details, see
“NISSAN Voice Recognition System” in this sec-
tion.
Before using the Bluetooth® Hands-Free Phone
System, refer to the following notes.● Set up the wireless connection between a
cellular phone and the in-vehicle phone
module before using the hands-free phone
system.
● Some Bluetooth® enabled cellular phones
may not be recognized by the in-vehicle
phone module. Please visit
www.nissanusa.com/bluetooth for a recom-
mended phone list and connecting.
● You will not be able to use a hands-free
phone under the following conditions:
– Your vehicle is outside of the cellular ser- vice area. – Your vehicle is in an area where it is
difficult to receive cellular signal; such as
in a tunnel, in an underground parking
garage, near a tall building or in a moun-
tainous area.
– Your cellular phone is locked to prevent it from being dialed.
● When the radio wave condition is not ideal
or ambient sound is too loud, it may be
difficult to hear the other person’s voice dur-
ing a call.
● Immediately after the ignition switch is
placed in the ON position, it may be impos-
sible to receive a call for a short period of
time.
● Do not place the cellular phone in an area
surrounded by metal or far away from the
in-vehicle phone module to prevent tone
quality degradation and wireless connection
disruption.
● While a cellular phone is connected through
the Bluetooth® wireless connection, the
battery power of the cellular phone may dis-
charge quicker than usual. The Bluetooth®
Hands-Free Phone System cannot charge
cellular phones. ●
If the hands-free phone system seems to be
malfunctioning, see “Troubleshooting guide”
in this section. You can also visit
www.nissanusa.com/bluetooth for trouble-
shooting help.
● Some cellular phones or other devices may
cause interference or a buzzing noise to
come from the audio system speakers. Stor-
ing the device in a different location may
reduce or eliminate the noise.
● Refer to the cellular phone owner’s manual
regarding the telephone charges, cellular
phone antenna and body, etc.
● The signal strength display on the monitor
will not coincide with the signal strength
display of some cellular phones.
● If reception between callers is unclear, ad-
justing the incoming or outgoing call volume
may improve the clarity. See “Call volume” in
this section.
4-132Monitor, climate, audio, phone and voice recognition systems
Page 468 of 571
To shut off the engine in an emergency situation
while driving, perform the following procedure:
– Rapidly push the push-button ignition switch 3consecutive times in less than 1.5 seconds, or
– Push and hold the push-button ignition switch for more than 2 seconds.
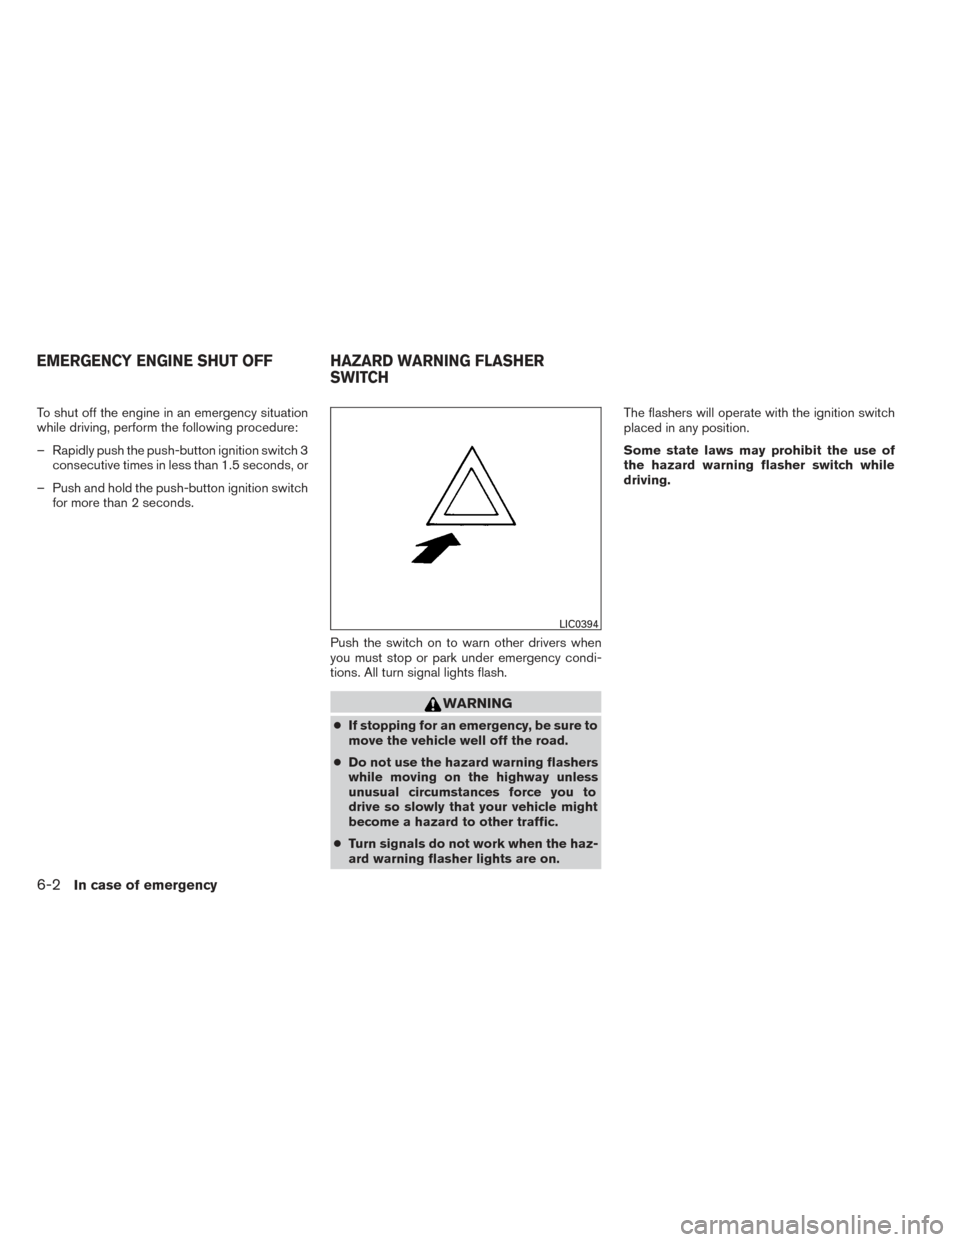
Push the switch on to warn other drivers when
you must stop or park under emergency condi-
tions. All turn signal lights flash.
WARNING
●If stopping for an emergency, be sure to
move the vehicle well off the road.
● Do not use the hazard warning flashers
while moving on the highway unless
unusual circumstances force you to
drive so slowly that your vehicle might
become a hazard to other traffic.
● Turn signals do not work when the haz-
ard warning flasher lights are on. The flashers will operate with the ignition switch
placed in any position.
Some state laws may prohibit the use of
the hazard warning flasher switch while
driving.
LIC0394
EMERGENCY ENGINE SHUT OFF HAZARD WARNING FLASHER
SWITCH
6-2In case of emergency
Page 469 of 571
TIRE PRESSURE MONITORING
SYSTEM (TPMS)
This vehicle is equipped with the Tire Pressure
Monitoring System (TPMS) . It monitors tire pres-
sure of all tires except the spare. When the low
tire pressure warning light is lit, and the Tire
Pressure Low - Add Air warning appears in the
vehicle information display, one or more of your
tires is significantly under-inflated. If equipped,
the system also displays pressure of all tires
(except the spare tire) on the display screen by
sending a signal from a sensor that is installed in
each wheel. If the vehicle is being driven with low
tire pressure, the TPMS will activate and warn
you of it by the low tire pressure warning light.
This system will activate only when the vehicle is
driven at speeds above 16 MPH (25 km/h). For
more details, refer to “Warning/indicator lights
and audible reminders” in the “Instruments and
controls” section and “Tire Pressure Monitoring
System (TPMS)” in the “Starting and driving”
section.
WARNING
●Radio waves could adversely affect
electric medical equipment. Those who
use a pacemaker should contact the
electric medical equipment manufac-
turer for the possible influences before
use.
● If the low tire pressure warning light
illuminates while driving, avoid sudden
steering maneuvers or abrupt braking,
reduce vehicle speed, pull off the road
to a safe location and stop the vehicle
as soon as possible. Driving with under-
inflated tires may permanently damage
the tires and increase the likelihood of
tire failure. Serious vehicle damage
could occur and may lead to an acci-
dent and could result in serious per-
sonal injury. Check the tire pressure for
all four tires. Adjust the tire pressure to
the recommended COLD tire pressure
shown on the Tire and Loading Informa-
tion label to turn the low tire pressure
warning light OFF. If you have a flat tire,
replace it with a spare tire as soon as
possible. ●
When a spare tire is mounted or a wheel
is replaced, tire pressure will not be
indicated, the TPMS will not function
and the low tire pressure warning light
will flash for approximately 1 minute.
The light will remain on after 1 minute.
Contact your NISSAN dealer as soon as
possible for tire replacement and/or
system resetting.
● Replacing tires with those not originally
specified by NISSAN could affect the
proper operation of the TPMS.
● Do not inject any tire liquid or aerosol
tire sealant into the tires, as this may
cause a malfunction of the tire pressure
sensors.
CHANGING A FLAT TIRE
If you have a flat tire, follow the instructions be-
low:
Stopping the vehicle
1. Safely move the vehicle off the road and
away from traffic.
2. Turn on the hazard warning flashers.
3. Park on a level surface and apply the parking brake. Move the shift lever to P (Park) .
FLAT TIRE
In case of emergency6-3