2014 NISSAN LEAF brakes
[x] Cancel search: brakesPage 30 of 397
Li-ion battery is fully charged to prevent
the Li-ion battery from becoming over-
charged. Regenerating brake is also auto-
matically reduced when the battery tem-
perature is high/low (indicated by the red/
blue zones on the Li-ion battery
temperature gauge) to prevent Li-ion bat-
tery damage.
•The brake pedal should be used to slow or
stop the vehicle depending on traffic or
road conditions. The vehicle brakes are
not affected by regenerative brake system
operation.NOISE AND VIBRATION
You might experience the following noise or vi-
bration as a normal characteristic of this vehicle.
• Traction motor noise from motor compartment.
• Water pump and radiator fan noise while charg-
ing.
• Compressor and radiator fan noise when the
Climate Ctrl. Timer or remote climate control
(models with navigation system) is used.
• Relay operation noise and vibration at start-up
and shut-down of the EV (Electric Vehicle) sys-
tem (power switch placed in the ON and OFF
position) .
• Approaching Vehicle Sound for Pedestrians
(VSP) .This section provides a brief explanation for the
most important LEAF functions. Refer to the spe-
cific sections of this manual for detailed explana-
tions of the vehicle features and operation.
CHARGING THE LI-ION BATTERY
WARNING
The EV (Electric Vehicle) system uses a
high voltage current. Failure to follow the
proper handling instructions may cause
serious injury or death. Be sure to read
the “Charge” section and follow the pro-
cedures and guidelines described.
LIFE WITH AN EV (SCENE GUIDE)
EV-10EV Overview
Page 44 of 397
• Release the accelerator pedal to slow down
and do not apply the brakes when traffic and
road conditions allow.
– This vehicle is equipped with a regenerative
brake system. The primary purpose of re-
generative brake system is to provide some
power to recharge the Li-ion battery and
extend driving range. A secondary benefit is
“engine braking” that operates based on
Li-ion battery conditions. In the D (Drive)
position, when the accelerator is released,
the regenerative brake system provides
some deceleration and some power to the
Li-ion battery.
LI-ION BATTERY LIFE
The Li-ion battery’s ability to hold a charge, like all
batteries, decreases with battery age and usage
which results in decreased vehicle range when
compared to the vehicle range when the vehicle
was new. This is normal and expected, and does
not indicate a malfunction of the vehicle or Li-ion
battery.The Li-ion battery’s ability to hold a charge can be
affected by how you drive the vehicle, store the
vehicle, how you charge the Li-ion battery and
Li-ion battery temperature during vehicle opera-
tion and charging.
To maximize the battery’s useful life, use the fol-
lowing driving and charging habits where pos-
sible:
• Avoid exposing a vehicle to extreme ambient
temperatures for extended periods.
• Avoid storing a vehicle in temperatures below
−13°F (−25°C) for over 7 days.
• Avoid leaving your vehicle for over 14 days
where the Li-ion battery available charge gauge
reaches a zero or near zero (state of charge) .
• Allow the vehicle and Li-ion battery to cool
down after use before charging.
• Park/store your vehicle in cool locations out of
direct sunlight and away from heat sources.
• Avoid sustained high battery temperatures
(caused, for example, by exposure to very high
ambient temperatures or extending highway
driving with multiple quick charges) .• Use the normal charging or trickle charging
methods to charge the Li-ion battery and mini-
mize the use of public Fast Charge or Quick
Charger.
• Avoid repetitive charging of the Li-ion battery
with high battery state of charge.
• Moderate driving.
• Use of ECO mode.
• If the vehicle will not be used for an extended
period of time, charge the Li-ion battery once
every 3 months. Do not operate the charging
timer repeatedly while the charge connector is
connected to the vehicle after the Li-ion battery
charging is completed. Doing so may discharge
the 12-volt battery.
The power of the Li-ion battery can be checked
on the Li-ion battery available charge gauge.
See “Li-ion battery available charge gauge” in
the “Instruments and controls” for details.
EV-24EV Overview
Page 152 of 397
cooperative regenerative brake and/or the elec-
tronically driven intelligent brake systems are not
functioning properly. Have the system checked
by a NISSAN certified LEAF dealer. If the BRAKE
warning light (red) also illuminates, stop the ve-
hicle immediately and contact a NISSAN certified
LEAF dealer. For additional information, see
“Brakes” in the “Starting and driving” section.
WARNING
• Pressing the brake pedal when the
power switch position is not in the ON
or READY to drive position and/or low
brake fluid level may increase the
stopping distance and braking will re-
quire greater pedal effort as well as
pedal travel.
• If the brake fluid level is below the
minimum or MIN mark on the brake
fluid reservoir, do not drive until the
brake system has been checked at a
NISSAN certified LEAF dealer.• The cooperative regenerative brake
system may not be working properly if
the brake system warning light illumi-
nates when the READY to drive indica-
tor light is ON. If you judge it to be safe,
drive carefully to the nearest service
station for repairs. Otherwise, have
your vehicle towed because driving
could be dangerous.orBRAKE warning
light (red)
When the power switch is placed in the ON
position or in the READY to drive position, the
light remains illuminated for about a few seconds.
If the light illuminates at any other time, it may
indicate that the hydraulic brake system is not
functioning properly. If the BRAKE warning light
illuminates, stop the vehicle immediately and
contact a NISSAN certified LEAF dealer.
Parking brake indicator:
When the ignition switch is placed in the ON
position, the light comes on when the parking
brake is applied.
Low brake fluid warning light:
When the power switch is in the ON position, the
light warns of a low brake fluid level. If this warn-ing light illuminates, the Vehicle Dynamic Control
(VDC) warning light and the brake system warn-
ing light (yellow) also illuminate.
If the light illuminates while the power switch is in
the READY to drive position with the parking
brake not applied, stop the vehicle and perform
the following items.
1. Check the brake fluid level. If brake fluid is
necessary, add fluid and have the system
checked by a NISSAN certified LEAF dealer.
See “Brake fluid” in the “Maintenance and
do-it-yourself” section.
2. If the brake fluid level is correct, have the
warning system checked by a NISSAN certi-
fied LEAF dealer.
WARNING
• Your brake system may not be working
properly if the warning light is on. Driv-
ing could be dangerous. If you judge
the brake system to be safe, drive care-
fully to the nearest service station for
repairs. Otherwise, have your vehicle
towed because driving it could be dan-
gerous.
2-16Instruments and controls
Page 158 of 397
charged in order to be driven. See “Low battery
charge warning light”.
Security indicator light
This light blinks when the power switch is in the
ACC, OFF or LOCK position. This function indi-
cates the security system equipped on the ve-
hicle is operational.
If the security system is malfunctioning, this light
will remain on while the power switch is in the ON
position. For additional information, see “Security
systems.
Turn signal/hazard indicator
lights
This light flashes when the turn signal switch
lever or hazard switch is turned on.
Vehicle Dynamic Control
(VDC) off indicator light
This light illuminates when the Vehicle Dynamic
Control (VDC) switch is pushed to OFF. This
indicates that the VDC system is not operating.
See “Vehicle Dynamic Control (VDC) system” in
the “Starting and driving” section.
AUDIBLE REMINDERS
Brake pad wear warning
The disc brake pads have audible wear warnings.
When a brake pad requires replacement, it will
make a high pitched scraping sound when the
vehicle is in motion. This scraping sound will first
occur only when the brake pedal is depressed.
After more wear of the brake pad, the sound will
always be heard even if the brake pedal is not
depressed. Have the brakes checked as soon as
possible if the warning sound is heard.
Electric shift control system reminder
chime
If an improper shift operation is performed, for
safety reasons a chime will sound and at the
same time, depending on the conditions, the
operation will be cancelled or the shift position
will switch to the N position.
For more details, see “Driving vehicle” in the
“Starting and driving” section.
Key reminder chime
A chime will sound if the driver’s side door is
opened while the power switch is pushed to the
ON or ACC position.Make sure that the power switch is pushed to the
OFF position, and take the Intelligent Key with
you when leaving the vehicle.
Light reminder chime
The light reminder chime will sound when the
driver side door is opened with the light switch in
the
orposition, and the power
switch in the ACC, OFF or LOCK position.
Turn the light switch off when you leave the
vehicle.
Parking brake reminder chime
A chime sounds if the parking brake is set and the
vehicle is driven. The chime will stop if the parking
brake is released or the vehicle speed returns to
zero.
Power switch reminder chime (if so
equipped)
The power switch reminder chime will sound
when the driver’s door is opened while the power
switch is in the ON or READY position. Push the
power switch to the OFF position.
2-22Instruments and controls
Page 285 of 397
tire briefly to release pressure. When the pres-
sure reaches the designated pressure, the horn
beeps once.
• If the hazard indicator does not flash within
approximately 15 seconds after starting to in-
flate the tire, it indicates that the Easy Fill Tire
Alert is not operating.
• The TPMS will not activate the Easy Fill Tire
Alert under the following conditions:
– If there is interference from an external de-
vice or transmitter.
– The air pressure from the inflation device is
not sufficient to inflate the tire such as those
using a power socket.
– If an electrical equipment is being used in or
near the vehicle.
– There is a malfunction in the TPMS system.
– There is a malfunction in the horn or hazard
indicators.
– If the Easy Fill Tire Alert does not operate
due to TPMS interference, move the vehicle
about 3 ft (1 m) backward or forward and try
again.
If the Easy Fill Tire Alert is not working, use a tire
pressure gauge.AVOIDING COLLISION AND
ROLLOVER
WARNING
Failure to operate this vehicle in a safe
and prudent manner may result in loss of
control or an accident.
Be alert and drive defensively at all times. Obey
all traffic regulations. Avoid excessive speed,
high speed cornering, or sudden steering ma-
neuvers, because these driving practices could
cause you to lose control of your vehicle.As with
any vehicle, a loss of control could result in
a collision with other vehicles or objects, or
cause the vehicle to rollover, particularly if
the loss of control causes the vehicle to
slide sideways.Be attentive at all times, and
avoid driving when tired. Never drive when under
the influence of alcohol or drugs (including pre-
scription or over-the-counter drugs which may
cause drowsiness) . Always wear your seat belt
as outlined in the “Seat belts” in the “Safety —
Seats seat belts and supplemental restraint sys-
tem” section of this manual, and also instruct your
passengers to do so.Seat belts help reduce the risk of injury in colli-
sions and rollovers.In a rollover crash, an
unbelted or improperly belted person is
significantly more likely to be injured or
killed than a person properly wearing a
seat belt.
OFF-ROAD RECOVERY
While driving, the right side or left side wheels
may unintentionally leave the road surface. If this
occurs, maintain control of the vehicle by follow-
ing the procedure below. Please note that this
procedure is only a general guide. The vehicle
must be driven as appropriate based on the con-
ditions of the vehicle, road and traffic.
1. Remain calm and do not overreact.
2. Do not apply the brakes.
3. Maintain a firm grip on the steering wheel with
both hands and try to hold a straight course.
4. When appropriate, slowly release the accel-
erator pedal to gradually slow the vehicle.
5. If there is nothing in the way, steer the vehicle
to follow the road while the vehicle speed is
reduced. Do not attempt to drive the vehicle
back onto the road surface until vehicle speed
is reduced.
Starting and driving5-5
Page 286 of 397
6. When it is safe to do so, gradually turn the
steering wheel until both tires return to the
road surface. When all tires are on the road
surface, steer the vehicle to stay in the appro-
priate driving lane.
• If you decide that it is not safe to return the
vehicle to the road surface based on vehicle,
road or traffic conditions, gradually slow the
vehicle to a stop in a safe place off the road.
RAPID AIR PRESSURE LOSS
Rapid air pressure loss or a “blow-out” can occur
if the tire is punctured or is damaged due to
hitting a curb or pothole. Rapid air pressure loss
can also be caused by driving on under-inflated
tires.
Rapid air pressure loss can affect the handling
and stability of the vehicle, especially at highway
speeds.
Help prevent rapid air pressure loss by maintain-
ing the correct air pressure and visually inspect
the tires for wear and damage. See “Wheels and
tires” in the “Maintenance and do-it-yourself”
section of this manual.
If a tire rapidly loses air pressure or “blows-out”
while driving maintain control of the vehicle by
following the procedure below. Please note thatthis procedure is only a general guide. The ve-
hicle must be driven as appropriate based on the
conditions of the vehicle, road and traffic.
WARNING
The following actions can increase the
chance of losing control of the vehicle if
there is a sudden loss of tire air pressure.
Losing control of the vehicle may cause a
collision and result in personal injury.
• The vehicle generally moves or pulls in
the direction of the flat tire.
• Do not rapidly apply the brakes.
• Do not rapidly release the accelerator
pedal.
• Do not rapidly turn the steering wheel.
1. Remain calm and do not overreact.
2. Maintain a firm grip on the steering wheel with
both hands and try to hold a straight course.
3. When appropriate, slowly release the accel-
erator pedal to gradually slow the vehicle.
4. Gradually steer the vehicle to a safe location
off the road and away from traffic if possible.
5. Lightly apply the brake pedal to gradually stop
the vehicle.
6. Turn on the hazard warning flashers and either
contact a roadside emergency service tochange the tire or see “Flat tire” in the “In case
of emergency” section of this Owner’s
Manual.DRINKING ALCOHOL/DRUGS AND
DRIVING
WARNING
Never drive under the influence of alco-
hol or drugs. Alcohol in the bloodstream
reduces coordination, delays reaction
time and impairs judgement. Driving af-
ter drinking alcohol increases the likeli-
hood of being involved in an accident
injuring yourself and others. Additionally,
if you are injured in an accident, alcohol
can increase the severity of the injury.
NISSAN is committed to safe driving. However,
you must choose not to drive under the influence
of alcohol. Every year thousands of people are
injured or killed in alcohol-related accidents. Al-
though the local laws vary on what is considered
to be legally intoxicated, the fact is that alcohol
affects all people differently and most people
underestimate the effects of alcohol.
5-6Starting and driving
Page 294 of 397
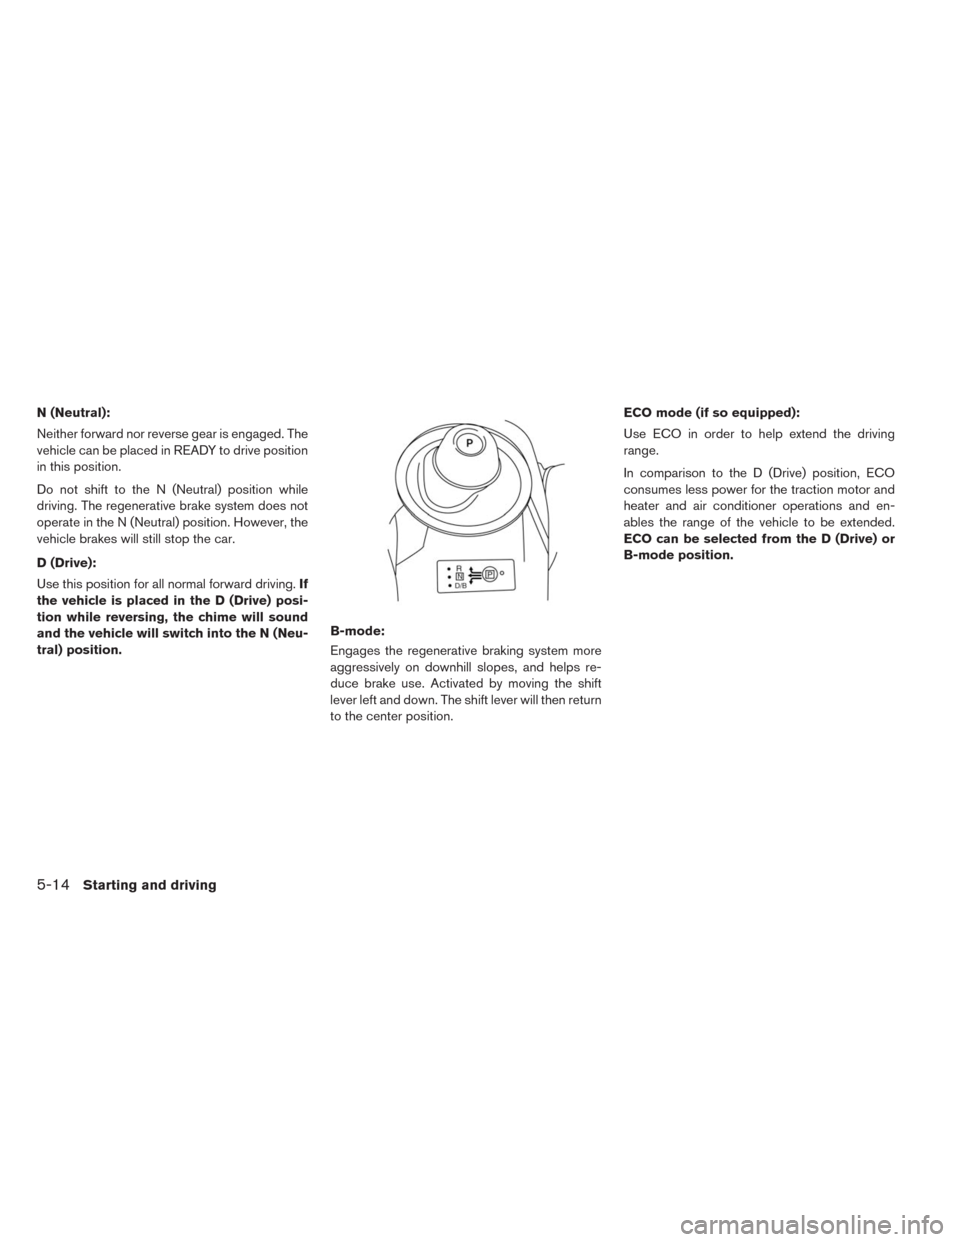
N (Neutral):
Neither forward nor reverse gear is engaged. The
vehicle can be placed in READY to drive position
in this position.
Do not shift to the N (Neutral) position while
driving. The regenerative brake system does not
operate in the N (Neutral) position. However, the
vehicle brakes will still stop the car.
D (Drive):
Use this position for all normal forward driving.If
the vehicle is placed in the D (Drive) posi-
tion while reversing, the chime will sound
and the vehicle will switch into the N (Neu-
tral) position.B-mode:
Engages the regenerative braking system more
aggressively on downhill slopes, and helps re-
duce brake use. Activated by moving the shift
lever left and down. The shift lever will then return
to the center position.ECO mode (if so equipped):
Use ECO in order to help extend the driving
range.
In comparison to the D (Drive) position, ECO
consumes less power for the traction motor and
heater and air conditioner operations and en-
ables the range of the vehicle to be extended.
ECO can be selected from the D (Drive) or
B-mode position.
5-14Starting and driving
Page 298 of 397
– The ECO position helps reduce power con-
sumption by reducing acceleration when
compared to the same accelerator pedal
position in the D (Drive ) position.
– The ECO position reduces the power pro-
vided to the heater and air conditioner sys-
tem.
• Drive at a constant speed. Maintain cruising
speeds with a constant accelerator positions or
by using cruise control when appropriate.
• Accelerate slowly and smoothly. Gently press
and release the accelerator pedal for accelera-
tion and deceleration.
• Drive at moderate speeds on the highway.
• Avoid frequent stopping and braking. Maintain a
safe distance behind other vehicles.
• Turn off the air conditioner/heater when it is not
necessary.
• Select a moderate temperature setting for heat-
ing or cooling to help reduce power consump-
tion.
• Use the air conditioner/heater and close win-
dows to reduce drag when cruising at highway
speed.• Release the accelerator pedal to slow down
and do not apply the brakes when traffic and
road conditions allow.
– This vehicle is equipped with a regenerative
brake system. The primary purpose of re-
generative brake system is to provide some
power to recharge the Li-ion battery and
extend driving range. A secondary benefit is
“engine braking” that operates based on
Li-ion battery conditions. In the D (Drive)
position, when the accelerator pedal is re-
leased, the regenerative brake system pro-
vides some deceleration and some power to
the Li-ion battery.
WARNING
• Do not stop or park the vehicle over
flammable materials such as dry grass,
waste paper or rags. They may ignite
and cause a fire.
• Never leave the vehicle in the READY
to drive mode while the vehicle is un-
attended.
• Do not leave children unattended in-
side the vehicle. They could unknow-
ingly activate switches or controls. Un-
attended children could become
involved in serious accidents.
• Safe parking procedures require that
both the parking brake be applied and
the vehicle placed in the park position.
Failure to do so could cause the ve-
hicle to move unexpectedly or roll
away and result in an accident.
PARKING/PARKING ON HILLS
5-18Starting and driving