2014 NISSAN JUKE AUX
[x] Cancel search: AUXPage 17 of 402
0-8Illustrated table of contents
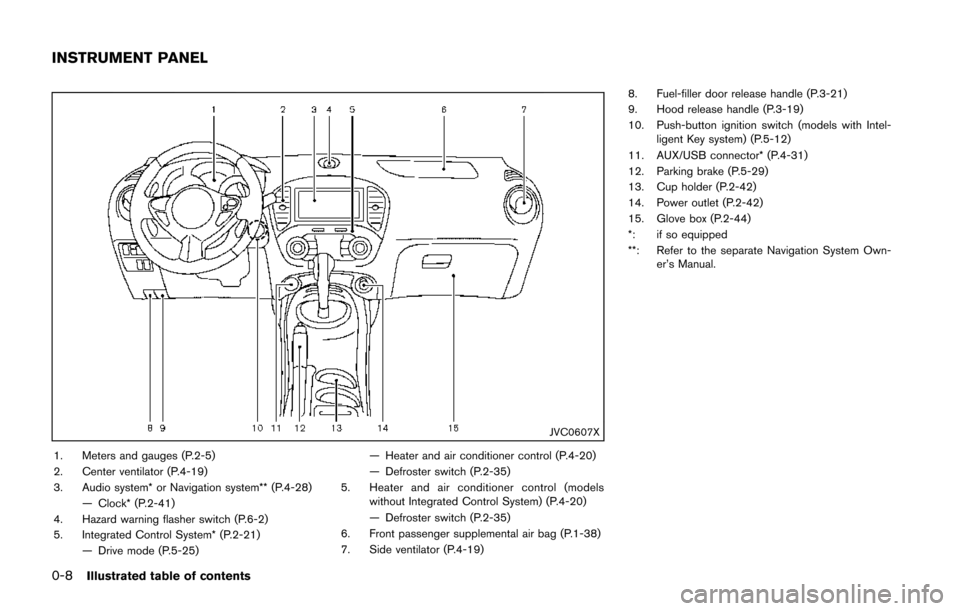
JVC0607X
1. Meters and gauges (P.2-5)
2. Center ventilator (P.4-19)
3. Audio system* or Navigation system** (P.4-28)— Clock* (P.2-41)
4. Hazard warning flasher switch (P.6-2)
5. Integrated Control System* (P.2-21) — Drive mode (P.5-25) — Heater and air conditioner control (P.4-20)
— Defroster switch (P.2-35)
5. Heater and air conditioner control (models without Integrated Control System) (P.4-20)
— Defroster switch (P.2-35)
6. Front passenger supplemental air bag (P.1-38)
7. Side ventilator (P.4-19) 8. Fuel-filler door release handle (P.3-21)
9. Hood release handle (P.3-19)
10. Push-button ignition switch (models with Intel-
ligent Key system) (P.5-12)
11. AUX/USB connector* (P.4-31)
12. Parking brake (P.5-29)
13. Cup holder (P.2-42)
14. Power outlet (P.2-42)
15. Glove box (P.2-44)
*: if so equipped
**: Refer to the separate Navigation System Own- er’s Manual.
INSTRUMENT PANEL
Page 79 of 402
2-4Instruments and controls
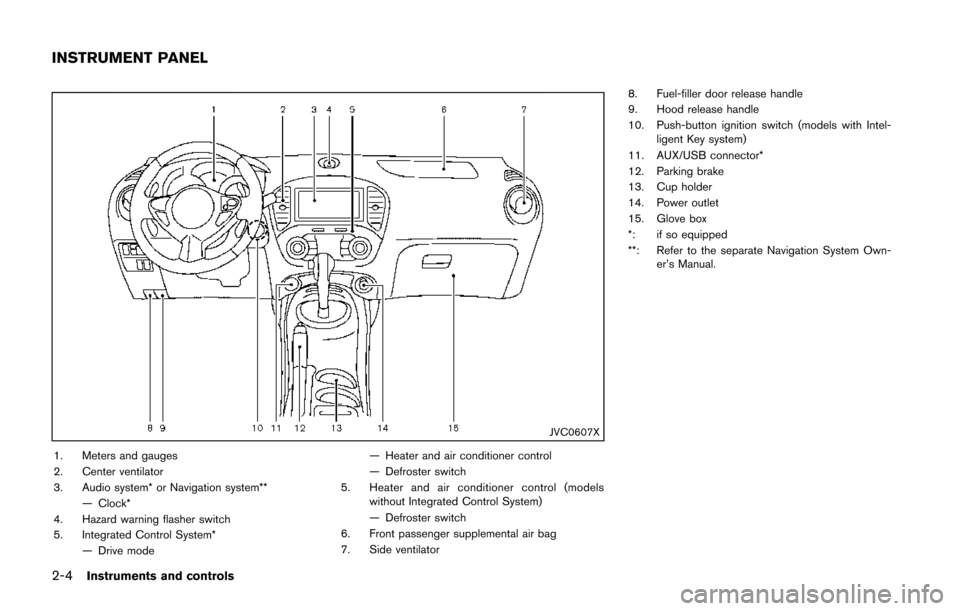
JVC0607X
1. Meters and gauges
2. Center ventilator
3. Audio system* or Navigation system**— Clock*
4. Hazard warning flasher switch
5. Integrated Control System* — Drive mode — Heater and air conditioner control
— Defroster switch
5. Heater and air conditioner control (models without Integrated Control System)
— Defroster switch
6. Front passenger supplemental air bag
7. Side ventilator 8. Fuel-filler door release handle
9. Hood release handle
10. Push-button ignition switch (models with Intel-
ligent Key system)
11. AUX/USB connector*
12. Parking brake
13. Cup holder
14. Power outlet
15. Glove box
*: if so equipped
**: Refer to the separate Navigation System Own- er’s Manual.
INSTRUMENT PANEL
Page 162 of 402
to disable the feature entirely.
AUX Level:
Controls the volume level of incoming sound
when an auxiliary device is connected to the
system. Available options are Quiet, Medium
and Loud.
Navigation setup
Refer to the separate Navigation System Own-
er’s Manual for information regarding this item.
XM setup
For SiriusXM Satellite Radio setup, refer to “FM-
AM-SAT radio with Compact Disc (CD) player
(Type B)” (P.4-48).SAA3391
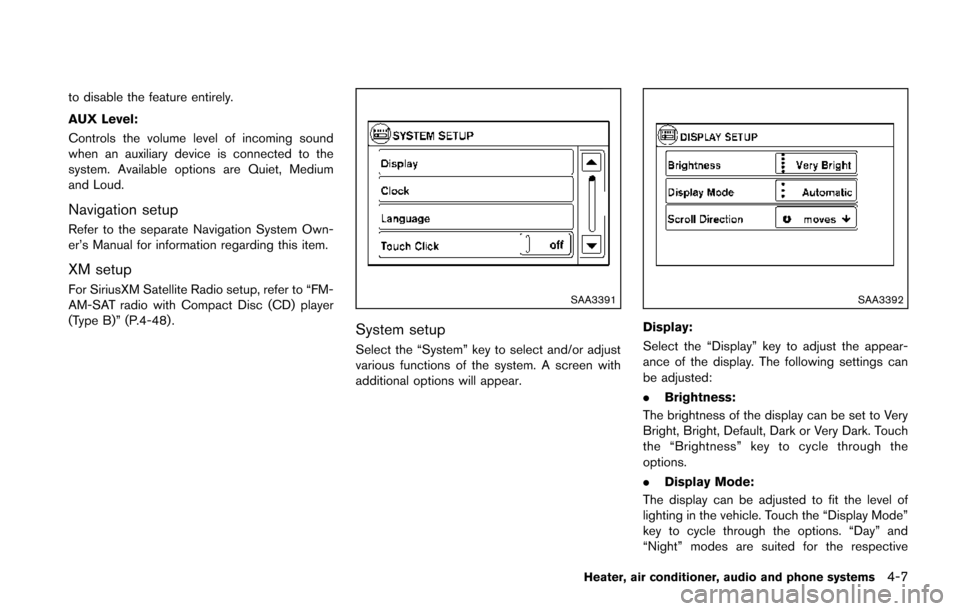
System setup
Select the “System” key to select and/or adjust
various functions of the system. A screen with
additional options will appear.
SAA3392
Display:
Select the “Display” key to adjust the appear-
ance of the display. The following settings can
be adjusted:
.Brightness:
The brightness of the display can be set to Very
Bright, Bright, Default, Dark or Very Dark. Touch
the “Brightness” key to cycle through the
options.
. Display Mode:
The display can be adjusted to fit the level of
lighting in the vehicle. Touch the “Display Mode”
key to cycle through the options. “Day” and
“Night” modes are suited for the respective
Heater, air conditioner, audio and phone systems4-7
Page 195 of 402
4-40Heater, air conditioner, audio and phone systems
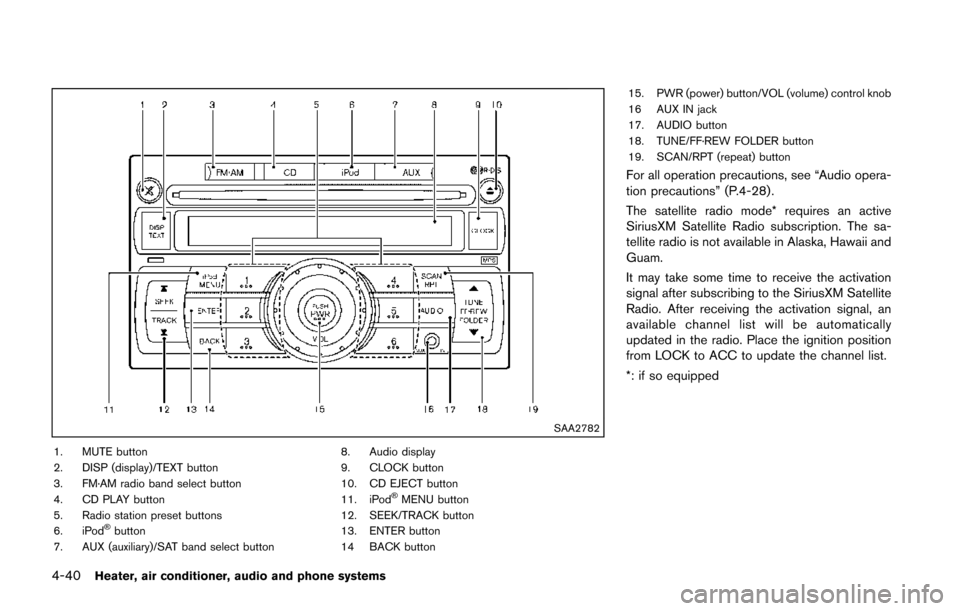
SAA2782
1. MUTE button
2. DISP (display)/TEXT button
3. FM·AM radio band select button
4. CD PLAY button
5. Radio station preset buttons
6. iPod
®button
7. AUX (auxiliary)/SAT band select button 8. Audio display
9. CLOCK button
10. CD EJECT button
11. iPod
®MENU button
12. SEEK/TRACK button
13. ENTER button
14 BACK button 15. PWR (power) button/VOL (volume) control knob
16 AUX IN jack
17. AUDIO button
18. TUNE/FF·REW FOLDER button
19. SCAN/RPT (repeat) button
For all operation precautions, see “Audio opera-
tion precautions” (P.4-28) .
The satellite radio mode* requires an active
SiriusXM Satellite Radio subscription. The sa-
tellite radio is not available in Alaska, Hawaii and
Guam.
It may take some time to receive the activation
signal after subscribing to the SiriusXM Satellite
Radio. After receiving the activation signal, an
available channel list will be automatically
updated in the radio. Place the ignition position
from LOCK to ACC to update the channel list.
*: if so equipped
Page 196 of 402
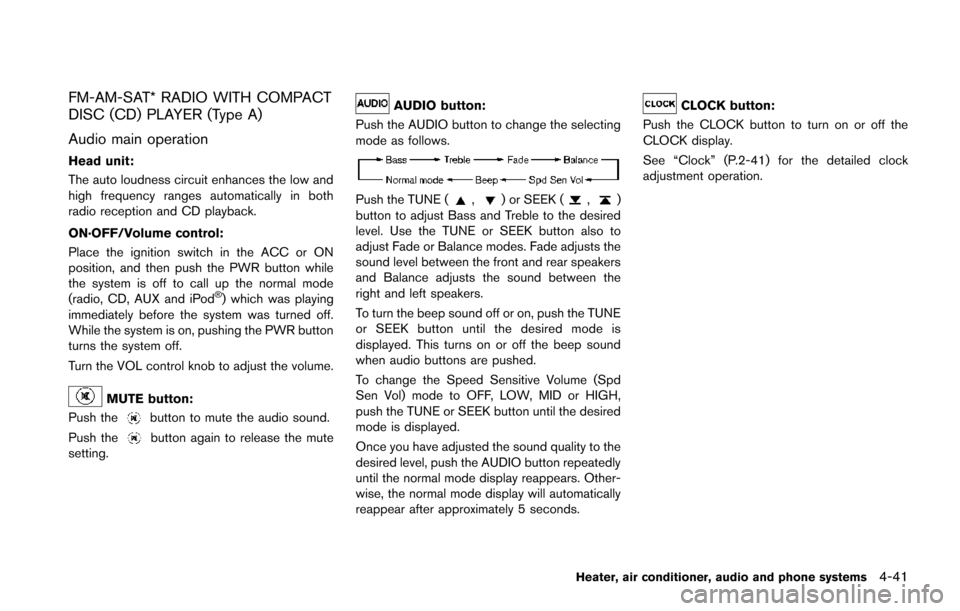
FM-AM-SAT* RADIO WITH COMPACT
DISC (CD) PLAYER (Type A)
Audio main operation
Head unit:
The auto loudness circuit enhances the low and
high frequency ranges automatically in both
radio reception and CD playback.
ON·OFF/Volume control:
Place the ignition switch in the ACC or ON
position, and then push the PWR button while
the system is off to call up the normal mode
(radio, CD, AUX and iPod
®) which was playing
immediately before the system was turned off.
While the system is on, pushing the PWR button
turns the system off.
Turn the VOL control knob to adjust the volume.
MUTE button:
Push the
button to mute the audio sound.
Push the
button again to release the mute
setting.
AUDIO button:
Push the AUDIO button to change the selecting
mode as follows.
Push the TUNE (,) or SEEK (,)
button to adjust Bass and Treble to the desired
level. Use the TUNE or SEEK button also to
adjust Fade or Balance modes. Fade adjusts the
sound level between the front and rear speakers
and Balance adjusts the sound between the
right and left speakers.
To turn the beep sound off or on, push the TUNE
or SEEK button until the desired mode is
displayed. This turns on or off the beep sound
when audio buttons are pushed.
To change the Speed Sensitive Volume (Spd
Sen Vol) mode to OFF, LOW, MID or HIGH,
push the TUNE or SEEK button until the desired
mode is displayed.
Once you have adjusted the sound quality to the
desired level, push the AUDIO button repeatedly
until the normal mode display reappears. Other-
wise, the normal mode display will automatically
reappear after approximately 5 seconds.
CLOCK button:
Push the CLOCK button to turn on or off the
CLOCK display.
See “Clock” (P.2-41) for the detailed clock
adjustment operation.
Heater, air conditioner, audio and phone systems4-41
Page 197 of 402
4-42Heater, air conditioner, audio and phone systems
SAA3490
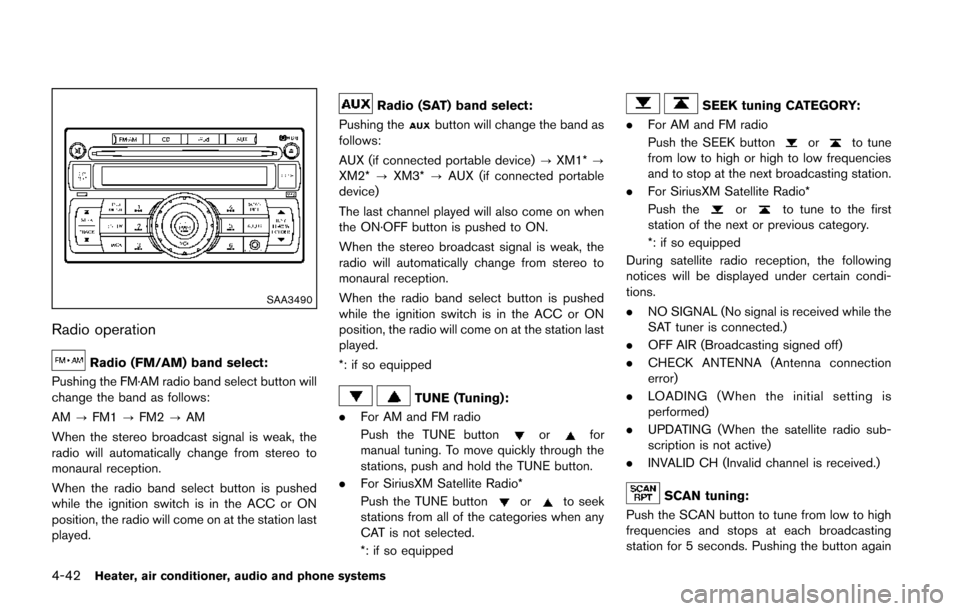
Radio operation
Radio (FM/AM) band select:
Pushing the FM·AM radio band select button will
change the band as follows:
AM ?FM1 ?FM2 ?AM
When the stereo broadcast signal is weak, the
radio will automatically change from stereo to
monaural reception.
When the radio band select button is pushed
while the ignition switch is in the ACC or ON
position, the radio will come on at the station last
played.
Radio (SAT) band select:
Pushing the
button will change the band as
follows:
AUX (if connected portable device) ?XM1* ?
XM2* ?XM3* ?AUX (if connected portable
device)
The last channel played will also come on when
the ON·OFF button is pushed to ON.
When the stereo broadcast signal is weak, the
radio will automatically change from stereo to
monaural reception.
When the radio band select button is pushed
while the ignition switch is in the ACC or ON
position, the radio will come on at the station last
played.
*: if so equipped
TUNE (Tuning):
. For AM and FM radio
Push the TUNE button
orfor
manual tuning. To move quickly through the
stations, push and hold the TUNE button.
. For SiriusXM Satellite Radio*
Push the TUNE button
orto seek
stations from all of the categories when any
CAT is not selected.
*: if so equipped
SEEK tuning CATEGORY:
. For AM and FM radio
Push the SEEK button
orto tune
from low to high or high to low frequencies
and to stop at the next broadcasting station.
. For SiriusXM Satellite Radio*
Push the
orto tune to the first
station of the next or previous category.
*: if so equipped
During satellite radio reception, the following
notices will be displayed under certain condi-
tions.
. NO SIGNAL (No signal is received while the
SAT tuner is connected.)
. OFF AIR (Broadcasting signed off)
. CHECK ANTENNA (Antenna connection
error)
. LOADING (When the initial setting is
performed)
. UPDATING (When the satellite radio sub-
scription is not active)
. INVALID CH (Invalid channel is received.)
SCAN tuning:
Push the SCAN button to tune from low to high
frequencies and stops at each broadcasting
station for 5 seconds. Pushing the button again
Page 202 of 402
than 1.5 seconds while the iPod®is playing, the
next track or the beginning of the current track
on the iPod
®will be played.
APS (Automatic Program
Search) FF, APS REW button:
When the
orbutton is pushed for more
than 1.5 seconds while the iPod®is playing,
numbers of tracks can be skipped through.
When the
orbutton is pushed for less
than 1.5 seconds while iPod®is playing, the next
track or the beginning of the current track on the
iPod
®will be played.
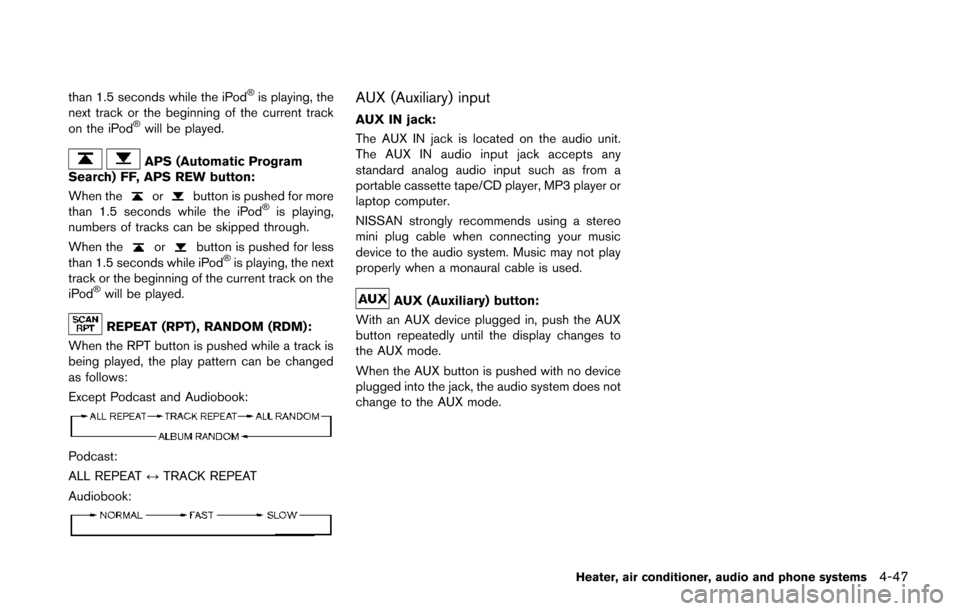
REPEAT (RPT) , RANDOM (RDM):
When the RPT button is pushed while a track is
being played, the play pattern can be changed
as follows:
Except Podcast and Audiobook:
Podcast:
ALL REPEAT ↔TRACK REPEAT
Audiobook:
AUX (Auxiliary) input
AUX IN jack:
The AUX IN jack is located on the audio unit.
The AUX IN audio input jack accepts any
standard analog audio input such as from a
portable cassette tape/CD player, MP3 player or
laptop computer.
NISSAN strongly recommends using a stereo
mini plug cable when connecting your music
device to the audio system. Music may not play
properly when a monaural cable is used.
AUX (Auxiliary) button:
With an AUX device plugged in, push the AUX
button repeatedly until the display changes to
the AUX mode.
When the AUX button is pushed with no device
plugged into the jack, the audio system does not
change to the AUX mode.
Heater, air conditioner, audio and phone systems4-47
Page 203 of 402
4-48Heater, air conditioner, audio and phone systems
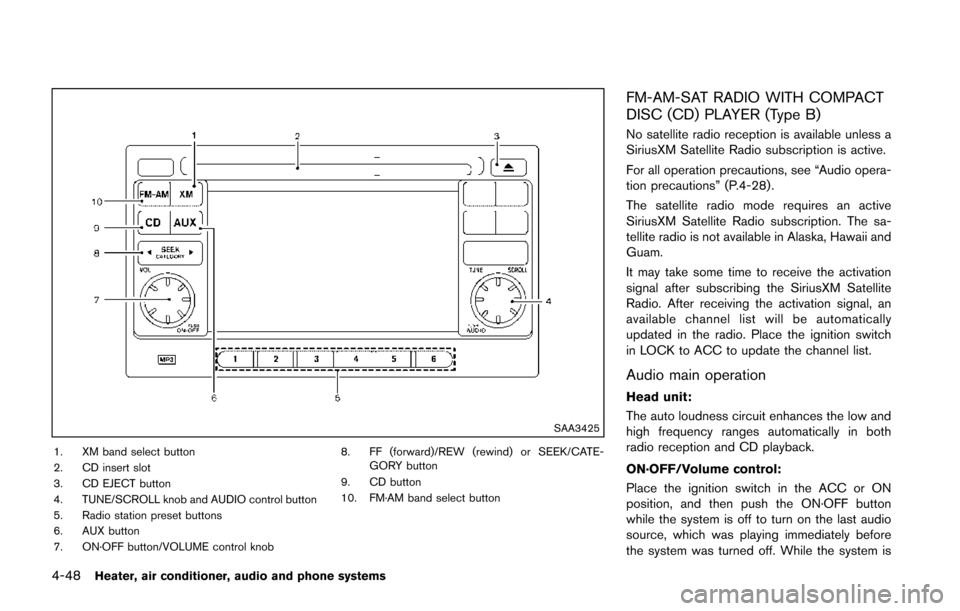
SAA3425
1. XM band select button
2. CD insert slot
3. CD EJECT button
4. TUNE/SCROLL knob and AUDIO control button
5. Radio station preset buttons
6. AUX button
7. ON·OFF button/VOLUME control knob8. FF (forward)/REW (rewind) or SEEK/CATE-
GORY button
9. CD button
10. FM·AM band select button
FM-AM-SAT RADIO WITH COMPACT
DISC (CD) PLAYER (Type B)
No satellite radio reception is available unless a
SiriusXM Satellite Radio subscription is active.
For all operation precautions, see “Audio opera-
tion precautions” (P.4-28) .
The satellite radio mode requires an active
SiriusXM Satellite Radio subscription. The sa-
tellite radio is not available in Alaska, Hawaii and
Guam.
It may take some time to receive the activation
signal after subscribing the SiriusXM Satellite
Radio. After receiving the activation signal, an
available channel list will be automatically
updated in the radio. Place the ignition switch
in LOCK to ACC to update the channel list.
Audio main operation
Head unit:
The auto loudness circuit enhances the low and
high frequency ranges automatically in both
radio reception and CD playback.
ON·OFF/Volume control:
Place the ignition switch in the ACC or ON
position, and then push the ON·OFF button
while the system is off to turn on the last audio
source, which was playing immediately before
the system was turned off. While the system is