Page 63 of 314
2-36Navigation
4. The previous start point is set as a destina-tion, and the entire route is shown on the
map. Highlight [Start] after confirming the
location of the displayed destination, and
push . The system sets the
destination to the selected location and
starts calculating a route.
INFO:
Even after setting a destination, the location of
the destination can be adjusted, the route can
be stored, etc.
“Procedures after setting destination”
(page 2-44)
Setting by voice command
1. Push <
>located on the steering wheel.
2. After the tone sounds, speak a command.
To set a previous start point as the destination:
“Previous Start Point” (Alternate Command
Mode)
SETTING FROM STORED ROUTES
It is possible to select a preferred route from the
stored routes.
1. Push .
2. Highlight [Next Page] and push .
3. Highlight [Stored Routes] and push
. A list screen is displayed.
4. Highlight the preferred route from the listand push . The route to the
destination is set.
Page 70 of 314
3. The system sets the destination to theselected location and starts calculating a
route.
INFO:
If a point on a freeway is set as the destination, a
confirmation message is displayed.
DELETE DESTINATION
It is possible to delete a destination and all
waypoints that have already been set.
1. Press .
2. Select [Delete Destination] and press .
3. A confirmation message is displayed. Select
[Yes] and press .
The destination and the waypoints are
deleted.
INFO:
The deleted destination and waypoints are not
able to be reactivated.
Setting by voice command
1. Push <
>on the steering wheel.
2. After the tone sounds, speak a command.
To delete a destination and all waypoints:
“Delete Destination” (Alternate Command
Mode)
Navigation2-43
Page 82 of 314
Canceling/reactivating route
A route that is already set can be canceled at
any time. If a route is deleted, the destination
and waypoints are also canceled.
It is also possible to reactivate a canceled route.
INFO:
Canceling a route does not delete the destina-
tion and waypoint information completely. To
delete the destination and waypoints completely.
“Delete destination” (page 2-43)
Canceling route:
1. Push .
2. Highlight [Cancel Route] and push .
3. A confirmation message is displayed.
Highlight [Yes] and push .
The route is canceled along with the
destination and waypoints.
Setting by voice command
1. Push <
>located on the steering wheel.
2. After the tone sounds, speak a command.
To cancel a route:
“Cancel Route” (Alternate Command Mode) Reactivating route:
1. Push
.
2. Highlight [Resume Route] and push .
3. A confirmation message is displayed. High-light [Yes] and push . The can-
celed route is reactivated.
Navigation2-55
Page 89 of 314
![NISSAN GT-R 2014 R35 Multi Function Display Owners Manual 2-62Navigation
Confirming route by simulation:
1. Highlight [Simulation] and push<ENTER>.
2. Highlight the preferred key and push <ENTER>.
: Pauses the simulation.
: Resumes the simulation.
: Ends the NISSAN GT-R 2014 R35 Multi Function Display Owners Manual 2-62Navigation
Confirming route by simulation:
1. Highlight [Simulation] and push<ENTER>.
2. Highlight the preferred key and push <ENTER>.
: Pauses the simulation.
: Resumes the simulation.
: Ends the](/manual-img/5/367/w960_367-88.png)
2-62Navigation
Confirming route by simulation:
1. Highlight [Simulation] and push.
2. Highlight the preferred key and push .
: Pauses the simulation.
: Resumes the simulation.
: Ends the simulation.
3. Push
Page 93 of 314
![NISSAN GT-R 2014 R35 Multi Function Display Owners Manual 2-66Navigation
1. Push<ROUTE VOICE>.
2. Highlight [Route Settings] and push <ENTER>.
3. Highlight [Basic Route Type] and push <ENTER>.
4. Highlight the preferred condition and push <ENTER>. The indica NISSAN GT-R 2014 R35 Multi Function Display Owners Manual 2-66Navigation
1. Push<ROUTE VOICE>.
2. Highlight [Route Settings] and push <ENTER>.
3. Highlight [Basic Route Type] and push <ENTER>.
4. Highlight the preferred condition and push <ENTER>. The indica](/manual-img/5/367/w960_367-92.png)
2-66Navigation
1. Push.
2. Highlight [Route Settings] and push .
3. Highlight [Basic Route Type] and push .
4. Highlight the preferred condition and push . The indicator for the selected
condition illuminates.
5. When the conditions are set, the system starts calculating the route with the new
conditions, and the current location map
screen is displayed.
Available conditions
. [Fastest Route]:
Prioritizes by the fastest time.
. [Minimize Freeway]:
Minimizes the use of motorways. .
[Shortest Route]:
Prioritizes by the shortest route.
INFO:
Only one of these conditions can be utilized at a
time.
Setting by voice command
1. Push <
>located on the steering wheel.
2. After the tone sounds, speak a command.
To set conditions for the route calculation
(Alternate Command Mode):
“Fastest Route”
“Minimize Freeway Route”
“Shortest Route”
Detailed route settings:
Detailed conditions can be set for the route
calculation.
1. Push .
2. Highlight [Route Settings] and push .
3. Highlight [Other Routing Choices] and push .
4. Highlight the preferred condition and push . The indicator for the selected
condition illuminates.
5. If [Route Settings] is exited after changing the settings, the system starts calculating
the route with the new conditions.
Available setting items
. [Minimize Toll Roads]:
Minimizes the use of toll roads.
. [Use Time Restricted Roads]:
Uses any roads subject to time restrictions.
. [Use Statistical Traffic Information]:
Uses statistical traffic information that is
stored in the map data.
. [Use Real Time Traffic Information]:
Uses the latest traffic information received
via the SiriusXM broadcast.
. [Use Avoid Area Settings]:
Enables the avoid area setting.
Page 162 of 314
![NISSAN GT-R 2014 R35 Multi Function Display Owners Manual listed below.
1. Select [Answer].
2. Push<PHONE> on the instrument panel.
3. Push <
>on the steering wheel.
There are some options available when receiving
a call. Select one of the following displaye NISSAN GT-R 2014 R35 Multi Function Display Owners Manual listed below.
1. Select [Answer].
2. Push<PHONE> on the instrument panel.
3. Push <
>on the steering wheel.
There are some options available when receiving
a call. Select one of the following displaye](/manual-img/5/367/w960_367-161.png)
listed below.
1. Select [Answer].
2. Push on the instrument panel.
3. Push <
>on the steering wheel.
There are some options available when receiving
a call. Select one of the following displayed on
the screen.
. [Answer]:
Accept an incoming call to talk.
. [Hold Call]:
Put an incoming call on hold.
. [Reject Call]:
Reject an incoming call.
To finish the call, perform one of the
following procedures listed below.
1. Select [Hang up].
2. Push on the instrument panel.
3. Push <
>on the steering wheel.
DURING A CALL
There are some options available during a call.
Select one of the following displayed on the
screen if necessary.
. [Hang up]:
Finish the call.
. [Use Handset]:
Transfer the call to the cellular phone.
. [Mute]:
Mute your voice to the person.
. [Keypad]:
Using the touch tone, send digits to the
connected party for using services such as
voicemail.
. [Cancel Mute]:
This will appear after [Mute] is selected.
Mute will be canceled.
To adjust the person’s voice to be louder or
quieter, push the volume control switch (+ or −)on the steering wheel or turn the volume control
knob on the instrument panel while talking on
the phone. This adjustment is also available in
the SETTING mode.
PHONE SETTING
To set up the Bluetooth®Hands-Free Phone
System to your preferred settings, push
and select [PHONE].
Edit Quick Dial
Quick dial registration and editing/deleting the
registered quick dial can be performed.
Delete Quick Dial
The quick dial entries can be deleted all at the
same time or one by one.
Bluetooth®Hands-Free Phone System4-7
Page 177 of 314

6-4Viewing technical information
*4Displays the distance to the next intersection on
the route.
*5Displays the distance traveled from the previous
intersection on the route.
Setting by voice command
1. Push <
>located on the steering wheel.
2. After the tone sounds, speak a command.
To display the information about the vehicle
location:
“Information” “Where am I?” (Standard Mode)
“Where am I?” (Alternate Command Mode)
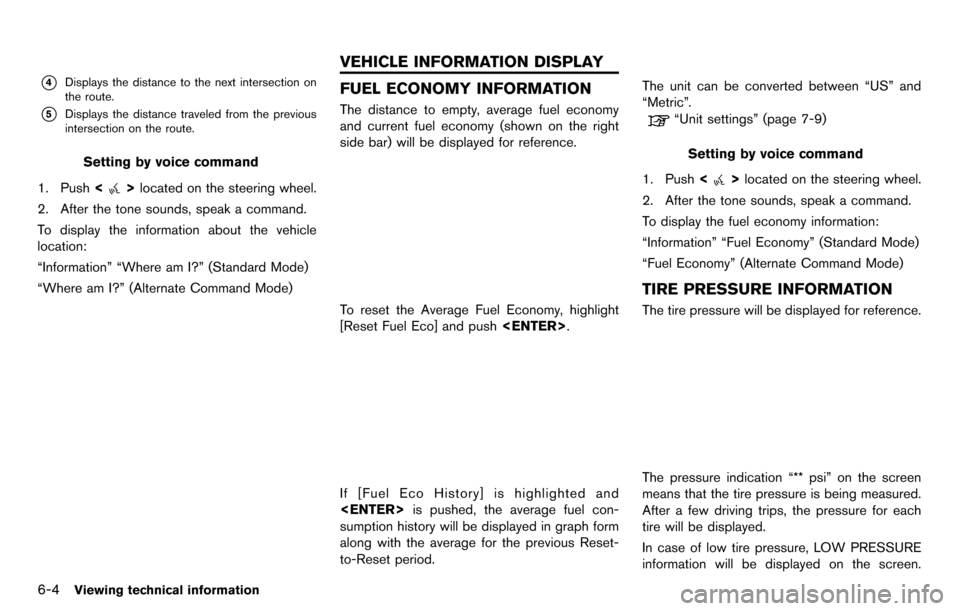
FUEL ECONOMY INFORMATION
The distance to empty, average fuel economy
and current fuel economy (shown on the right
side bar) will be displayed for reference.
To reset the Average Fuel Economy, highlight
[Reset Fuel Eco] and push .
If [Fuel Eco History] is highlighted and
is pushed, the average fuel con-
sumption history will be displayed in graph form
along with the average for the previous Reset-
to-Reset period. The unit can be converted between “US” and
“Metric”.
“Unit settings” (page 7-9)
Setting by voice command
1. Push <
>located on the steering wheel.
2. After the tone sounds, speak a command.
To display the fuel economy information:
“Information” “Fuel Economy” (Standard Mode)
“Fuel Economy” (Alternate Command Mode)
TIRE PRESSURE INFORMATION
The tire pressure will be displayed for reference.
The pressure indication “** psi” on the screen
means that the tire pressure is being measured.
After a few driving trips, the pressure for each
tire will be displayed.
In case of low tire pressure, LOW PRESSURE
information will be displayed on the screen.
VEHICLE INFORMATION DISPLAY
Page 178 of 314

Check the pressure for all tires.
Tire pressure rises and falls depending on the
heat caused by the vehicle’s traveling condition
and the temperature.
To change the measurement units, highlight
[Select Units] and press.
“Unit settings (Tire Pressure)” (page 7-10)
WARNING
.When a wheel is replaced, tire
pressure will not be indicated, the
TPMS will not function and the low
tire pressure warning light will flash
for approximately 1 minute. The
light will remain on after 1 minute.
Contact your NISSAN dealer or GT-R
certified NISSAN dealer as soon as
possible for tire replacement and/or
system resetting.
. Replacing tires with those not ori-
ginally specified by NISSAN could
affect the proper operation of the
TPMS.
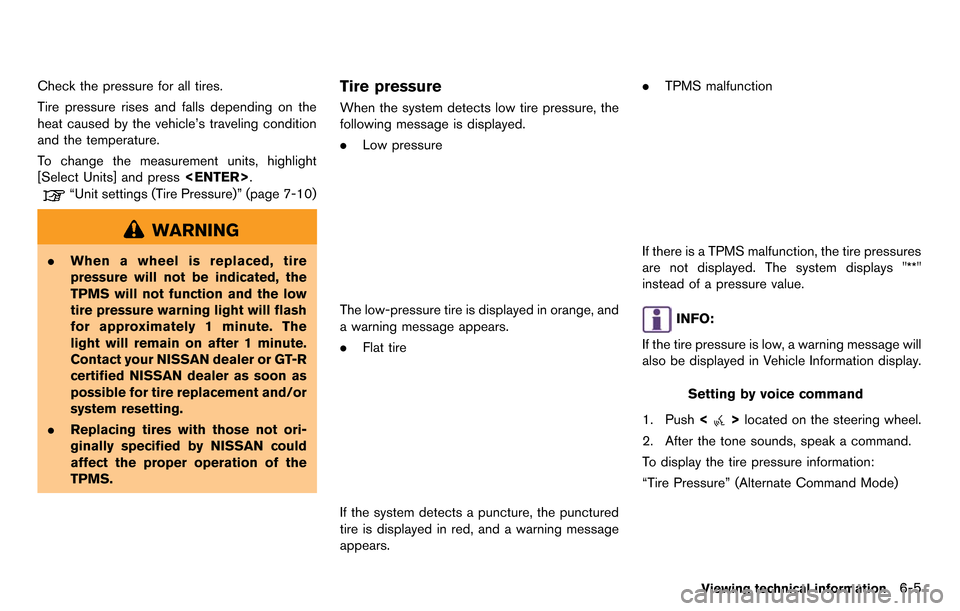
Tire pressure
When the system detects low tire pressure, the
following message is displayed.
.Low pressure
The low-pressure tire is displayed in orange, and
a warning message appears.
.Flat tire
If the system detects a puncture, the punctured
tire is displayed in red, and a warning message
appears. .
TPMS malfunction
If there is a TPMS malfunction, the tire pressures
are not displayed. The system displays "**"
instead of a pressure value.
INFO:
If the tire pressure is low, a warning message will
also be displayed in Vehicle Information display.
Setting by voice command
1. Push <
>located on the steering wheel.
2. After the tone sounds, speak a command.
To display the tire pressure information:
“Tire Pressure” (Alternate Command Mode)
Viewing technical information6-5