2014 NISSAN GT-R light
[x] Cancel search: lightPage 131 of 314
3-4Audio system
.During cold weather or rainy days, the player
may malfunction due to the humidity. If this
occurs, remove the CD and dehumidify or
ventilate the player completely.
. The player may skip while driving on rough
roads.
. The CD player sometimes cannot function
when the passenger compartment tempera-
ture is extremely high. Decrease the tem-
perature before use.
. Only use high quality 4.7 in (12 cm) round
discs that have the “COMPACT disc DIGI-
TAL AUDIO” logo on the disc or packaging.
. Do not expose the CD to direct sunlight.
. CDs that are of poor quality, dirty, scratched,
covered with fingerprints, or that have pin
holes may not work properly.
. The following CDs may not work properly:
— Copy control compact discs (CCCD)
— Recordable compact discs (CD-R)
— Rewritable compact discs (CD-RW)
. Do not use the following CDs as they may
cause the CD player to malfunction.
— 3.1 in (8 cm) discs
— CDs that are not round
— CDs with a paper label — CDs that are warped, scratched, or have
abnormal edges
. This audio system can only play prerecorded
CDs. It has no capabilities to record or burn
CDs.
. If the CD cannot be played, one of the
following messages will be displayed.
CHECK DISC:
— Confirm that the CD is inserted correctly
(the label side is facing up, etc.).
— Confirm that the CD is not bent or warped and it is free of scratches.
PUSH EJECT:
This is an error due to the temperature inside
the player is too high. Remove the CD by
pushing the EJECT button, and after a short
time reinsert the CD. The CD can be played
when the temperature of the player returns
to normal.
UNPLAYABLE:
The file is unplayable in this audio system
(only MP3, WMA or AAC CD) .DVD (Digital Versatile Disc) player
. Do not force a compact disc into the CD/
DVD insert slot. This could damage the CD/
DVD player.
. During cold weather or rainy days, the player
may malfunction due to humidity. If this
occurs, remove the CD/DVD and dehumidify
or ventilate the player completely.
. The player may skip while driving on rough
roads.
Page 132 of 314
.The CD/DVD player sometimes cannot
function when the passenger compartment
temperature is extremely high. Decrease the
temperature before use.
. Only use high quality 4.7 in (12 cm) round
discs that have the “COMPACT disc DIGI-
TAL AUDIO” or “DVD Video” logo on the
disc or packaging.
. Do not expose the CD/DVD to direct
sunlight.
. CD/DVDs that are of poor quality, dirty,
scratched, covered with fingerprints, or that
have pinholes may not work properly.
. The following CD/DVDs are not guaranteed
to play:
— Copy control compact discs (CCCD)
— Recordable compact discs (CD-R)
— Rewritable compact discs (CD-RW)
— Recordable DVDs (DVD±R, DVD±R DL)
— Rewritable DVDs (DVD±RW, DVD±RW
DL)
. Do not use the following CD/DVDs as they
may cause the CD/DVD player to malfunc-
tion.
— 3.1 in (8 cm) discs
— CD/DVDs that are not round — CD/DVDs with a paper label
— CD/DVDs that are warped, scratched or
have abnormal edges
— This audio system can only play pre- recorded CD/DVDs. It has no capabilities
to record or burn CD/DVDs.
. If the CD/DVD cannot be played, one of the
following messages will be displayed.
Disc Read Error:
— Confirm that the CD/DVD is inserted
correctly (the label side is facing up,
etc.).
— Confirm that the CD/DVD is not bent or warped and it is free of scratches.
Please Eject Disc:
— This may be an error due to the temperature inside the player being too
high. Remove the CD/DVD by pushing
the EJECT button, and after a short time
reinsert the CD/DVD. The CD/DVD can
be played when the temperature of the
player returns to normal. If the error
persists, consult your local retailership.
Unplayable File:
— The file may be copy protected.
— The file is not MP3, WMA, AAC, M4A or DivX
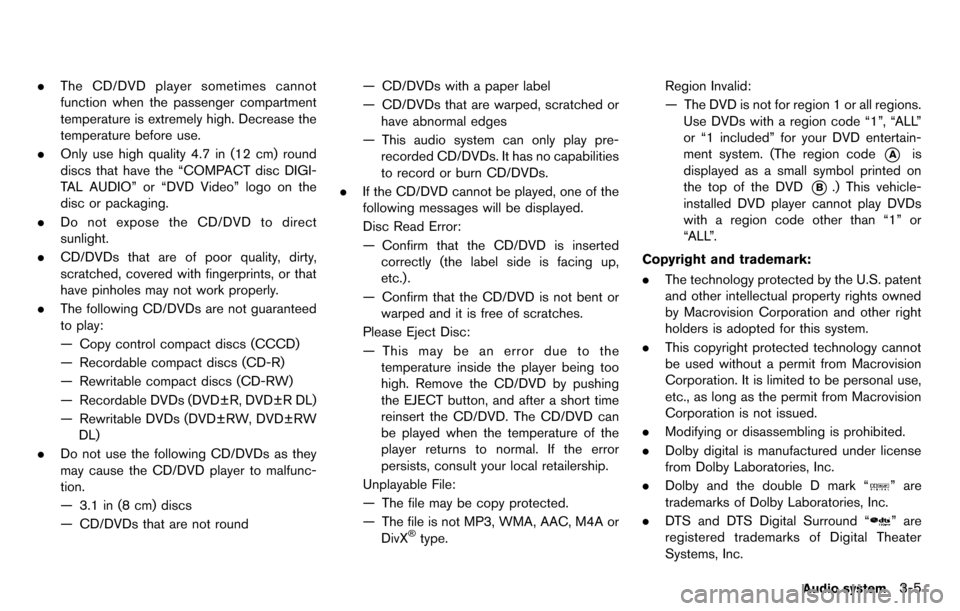
®type. Region Invalid:
— The DVD is not for region 1 or all regions.
Use DVDs with a region code “1”, “ALL”
or “1 included” for your DVD entertain-
ment system. (The region code
*Ais
displayed as a small symbol printed on
the top of the DVD
*B.) This vehicle-
installed DVD player cannot play DVDs
with a region code other than “1” or
“ALL”.
Copyright and trademark:
. The technology protected by the U.S. patent
and other intellectual property rights owned
by Macrovision Corporation and other right
holders is adopted for this system.
. This copyright protected technology cannot
be used without a permit from Macrovision
Corporation. It is limited to be personal use,
etc., as long as the permit from Macrovision
Corporation is not issued.
. Modifying or disassembling is prohibited.
. Dolby digital is manufactured under license
from Dolby Laboratories, Inc.
. Dolby and the double D mark “
” are
trademarks of Dolby Laboratories, Inc.
. DTS and DTS Digital Surround “
” are
registered trademarks of Digital Theater
Systems, Inc.
Audio system3-5
Page 139 of 314
3-12Audio system
— Receiving a hands-free call.
— Checking the connection to the hands-free phone.
. Do not place a Bluetooth
®audio device in
an area surrounded by metal or far away
from the in-vehicle Bluetooth
®module to
prevent tone quality degradation and wire-
less connection disruption.
. While an audio device is connected through
a Bluetooth
®wireless connection, the bat-
tery power of the device may discharge
quicker than usual.
. This system supports the Bluetooth
®Audio
Distribution Profile (A2DP, AVRCP).
. Bluetooth
®is a trademark owned by Blue-
tooth SIG, Inc.
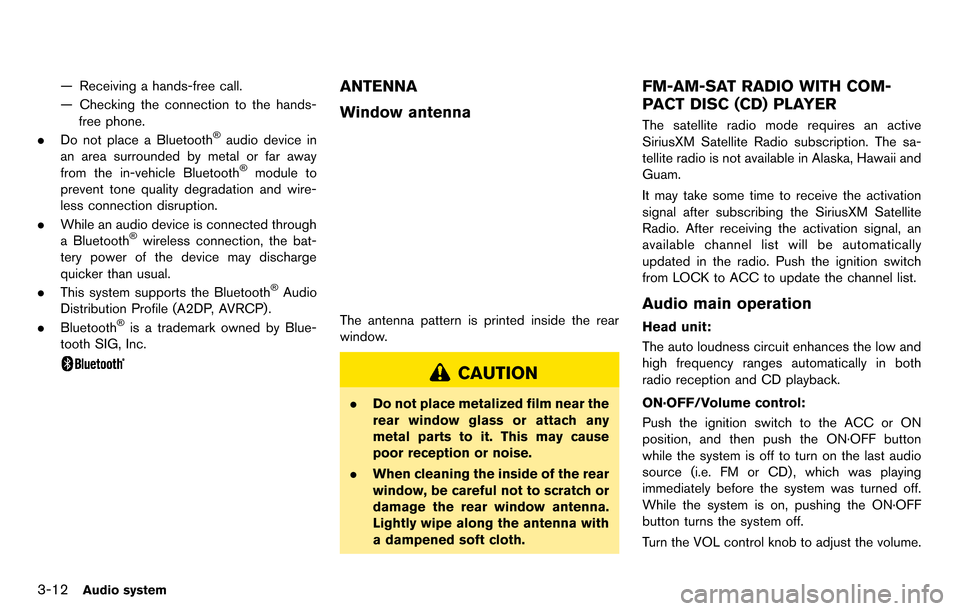
ANTENNA
Window antenna
The antenna pattern is printed inside the rear
window.
CAUTION
. Do not place metalized film near the
rear window glass or attach any
metal parts to it. This may cause
poor reception or noise.
. When cleaning the inside of the rear
window, be careful not to scratch or
damage the rear window antenna.
Lightly wipe along the antenna with
a dampened soft cloth.
FM-AM-SAT RADIO WITH COM-
PACT DISC (CD) PLAYER
The satellite radio mode requires an active
SiriusXM Satellite Radio subscription. The sa-
tellite radio is not available in Alaska, Hawaii and
Guam.
It may take some time to receive the activation
signal after subscribing the SiriusXM Satellite
Radio. After receiving the activation signal, an
available channel list will be automatically
updated in the radio. Push the ignition switch
from LOCK to ACC to update the channel list.
Audio main operation
Head unit:
The auto loudness circuit enhances the low and
high frequency ranges automatically in both
radio reception and CD playback.
ON·OFF/Volume control:
Push the ignition switch to the ACC or ON
position, and then push the ON·OFF button
while the system is off to turn on the last audio
source (i.e. FM or CD) , which was playing
immediately before the system was turned off.
While the system is on, pushing the ON·OFF
button turns the system off.
Turn the VOL control knob to adjust the volume.
Page 153 of 314
3-26Audio system
.Shuffle Songs
The following touch-panel buttons shown on the
screen are also available:
.
: returns to the previous screen.
.
: plays/pauses the music selected.
Next/Previous Track and Fast Forward/
Rewind:
When <
>or <>is pushed for more than
1.5 seconds while the iPod®is playing, the
iPod®will play while fast forwarding or rewind-
ing. When the button is released, the iPod®will
return to the normal play speed.
When <
>or <>is pushed for less than
1.5 seconds while the iPod®is playing, the next
track or the beginning of the current track on the
iPod
®will be played.
The center dial can also be used to select tracks
when the iPod
®is playing.
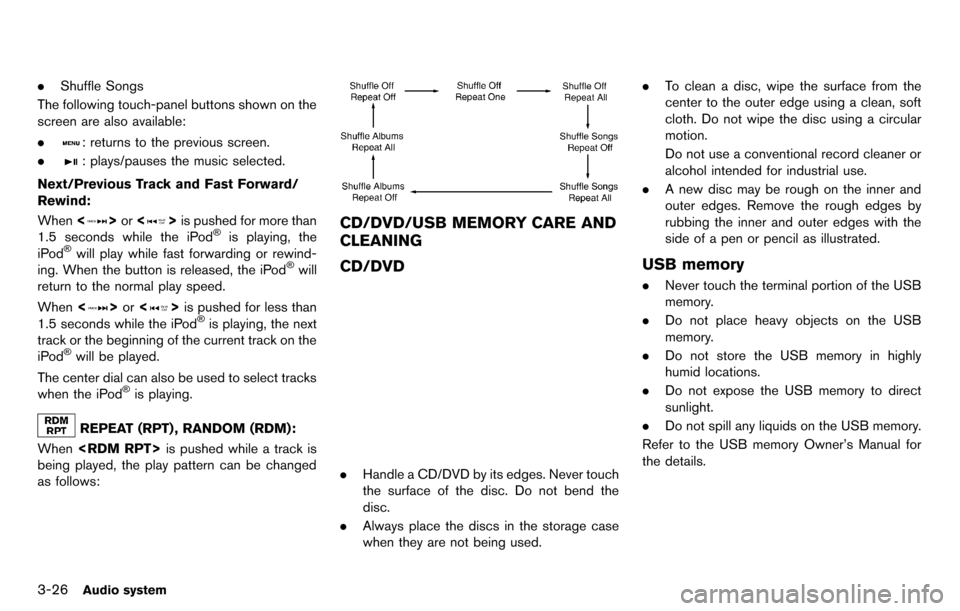
REPEAT (RPT) , RANDOM (RDM):
When
being played, the play pattern can be changed
as follows:
CD/DVD/USB MEMORY CARE AND
CLEANING
CD/DVD
. Handle a CD/DVD by its edges. Never touch
the surface of the disc. Do not bend the
disc.
. Always place the discs in the storage case
when they are not being used. .
To clean a disc, wipe the surface from the
center to the outer edge using a clean, soft
cloth. Do not wipe the disc using a circular
motion.
Do not use a conventional record cleaner or
alcohol intended for industrial use.
. A new disc may be rough on the inner and
outer edges. Remove the rough edges by
rubbing the inner and outer edges with the
side of a pen or pencil as illustrated.
USB memory
.Never touch the terminal portion of the USB
memory.
. Do not place heavy objects on the USB
memory.
. Do not store the USB memory in highly
humid locations.
. Do not expose the USB memory to direct
sunlight.
. Do not spill any liquids on the USB memory.
Refer to the USB memory Owner’s Manual for
the details.
Page 169 of 314
5-4Heater and air conditioner
.Do not set the temperature lower than the
outside air temperature. Otherwise the
system may not work properly.
. Not recommended if windows fog up.
DEHUMIDIFIED DEFROSTING or
DEFOGGING
1. Push the front defroster button <>. The
indicator light on the button will come on.
2. Operate the temperature control dial to set the desired temperature.
. To quickly remove ice from the outside of the
windows, turn the fan speed control dial
<
>and set it to the maximum position.
. As soon as possible after the windshield is
clean, push
the auto mode. .
When the front defroster button <
>is
pushed, the air conditioner will automatically
be turned on at outside temperatures above
238F( −58C) to defog the windshield, and
the air recirculate mode will automatically be
turned off.
Outside air is drawn into the passenger
compartment to improve the defogging
performance.FAN SPEED CONTROL
Turn the fan speed control dial <>to
manually control the fan speed.
Push
control of the fan speed.
AIR RECIRCULATION
MANUAL OPERATION
Page 170 of 314
Push the intake air control button<>to
recirculate interior air inside the vehicle. The
indicator light “
” will come on.
The air recirculation mode cannot be activated
when the air conditioner is in the front defrosting
mode “
”.
OUTSIDE AIR CIRCULATION
Push the outside air circulation button <>to
change the air circulation from the intake air to
the outside air. The indicator light “
” will
come on.
AUTOMATIC AIR INTAKE CONTROL
In the AUTO mode, the intake air will be
controlled automatically. To manually control
the intake air, push the intake air control button
<
>. To return to the automatic control mode,
push the intake air control button <
>for
about 2 seconds. The indicator lights will flash
twice, and then the intake air will be controlled
automatically.
AIR FLOW CONTROL
Pushing
: Air flows from center and side ventilators.
: Air flows from center and side ventilators
and foot outlets.
: Air flows mainly from foot outlets.
: Air flows from defroster and foot outlets.
Push
Heater and air conditioner5-5
TO TURN THE SYSTEM OFF
Page 175 of 314
6-2Viewing technical information
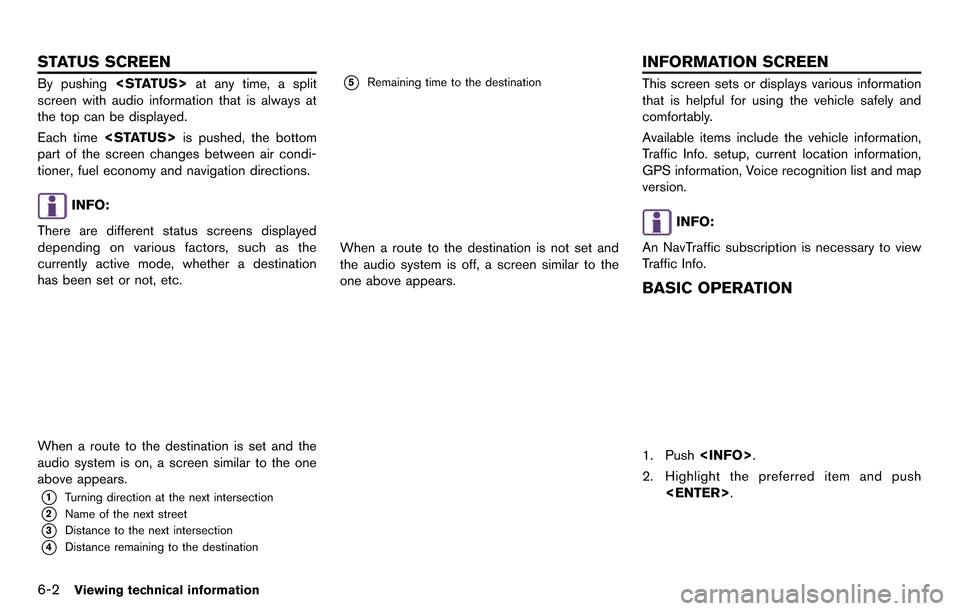
By pushing
screen with audio information that is always at
the top can be displayed.
Each time
part of the screen changes between air condi-
tioner, fuel economy and navigation directions.
INFO:
There are different status screens displayed
depending on various factors, such as the
currently active mode, whether a destination
has been set or not, etc.
When a route to the destination is set and the
audio system is on, a screen similar to the one
above appears.
*1Turning direction at the next intersection
*2Name of the next street
*3Distance to the next intersection
*4Distance remaining to the destination
*5Remaining time to the destination
When a route to the destination is not set and
the audio system is off, a screen similar to the
one above appears.
This screen sets or displays various information
that is helpful for using the vehicle safely and
comfortably.
Available items include the vehicle information,
Traffic Info. setup, current location information,
GPS information, Voice recognition list and map
version.
INFO:
An NavTraffic subscription is necessary to view
Traffic Info.
BASIC OPERATION
1. Push
2. Highlight the preferred item and push
STATUS SCREEN INFORMATION SCREEN
Page 176 of 314
![NISSAN GT-R 2014 R35 Multi Function Display Owners Manual Available items
.[Fuel Economy]:
Displays the fuel economy information.
“Fuel economy information” (page 6-4)
. [Tire Pressure]:
Displays the tire pressure information.
“Tire pressure informatio NISSAN GT-R 2014 R35 Multi Function Display Owners Manual Available items
.[Fuel Economy]:
Displays the fuel economy information.
“Fuel economy information” (page 6-4)
. [Tire Pressure]:
Displays the tire pressure information.
“Tire pressure informatio](/manual-img/5/367/w960_367-175.png)
Available items
.[Fuel Economy]:
Displays the fuel economy information.
“Fuel economy information” (page 6-4)
. [Tire Pressure]:
Displays the tire pressure information.
“Tire pressure information” (page 6-4)
. [Maintenance]:
Displays the vehicle maintenance informa-
tion.
“Maintenance information” (page 6-6)
. [Where am I?]:
Displays information regarding the current
vehicle location.
“Viewing information about current
vehicle location” (page 6-3)
. [Traffic Info]:
Allows Traffic Info. setup.
“Viewing available traffic information”
(page 6-7)
. [Weather Info]:
Displays weather information.
“Viewing available weather informa-
tion” (page 6-12)
. [Others]: — [Map Update]:
Display the map version and enable
updating of the map data.
“Map update” (page 6-21)
— [Navigation Version]: Displays the current navigation system
version.
“Viewing navigation system version
information” (page 6-22)
— [GPS Position]: Displays GPS information regarding the
current vehicle location.
“Viewing GPS current location in-
formation” (page 6-22)
— [Voice Recognition]: Displays the voice recognition list.
“8. Voice recognition”
This displays the information about the vehicle
location on the route when driving according to
route guidance.
BASIC OPERATION
1. Push
2. Highlight [Where am I?] and push
3. Push
screen. Push