2014 NISSAN FRONTIER tire pressure
[x] Cancel search: tire pressurePage 397 of 434
TIRE AND LOADING INFORMATION
LABEL
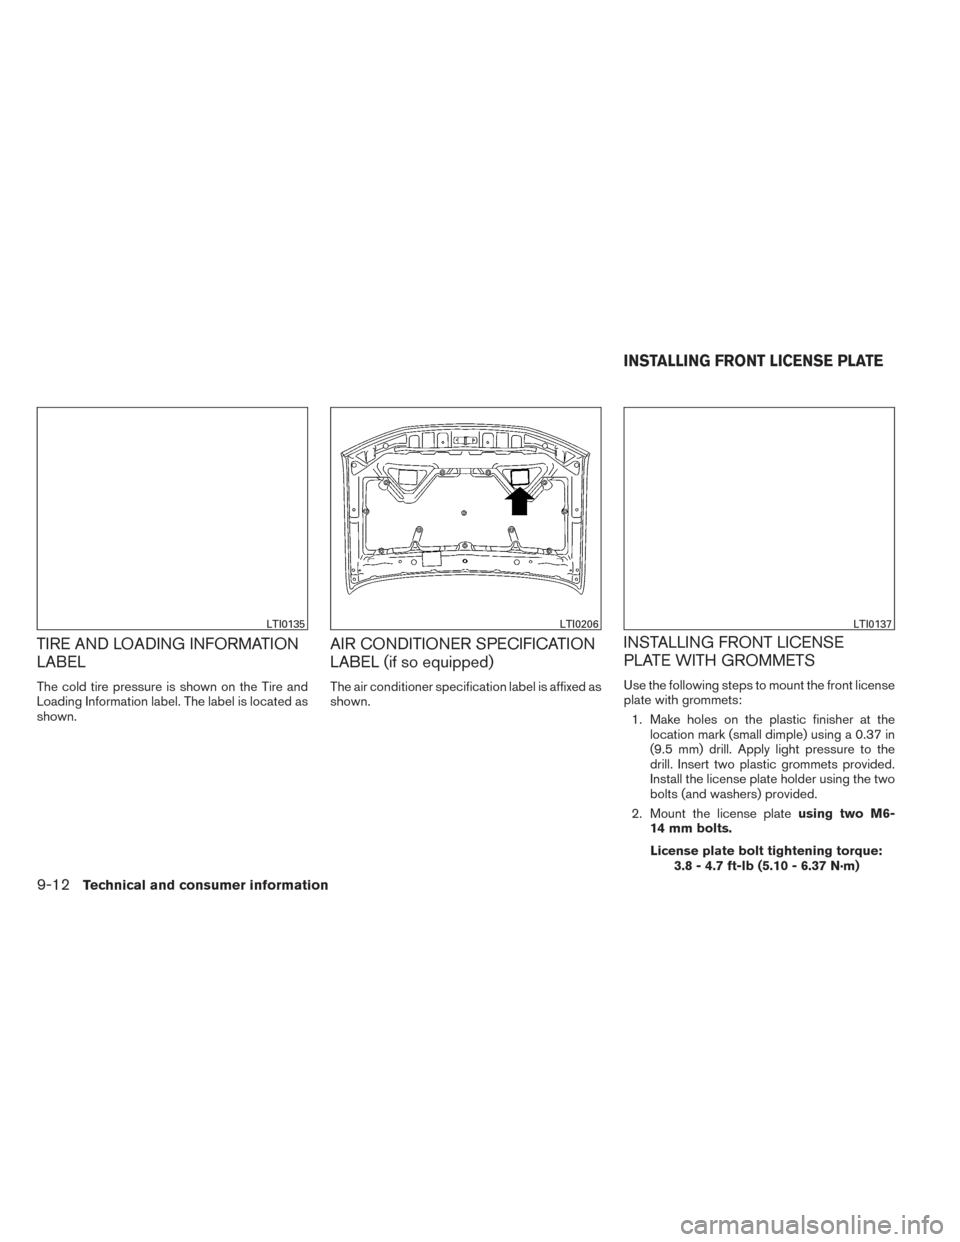
The cold tire pressure is shown on the Tire and
Loading Information label. The label is located as
shown.
AIR CONDITIONER SPECIFICATION
LABEL (if so equipped)
The air conditioner specification label is affixed as
shown.
INSTALLING FRONT LICENSE
PLATE WITH GROMMETS
Use the following steps to mount the front license
plate with grommets:1. Make holes on the plastic finisher at the location mark (small dimple) using a 0.37 in
(9.5 mm) drill. Apply light pressure to the
drill. Insert two plastic grommets provided.
Install the license plate holder using the two
bolts (and washers) provided.
2. Mount the license plate using two M6-
14 mm bolts.
License plate bolt tightening torque: 3.8 - 4.7 ft-lb (5.10 - 6.37 N·m)
LTI0135LTI0206LTI0137
INSTALLING FRONT LICENSE PLATE
9-12Technical and consumer information
Page 398 of 434

INSTALLING FRONT LICENSE
PLATE WITHOUT GROMMETS
Use the following steps to mount the front license
plate without grommets:1. Make a shallow hole in each plastic finisher at the location mark (small dimple) using a
0.31 in (8 mm) drill. To avoid damaging the
threads behind the finisher, apply only light
pressure to the drill.
2. Mount the license plate bracket using two 8 mm slotted hex head screws.
WARNING
● It is extremely dangerous to ride
in a cargo area inside a vehicle. In
a collision, people riding in these
areas are more likely to be seri-
ously injured or killed.
● Do not allow people to ride in any
area of your vehicle that is not
equipped with seats and seat
belts.
● Be sure everyone in your vehicle
is in a seat and using a seat belt
properly.
TERMS
It is important to familiarize yourself with
the following terms before loading your
vehicle:
● Curb Weight (actual weight of your
vehicle) - vehicle weight including:
standard and optional equipment, flu-
ids, emergency tools, and spare tire
assembly. This weight does notin-
clude passengers and cargo. ●
GVW (Gross Vehicle Weight) - curb
weight plus the combined weight of
passengers and cargo.
● GVWR (Gross Vehicle Weight Rat-
ing) - maximum total combined
weight of the unloaded vehicle, pas-
sengers, luggage, hitch, trailer
tongue load and any other optional
equipment. This information is lo-
cated on the F.M.V.S.S./C.M.V.S.S.
certification label.
● GAWR (Gross Axle Weight Rating) -
maximum weight (load) limit specified
for the front or rear axle. This informa-
tion is located on the
F.M.V.S.S./C.M.V.S.S. certification
label.
● GCWR (Gross Combined Weight
rating) - The maximum total weight
rating of the vehicle, passengers,
cargo, and trailer.
VEHICLE LOADING INFORMATION
Technical and consumer information9-13
Page 408 of 434
LOCATION FOR CENTER OF
GRAVITY
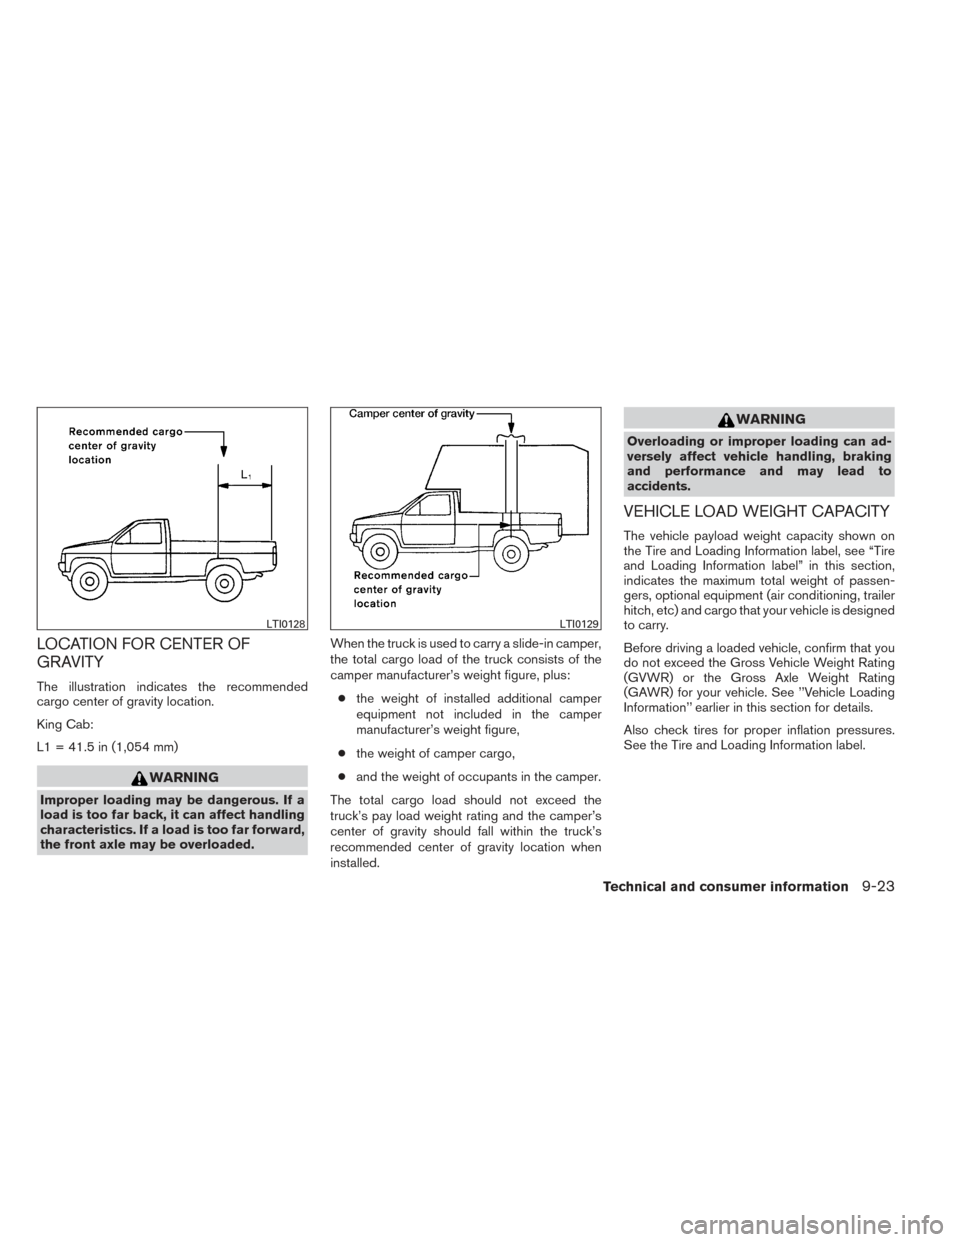
The illustration indicates the recommended
cargo center of gravity location.
King Cab:
L1 = 41.5 in (1,054 mm)
WARNING
Improper loading may be dangerous. If a
load is too far back, it can affect handling
characteristics. If a load is too far forward,
the front axle may be overloaded.When the truck is used to carry a slide-in camper,
the total cargo load of the truck consists of the
camper manufacturer’s weight figure, plus:
● the weight of installed additional camper
equipment not included in the camper
manufacturer’s weight figure,
● the weight of camper cargo,
● and the weight of occupants in the camper.
The total cargo load should not exceed the
truck’s pay load weight rating and the camper’s
center of gravity should fall within the truck’s
recommended center of gravity location when
installed.
WARNING
Overloading or improper loading can ad-
versely affect vehicle handling, braking
and performance and may lead to
accidents.
VEHICLE LOAD WEIGHT CAPACITY
The vehicle payload weight capacity shown on
the Tire and Loading Information label, see “Tire
and Loading Information label” in this section,
indicates the maximum total weight of passen-
gers, optional equipment (air conditioning, trailer
hitch, etc) and cargo that your vehicle is designed
to carry.
Before driving a loaded vehicle, confirm that you
do not exceed the Gross Vehicle Weight Rating
(GVWR) or the Gross Axle Weight Rating
(GAWR) for your vehicle. See ’’Vehicle Loading
Information’’ earlier in this section for details.
Also check tires for proper inflation pressures.
See the Tire and Loading Information label.
LTI0128LTI0129
Technical and consumer information9-23
Page 416 of 434
Sway control device
Sudden maneuvers, wind gusts, and buffeting
caused by other vehicles can affect trailer han-
dling. Sway control devices may be used to help
control these affects. If you choose to use one,
contact a reputable trailer hitch supplier to make
sure the sway control device will work with the
vehicle, hitch, trailer and the trailer’s brake sys-
tem. Follow the instructions provided by the
manufacturer for installing and using the sway
control device.
Class I hitch
Class I trailer hitch equipment (receiver, ball
mount and hitch ball) can be used to tow trailers
of a maximum weight of 2,000 lb (907 kg) .
Class II hitch
Class II trailer hitch equipment (receiver, ball
mount and hitch ball) can be used to tow trailers
of a maximum weight of 3,500 lb (1,587 kg).
The genuine NISSAN step bumper is considered
a Class II ball mount.
Class III hitch
Class III trailer hitch equipment (receiver, ball
mount and hitch ball) can be used to tow trailers
of a maximum weight of 5,000 lb (2,268 kg).
Class IV hitch
Class IV trailer hitch equipment (receiver, ball
mount and hitch ball) can be used to tow trailers
of a maximum weight of 10,000 lb (4,535 kg). A
weight distributing hitch should be used to tow
trailers that weigh over 5,000 lb (2,268 kg).
Your vehicle may be equipped with Class IV
trailer hitch equipment that has a 10,000 lb
(4,535 kg) maximum weight rating, but your ve-
hicle is only capable of towing the maximum
trailer weights shown in the “Towing
Load/Specification” chart earlier in this section.
CAUTION
●Special hitches which include frame re-
inforcements are required for towing
above 2,000 lb (907 kg) . Suitable genu-
ine NISSAN hitches, ball mounts and
hitch balls for pickup trucks and sport
utility vehicles are available at a
NISSAN dealer.
● The hitch should not be attached to or
affect the operation of the impact-
absorbing bumper.
● Do not use axle-mounted hitches.
● Do not modify the vehicle exhaust sys-
tem, brake system, etc. to install a
trailer hitch. ●
To reduce the possibility of additional
damage if your vehicle is struck from
the rear, where practical, remove the
receiver when not in use.
● Regularly check that all trailer hitch
mounting bolts are securely mounted.
Tire pressures
● When towing a trailer, inflate the ve-
hicle tires to the recommended cold
tire pressure indicated on the Tire
and Loading Information label.
● Trailer tire condition, size, load rating
and proper inflation pressure should
be in accordance with the trailer and
tire manufacturer’s specifications.
Safety chains
Always use suitable safety chains between your
vehicle and the trailer. The safety chains should
be crossed and should be attached to the hitch,
not to the vehicle bumper or axle. The safety
chains can be attached to the bumper if the hitch
ball is mounted to the bumper. Be sure to leave
enough slack in the chains to permit turning
corners.
Technical and consumer information9-31
Page 418 of 434
Pre-towing tips
●Be certain your vehicle maintains a level
position when a loaded and/or unloaded
trailer is hitched. Do not drive the vehicle if it
has an abnormal nose-up or nose-down
condition; check for improper tongue load,
overload, worn suspension or other possible
causes of either condition.
● Always secure items in the trailer to prevent
load shift while driving.
●
Keep the cargo load as low as possible in the
trailer to keep the trailer center of gravity low.
● Load the trailer so approximately 60% of the
trailer load is in the front half and 40% is in
the back half. Also make sure the load is
balanced side to side.
● Check your hitch, trailer tire pressure, ve-
hicle tire pressure, trailer light operation, and
trailer wheel lug nuts every time you attach a
trailer to the vehicle.
● Be certain your rearview mirrors conform to
all federal, state or local regulations. If not,
install any mirrors required for towing before
driving the vehicle.
●
Determine the overall height of the vehicle and
trailer so the required clearance is known.
Trailer towing tips
In order to gain skill and an understanding of the
vehicle’s behavior, you should practice turning,
stopping and backing up in an area which is free
from traffic. Steering stability and braking perfor-
mance will be somewhat different than under
normal driving conditions.
● Always secure items in the trailer to prevent
load shift while driving.
● Lock the trailer hitch coupler with a pin or
lock to prevent the coupler from inadver-
tently becoming unlatched.
● Avoid abrupt starts, acceleration or stops.
● Avoid sharp turns or lane changes.
● Always drive your vehicle at a moderate
speed.
● When backing up, hold the bottom of the
steering wheel with one hand. Move your
hand in the direction in which you want the
trailer to go. Make small corrections and
back up slowly. If possible, have someone
guide you when you are backing up. Always block the wheels on both vehicle and
trailer when parking. Parking on a slope is not
recommended; however, if you must do so:
CAUTION
If you move the shift lever to the P (Park)
position before blocking the wheels and
applying the parking brake, transmission
damage could occur.
1. Apply and hold the brake pedal.
2. Have someone place blocks on the downhill side of the vehicle and trailer wheels.
3. After the wheel blocks are in place, slowly release the brake pedal until the blocks ab-
sorb the vehicle load.
4. Apply the parking brake.
5. Shift the transmission into P (Park) .
6.
Make sure theindicator light (if so
equipped) indicates the transfer case is in 4H,
4L, or 2H and that the ATP light is off. If
the
indicator light is flashing, or the ATP
light is ON, make sure the transmission is in P
(Park) (A/T) and turn the 4WD switch to 2WD
or 4H. See “Automatic transmission park
warning light” in the “Instruments and con-
trols” section and “Using four wheel drive
(4WD)” in the “Starting and driving” section.
7. Turn off the engine.
Technical and consumer information9-33
Page 427 of 434
Precautions on child
restraints.........1-25,1-37,1-50,1-60
Top tether strap anchor point locations . .1-30
Child restraint with top tether strap .......1-30
Child safety rear door lock ............3-6
Chimes, audible reminders ...........2-23
Cleaning exterior and interior ...........7-2
Clock.......................4-36 (models without navigation system) ....4-36
Clockset.....................4-36
Clutch Clutch fluid ..................8-15
Clutch interlock (clutch start) switch ......2-36
C.M.V.S.S. certification label ..........9-11
Cold weather driving ...............5-41
Compact disc (CD) player ....4-37,4-42,4-48
Compass display .................2-10
Consolebox...................2-41
Control panel buttons ...............4-4
Brightness/contrast button ..........4-9
Enterbutton..................4-4
Setting button .................4-7
Controls Audiocontrols(steeringwheel).......4-63
Heater and air conditioner
controls ................4-16,4-24
Coolant Capacities and recommended
fuel/lubricants .................9-2
Changing engine coolant ...........8-9
Checking engine coolant level ........8-9
Engine coolant temperature gauge .....2-6
Corrosionprotection ...............7-5
Cruisecontrol..................5-21
Cupholders...................2-44
Curtainside-impactandrolloverairbag....1-77 D
Daytime running light system (Canada only) . .2-30
Defroster switch Rear window defroster switch .......2-27
Dimensionsandweights.............9-9
Dimmer switch for instrument panel ......2-31
Display controls (see control panel buttons) . .4-4
Door locks .....................3-3
Door open warning light .............2-16
Drive belt .....................8-18
Driving Cold weather driving .............5-41
Driving with automatic transmission ....5-13
Driving with manual transmission ......5-18
Precautions when starting and driving ....5-2
E
Economy - fuel ..................5-24
Electronic locking rear differential (E-Lock)
system ......................5-31
Electronic locking rear differential (E-Lock)
system switch ..................2-35
Emission control information label .......9-11
Emission control system warranty .......9-37
Engine Before starting the engine ..........5-12
Block heater .................5-42
Capacities and recommended
fuel/lubricants .................9-2
Changingenginecoolant...........8-9
Changingengineoil.............8-11
Changing engine oil filter ..........8-12 Checking engine coolant level
........8-9
Checking engine oil level ..........8-10
Engine compartment check locations ....8-6
Engine coolant temperature gauge .....2-6
Engine cooling system ............8-8
Engine oil ...................8-10
Engine
oil and oil filter recommendation . . .9-6
Engine oil pressure warning light ......2-17
Engine oil viscosity ..............9-6
Engine serial number ............9-11
Engine specifications .............9-8
Starting the engine .............5-12
Engine oil pressure gauge ............2-8
Enterbutton....................4-4
Eventdatarecorders ..............9-39
Exhaustgas(Carbonmonoxide).........5-2
Extended storage switch ............8-27
F
First aid kit .....................6-2
Flashers (See hazard warning flasher switch) . .6-3
Flat tire .......................6-3
Floor mat positioning aid .............7-5
Fluid Brake fluid ..................8-14
Capacities and recommended
fuel/lubricants .................9-2
Clutchfluid..................8-15
Engine coolant .................8-8
Engine oil ...................8-10
Power steering fluid .............8-14
Windshield-washer fluid ...........8-15
F.M.V.S.S. certification label ...........9-11
Foglightswitch .................2-32
10-2
Page 428 of 434
Front air bag system
(See supplemental restraint system)......1-72
Frontseats.....................1-2
Fuel Capacities and recommended
fuel/lubricants .................9-2
Fuel economy ................5-24
Fuel-filler door and cap ...........3-11
Fuel gauge ...................2-7
Fueloctanerating...............9-5
Fuel recommendation .............9-4
Loosefuelcapwarning ........2-5,3-11
Fuses.......................8-24
Fusiblelinks ...................8-26
G
Garage door opener, HomeLink® Universal
Transceiver....................2-54
Gascap .....................3-11
Gauge Engine coolant temperature gauge .....2-6
Engine oil pressure gauge ..........2-8
Fuel gauge ...................2-7
Odometer ...................2-4
Speedometer .................2-4
Tachometer ..................2-6
Trip computer .................2-9
Trip odometer .................2-4
Voltmeter....................2-8
Generalmaintenance...............8-2
Glovebox.....................2-42 H
Hands-free phone system,
Bluetooth®................4-66,4-80
Hazard warning flasher switch ..........6-3
Headlight and turn signal switch ........2-28
Headlight control switch ............2-28
Headlights ....................8-29
Head restraints Active Head Restraint .............1-6
Heated seats ...................2-33
Heater Heater and air conditioner
controls................4-16,4-24
Heater operation ...........4-17,4-25
Hill descent control switch ...........2-34
Hill descent control system ...........5-38
Hill start assist system ..............5-39
HomeLink® Universal Transceiver .......2-54
Hood release ...................3-10
Horn .......................2-32
I
Ignition switch ..................5-10
Immobilizer system .........2-25,3-2,5-12
Important vehicle information label .......9-11
In-cabin microfilter ................8-21
Increasing fuel economy .............5-24
Indicator lights and audible reminders
(See warning/indicator lights and audible
reminders)....................2-14
Inside automatic anti-glare mirror ........3-15
Inside mirror ...................3-15 Instrument brightness control
..........2-31
Instrument panel ...............0-6,2-2
Instrument panel dimmer switch ........2-31
Interiorlight....................2-52
iPod® Player ...............4-54,4-56
ISOFIX child restraints .............1-27
J
Jumpseat .....................1-5
Jump starting ...................6-11
K
Key.........................3-2
Keyfob battery replacement ...........8-28
Keyless entry system
(See remote keyless entry system) ........3-6
L
Labels Air
conditioner specification label .....9-12
C.M.V.S.S. certification label ........9-11
Emission control information label .....9-11
Engine serial number ............9-11
F.M.V.S.S. certification label .........9-11
Tire and Loading Information label .....9-12
Vehicle identification number (VIN) plate . .9-10
Warning labels (for SRS) ..........1-79
LATCH (Lower Anchors and Tethers for CHildren)
System ......................1-27
10-3
Page 429 of 434
License plateInstalling the license plate ..........9-12
Light Airbagwarninglight.........1-80,2-19
Brakelight(Seestoplight).........8-31
Bulb check/instrument panel ........2-15
Bulb replacement ..............8-31
Chargewarninglight ............2-16
Foglightswitch ...............2-32
Headlight and turn signal switch ......2-28
Headlightcontrolswitch ..........2-28
Headlights..................8-29
Interiorlight..................2-52
Lightbulbs..................8-29
Low tire pressure warning light .......2-17
Low windshield-washer fluid warning
light......................2-19
Passenger air bag and status light .....1-74
Security indicator light ............2-22
Warning/indicator lights and audible
reminders ...................2-14
Lights Maplights ..................2-53
Lock Child safety rear door lock ..........3-6
Door locks ...................3-3
Power door locks ...............3-4
Loose fuel cap warning ..........2-5,3-11
Lowfuelwarninglight..............2-17
Low tire pressure warning light .........2-17
Low windshield-washer fluid warning light . . .2-19
Luggage rack (see roof rack) ..........2-46
Luggage (See vehicle loading information) . .9-13 M
Maintenance Generalmaintenance.............8-2
Insidethevehicle...............8-3
Maintenance precautions ...........8-5
Outside the vehicle ..............8-2
Seatbeltmaintenance............1-23
Underthehoodandvehicle .........8-4
Malfunction indicator light ............2-21
Manual front seat adjustment ...........1-2
Manual windows .................2-49
Maplights ....................2-53
Map pocket ....................2-43
Meters and gauges ................2-3
Instrument brightness control ........2-31
Mirror Automatic anti-glare inside mirror ......3-15
Inside mirror .................3-15
Outside mirrors ...............3-16
Vanity mirror .................3-14
Moonroof .....................2-50
Multi-remote control system
(See remote keyless entry system) ........3-6
N
NISSAN vehicle immobilizer
system ................2-25,3-2,5-12
NISSAN voice recognition system .......4-86
O
Octane rating (See fuel octane rating) ......9-5Odometer
.....................2-4
Oil Capacities and recommended
fuel/lubricants .................9-2
Changing engine oil .............8-11
Changing engine oil filter ..........8-12
Checking engine oil level ..........8-10
Engine oil ...................8-10
Engine oil and oil filter recommendation . . .9-6
Engine oil viscosity ..............9-6
Outside mirrors .................3-16
Overdrive switch .................5-17
Overheat If your vehicle overheats ...........6-13
Owner’s manual order form ...........9-39
Owner’s manual/service manual order
information ....................
9-39
P
Parking Parking brake operation ...........5-20
Parking/parking on hills ...........5-33
Phone, Bluetooth® hands-free
system ...................4-66,4-80
Power Frontseatadjustment.............1-4
Power door locks ...............3-4
Power outlet .................2-37
Power steering fluid .............8-14
Power steering system ...........5-34
Power windows ...............2-47
Rear power windows ............2-49
Precautions Maintenanceprecautions...........8-5
10-4