2014 NISSAN CUBE ESP
[x] Cancel search: ESPPage 40 of 332
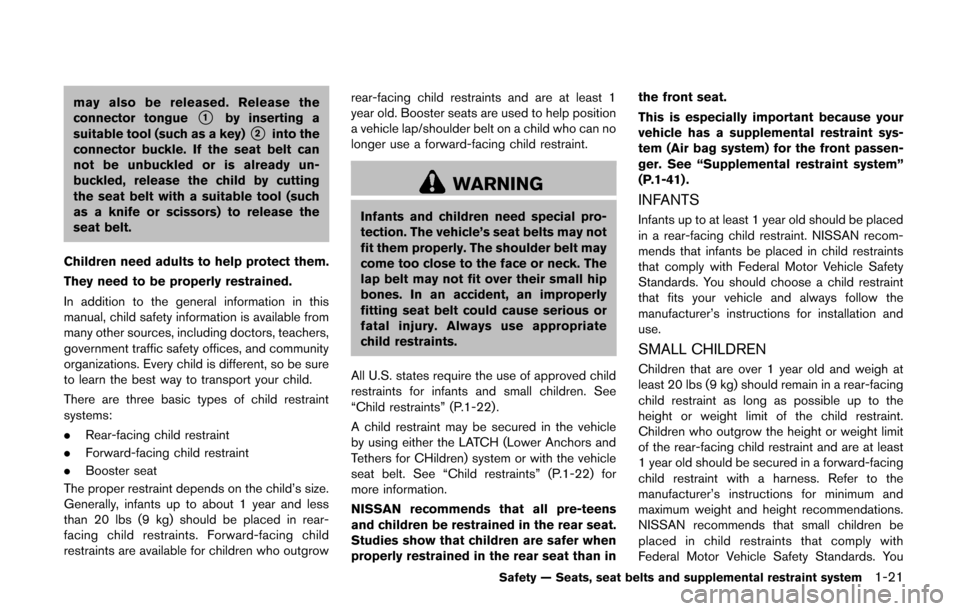
may also be released. Release the
connector tongue*1by inserting a
suitable tool (such as a key)*2into the
connector buckle. If the seat belt can
not be unbuckled or is already un-
buckled, release the child by cutting
the seat belt with a suitable tool (such
as a knife or scissors) to release the
seat belt.
Children need adults to help protect them.
They need to be properly restrained.
In addition to the general information in this
manual, child safety information is available from
many other sources, including doctors, teachers,
government traffic safety offices, and community
organizations. Every child is different, so be sure
to learn the best way to transport your child.
There are three basic types of child restraint
systems:
. Rear-facing child restraint
. Forward-facing child restraint
. Booster seat
The proper restraint depends on the child’s size.
Generally, infants up to about 1 year and less
than 20 lbs (9 kg) should be placed in rear-
facing child restraints. Forward-facing child
restraints are available for children who outgrow rear-facing child restraints and are at least 1
year old. Booster seats are used to help position
a vehicle lap/shoulder belt on a child who can no
longer use a forward-facing child restraint.
WARNING
Infants and children need special pro-
tection. The vehicle’s seat belts may not
fit them properly. The shoulder belt may
come too close to the face or neck. The
lap belt may not fit over their small hip
bones. In an accident, an improperly
fitting seat belt could cause serious or
fatal injury. Always use appropriate
child restraints.
All U.S. states require the use of approved child
restraints for infants and small children. See
“Child restraints” (P.1-22) .
A child restraint may be secured in the vehicle
by using either the LATCH (Lower Anchors and
Tethers for CHildren) system or with the vehicle
seat belt. See “Child restraints” (P.1-22) for
more information.
NISSAN recommends that all pre-teens
and children be restrained in the rear seat.
Studies show that children are safer when
properly restrained in the rear seat than in the front seat.
This is especially important because your
vehicle has a supplemental restraint sys-
tem (Air bag system) for the front passen-
ger. See “Supplemental restraint system”
(P.1-41) .INFANTS
Infants up to at least 1 year old should be placed
in a rear-facing child restraint. NISSAN recom-
mends that infants be placed in child restraints
that comply with Federal Motor Vehicle Safety
Standards. You should choose a child restraint
that fits your vehicle and always follow the
manufacturer’s instructions for installation and
use.
SMALL CHILDREN
Children that are over 1 year old and weigh at
least 20 lbs (9 kg) should remain in a rear-facing
child restraint as long as possible up to the
height or weight limit of the child restraint.
Children who outgrow the height or weight limit
of the rear-facing child restraint and are at least
1 year old should be secured in a forward-facing
child restraint with a harness. Refer to the
manufacturer’s instructions for minimum and
maximum weight and height recommendations.
NISSAN recommends that small children be
placed in child restraints that comply with
Federal Motor Vehicle Safety Standards. You
Safety — Seats, seat belts and supplemental restraint system1-21
Page 65 of 332
1-46Safety — Seats, seat belts and supplemental restraint system
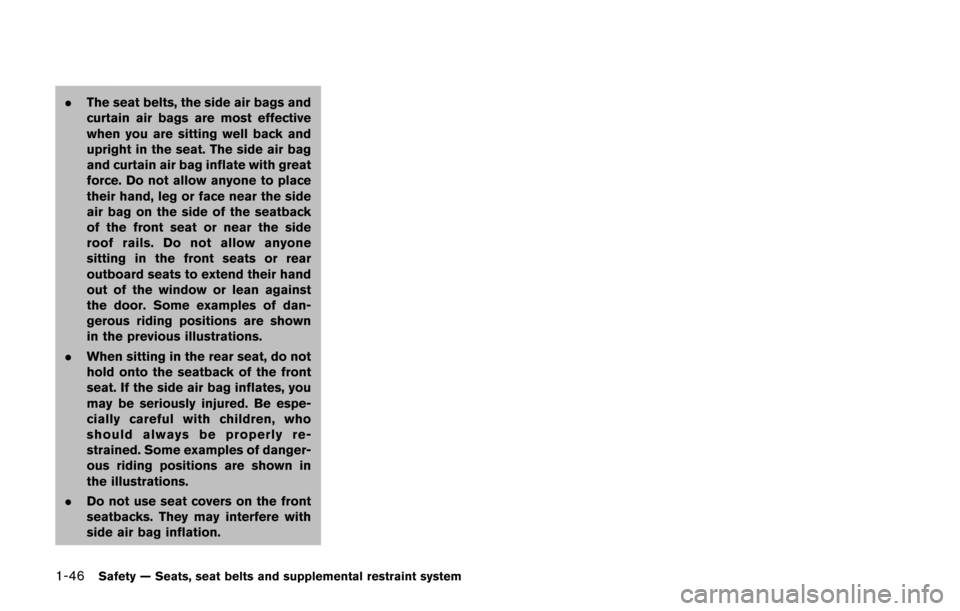
.The seat belts, the side air bags and
curtain air bags are most effective
when you are sitting well back and
upright in the seat. The side air bag
and curtain air bag inflate with great
force. Do not allow anyone to place
their hand, leg or face near the side
air bag on the side of the seatback
of the front seat or near the side
roof rails. Do not allow anyone
sitting in the front seats or rear
outboard seats to extend their hand
out of the window or lean against
the door. Some examples of dan-
gerous riding positions are shown
in the previous illustrations.
. When sitting in the rear seat, do not
hold onto the seatback of the front
seat. If the side air bag inflates, you
may be seriously injured. Be espe-
cially careful with children, who
should always be properly re-
strained. Some examples of danger-
ous riding positions are shown in
the illustrations.
. Do not use seat covers on the front
seatbacks. They may interfere with
side air bag inflation.
Page 88 of 332
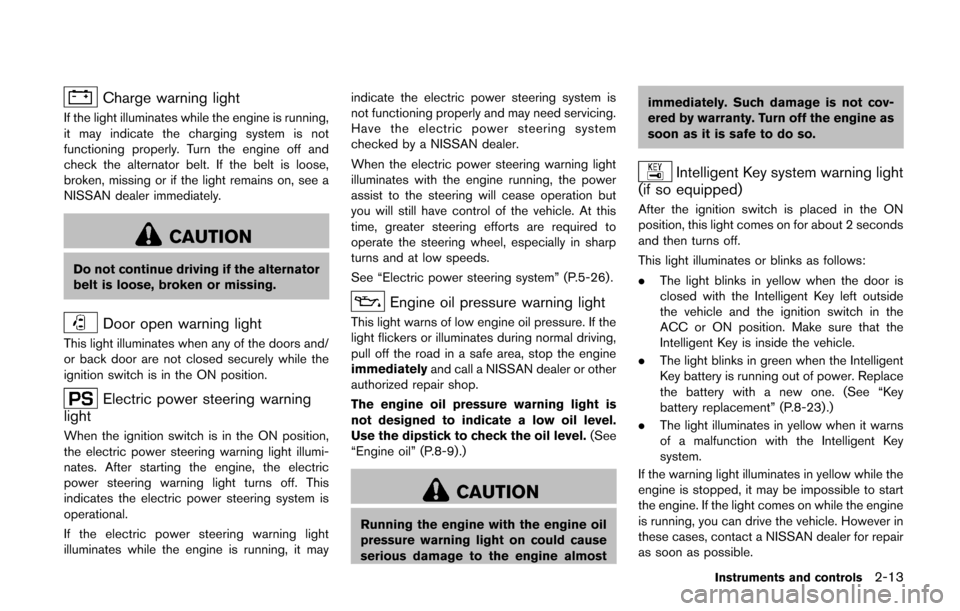
Charge warning light
If the light illuminates while the engine is running,
it may indicate the charging system is not
functioning properly. Turn the engine off and
check the alternator belt. If the belt is loose,
broken, missing or if the light remains on, see a
NISSAN dealer immediately.
CAUTION
Do not continue driving if the alternator
belt is loose, broken or missing.
Door open warning light
This light illuminates when any of the doors and/
or back door are not closed securely while the
ignition switch is in the ON position.
Electric power steering warning
light
When the ignition switch is in the ON position,
the electric power steering warning light illumi-
nates. After starting the engine, the electric
power steering warning light turns off. This
indicates the electric power steering system is
operational.
If the electric power steering warning light
illuminates while the engine is running, it may indicate the electric power steering system is
not functioning properly and may need servicing.
Have the electric power steering system
checked by a NISSAN dealer.
When the electric power steering warning light
illuminates with the engine running, the power
assist to the steering will cease operation but
you will still have control of the vehicle. At this
time, greater steering efforts are required to
operate the steering wheel, especially in sharp
turns and at low speeds.
See “Electric power steering system” (P.5-26) .
Engine oil pressure warning light
This light warns of low engine oil pressure. If the
light flickers or illuminates during normal driving,
pull off the road in a safe area, stop the engine
immediately
and call a NISSAN dealer or other
authorized repair shop.
The engine oil pressure warning light is
not designed to indicate a low oil level.
Use the dipstick to check the oil level. (See
“Engine oil” (P.8-9).)
CAUTION
Running the engine with the engine oil
pressure warning light on could cause
serious damage to the engine almost immediately. Such damage is not cov-
ered by warranty. Turn off the engine as
soon as it is safe to do so.
Intelligent Key system warning light
(if so equipped)
After the ignition switch is placed in the ON
position, this light comes on for about 2 seconds
and then turns off.
This light illuminates or blinks as follows:
. The light blinks in yellow when the door is
closed with the Intelligent Key left outside
the vehicle and the ignition switch in the
ACC or ON position. Make sure that the
Intelligent Key is inside the vehicle.
. The light blinks in green when the Intelligent
Key battery is running out of power. Replace
the battery with a new one. (See “Key
battery replacement” (P.8-23) .)
. The light illuminates in yellow when it warns
of a malfunction with the Intelligent Key
system.
If the warning light illuminates in yellow while the
engine is stopped, it may be impossible to start
the engine. If the light comes on while the engine
is running, you can drive the vehicle. However in
these cases, contact a NISSAN dealer for repair
as soon as possible.
Instruments and controls2-13
Page 96 of 332
FCC Notice:
This device complies with Part 15 of the
FCC Rules. Operation is subject to the
following two conditions: (1) This device
may not cause harmful interference, and
(2) this device must accept any interfer-
ence received, including interference that
may cause undesired operation.
NOTE:
Changes or modifications not expressly
approved by the party responsible for
compliance could void the user’s authority
to operate the equipment.
SIC2045
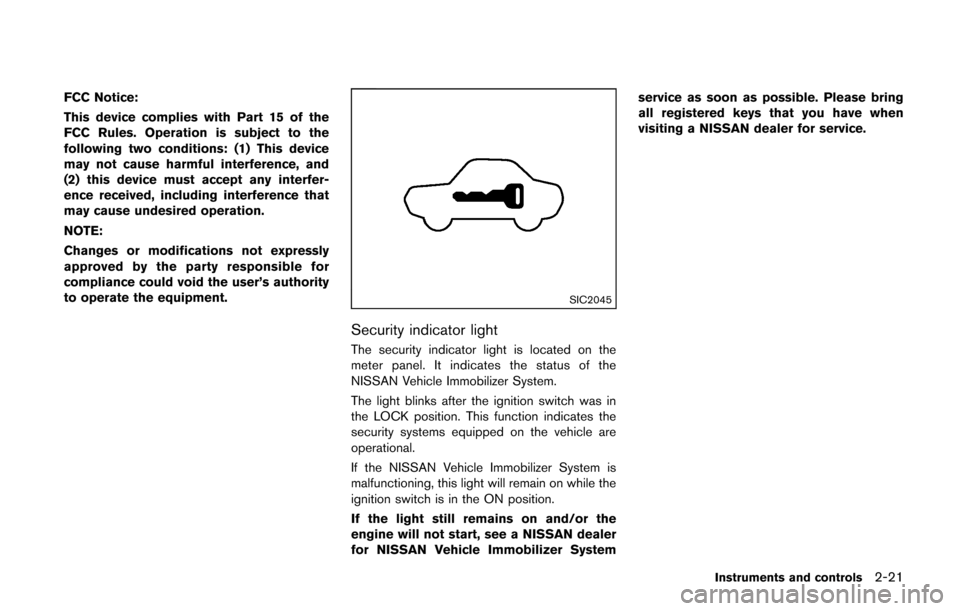
Security indicator light
The security indicator light is located on the
meter panel. It indicates the status of the
NISSAN Vehicle Immobilizer System.
The light blinks after the ignition switch was in
the LOCK position. This function indicates the
security systems equipped on the vehicle are
operational.
If the NISSAN Vehicle Immobilizer System is
malfunctioning, this light will remain on while the
ignition switch is in the ON position.
If the light still remains on and/or the
engine will not start, see a NISSAN dealer
for NISSAN Vehicle Immobilizer Systemservice as soon as possible. Please bring
all registered keys that you have when
visiting a NISSAN dealer for service.
Instruments and controls2-21
Page 109 of 332
2-34Instruments and controls
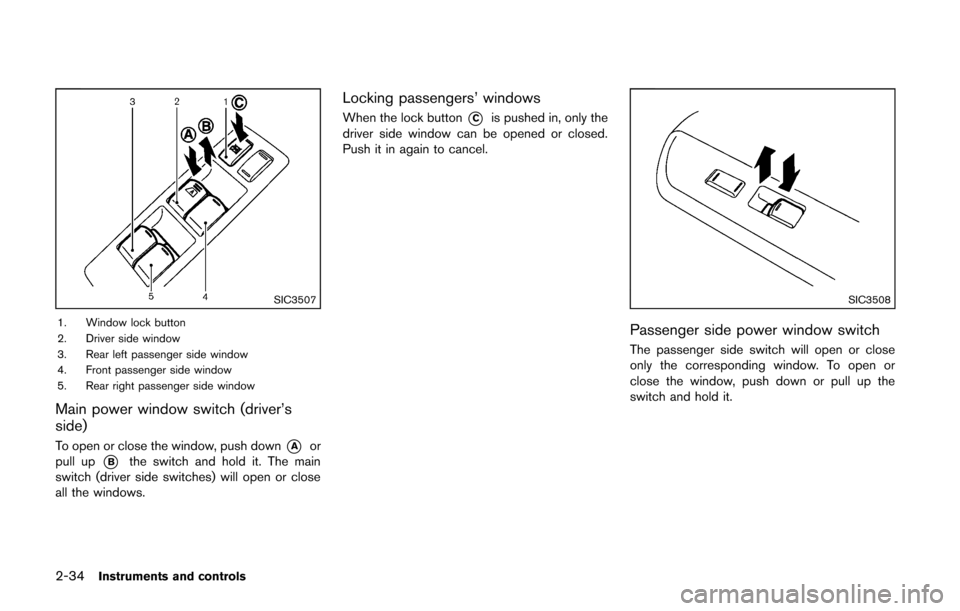
SIC3507
1. Window lock button
2. Driver side window
3. Rear left passenger side window
4. Front passenger side window
5. Rear right passenger side window
Main power window switch (driver’s
side)
To open or close the window, push down*Aor
pull up
*Bthe switch and hold it. The main
switch (driver side switches) will open or close
all the windows.
Locking passengers’ windows
When the lock button*Cis pushed in, only the
driver side window can be opened or closed.
Push it in again to cancel.
SIC3508
Passenger side power window switch
The passenger side switch will open or close
only the corresponding window. To open or
close the window, push down or pull up the
switch and hold it.
Page 119 of 332
3-6Pre-driving checks and adjustments
Lockout protection
Lockout protection function helps to prevent the
keys from being accidentally locked inside the
vehicle.
For models with Intelligent Key system:
.When the power door lock switch (driver’s
or front passenger’s) is moved to the lock
position with the ignition switch placed in
the ACC or ON position and any door open,
all doors will lock and then unlock auto-
matically.
. When the power door lock switch is moved
to the lock position with the Intelligent Key
left in the vehicle and any door open, all
doors will unlock automatically and a chime
will sound after the door is closed.
For models without Intelligent Key system:
When the power door lock switch is moved to
the lock position with the key in the ignition
switch and any door open, all doors will lock and
then unlock automatically.
AUTOMATIC DOOR LOCKS
. All doors lock automatically when the vehicle
speed reaches 15 MPH (24 km/h) .
. All doors unlock automatically when the
ignition switch is placed in the OFF position
(models with Intelligent Key system) or when
the key is removed from the ignition switch (models without Intelligent Key system) .
The automatic unlock function can be
deactivated or activated.
To deactivate or activate the automatic door
unlock system, perform the following procedure:
1. Close all doors.
2. Place the ignition switch in the ON position.
3. Within 20 seconds of performing step 2, push and hold the power door lock switch to
the
position (UNLOCK) for more than 5
seconds.
4. When activated, the hazard indicator will flash twice. When deactivated, the hazard
indicator will flash once.
5. The ignition switch must be placed in the OFF and ON position again between each
setting change.
When the automatic door unlock system is
deactivated, the doors do not unlock when the
ignition switch is placed in the OFF position
(models with Intelligent Key system) or when the
key is removed from the ignition switch (models
without Intelligent Key system) . To unlock the
door manually, use the inside lock knob or the
power door lock switch (driver’s or front
passenger’s side).
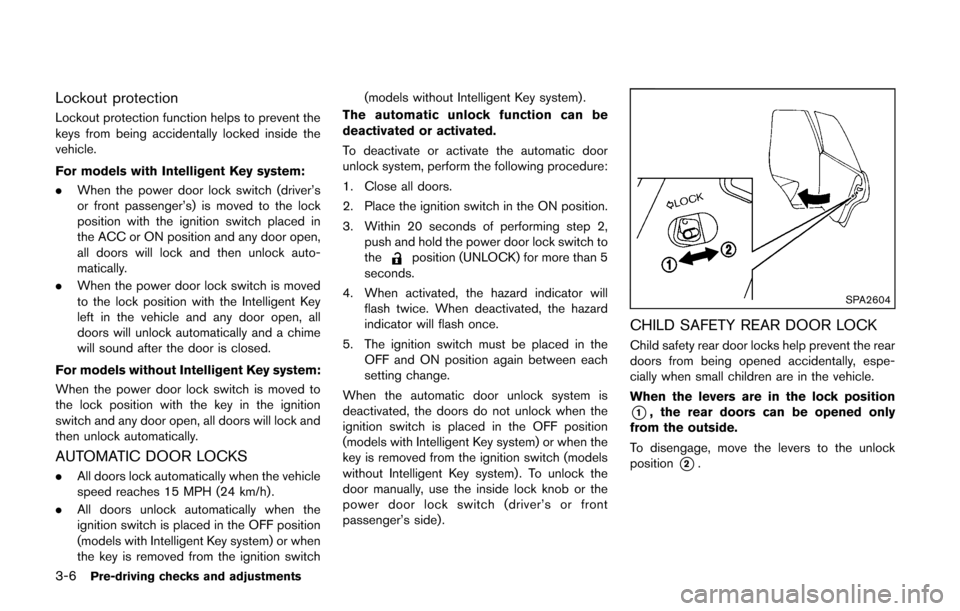
SPA2604
CHILD SAFETY REAR DOOR LOCK
Child safety rear door locks help prevent the rear
doors from being opened accidentally, espe-
cially when small children are in the vehicle.
When the levers are in the lock position
*1, the rear doors can be opened only
from the outside.
To disengage, move the levers to the unlock
position
*2.
Page 127 of 332
3-14Pre-driving checks and adjustments
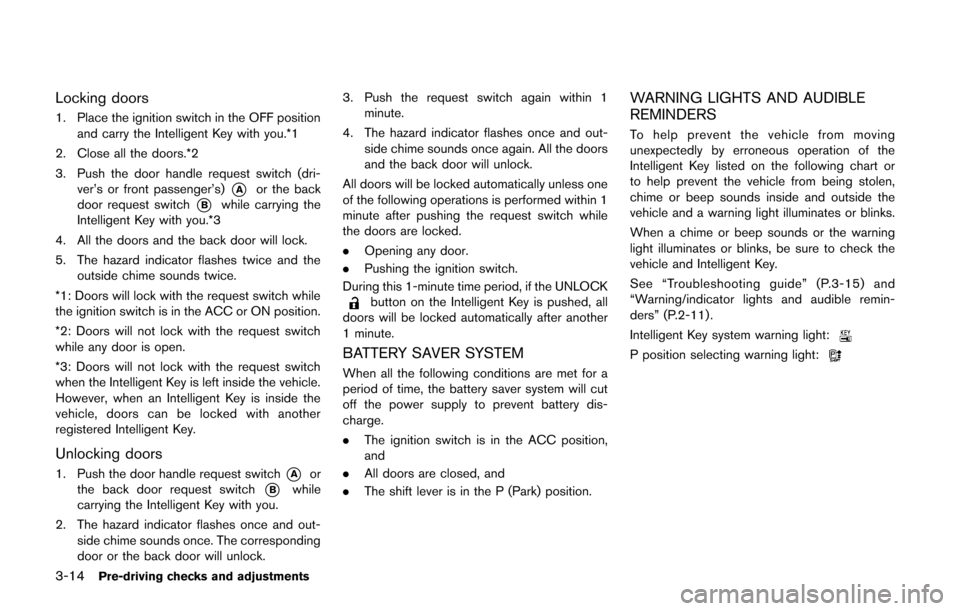
Locking doors
1. Place the ignition switch in the OFF positionand carry the Intelligent Key with you.*1
2. Close all the doors.*2
3. Push the door handle request switch (dri- ver’s or front passenger’s)
*Aor the back
door request switch
*Bwhile carrying the
Intelligent Key with you.*3
4. All the doors and the back door will lock.
5. The hazard indicator flashes twice and the outside chime sounds twice.
*1: Doors will lock with the request switch while
the ignition switch is in the ACC or ON position.
*2: Doors will not lock with the request switch
while any door is open.
*3: Doors will not lock with the request switch
when the Intelligent Key is left inside the vehicle.
However, when an Intelligent Key is inside the
vehicle, doors can be locked with another
registered Intelligent Key.
Unlocking doors
1. Push the door handle request switch*Aor
the back door request switch
*Bwhile
carrying the Intelligent Key with you.
2. The hazard indicator flashes once and out- side chime sounds once. The corresponding
door or the back door will unlock. 3. Push the request switch again within 1
minute.
4. The hazard indicator flashes once and out- side chime sounds once again. All the doors
and the back door will unlock.
All doors will be locked automatically unless one
of the following operations is performed within 1
minute after pushing the request switch while
the doors are locked.
. Opening any door.
. Pushing the ignition switch.
During this 1-minute time period, if the UNLOCK
button on the Intelligent Key is pushed, all
doors will be locked automatically after another
1 minute.
BATTERY SAVER SYSTEM
When all the following conditions are met for a
period of time, the battery saver system will cut
off the power supply to prevent battery dis-
charge.
. The ignition switch is in the ACC position,
and
. All doors are closed, and
. The shift lever is in the P (Park) position.
WARNING LIGHTS AND AUDIBLE
REMINDERS
To help prevent the vehicle from moving
unexpectedly by erroneous operation of the
Intelligent Key listed on the following chart or
to help prevent the vehicle from being stolen,
chime or beep sounds inside and outside the
vehicle and a warning light illuminates or blinks.
When a chime or beep sounds or the warning
light illuminates or blinks, be sure to check the
vehicle and Intelligent Key.
See “Troubleshooting guide” (P.3-15) and
“Warning/indicator lights and audible remin-
ders” (P.2-11) .
Intelligent Key system warning light:
P position selecting warning light:
Page 148 of 332
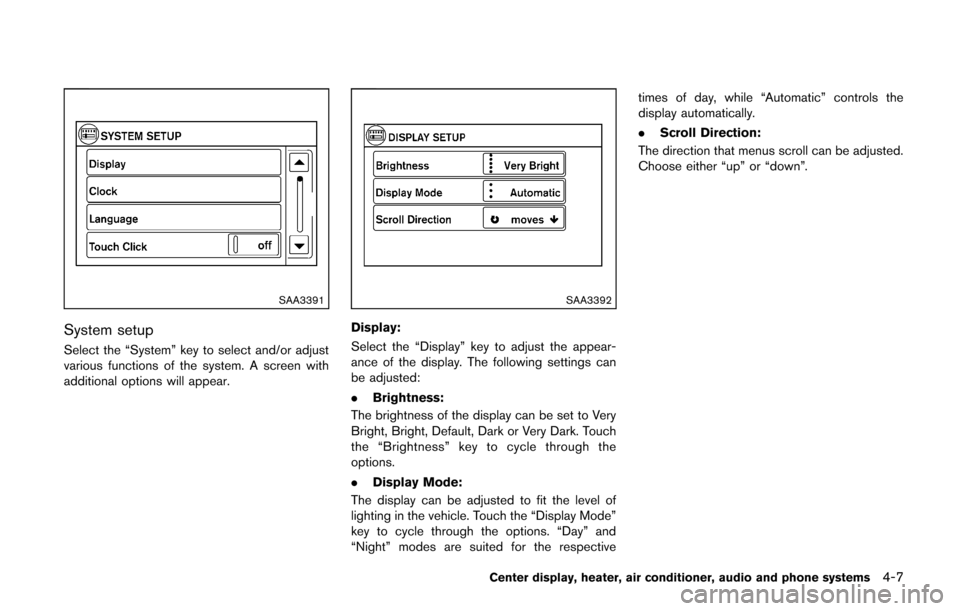
SAA3391
System setup
Select the “System” key to select and/or adjust
various functions of the system. A screen with
additional options will appear.
SAA3392
Display:
Select the “Display” key to adjust the appear-
ance of the display. The following settings can
be adjusted:
.Brightness:
The brightness of the display can be set to Very
Bright, Bright, Default, Dark or Very Dark. Touch
the “Brightness” key to cycle through the
options.
. Display Mode:
The display can be adjusted to fit the level of
lighting in the vehicle. Touch the “Display Mode”
key to cycle through the options. “Day” and
“Night” modes are suited for the respective times of day, while “Automatic” controls the
display automatically.
.
Scroll Direction:
The direction that menus scroll can be adjusted.
Choose either “up” or “down”.
Center display, heater, air conditioner, audio and phone systems4-7