Page 99 of 332
2-24Instruments and controls
SIC4127Type A
SIC4145Type B
To defog/defrost the rear window glass, start the
engine and push the switch
*1on. The
indicator light
*2will illuminate. Push the switch
again to turn the defroster off.
It will automatically turn off in approximately 15
minutes.
CAUTION
When cleaning the inner side of the rear
window, be careful not to scratch or
damage the rear window defroster.
SIC3668
HEADLIGHT SWITCH
Lighting
*1Turn the switch to theposition:
The front parking, side marker, tail, license plate
and instrument lights will come on.
*2Turn the switch to theposition:
Headlights will come on and all the other lights
remain on.
REAR WINDOW DEFROSTER
SWITCH HEADLIGHT AND TURN SIGNAL
SWITCH
Page 101 of 332
2-26Instruments and controls
SIC3670
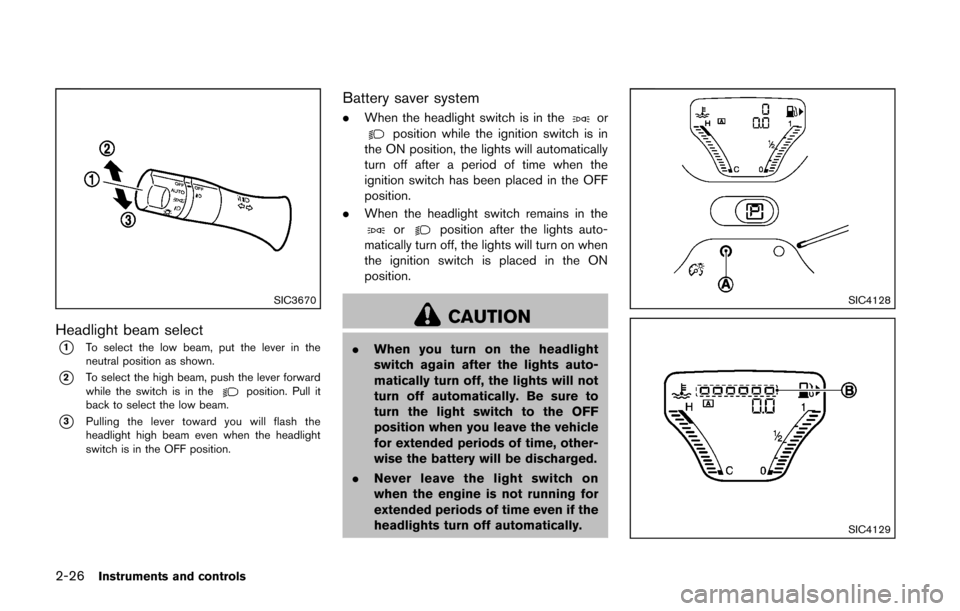
Headlight beam select
*1To select the low beam, put the lever in the
neutral position as shown.
*2To select the high beam, push the lever forward
while the switch is in theposition. Pull it
back to select the low beam.
*3Pulling the lever toward you will flash the
headlight high beam even when the headlight
switch is in the OFF position.
Battery saver system
. When the headlight switch is in theorposition while the ignition switch is in
the ON position, the lights will automatically
turn off after a period of time when the
ignition switch has been placed in the OFF
position.
. When the headlight switch remains in the
orposition after the lights auto-
matically turn off, the lights will turn on when
the ignition switch is placed in the ON
position.
CAUTION
. When you turn on the headlight
switch again after the lights auto-
matically turn off, the lights will not
turn off automatically. Be sure to
turn the light switch to the OFF
position when you leave the vehicle
for extended periods of time, other-
wise the battery will be discharged.
. Never leave the light switch on
when the engine is not running for
extended periods of time even if the
headlights turn off automatically.
SIC4128
SIC4129
Page 102 of 332
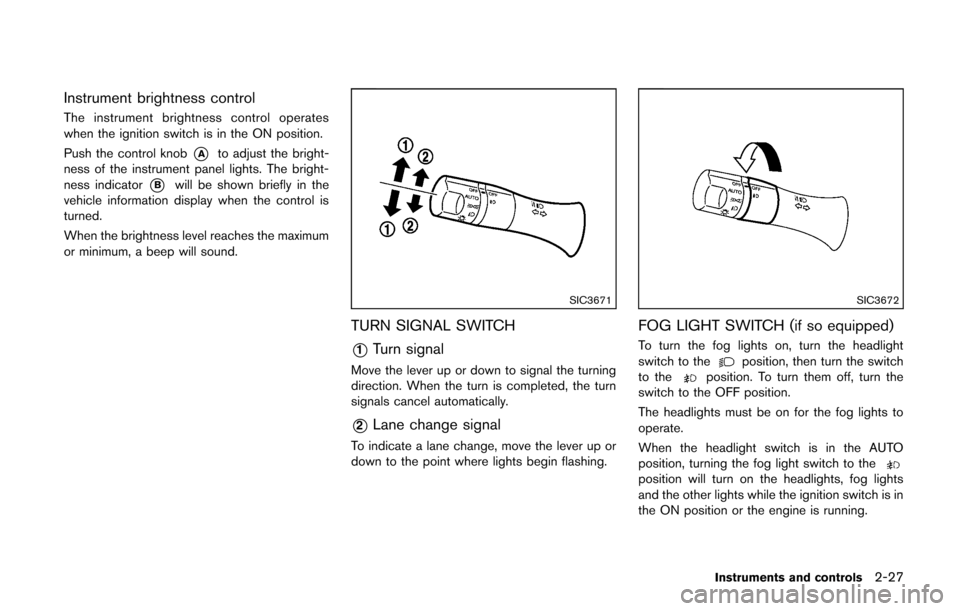
Instrument brightness control
The instrument brightness control operates
when the ignition switch is in the ON position.
Push the control knob
*Ato adjust the bright-
ness of the instrument panel lights. The bright-
ness indicator
*Bwill be shown briefly in the
vehicle information display when the control is
turned.
When the brightness level reaches the maximum
or minimum, a beep will sound.
SIC3671
TURN SIGNAL SWITCH
*1Turn signal
Move the lever up or down to signal the turning
direction. When the turn is completed, the turn
signals cancel automatically.
*2Lane change signal
To indicate a lane change, move the lever up or
down to the point where lights begin flashing.
SIC3672
FOG LIGHT SWITCH (if so equipped)
To turn the fog lights on, turn the headlight
switch to theposition, then turn the switch
to theposition. To turn them off, turn the
switch to the OFF position.
The headlights must be on for the fog lights to
operate.
When the headlight switch is in the AUTO
position, turning the fog light switch to the
position will turn on the headlights, fog lights
and the other lights while the ignition switch is in
the ON position or the engine is running.
Instruments and controls2-27
Page 103 of 332
2-28Instruments and controls
SIC4130
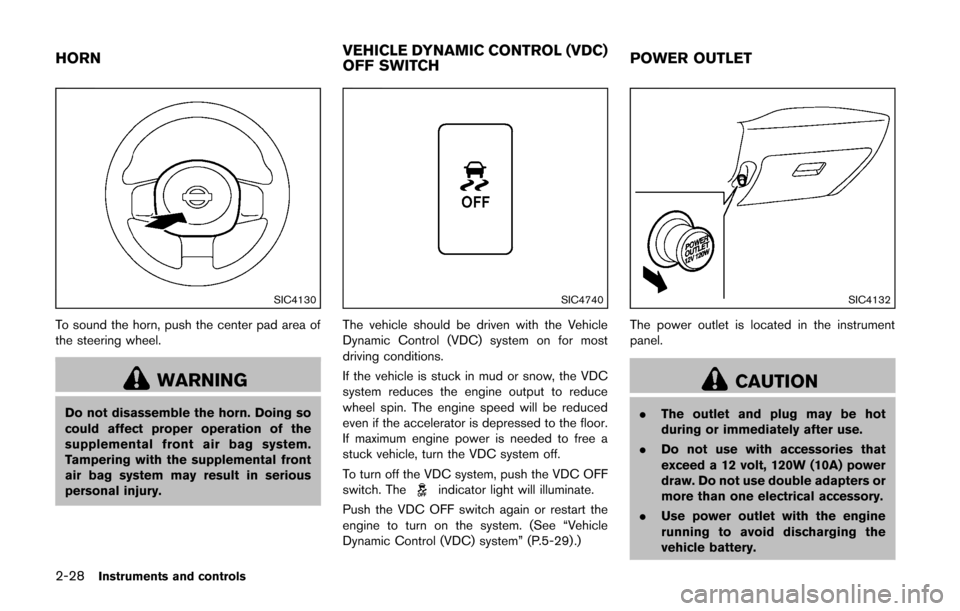
To sound the horn, push the center pad area of
the steering wheel.
WARNING
Do not disassemble the horn. Doing so
could affect proper operation of the
supplemental front air bag system.
Tampering with the supplemental front
air bag system may result in serious
personal injury.
SIC4740
The vehicle should be driven with the Vehicle
Dynamic Control (VDC) system on for most
driving conditions.
If the vehicle is stuck in mud or snow, the VDC
system reduces the engine output to reduce
wheel spin. The engine speed will be reduced
even if the accelerator is depressed to the floor.
If maximum engine power is needed to free a
stuck vehicle, turn the VDC system off.
To turn off the VDC system, push the VDC OFF
switch. The
indicator light will illuminate.
Push the VDC OFF switch again or restart the
engine to turn on the system. (See “Vehicle
Dynamic Control (VDC) system” (P.5-29) .)
SIC4132
The power outlet is located in the instrument
panel.
CAUTION
. The outlet and plug may be hot
during or immediately after use.
. Do not use with accessories that
exceed a 12 volt, 120W (10A) power
draw. Do not use double adapters or
more than one electrical accessory.
. Use power outlet with the engine
running to avoid discharging the
vehicle battery.
HORN VEHICLE DYNAMIC CONTROL (VDC)
OFF SWITCHPOWER OUTLET
Page 111 of 332
2-36Instruments and controls
CAUTION
Do not use for extended periods of time
with the engine stopped. This could
result in a discharged battery.
SIC4572
MAP LIGHTS
Operate the map light switch to turn the map
light on or off.
*1: ON position
*2: OFF position
SIC4573
MAP LIGHT CONTROL SWITCH
The map lights control switch has three posi-
tions: ON
*1, OFF*2and center.
ON position
When the switch is in the ON position*1, the
map lights will illuminate.
OFF position
When the switch is in the OFF position*2, the
map lights will not illuminate, regardless of the
condition.
INTERIOR LIGHTS
Page 128 of 332
TROUBLESHOOTING GUIDE
SymptomPossible causeAction to take
When pushing the ignition switch to
stop the engine The P position selecting warning light in
the meter illuminates and the inside warn-
ing chime sounds continuously.
The shift lever is not in the P (Park)
position.
Shift the shift lever to the P (Park)
position.
When shifting the shift lever to the P
(Park) position. The inside warning chime sounds con-
tinuously. The ignition switch is in the ACC or ON
position.Push the ignition switch to the OFF
position.
When opening the driver’s door to get
out of the vehicle The inside warning chime sounds con-
tinuously.
The ignition switch is in the ACC position.Push the ignition switch to the OFF
position.
When closing the door after getting
out of the vehicle The Intelligent Key system warning light in
the meter blinks in yellow, and the outside
chime sounds 3 times and the inside
warning chime sounds for a few seconds.
The ignition switch is in the ACC or ON
position.
Push the ignition switch to the OFF
position.
The P position selecting warning light in
the meter illuminates and the outside chime
sounds continuously. The ignition switch is in the ACC or OFF
position and the shift lever is not in the P
(Park) position.Move the shift lever to the P (Park)
position and push the ignition switch to
the OFF position.
When closing the door with the inside
lock knob turned to LOCK The outside chime sounds for a few
seconds and all the doors unlock.
The Intelligent Key is inside the vehicle. Carry the Intelligent Key with you.
When pushing the request switch or
the LOCK
button on the Intelli-
gent Key to lock the door The outside chime sounds for a few
seconds.
The Intelligent Key is inside the vehicle. Carry the Intelligent Key with you.
A door is not closed securely.
Close the door securely.
When pushing the ignition switch to
start the engine The Intelligent Key system warning light in
the meter blinks in green.
The battery charge is low.Replace the battery with a new one. (See
“Key battery replacement” (P.8-23) .)
The Intelligent Key system warning light in
the meter blinks in yellow and the inside
warning chime sounds for a few seconds. The Intelligent Key is not in the vehicle. Carry the Intelligent Key with you.
When pushing the ignition switch The Intelligent Key system warning light in
the meter illuminates in yellow. It warns of a malfunction with the Intelli-
gent Key system.
Contact a NISSAN dealer.
Pre-driving checks and adjustments3-15
Page 132 of 332
WARNING
.Make sure the hood is completely
closed and latched before driving.
Failure to do so could cause the
hood to fly open and result in an
accident.
. If you see steam or smoke coming
from the engine compartment, to
avoid injury do not open the hood.
SPA2607
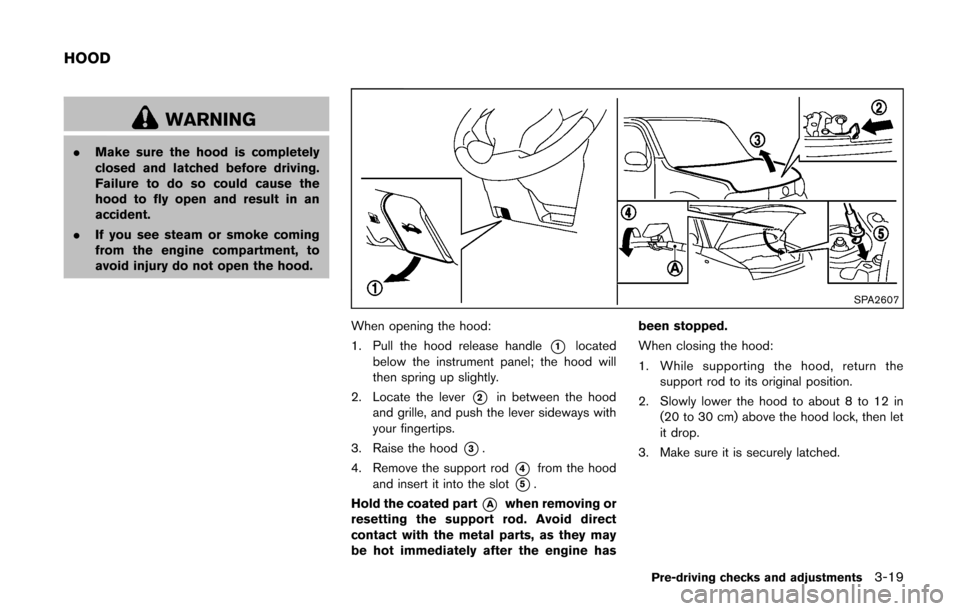
When opening the hood:
1. Pull the hood release handle
*1located
below the instrument panel; the hood will
then spring up slightly.
2. Locate the lever
*2in between the hood
and grille, and push the lever sideways with
your fingertips.
3. Raise the hood
*3.
4. Remove the support rod
*4from the hood
and insert it into the slot
*5.
Hold the coated part
*Awhen removing or
resetting the support rod. Avoid direct
contact with the metal parts, as they may
be hot immediately after the engine has been stopped.
When closing the hood:
1. While supporting the hood, return the
support rod to its original position.
2. Slowly lower the hood to about 8 to 12 in (20 to 30 cm) above the hood lock, then let
it drop.
3. Make sure it is securely latched.
Pre-driving checks and adjustments3-19
HOOD
Page 134 of 332
SPA2336
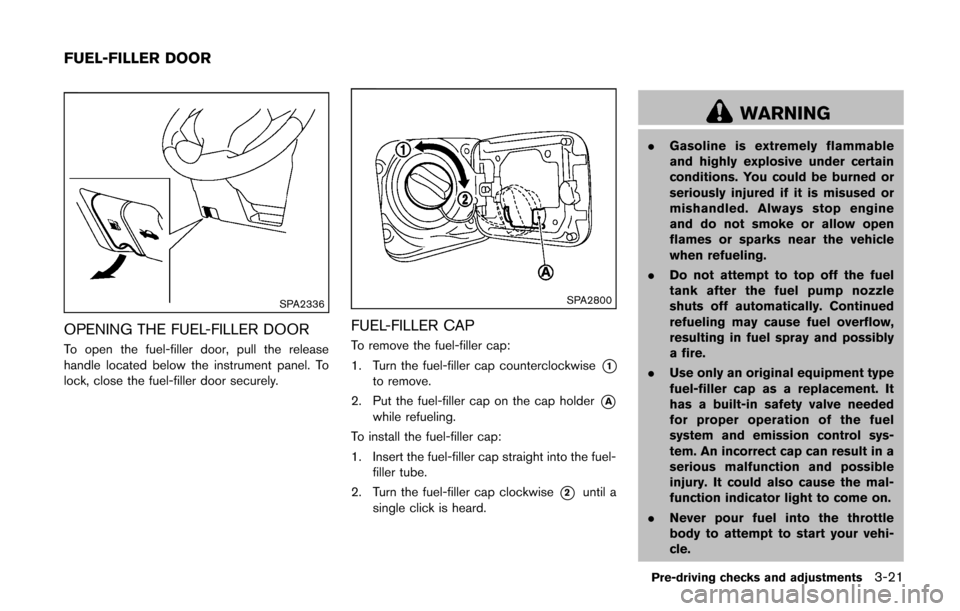
OPENING THE FUEL-FILLER DOOR
To open the fuel-filler door, pull the release
handle located below the instrument panel. To
lock, close the fuel-filler door securely.
SPA2800
FUEL-FILLER CAP
To remove the fuel-filler cap:
1. Turn the fuel-filler cap counterclockwise
*1to remove.
2. Put the fuel-filler cap on the cap holder
*Awhile refueling.
To install the fuel-filler cap:
1. Insert the fuel-filler cap straight into the fuel- filler tube.
2. Turn the fuel-filler cap clockwise
*2until a
single click is heard.
WARNING
. Gasoline is extremely flammable
and highly explosive under certain
conditions. You could be burned or
seriously injured if it is misused or
mishandled. Always stop engine
and do not smoke or allow open
flames or sparks near the vehicle
when refueling.
. Do not attempt to top off the fuel
tank after the fuel pump nozzle
shuts off automatically. Continued
refueling may cause fuel overflow,
resulting in fuel spray and possibly
a fire.
. Use only an original equipment type
fuel-filler cap as a replacement. It
has a built-in safety valve needed
for proper operation of the fuel
system and emission control sys-
tem. An incorrect cap can result in a
serious malfunction and possible
injury. It could also cause the mal-
function indicator light to come on.
. Never pour fuel into the throttle
body to attempt to start your vehi-
cle.
Pre-driving checks and adjustments3-21
FUEL-FILLER DOOR