2014 NISSAN ALTIMA alarm
[x] Cancel search: alarmPage 95 of 428
HOW TO USE THE VEHICLE
INFORMATION DISPLAY
The vehicle information display can be changed
using the buttons
and ENTER located on
the steering wheel.
1.
— navigate through the items in ve-
hicle information
ENTER — change or select an item in the
vehicle information display
2.
— go back to the previous menu 3.
— select/enter the Vehicle informa-
tion menu items or to change from one dis-
play screen to the next (i.e. trip, TPMS, Fuel
economy)
The ENTER and
buttons also control audio
and control panel functions. For additional infor-
mation see, “Steering wheel switch for audio
control” in “Monitor, climate, audio, phone and
voice recognition systems” section.
STARTUP DISPLAY
When the vehicle in placed in the ON or ACC
position the screens that display in the vehicle
information include:
● Active system status (if so equipped)
● Trip computer
● Tire pressure information (if so equipped)
● Fuel economy
● Warnings
Warnings will only display if there are any pres-
ent, for more information on warnings and indica-
tors see, “Vehicle information display warnings
and indicators” in this section.
To control what items display in the vehicle infor-
mation display, see “Main menu selection” in this
section.
SETTINGS
The setting mode allows you to change the informa-
tion displayed in the vehicle information display:
● Driver Assistance (if so equipped)
● Main Menu Selection
● Body Color
● Maintenance
● Alarms
● Vehicle Settings
● Language
● Unit
● Welcome Effects
● Factory Reset
Driver Assistance (if so equipped)
To change the status, warnings or turn on or off
any of the systems/warnings displayed in the
“Driver Assistance” menu:
Use the
button to select and the ENTER
button to change a menu item:
● Driving Aids (if so equipped)
● Parking Aids (if so equipped)
LIC2322
2-18Instruments and controls
Page 98 of 428
Alarms
This setting allows the customer to set alarms for
outside temperature and a timer alert.1. Press the
button.
2. Use the
button until “Settings” is se-
lected, and press ENTER.
3. Select “Alarms” using the
button and
press ENTER.
Outside Temperature
This setting allows the customer to
enable/disable the alert for low outside tempera-
ture in the vehicle information display.
1. Use the
button to select “Outside
Temperature”.
2. Press the ENTER button to turn ON/OFF the outside temperature in the vehicle infor-
mation display.
Timer Alert
This setting allows the driver to set an alert to
notify a set time has been reached.
1. Use the
button to select “Timer Alert”.
2. Press the ENTER button. 3. To change the timer amount, use the
button and the ENTER button to save the
selected time amount.
Navigation (if so equipped)
This setting allows the customer to
enable/disable the alert for navigation in the ve-
hicle information display.
1. Use the
buttons to select “Naviga-
tion”.
2. Press the ENTER button to turn ON/OFF the alert.
Vehicle Settings
The vehicle settings allows the customer to
change settings for interior lights, intelligent key
settings, unlock settings and other vehicle set-
tings.
The vehicle settings can be changed using
the
,, and the ENTER buttons.
Auto Room Lamp
The interior lights can be set to be ON or OFF if
any door is unlocked. From the Vehicle Settings
menu, select “Auto Room Light”. Use the ENTER
button to turn this feature ON or OFF. Light Sensitivity (if so equipped)
The light sensitivity can be set to illuminate earlier
based on the brightness outside the vehicle.
From the Vehicle Settings menu, select “Light
Sensitivity”. Use the ENTER button to change the
sensitivity.
Light Off Delay (if so equipped)
The duration of the automatic headlights can be
changed from 0 to 180 seconds. From the Ve-
hicle Settings menu, select “Light Off Delay”. Use
the ENTER button to change the duration.
Wiper with Speed
The wiper with speed can be set to be ON or
OFF. From the Vehicle Settings menu, select
“Wiper with Speed”. Use the ENTER button to
turn this feature ON or OFF.
I-Key Door Lock (if so equipped)
From the Vehicle Settings menu, select “I-Key
Door Lock”. When this item is turned on, the
request switch on the door is activated. When
this item is turned off, the request switch on the
door is deactivated. Use the ENTER button to
activate this function.
Selective-Unlock
When this item is turned on, only the driver’s door
is unlocked first after the door unlock operation.
Instruments and controls2-21
Page 104 of 428
Push to start (if so equipped)
This warning appears in the vehicle information
display when the vehicle has been started using
the remote start function. To start the vehicle,
apply the brake and place the ignition switch in
the ON position.
Loose Fuel Cap
This warning appears when the fuel-filler cap is
not tightened correctly after the vehicle has been
refueled. See “Fuel-filler cap” in the “Pre-driving
checks and adjustments” section of this manual.
Intelligent Key error
After the ignition switch is pushed to the ON
position, this light comes on for about 2 seconds
and then turns off.
The I-Key System Error message warns of a
malfunction with the Intelligent Key system. If the
light comes on while the engine is stopped, it may
be impossible to start the engine.
If the light comes on while the engine is running,
you can drive the vehicle. However in these
cases, contact a NISSAN dealer for repair as
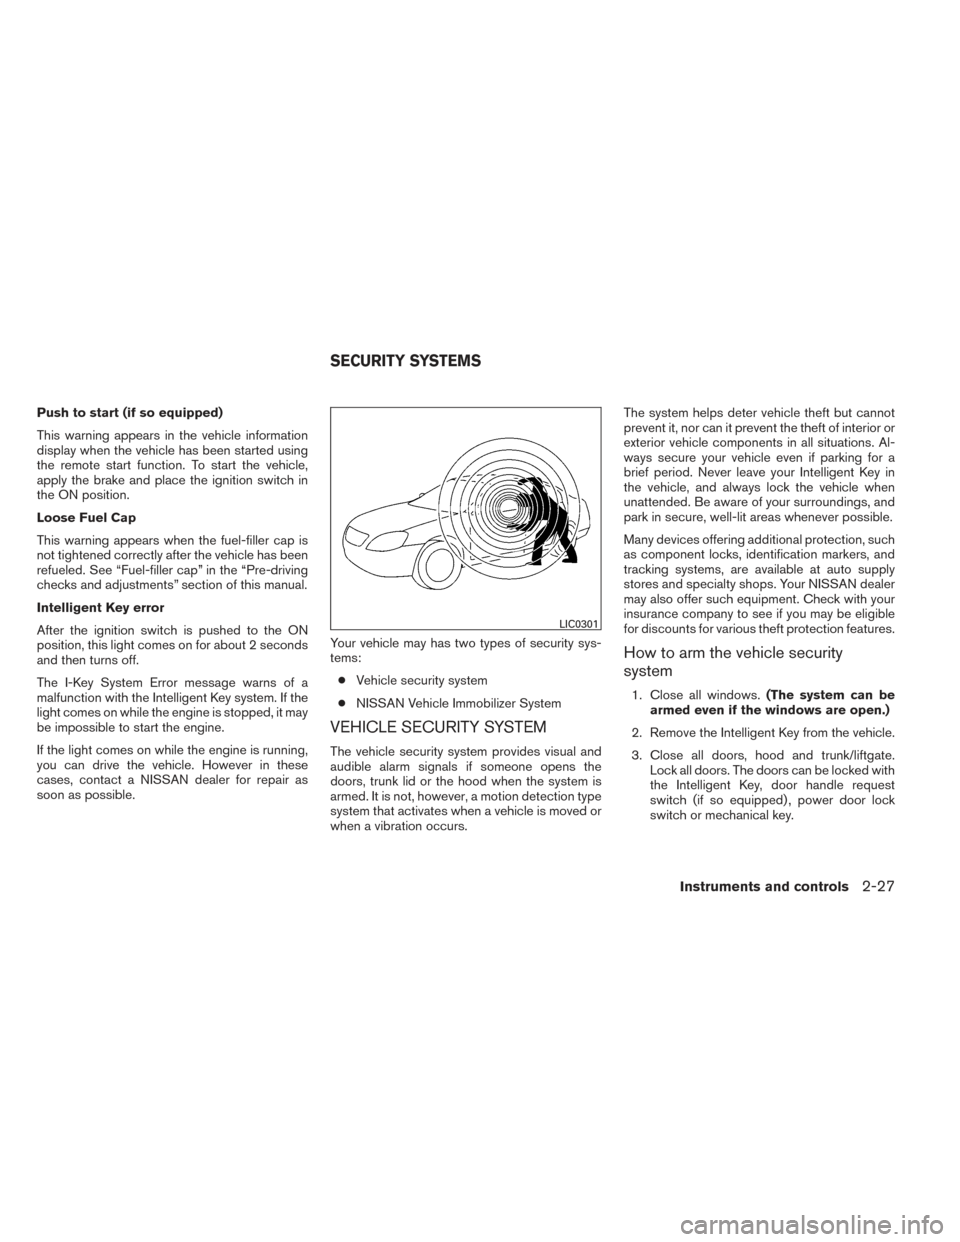
soon as possible.Your vehicle may has two types of security sys-
tems:
● Vehicle security system
● NISSAN Vehicle Immobilizer System
VEHICLE SECURITY SYSTEM
The vehicle security system provides visual and
audible alarm signals if someone opens the
doors, trunk lid or the hood when the system is
armed. It is not, however, a motion detection type
system that activates when a vehicle is moved or
when a vibration occurs. The system helps deter vehicle theft but cannot
prevent it, nor can it prevent the theft of interior or
exterior vehicle components in all situations. Al-
ways secure your vehicle even if parking for a
brief period. Never leave your Intelligent Key in
the vehicle, and always lock the vehicle when
unattended. Be aware of your surroundings, and
park in secure, well-lit areas whenever possible.
Many devices offering additional protection, such
as component locks, identification markers, and
tracking systems, are available at auto supply
stores and specialty shops. Your NISSAN dealer
may also offer such equipment. Check with your
insurance company to see if you may be eligible
for discounts for various theft protection features.
How to arm the vehicle security
system
1. Close all windows.
(The system can be
armed even if the windows are open.)
2. Remove the Intelligent Key from the vehicle.
3. Close all doors, hood and trunk/liftgate. Lock all doors. The doors can be locked with
the Intelligent Key, door handle request
switch (if so equipped) , power door lock
switch or mechanical key.
LIC0301
SECURITY SYSTEMS
Instruments and controls2-27
Page 105 of 428
4. Confirm that the security indicator lightcomes on. The security light stays on for
about 30 seconds. The vehicle security sys-
tem is now pre-armed. After about 30 sec-
onds the vehicle security system automati-
cally shifts into the armed phase. The
security light begins to flash once every
3 seconds. If, during the 30-second pre-arm
time period, the driver’s door is unlocked by
the key or the keyfob, or the ignition switch is
placed in the ACC or ON position, the sys-
tem will not arm.
● Even when the driver and/or passen-
gers are in the vehicle, the system will
activate with all the doors, hood and
trunk lid locked with the ignition switch
placed in the LOCK position. When
placing the ignition switch in the ACC
or ON position, the system will be re-
leased.
Vehicle security system activation
The vehicle security system will give the following
alarm:
● The headlights blink and the horn sounds
intermittently. ●
The alarm automatically turns off after a pe-
riod of time. However, the alarm reactivates if
the vehicle is tampered with again. The alarm
can be shut off by unlocking the driver’s door
or trunk lid with the key, or by pressing
the
button on the Intelligent Key.
The alarm is activated by: ● opening the door or trunk lid without using
the key or Intelligent Key (even if the door is
unlocked by releasing the door inside lock
switch) .
How to stop an activated alarm
The alarm stops only by unlocking the driver’s
door or the trunk lid with the key, pressing
the
button on the Intelligent Key, or press-
ing the request switch (if so equipped) on the
driver’s or passenger’s door with the Intelligent
Key in range of the door handle.
NISSAN VEHICLE IMMOBILIZER
SYSTEM
The NISSAN Vehicle Immobilizer System will not
allow the engine to start without the use of a
registered key. Never leave these keys in the vehicle.
FCC Notice:
For USA:
This device complies with part 15 of the
FCC Rules. Operation is subject to the fol-
lowing two conditions: (1) This device may
not cause harmful interference, and (2) this
device must accept any interference re-
ceived, including interference that may
cause undesired operation.
NOTE:
Changes or modifications not expressly ap-
proved by the party responsible for compli-
ance could void the user’s authority to op-
erate the equipment.
For Canada:
This device complies with RSS-210 of In-
dustry Canada. Operation is subject to the
following two conditions: (1) this device
may not cause harmful interference, and (2)
this device must accept any interference
received, including interference that may
cause undesired operation of the device.
2-28Instruments and controls
Page 147 of 428
Using the panic alarm
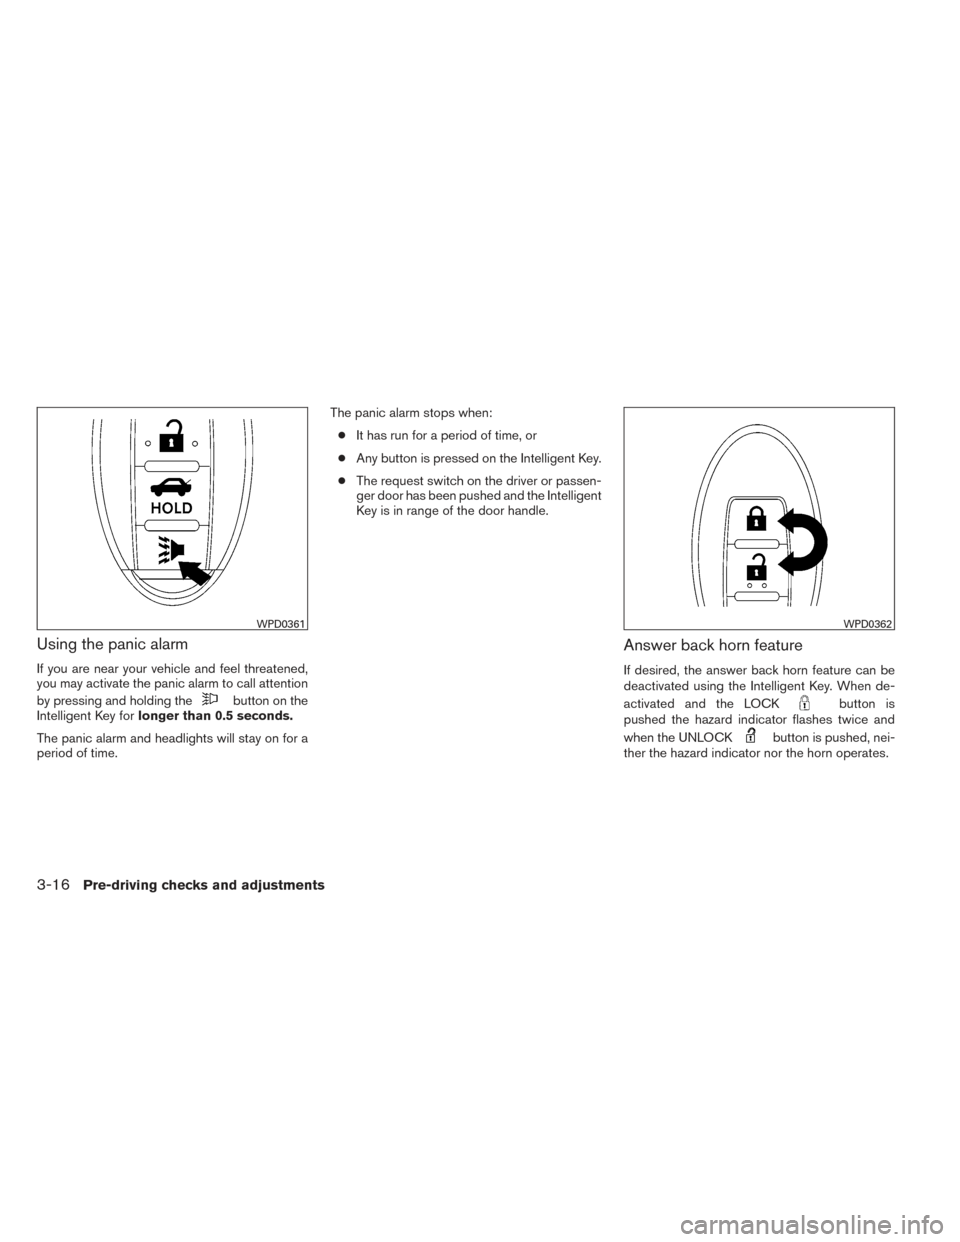
If you are near your vehicle and feel threatened,
you may activate the panic alarm to call attention
by pressing and holding the
button on the
Intelligent Key for longer than 0.5 seconds.
The panic alarm and headlights will stay on for a
period of time. The panic alarm stops when:
● It has run for a period of time, or
● Any button is pressed on the Intelligent Key.
● The request switch on the driver or passen-
ger door has been pushed and the Intelligent
Key is in range of the door handle.
Answer back horn feature
If desired, the answer back horn feature can be
deactivated using the Intelligent Key. When de-
activated and the LOCK
button is
pushed the hazard indicator flashes twice and
when the UNLOCK
button is pushed, nei-
ther the hazard indicator nor the horn operates.
WPD0361WPD0362
3-16Pre-driving checks and adjustments
Page 148 of 428
NOTE:
If you change the answer back horn and
light flash feature with the Intelligent Key,
the vehicle information display screen will
show the current mode after the ignition
switch has been cycled from the OFF to the
ON position. The vehicle information dis-
play screen can also be used to change the
answer back horn mode. See “Answer back
horn” in the “Instruments and controls”
section.
To deactivate:Press and hold the
andbuttonsfor at least 2 seconds.
The hazard warning lights will flash 3 times to
confirm that the answer back horn feature has
been deactivated.
To activate: Press and hold the
andbuttonsfor at least 2 seconds once
more.
The hazard warning lights will flash once and the
horn will sound once to confirm that the horn
beep feature has been reactivated.
Deactivating the horn beep feature does not si-
lence the horn if the alarm is triggered.
WARNING SIGNALS
To help prevent the vehicle from moving unex-
pectedly by erroneous operation of the Intelligent
Key or to help prevent the vehicle from being
stolen, a chime or buzzer sounds from inside and
outside the vehicle and a warning is displayed in
the instrument panel.
When a chime or beep sounds or a warning is
displayed, be sure to check the vehicle and the
Intelligent Key.
See the “Troubleshooting guide” that follows and
“Vehicle information display” in the “Instruments
and controls” section of this manual.
Pre-driving checks and adjustments3-17
Page 154 of 428
Using the panic alarm
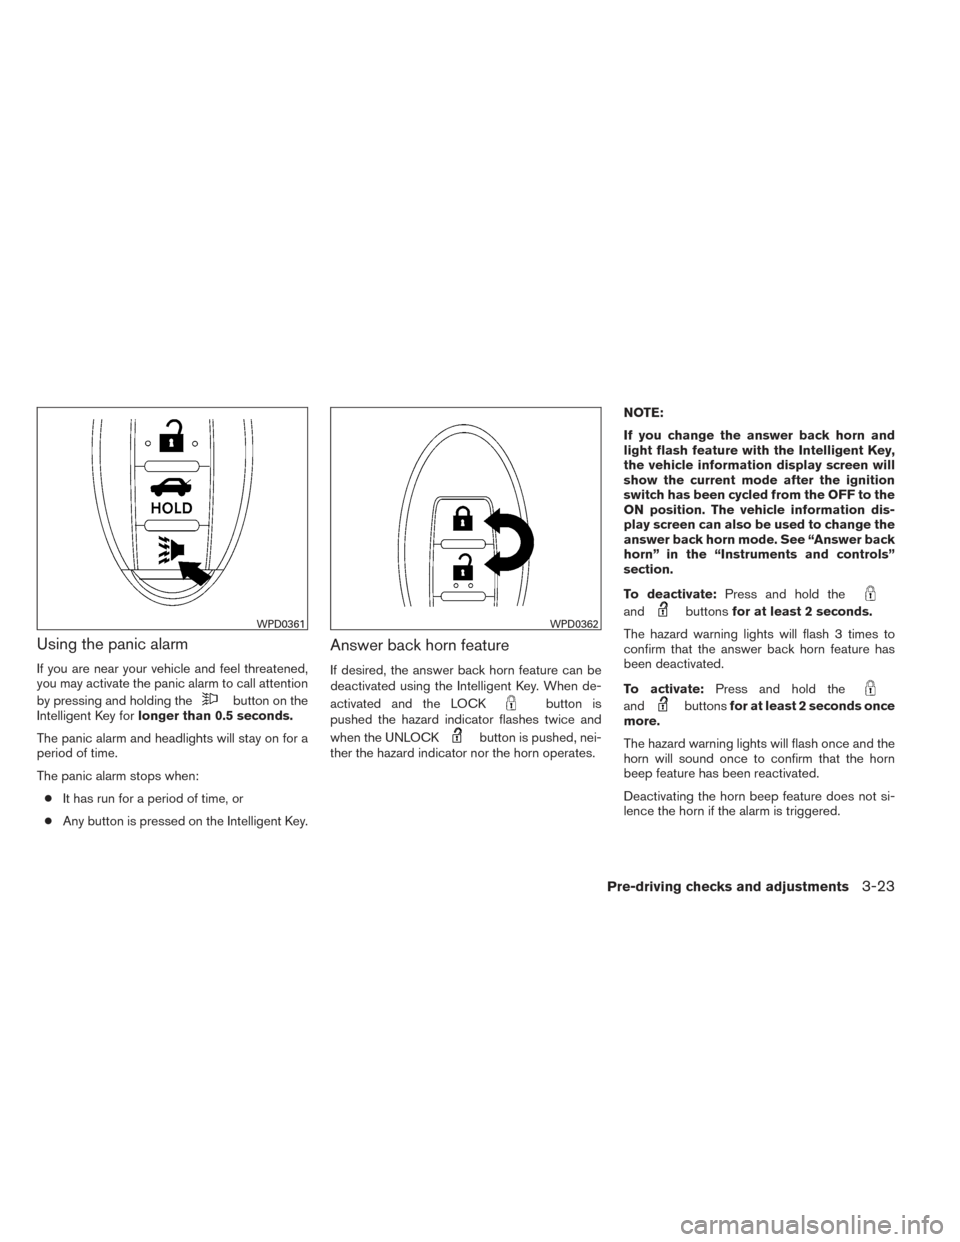
If you are near your vehicle and feel threatened,
you may activate the panic alarm to call attention
by pressing and holding the
button on the
Intelligent Key for longer than 0.5 seconds.
The panic alarm and headlights will stay on for a
period of time.
The panic alarm stops when: ● It has run for a period of time, or
● Any button is pressed on the Intelligent Key.
Answer back horn feature
If desired, the answer back horn feature can be
deactivated using the Intelligent Key. When de-
activated and the LOCK
button is
pushed the hazard indicator flashes twice and
when the UNLOCK
button is pushed, nei-
ther the hazard indicator nor the horn operates. NOTE:
If you change the answer back horn and
light flash feature with the Intelligent Key,
the vehicle information display screen will
show the current mode after the ignition
switch has been cycled from the OFF to the
ON position. The vehicle information dis-
play screen can also be used to change the
answer back horn mode. See “Answer back
horn” in the “Instruments and controls”
section.
To deactivate:
Press and hold the
andbuttonsfor at least 2 seconds.
The hazard warning lights will flash 3 times to
confirm that the answer back horn feature has
been deactivated.
To activate: Press and hold the
andbuttonsfor at least 2 seconds once
more.
The hazard warning lights will flash once and the
horn will sound once to confirm that the horn
beep feature has been reactivated.
Deactivating the horn beep feature does not si-
lence the horn if the alarm is triggered.
WPD0361WPD0362
Pre-driving checks and adjustments3-23
Page 158 of 428
The following events will occur when the engine
starts:● The parking lights will turn on and remain on
as long as the engine is running.
● The doors will be locked and the climate
control system may come on.
● The engine will continue to run for 10 min-
utes. Repeat the steps to extend the time for
an additional 10 minutes. See “Extending
engine run time” in this section.
Depress the brake and place the ignition switch
in the ON position before driving. For further
instructions see “Driving the vehicle” in the
“Starting and driving” section.
EXTENDING ENGINE RUN TIME
The remote start feature can be extended one
time by performing the steps listed in “Remote
starting the vehicle” in this section. Run time will
be calculated as follows: ● The first 10 minute run time will start when
the remote start function is performed.
● The second 10 minutes will start immedi-
ately when the remote start function is per-
formed. For example, if the engine has been
running for 5 minutes, and 10 minutes are
added, the engine will run for a total of
15 minutes. A maximum of two remote starts, or a single start
with an extension, are allowed between ignition
cycles.
The ignition switch must be cycled to the ON
position and then back to the OFF position be-
fore the remote start procedure can be used
again.
CANCELING A REMOTE START
To cancel a remote start, perform one of the
following:
● Aim the Intelligent Key at the vehicle and
press and hold
until the parking lights
turn off.
● Turn on the hazard warning flashers.
● Cycle the ignition switch ON and then OFF.
CONDITIONS THE REMOTE START
WILL NOT WORK
The remote start will not operate if any of the
following conditions are present:
● The ignition switch is placed in the ON po-
sition.
● The hood is not securely closed.
● The hazard warning lights are on. ●
The I–Key Indicator Light
remains
solid in the vehicle information display.
● The alarm sounds due to illegal entry into the
vehicle.
● The ignition switch is pushed without an
Intelligent Key in the vehicle.
● The ignition switch is pushed with an Intelli-
gent Key in the vehicle but the brake pedal is
not depressed.
● Two remote vehicle starts, or a single remote
start with an extension, have already been
used.
● The vehicle is not in P (Park) .
● The Remote Start function has been
switched to the OFF position in Vehicle Set-
tings of the vehicle information display. For
additional information, see “Vehicle informa-
tion display” in the “Instruments and con-
trols” section of this manual.
The remote engine start may display a warning or
indicator in the vehicle information display. For an
explanation of the warning or indicator please see
“Vehicle information display warning and indica-
tors” in the “Instruments and controls” section.
Pre-driving checks and adjustments3-27