2014 NISSAN ALTIMA belt
[x] Cancel search: beltPage 75 of 428
WARNING
●Once a front air bag, side air bag, or
curtain air bag has inflated, the air bag
module will not function again and
must be replaced. Additionally, the acti-
vated pretensioners must also be re-
placed. The air bag module and preten-
sioners should be replaced by a
NISSAN dealer. The air bag module and
pretensioners cannot be repaired.
● The front air bag, side air bag, curtain
air bag systems and the pretensioner
system should be inspected by a
NISSAN dealer if there is any damage to
the front end or side portion of the
vehicle.
● If you need to dispose of a supplemen-
tal air bag or pretensioners or scrap the
vehicle, contact a NISSAN dealer. Incor-
rect disposal procedures could cause
personal injury.
1-58Safety—Seats, seat belts and supplemental restraint system
Page 76 of 428

MEMO
Safety—Seats, seat belts and supplemental restraint system1-59
Page 87 of 428
Anti-lock Braking System (ABS) warning lightSupplemental air bag warning lightSide light and headlight indicator light (green)
orBrake warning lightFog light indicator light (if so equipped)Slip indicator light
Charge warning lightFront passenger air bag status lightSPORT mode indicator light (if so equipped)
Low tire pressure warning lightHigh beam indicator light (blue)Turn signal/hazard indicator lights
Master warning lightMalfunction Indicator Light (MIL)Vehicle Dynamic Control (VDC) off indicator
light
Power steering warning lightOverdrive off indicator light (if so equipped)
Seat belt warning light and chimeSecurity indicator light
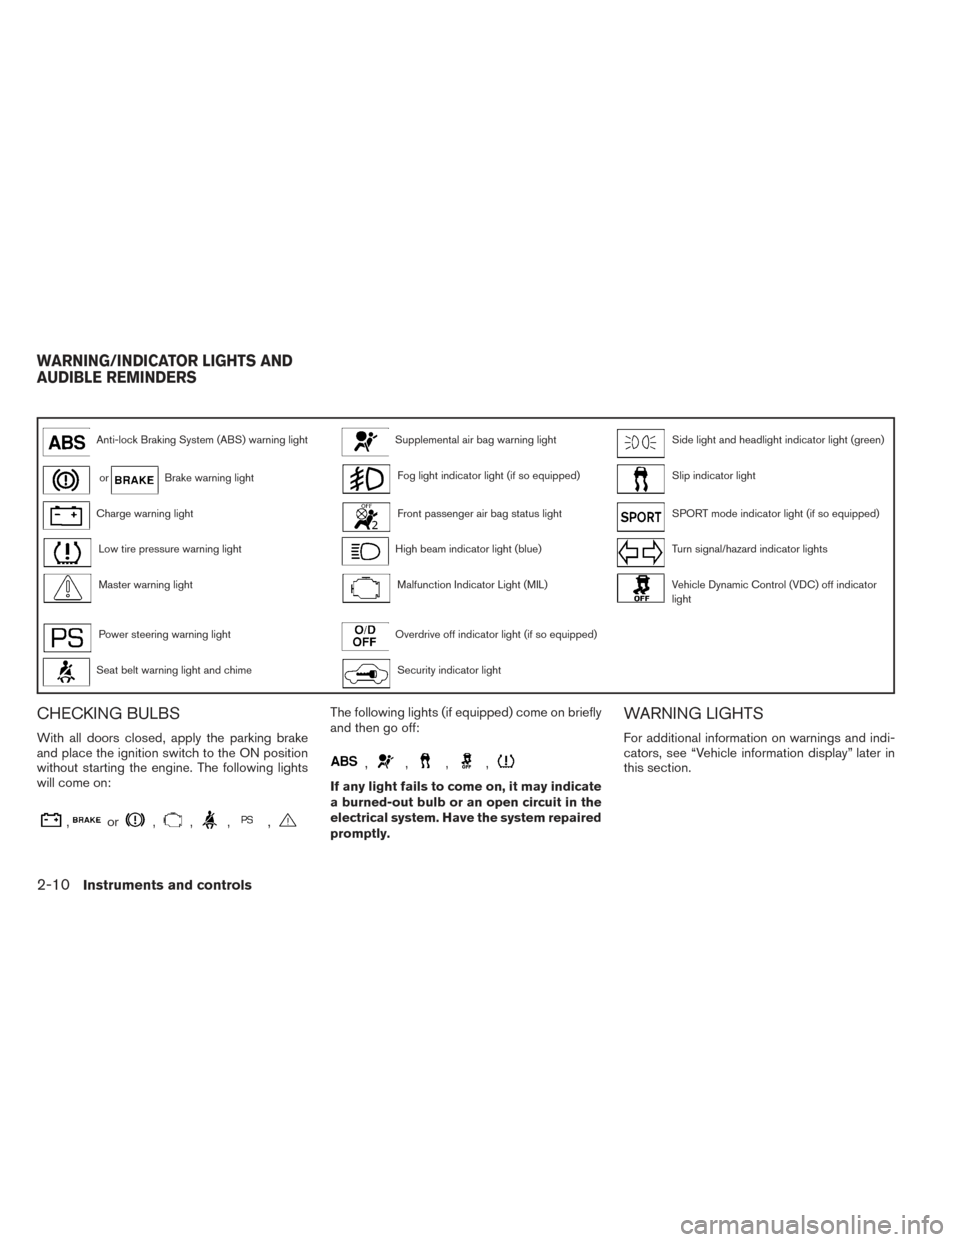
CHECKING BULBS
With all doors closed, apply the parking brake
and place the ignition switch to the ON position
without starting the engine. The following lights
will come on:
,or,,,,
The following lights (if equipped) come on briefly
and then go off:
,,,,
If any light fails to come on, it may indicate
a burned-out bulb or an open circuit in the
electrical system. Have the system repaired
promptly.
WARNING LIGHTS
For additional information on warnings and indi-
cators, see “Vehicle information display” later in
this section.
WARNING/INDICATOR LIGHTS AND
AUDIBLE REMINDERS
2-10Instruments and controls
Page 88 of 428
Anti-lock Braking System(ABS) warning light
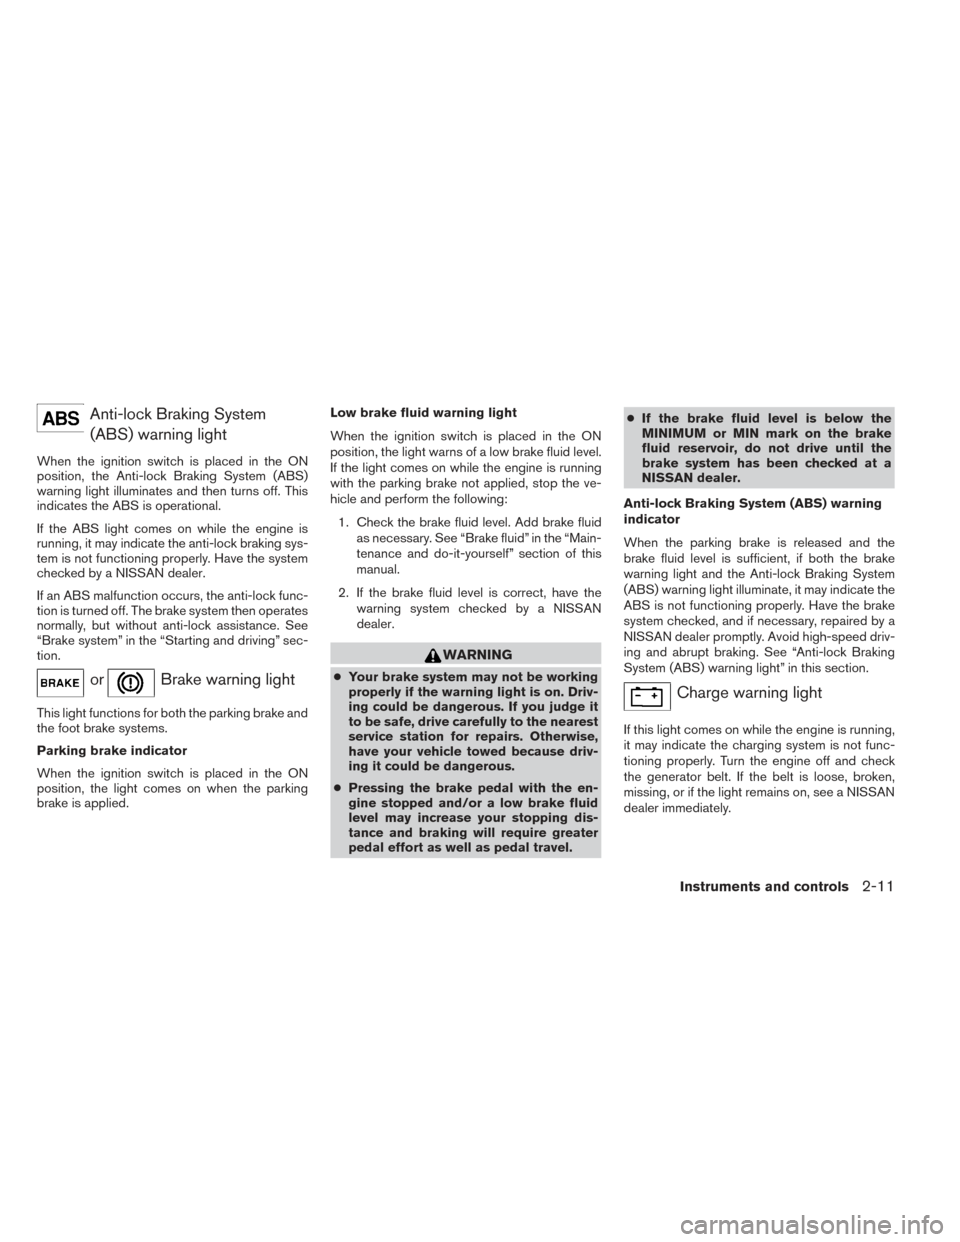
When the ignition switch is placed in the ON
position, the Anti-lock Braking System (ABS)
warning light illuminates and then turns off. This
indicates the ABS is operational.
If the ABS light comes on while the engine is
running, it may indicate the anti-lock braking sys-
tem is not functioning properly. Have the system
checked by a NISSAN dealer.
If an ABS malfunction occurs, the anti-lock func-
tion is turned off. The brake system then operates
normally, but without anti-lock assistance. See
“Brake system” in the “Starting and driving” sec-
tion.
orBrake warning light
This light functions for both the parking brake and
the foot brake systems.
Parking brake indicator
When the ignition switch is placed in the ON
position, the light comes on when the parking
brake is applied. Low brake fluid warning light
When the ignition switch is placed in the ON
position, the light warns of a low brake fluid level.
If the light comes on while the engine is running
with the parking brake not applied, stop the ve-
hicle and perform the following:
1. Check the brake fluid level. Add brake fluid as necessary. See “Brake fluid” in the “Main-
tenance and do-it-yourself” section of this
manual.
2. If the brake fluid level is correct, have the warning system checked by a NISSAN
dealer.
WARNING
●Your brake system may not be working
properly if the warning light is on. Driv-
ing could be dangerous. If you judge it
to be safe, drive carefully to the nearest
service station for repairs. Otherwise,
have your vehicle towed because driv-
ing it could be dangerous.
● Pressing the brake pedal with the en-
gine stopped and/or a low brake fluid
level may increase your stopping dis-
tance and braking will require greater
pedal effort as well as pedal travel. ●
If the brake fluid level is below the
MINIMUM or MIN mark on the brake
fluid reservoir, do not drive until the
brake system has been checked at a
NISSAN dealer.
Anti-lock Braking System (ABS) warning
indicator
When the parking brake is released and the
brake fluid level is sufficient, if both the brake
warning light and the Anti-lock Braking System
(ABS) warning light illuminate, it may indicate the
ABS is not functioning properly. Have the brake
system checked, and if necessary, repaired by a
NISSAN dealer promptly. Avoid high-speed driv-
ing and abrupt braking. See “Anti-lock Braking
System (ABS) warning light” in this section.
Charge warning light
If this light comes on while the engine is running,
it may indicate the charging system is not func-
tioning properly. Turn the engine off and check
the generator belt. If the belt is loose, broken,
missing, or if the light remains on, see a NISSAN
dealer immediately.
Instruments and controls2-11
Page 89 of 428
CAUTION
●Do not ground electrical accessories di-
rectly to the battery terminal. Doing so
will bypass the variable control system
and the vehicle battery may not charge
completely. Refer to “Variable voltage
control system (if so equipped) ” in the
“Maintenance and do-it-yourself” sec-
tion later in this manual.
● Do not continue driving if the generator
belt is loose, broken or missing.
Low tire pressure warning light
Your vehicle is equipped with a Tire Pressure
Monitoring System (TPMS) that monitors the tire
pressure of all tires except the spare.
The low tire pressure warning light warns of low
tire pressure or indicates that the TPMS is not
functioning properly.
After the ignition switch is placed in the ON
position, this light illuminates for about 1 second
and turns off.
Low tire pressure warning:
If the vehicle is being driven with low tire
pressure, the warning light will illuminate. A “Tire Pressure Low - Add Air” warning
also appears in the vehicle information dis-
play.
When the low tire pressure warning light
illuminates, you should stop and adjust the
tire pressure of all 4 tires to the recom-
mended COLD tire pressure shown on the
Tire Load and Information label located in
the driver’s door opening. The low tire pres-
sure warning light does not automatically
turn off when the tire pressure is adjusted.
After the tire is inflated to the recom-
mended pressure, the vehicle must be
driven at speeds above 16 MPH (25 km/h)
to activate the TPMS and turn off the low
tire pressure warning light. Use a tire pres-
sure gauge to check the tire pressure.
The “Tire Pressure Low - Add Air” warning is
active as long as the low tire pressure warning
light remains illuminated.
For additional information, see “Vehicle informa-
tion display” in this section and “Tire Pressure
Monitoring System (TPMS)” in the “Starting and
driving” section and in the “In case of emergency”
section.
TPMS malfunction:
If the TPMS is not functioning properly, the low
tire pressure warning light will flash for approxi-
mately 1 minute when the ignition switch is
placed in the ON position. The light will remain on
after the 1 minute. Have the system checked by a
NISSAN dealer. The “Tire Pressure Low - Add
Air” warning does not appear if the low tire pres-
sure warning light illuminates to indicate a TPMS
malfunction.
For additional information, see “Tire Pressure
Monitoring System (TPMS)” in the “Starting and
driving” section and “Tire pressure” in the “Start-
ing and driving” section.
WARNING
●
Radio waves could adversely affect
electric medical equipment. Those who
use a pacemaker should contact the
electric medical equipment manufac-
turer for the possible influences before
use.
● If the light does not illuminate with the
ignition switch in the ON position, have
the vehicle checked by a NISSAN dealer
as soon as possible.
2-12Instruments and controls
Page 91 of 428
Seat belt warning light andchime
The light and chime remind you to fasten your
seat belts. The light illuminates whenever the
ignition switch is placed in the ON or START
position and remains illuminated until the driver’s
seat belt is fastened. At the same time, the chime
sounds for about 6 seconds unless the driver’s
seat belt is securely fastened.
The seat belt warning light may also illuminate if
the front passenger’s seat belt is not fastened
when the front passenger’s seat is occupied. For
7 seconds after the ignition switch is placed in
the ON position, the system does not activate the
warning light for the front passenger.
Refer to “Seat belts” in the “Safety—Seats, seat
belts and supplemental restraint system” section
for precautions on seat belt usage.
Supplemental air bag warninglight
When the ignition switch is placed in the ON or
START position, the supplemental air bag warn-
ing light illuminates for about 7 seconds and then
turns off. This means the system is operational. If any of the following conditions occur, the front
air bag, side air bag, curtain air bag, and preten-
sioner systems need servicing and your vehicle
must be taken to a NISSAN dealer:
● The supplemental air bag warning light re-
mains on after approximately 7 seconds.
● The supplemental air bag warning light
flashes intermittently.
● The supplemental air bag warning light does
not come on at all.
Unless checked and repaired, the supplemental
restraint system (air bag system) and/or the pre-
tensioners may not function properly. For addi-
tional details, see “Supplemental restraint sys-
tem” in the “Safety—Seats, seat belts and
supplemental restraint system” section of this
manual.
WARNING
If the supplemental air bag warning light
is on, it could mean that the front air bag,
side air bag, curtain air bag systems
and/or pretensioner systems will not op-
erate in an accident. To help avoid injury to
yourself or others, have your vehicle
checked by a NISSAN dealer as soon as
possible.
INDICATOR LIGHTS
For additional information on warnings and indi-
cators, see “Vehicle information display” later in
this section.
Front fog light indicator light (if so equipped)
The front fog light indicator light illuminates when
the front fog lights are ON. See “Fog light switch”
later in this section.
Front passenger air bag statuslight
The front passenger air bag status light ()
will be lit and the passenger front air bag will be
OFF depending on how the front passenger seat
is being used.
For front passenger air bag status light operation,
see “Front passenger air bag and status light” in
the “Safety — Seats, seat belts and supplemental
restraint system” section of this manual.
High beam indicator light
(blue)
This blue light comes on when the headlight high
beams are on and goes out when the low beams
are selected.
2-14Instruments and controls
Page 124 of 428
If the moonroof does not operate properly after
performing the procedure above, have your ve-
hicle checked by a NISSAN dealer.
Auto-reverse function (when closing or
tilting down the moonroof)
The auto-reverse function can be activated when
the moonroof is closed or tilted down by auto-
matic operation when the ignition switch is
placed in the ON position or for a period of time
after the ignition switch is placed in the OFF
position.
Depending on the environment or driving
conditions, the auto-reverse function may
be activated if an impact or load similar to
something being caught in the moonroof
occurs.
WARNING
There are some small distances immedi-
ately before the closed position which
cannot be detected. Make sure that all
passengers have their hands, etc., inside
the vehicle before closing the moonroof.
When closing:
If the control unit detects something caught in the
moonroof as it moves to the front, the moonroof
will immediately open backward. When tilting down:
If the control unit detects something caught in the
moonroof as it tilts down, the moonroof will im-
mediately tilt up.
If the auto-reverse function malfunctions and re-
peats opening or tilting up the moonroof, keep
pushing the tilt down switch within 5 seconds
after it happens; the moonroof will fully close
gradually. Make sure nothing is caught in the
moonroof.
WARNING
●
In an accident you could be thrown from
the vehicle through an open moonroof.
Always use seat belts and child
restraints.
● Do not allow anyone to stand up or
extend any portion of their body out of
the moonroof opening while the vehicle
is in motion or while the moonroof is
closing.
CAUTION
● Remove water drops, snow, ice or sand
from the moonroof before opening.
● Do not place heavy objects on the
moonroof or surrounding area.
Sunshade
Open and close the sunshade by sliding it for-
ward or backward.
If the moonroof does not close
Have your NISSAN dealer check and repair the
moonroof.
Instruments and controls2-47
Page 134 of 428
●Do not place the Intelligent Key near
equipment that produces a magnetic
field, such as a TV, audio equipment and
personal computers.
If an Intelligent Key is lost or stolen,
NISSAN recommends erasing the ID code
of that Intelligent Key from the vehicle.
This may prevent the unauthorized use of
the Intelligent Key to operate the vehicle.
For information regarding the erasing
procedure, contact an NISSAN dealer.
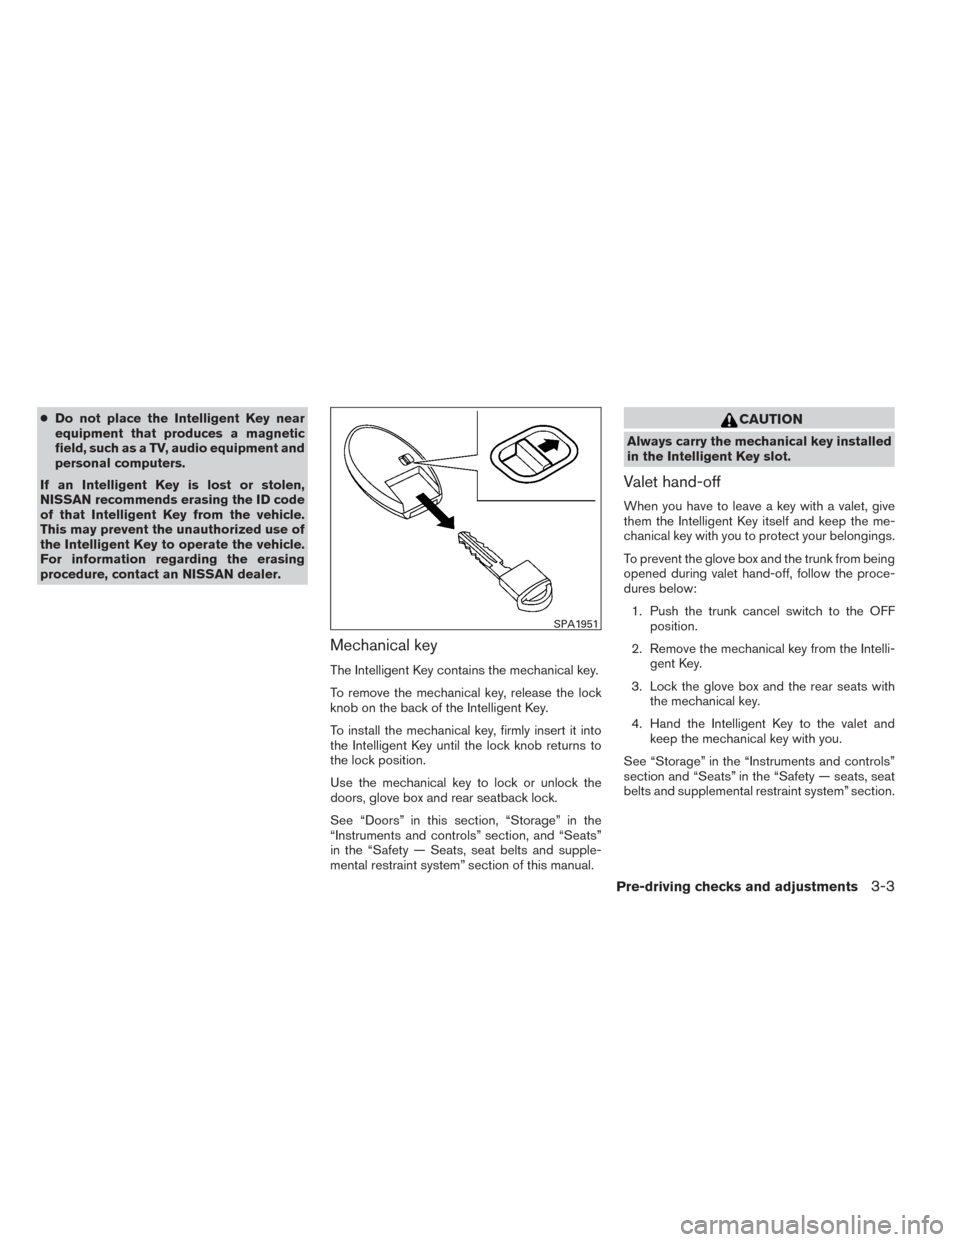
Mechanical key
The Intelligent Key contains the mechanical key.
To remove the mechanical key, release the lock
knob on the back of the Intelligent Key.
To install the mechanical key, firmly insert it into
the Intelligent Key until the lock knob returns to
the lock position.
Use the mechanical key to lock or unlock the
doors, glove box and rear seatback lock.
See “Doors” in this section, “Storage” in the
“Instruments and controls” section, and “Seats”
in the “Safety — Seats, seat belts and supple-
mental restraint system” section of this manual.
CAUTION
Always carry the mechanical key installed
in the Intelligent Key slot.
Valet hand-off
When you have to leave a key with a valet, give
them the Intelligent Key itself and keep the me-
chanical key with you to protect your belongings.
To prevent the glove box and the trunk from being
opened during valet hand-off, follow the proce-
dures below:
1. Push the trunk cancel switch to the OFF position.
2. Remove the mechanical key from the Intelli- gent Key.
3. Lock the glove box and the rear seats with the mechanical key.
4. Hand the Intelligent Key to the valet and keep the mechanical key with you.
See “Storage” in the “Instruments and controls”
section and “Seats” in the “Safety — seats, seat
belts and supplemental restraint system” section.
SPA1951
Pre-driving checks and adjustments3-3