2014 NISSAN 370Z ROADSTER change
[x] Cancel search: changePage 88 of 428
replacement indicator for a certain
driving distance does not mean your
tires will last that long. Use the tire
replacement indicator as a guide only
and always perform regular tire checks.
Failure to perform regular tire checks,
including tire pressure checks could
result in tire failure. Serious vehicle
damage could occur and may lead to a
collision, which could result in serious
personal injury or death.
4. “OTHER” indicator
This indicator appears when the set time comes
for replacing items other than the engine oil, oil
filter and tires. You can set or reset the distance
for replacing the items. (See “Trip computer”
(P.2-23) .)
Models with navigation system:
More maintenance reminders are also available
on the center display. (See “How to use INFO
button” (P.4-8).)
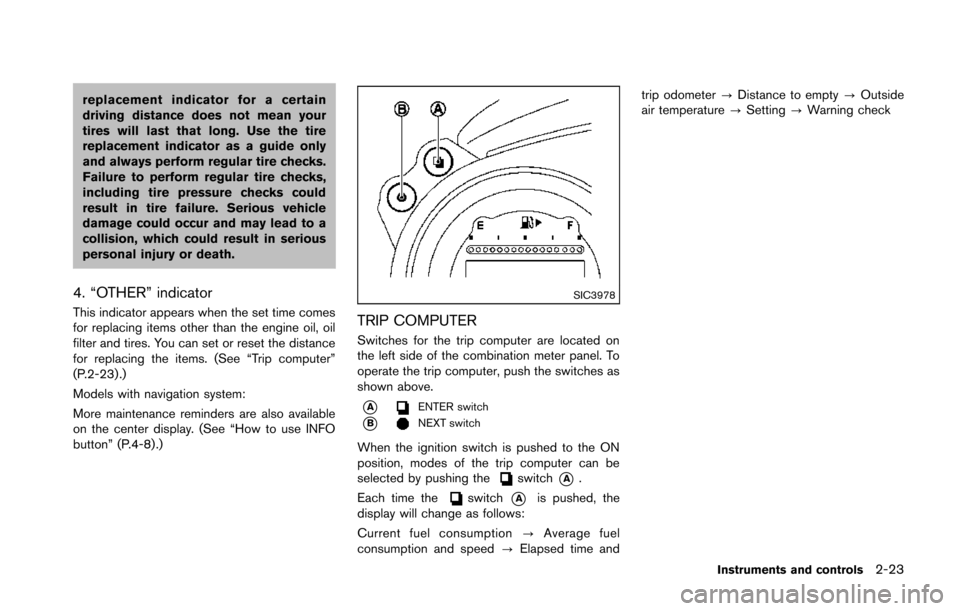
SIC3978
TRIP COMPUTER
Switches for the trip computer are located on
the left side of the combination meter panel. To
operate the trip computer, push the switches as
shown above.
*AENTER switch
*BNEXT switch
When the ignition switch is pushed to the ON
position, modes of the trip computer can be
selected by pushing the
switch*A.
Each time the
switch*Ais pushed, the
display will change as follows:
Current fuel consumption ?Average fuel
consumption and speed ?Elapsed time and trip odometer
?Distance to empty ?Outside
air temperature ?Setting ?Warning check
Instruments and controls2-23
Page 90 of 428
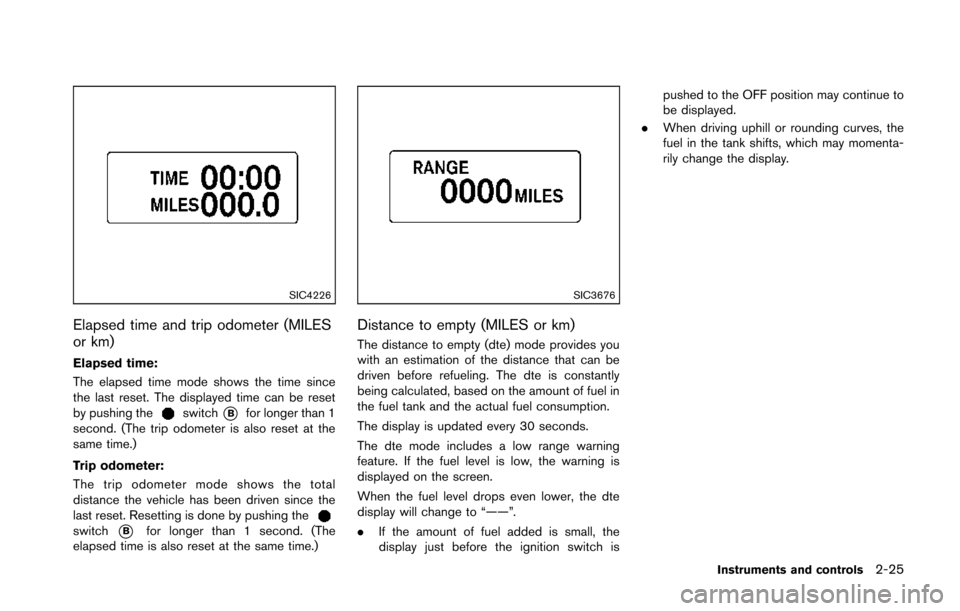
SIC4226
Elapsed time and trip odometer (MILES
or km)
Elapsed time:
The elapsed time mode shows the time since
the last reset. The displayed time can be reset
by pushing the
switch*Bfor longer than 1
second. (The trip odometer is also reset at the
same time.)
Trip odometer:
The trip odometer mode shows the total
distance the vehicle has been driven since the
last reset. Resetting is done by pushing the
switch*Bfor longer than 1 second. (The
elapsed time is also reset at the same time.)
SIC3676
Distance to empty (MILES or km)
The distance to empty (dte) mode provides you
with an estimation of the distance that can be
driven before refueling. The dte is constantly
being calculated, based on the amount of fuel in
the fuel tank and the actual fuel consumption.
The display is updated every 30 seconds.
The dte mode includes a low range warning
feature. If the fuel level is low, the warning is
displayed on the screen.
When the fuel level drops even lower, the dte
display will change to “——”.
. If the amount of fuel added is small, the
display just before the ignition switch is pushed to the OFF position may continue to
be displayed.
. When driving uphill or rounding curves, the
fuel in the tank shifts, which may momenta-
rily change the display.
Instruments and controls2-25
Page 95 of 428
2-30Instruments and controls
accept any interference received, including
interference that may cause undesired
operation.
Note: Changes or modifications not ex-
pressly approved by the party responsible
for compliance could void the user’s
authority to operate the equipment.
For Canada:
This device complies with RSS-210 of
Industry Canada. Operation is subject to
the following two conditions:
(1) this device may not cause interference,
and (2) this device must accept any inter-
ference, including interference that may
cause undesired operation of the device.
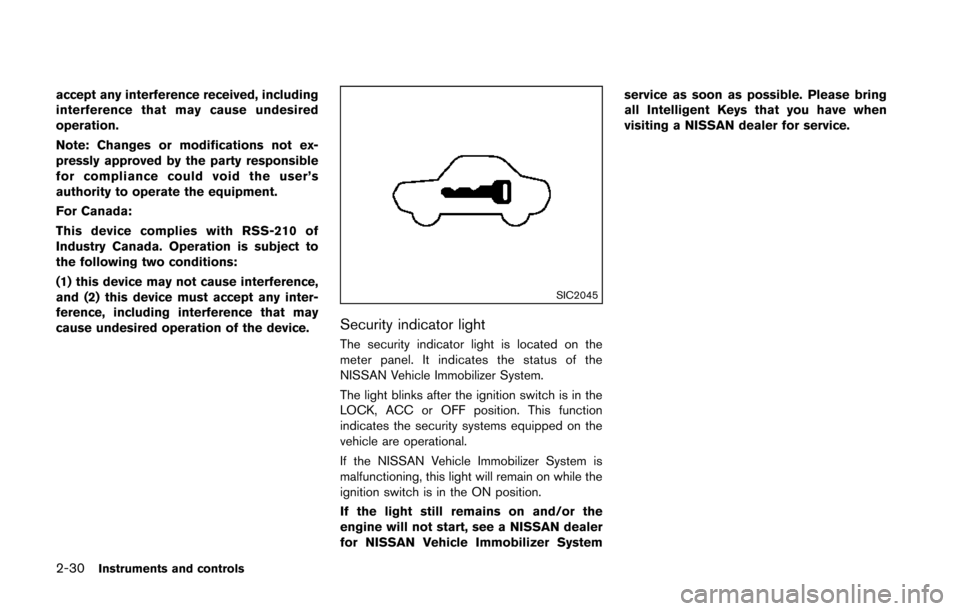
SIC2045
Security indicator light
The security indicator light is located on the
meter panel. It indicates the status of the
NISSAN Vehicle Immobilizer System.
The light blinks after the ignition switch is in the
LOCK, ACC or OFF position. This function
indicates the security systems equipped on the
vehicle are operational.
If the NISSAN Vehicle Immobilizer System is
malfunctioning, this light will remain on while the
ignition switch is in the ON position.
If the light still remains on and/or the
engine will not start, see a NISSAN dealer
for NISSAN Vehicle Immobilizer Systemservice as soon as possible. Please bring
all Intelligent Keys that you have when
visiting a NISSAN dealer for service.
Page 101 of 428
2-36Instruments and controls
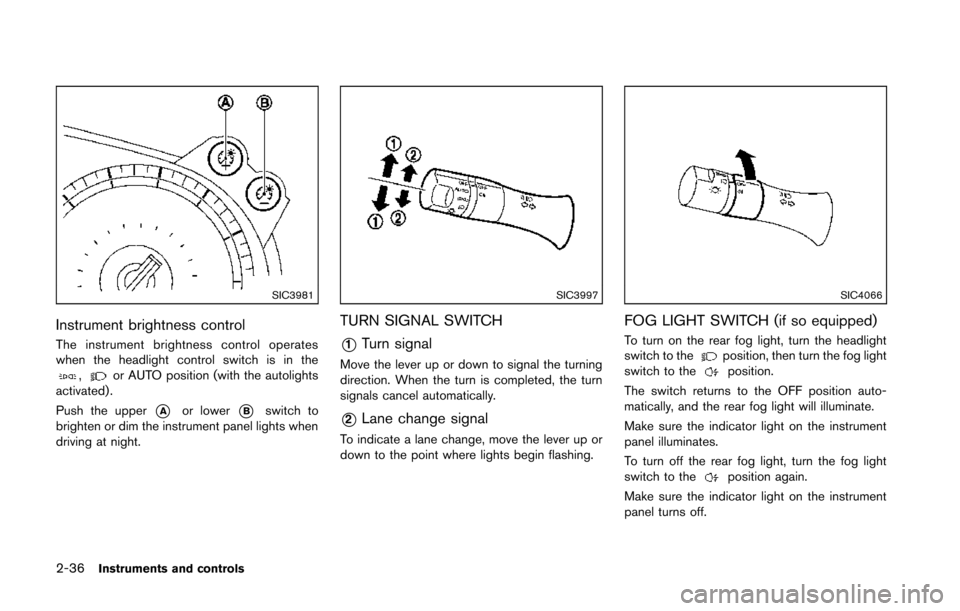
SIC3981
Instrument brightness control
The instrument brightness control operates
when the headlight control switch is in the
,or AUTO position (with the autolights
activated) .
Push the upper
*Aor lower*Bswitch to
brighten or dim the instrument panel lights when
driving at night.
SIC3997
TURN SIGNAL SWITCH
*1Turn signal
Move the lever up or down to signal the turning
direction. When the turn is completed, the turn
signals cancel automatically.
*2Lane change signal
To indicate a lane change, move the lever up or
down to the point where lights begin flashing.
SIC4066
FOG LIGHT SWITCH (if so equipped)
To turn on the rear fog light, turn the headlight
switch to theposition, then turn the fog light
switch to theposition.
The switch returns to the OFF position auto-
matically, and the rear fog light will illuminate.
Make sure the indicator light on the instrument
panel illuminates.
To turn off the rear fog light, turn the fog light
switch to the
position again.
Make sure the indicator light on the instrument
panel turns off.
Page 118 of 428
PROGRAMMING TROUBLESHOOT-
ING
If the HomeLink®does not quickly learn the
hand-held transmitter information:
. replace the hand-held transmitter batteries
with new batteries.
. position the hand-held transmitter with its
battery area facing away from the
HomeLink
®surface.
. press and hold both the HomeLink®and
hand-held transmitter buttons without inter-
ruption.
. position the hand-held transmitter 1-3 in
(26-76 mm) away from the HomeLink
®
surface. Hold the transmitter in that position
for up to 15 seconds. If HomeLink®is not
programmed within that time, try holding the
transmitter in another position - keeping the
indicator light in view at all times.
If you have any questions or are having difficulty
programming your HomeLink
®buttons, refer to
the HomeLink®web site at: www.homelink.com
or 1-800-355-3515.
CLEARING THE PROGRAMMED IN-
FORMATION
The following procedure clears the programmed
information from both buttons. Individual buttons
cannot be cleared. However, individual buttons
can be reprogrammed, see “Reprogramming a
single HomeLink
®button” (P.2-53).
To clear all programming
1. Press and hold the two outer HomeLink®
buttons until the indicator light begins to
flash in approximately 10 seconds. Do not
hold for longer than 20 seconds.
2. Release both buttons.
HomeLink
®is now in the programming mode
and can be programmed at any time beginning
with “Programming HomeLink
®” - Step 1.
REPROGRAMMING A SINGLE
HomeLink®BUTTON
To reprogram a HomeLink®Universal Transcei-
ver button, complete the following.
1. Press and hold the desired HomeLink
®
button. DO NOT release the button.
2. The indicator light will begin to flash after 20 seconds. Without releasing the HomeLink
®
button, proceed with “Programming
HomeLink®” - Step 1.
For questions or comments, contact HomeLink®
at: www.homelink.com or 1-800-355-3515.
The HomeLink®Universal Transceiver button
has now been reprogrammed. The new device
can be activated by pushing the HomeLink
®
button that was just programmed. This proce-
dure will not affect any other programmed
HomeLink
®buttons.
IF YOUR VEHICLE IS STOLEN
If your vehicle is stolen, you should change the
codes of any non-rolling code device that has
been programmed into HomeLink
®. Consult the
Owner’s Manual of each device or call the
manufacturer or retailer of those devices for
additional information.
When your vehicle is recovered, you will
need to reprogram the HomeLink
®Univer-
sal Transceiver with your new transmitter
information.
FCC Notice:
For USA:
This device complies with Part 15 of the
FCC Rules. Operation is subject to the
following two conditions: (1) This device
may not cause harmful interference, and
(2) this device must accept any interfer-
ence received, including interference that
may cause undesired operation.
Instruments and controls2-53
Page 119 of 428
2-54Instruments and controls
NOTE:
Changes or modifications not expressly
approved by the party responsible for
compliance could void the user’s authority
to operate the equipment.
For Canada:
This device complies with RSS-210 of
Industry Canada. Operation is subject to
the following two conditions: (1) this
device may not cause interference, and
(2) this device must accept any interfer-
ence, including interference that may
cause undesired operation of the device.
Page 124 of 428
ceed 1408F (608C) .
— Do not change or modify the Intelligent Key.
— Do not use a magnet key holder.
— Do not place the Intelligent Key near an electric appliance such
as a television set, personal
computer or cellular phone.
— Do not allow the Intelligent Key to come into contact with water
or salt water, and do not wash it
in a washing machine. This
could affect the system function.
. If an Intelligent Key is lost or stolen,
NISSAN recommends erasing the ID
code of that Intelligent Key. This will
prevent the Intelligent Key from
unauthorized use to unlock the
vehicle. For information regarding
the erasing procedure, please con-
tact a NISSAN dealer.
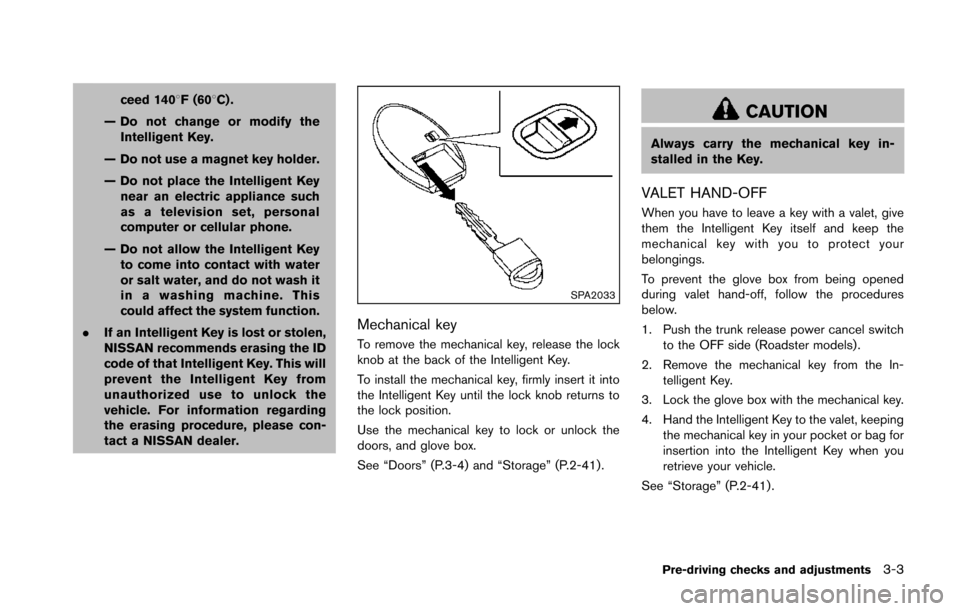
SPA2033
Mechanical key
To remove the mechanical key, release the lock
knob at the back of the Intelligent Key.
To install the mechanical key, firmly insert it into
the Intelligent Key until the lock knob returns to
the lock position.
Use the mechanical key to lock or unlock the
doors, and glove box.
See “Doors” (P.3-4) and “Storage” (P.2-41) .
CAUTION
Always carry the mechanical key in-
stalled in the Key.
VALET HAND-OFF
When you have to leave a key with a valet, give
them the Intelligent Key itself and keep the
mechanical key with you to protect your
belongings.
To prevent the glove box from being opened
during valet hand-off, follow the procedures
below.
1. Push the trunk release power cancel switch
to the OFF side (Roadster models) .
2. Remove the mechanical key from the In- telligent Key.
3. Lock the glove box with the mechanical key.
4. Hand the Intelligent Key to the valet, keeping the mechanical key in your pocket or bag for
insertion into the Intelligent Key when you
retrieve your vehicle.
See “Storage” (P.2-41) .
Pre-driving checks and adjustments3-3
Page 127 of 428
3-6Pre-driving checks and adjustments
3. Within 20 seconds of performing Step 2,push and hold the power door lock switch to
the
position (UNLOCK) for more than 5
seconds.
4. When activated, the hazard indicator will flash twice. When deactivated, the hazard
indicator will flash once.
5. The ignition switch must be placed in the OFF and ON position again between each
setting change.
When the automatic door unlock system is
deactivated, the doors do not unlock when the
ignition switch is placed in the OFF position. To
unlock the door manually, use the inside lock
knob or the power door lock switch (driver’s or
front passenger’s side).WARNING
. Radio waves could adversely affect
electric medical equipment. Those
who use a pacemaker should con-
tact the electric medical equipment
manufacturer for the possible influ-
ences before use.
. The Intelligent Key transmits radio
waves when the buttons are
pushed. The FAA advises that the
radio waves may affect aircraft na-
vigation and communication sys-
tems. Do not operate the
Intelligent Key while on an airplane.
Make sure the buttons are not
operated unintentionally when the
unit is stored during a flight.
The Intelligent Key system can operate all the
door and rear hatch/trunk lid locks using the
remote controller function or pushing the re-
quest switch on the vehicle without taking the
key out from a pocket or purse. The operating
environment and/or conditions may affect the
Intelligent Key system operation.
Be sure to read the following before using the
Intelligent Key system.
CAUTION
. Be sure to carry the Intelligent Key
with you when operating the vehi-
cle.
. Never leave the Intelligent Key in
the vehicle when you leave the
vehicle.
The Intelligent Key is always communicating with
the vehicle as it receives radio waves. The
Intelligent Key system transmits weak radio
waves. Environmental conditions may interfere
with the operation of the Intelligent Key system
under the following operating conditions.
. When operating near a location where
strong radio waves are transmitted, such
as a TV tower, power station and broad-
casting station.
. When in possession of wireless equipment,
such as a cellular telephone, transceiver,
and CB radio.
. When the Intelligent Key is in contact with or
covered by metallic materials.
. When any type of radio wave remote control
is used nearby.
. When the Intelligent Key is placed near an
electric appliance such as a personal
INTELLIGENT KEY SYSTEM