2014 MINI Coupe center console
[x] Cancel search: center consolePage 18 of 288

All around the center console1Hazard warning system2Speedometer with Control Display 163Radio 160
CD/multimedia 1604Air conditioning, automatic climate con‐
trol 1085Buttons on the center consoleSeat heating 56Power windows 42Rear fog lamp 88MINI Convertible: central power
window switch 43Front fog lamps 87Central locking, inside 37Seite 18At a glanceCockpit18
Online Edition for Part no. 01 40 2 911 498 - VI/13
Page 19 of 288

All around the head‐
liner1Indicator/warning lamps for the front pas‐
senger airbags 922Switch panelReading lamps 88MINI Roadster: interior lamps/
reading lamps 88Ambient lighting color 89MINI Coupe, MINI Roadster: ex‐
tending and retracting the spoiler
manually 103MINI Convertible: opening and
closing the sliding sunroof or
convertible top 43
MINI Roadster: opening and clos‐
ing the convertible top 51Interior lamps 88All around the shift/
selector lever1USB audio interface 1722Buttons in the center consoleSport button 103Driving stability control sys‐
tems 1013MINI joystick with buttons 20Seite 19CockpitAt a glance19
Online Edition for Part no. 01 40 2 911 498 - VI/13
Page 114 of 288

Interior equipmentVehicle equipmentThis chapter describes all series equipment as
well as country-specific and special equipment
offered for this model series.Therefore, it also
describes equipment that may not be found in
your vehicle, for instance due to the selected
special equipment or the country version. This
also applies to safety-related functions and sys‐
tems.
Cupholders and ashtray/
lighter
Cupholders
Two cupholders are located in the center con‐
sole in the front and another at the end of the
center console in the rear.
Shatter-proof containers and no hot
drinks
Use light and shatter-proof containers and do
not transport hot drinks. Otherwise, there is the
increased danger of injury in an accident. ◀
Unsuitable containers
Do not forcefully push unsuitable contain‐
ers into the cupholders. This may result in dam‐
age. ◀
Ashtray
The ashtray is located in one of the cupholders
in the center console at the front.
Emptying Take out the entire ashtray, arrow.
When installing, ensure that the ashtray is in‐
serted in the cupholder with the adapter.
Lighter
With the engine running or the ignition
switched on, press in the cigarette lighter.
The lighter can be removed as soon as it pops
back out.
Danger of burns
Only hold the hot lighter by its head; oth‐
erwise, there is the danger of getting burned.
Switch off the ignition and take the remote
control with you when leaving the vehicle so
that children cannot use the lighter and burn
themselves. ◀
Connecting electrical de‐
vices
The lighter socket can be used as a socket for
electrical equipment while the engine is run‐
ning or when the ignition is switched on. The
Seite 114ControlsInterior equipment114
Online Edition for Part no. 01 40 2 911 498 - VI/13
Page 115 of 288

total load of all sockets must not exceed
140 watts at 12 volt.
Avoid damaging the sockets by attempting to
insert plugs of unsuitable shape or size.
Do not connect the charger to the socket
Do not connect the battery charger to the
socket installed in the vehicle at the factory as
this could damage the battery. ◀
Replace the cover after use
Replace the lighter or socket cover after
use; otherwise, objects that fall into the lighter
socket or power socket could cause a short cir‐
cuit. ◀
Socket in the center console
Remove the cover or lighter, refer to page 114,
from the socket.
Socket in the cargo area
MINI Coupe, MINI Roadster
Take out the cover.
MINI Convertible
Take out the cover.
Cargo area MINI Coupe: cargo cover Do not place objects on the covers
Do not place objects on the cover; if you
do so, they may pose a danger to vehicle occu‐
pants during braking or evasive maneuvers or
damage the cover. ◀
The MINI Coupe is equipped with two cargo
covers. When the tailgate is opened, the rear
cargo cover is raised.
The covers can be removed individually.
Front cover
Pull the cover backwards out of the brackets,
arrow 1.
Seite 115Interior equipmentControls115
Online Edition for Part no. 01 40 2 911 498 - VI/13
Page 118 of 288

Storage compartmentsVehicle equipment
This chapter describes all series equipment as
well as country-specific and special equipment
offered for this model series.Therefore, it also
describes equipment that may not be found in
your vehicle, for instance due to the selected
special equipment or the country version. This
also applies to safety-related functions and sys‐
tems.
Notes No loose objects in the passenger com‐partment
Do not stow any objects in the passenger com‐
partment without securing them; otherwise,
they may present a danger to occupants for in‐
stance during braking and avoidance maneu‐
vers. ◀
No non-slip mats on the dashboard
Do not use non-slip materials, such as
non-slip mats, on the dashboard, or it could be
damaged by the substances in the materials. ◀
Storage compartments
Interior▷Glove compartment, refer to page 118.▷Center armrest, refer to page 119.▷Storage compartment on the passenger
side, refer to page 119.▷Compartments in the center console.▷Compartments in the doors.▷Compartments next to the rear seats.▷MINI Coupe, MINI Roadster: rear storage
shelf behind the seats, refer to page 120.▷Nets on the back of the front seat backrests
and in the front passenger footwell.▷Cupholder, refer to page 114.
Cargo area
▷Net on the cargo area floor and on the side
trim.▷Lashing eyes, refer to page 129.▷MINI Coupe, MINI Roadster: storage com‐
partment in the cargo area, refer to
page 116.
Glove compartment
Opening
Press the button to open the lid.
The light in the glove compartment switches
on.
Closing Fold up the cover.
Close the glove compartment again im‐
mediately
Close the glove compartment immediately after
use while driving; otherwise, injury may occur
during accidents. ◀
Seite 118ControlsStorage compartments118
Online Edition for Part no. 01 40 2 911 498 - VI/13
Page 171 of 288

that some CDs cannot be played or can only be
played to a limited extent.
MACROVISION
This product contains copyrighted technology
that is based on multiple registered US patents
and the intellectual property of the Macrovision
Corporation and other manufacturers. The use
of this copy protection must be approved by
Macrovision. Media protected by this product -
unless otherwise agreed with Macrovision -
may only be used for private purposes. Copying
of this technology is prohibited.
External devices At a glance
Various external devices can be connected with
the vehicle. Depending on how the device is connected to the vehicle, it may be possible to
operate it using the MINI joystick.SymbolMeaning AUX-IN port USB audio interface Music interface for smartphones Bluetooth audio
AUX-IN port
At a glance
▷For connecting audio devices, e.g., MP3
player. The sound is output on the vehicle
loudspeakers.▷Recommendation: use medium tone and
volume settings on the audio device. The
tone depends on the quality of the audio
files.Connecting
The AUX-IN port is in the center
console.
Connect the headphone connec‐
tor or line-out connector of the
device to the AUX-IN port.
Ensure that the connector is inserted all the
way into the AUX-IN port.
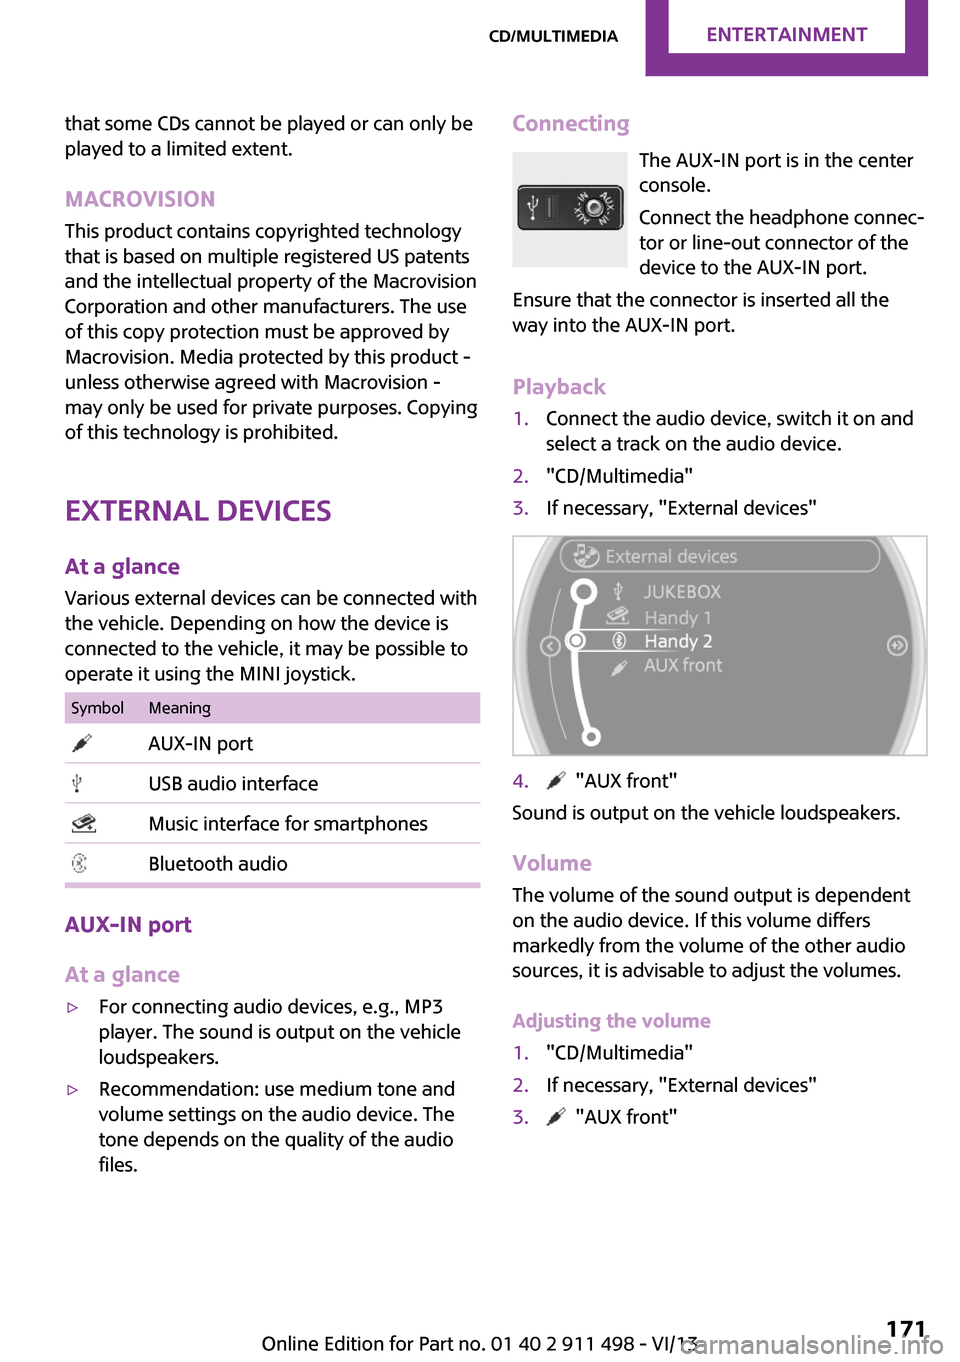
Playback1.Connect the audio device, switch it on and
select a track on the audio device.2."CD/Multimedia"3.If necessary, "External devices"4. "AUX front"
Sound is output on the vehicle loudspeakers.
Volume
The volume of the sound output is dependent
on the audio device. If this volume differs
markedly from the volume of the other audio
sources, it is advisable to adjust the volumes.
Adjusting the volume
1."CD/Multimedia"2.If necessary, "External devices"3. "AUX front"Seite 171CD/multimediaEntertainment171
Online Edition for Part no. 01 40 2 911 498 - VI/13
Page 172 of 288

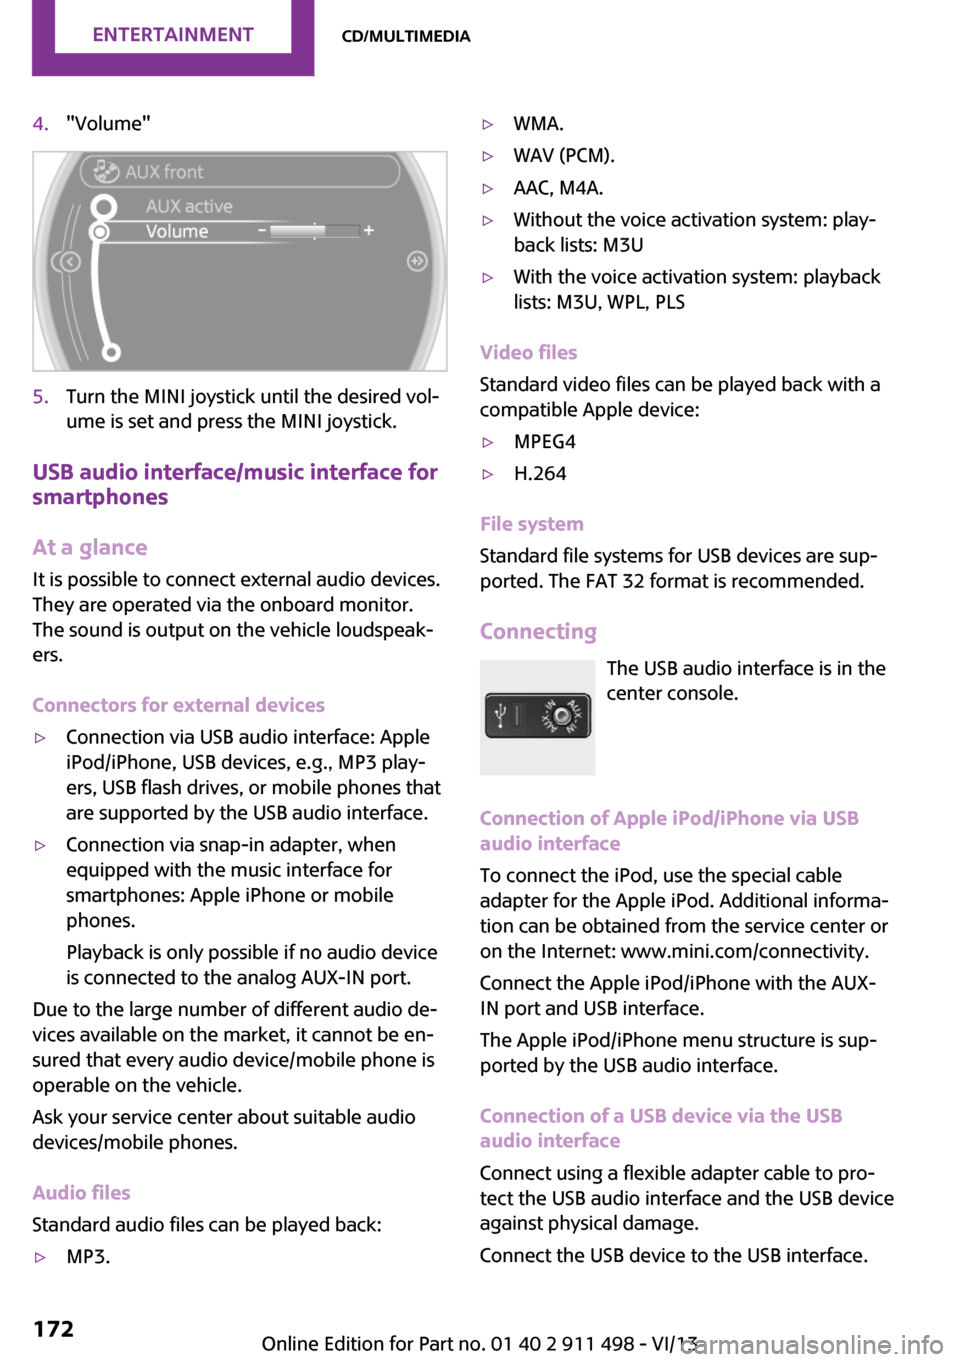
4."Volume"5.Turn the MINI joystick until the desired vol‐
ume is set and press the MINI joystick.
USB audio interface/music interface for
smartphones
At a glance
It is possible to connect external audio devices.
They are operated via the onboard monitor.
The sound is output on the vehicle loudspeak‐
ers.
Connectors for external devices
▷Connection via USB audio interface: Apple
iPod/iPhone, USB devices, e.g., MP3 play‐
ers, USB flash drives, or mobile phones that
are supported by the USB audio interface.▷Connection via snap-in adapter, when
equipped with the music interface for
smartphones: Apple iPhone or mobile
phones.
Playback is only possible if no audio device
is connected to the analog AUX-IN port.
Due to the large number of different audio de‐
vices available on the market, it cannot be en‐
sured that every audio device/mobile phone is
operable on the vehicle.
Ask your service center about suitable audio
devices/mobile phones.
Audio files
Standard audio files can be played back:
▷MP3.▷WMA.▷WAV (PCM).▷AAC, M4A.▷Without the voice activation system: play‐
back lists: M3U▷With the voice activation system: playback
lists: M3U, WPL, PLS
Video files
Standard video files can be played back with a
compatible Apple device:
▷MPEG4▷H.264
File system
Standard file systems for USB devices are sup‐
ported. The FAT 32 format is recommended.
Connecting The USB audio interface is in the
center console.
Connection of Apple iPod/iPhone via USB
audio interface
To connect the iPod, use the special cable
adapter for the Apple iPod. Additional informa‐
tion can be obtained from the service center or
on the Internet: www.mini.com/connectivity.
Connect the Apple iPod/iPhone with the AUX-
IN port and USB interface.
The Apple iPod/iPhone menu structure is sup‐
ported by the USB audio interface.
Connection of a USB device via the USB
audio interface
Connect using a flexible adapter cable to pro‐
tect the USB audio interface and the USB device
against physical damage.
Connect the USB device to the USB interface.
Seite 172EntertainmentCD/multimedia172
Online Edition for Part no. 01 40 2 911 498 - VI/13
Page 178 of 288

The device could not be paired or connected.▷Do the Bluetooth passkeys on the device
and the vehicle match? Enter the same
passkey on the device and via the onboard
monitor.▷A multi-character passkey may be needed.▷Did it take longer than 30 seconds to enter
the passkey? Repeat the pairing procedure.▷Are too many Bluetooth devices connected
to the device or vehicle? Delete connec‐
tions with other devices if necessary.▷Is the mobile phone in power-save mode or
does it have only a limited remaining bat‐
tery life? Charge the mobile phone in the
snap-in adapter or via a charging cable.▷Depending on the mobile phone, it is possi‐
ble that only one device can be connected
to the vehicle. Unpair the connected device
from the vehicle and pair and connect only
one device.▷The device no longer reacts? Switch the de‐
vice off and on again.▷Repeat the pairing procedure.
Music cannot be played back.
▷Start the program for playing back music
data on the device and select a track on the
device if necessary.▷Switch the radio on and off again.
Music files can only be played back softly.
▷Adjust the volume settings on the device.
Videos can only be played back without audio
or with delayed audio.
▷Check the compatibility of the devices. In‐
formation under www.mini.com/connectiv‐
ity.
Playback is disturbed when buttons are pressed
or by other messages on the device.
▷Switch off the button tones and other signal
tones on the device.Playback is interrupted by a telephone call or
traffic bulletin and is not resumed automati‐
cally.▷Switch the radio on and off again.
Playback is not possible if the mobile phone is
connected via Bluetooth Audio while it is also
connected via the music interface for smart‐
phones in the snap-in adapter.
▷Disconnect one of the two connections; for
example, disconnect the audio connection,
refer to page 177, and restart playback.
If all points in this list have been checked and
the required function is still not available,
please contact the hotline or service center.
Software Update The vehicle supports various external devices
depending on the current software version.
With a software update, the vehicle can support
new mobile phones or new external device, for
example.
Software updates and related current informa‐
tion is available at www.mini.com/connectivity.
Displaying the current version
The currently installed software is displayed.
1."Settings"2."Software update"3."Show current version"
Updating the software
The software may only be updated when the
vehicle is stationary.
1.Store the file for the software-update in the
main director of a USB flash drive.2.Insert the USB flash drive into the USB au‐
dio interface in the center console. An up‐
date via the USB interface in the glove com‐
partment is not possible.3."Settings"4."Software update"Seite 178EntertainmentCD/multimedia178
Online Edition for Part no. 01 40 2 911 498 - VI/13