2014 MERCEDES-BENZ SLS-Class stop start
[x] Cancel search: stop startPage 6 of 274

1, 2, 3 ...
360° camera Displaying images ............................ 56
Switching on/off .............................. 56
911 emergency call ..........................127A
Active partition (US Bdevices
only) Selecting ........................................ 203
Address book
Browsin g........................................ 150
Calling up ....................................... 150
Changing an entry .......................... 152
Connecting acall........................... 152
Creating an entry ........................... 150
Deleting an entry ........................... 151
Deleting contacts ........................... 156
Detail sabout an entry ................... 151
Entering characters .........................34
Entry as ahome address ...............103
Hiding contact details ....................157
Importing contacts ........................154
Introduction ................................... 149
Receiving vCards ........................... 155
Searching for an entry ...................150
Starting route guidance .................153
Voice tag ....................................... 153
Address entry menu ............................ 64
Adjusting the soun dsettings
Balance ............................................ 30
Alternative route ................................. 93
Audio Radio mode ................................... 184
Audio CD/DVD or MP3 mode
Switching to (Rear Seat
Entertainment System) ..................247
Audio DVD
Mode ,switchin gto........................ 197
Pause function ............................... 199
Playback options ........................... 204
Safety notes .................................. 193
Setting the audio forma t................ 203
Stop function ................................. 199Audio format, setting
Audi oDVD ..................................... 203
Video DVD ..................................... 233
Autostore ........................................... 187
AUX (audio) Notes/socket ................................ 225
Switching to ................................... 225
AUX (video)
Setting the volume and sound .......234
Showing/hiding the menu .............234
Switching to ................................... 234
AUX jacks
CD/DVD drive ............................... 240
Avoiding an area ................................ 115 B
Back button ......................................... 27
Balance, adjusting ............................... 30
Bass, setting ........................................ 30
Bird's-eye view (navigation) .............109
Bluetooth ®
Activating/deactivating ...................45
Activating audio mode ...................217
Conditions (telephone ).................. 127
Connecting another mobile phone .131
Connecting audio devices ..............213
Device lis t...................................... 214
Entering the passcode ...................130
External authorization ....................131
General information .........................44
Interface ........................................ 126
Introduction ................................... 126
Reconnecting an audio device .......215
Searching for a mobile phone ........129
Settings ........................................... 44
Telephone basic menu ...................133
Telephony ...................................... 127
Telephony notes ............................ 126
Bluetooth ®
audio basic display ........217
Brightness, setting (TV, video) .........228
Buttons on the COMAND controller ... 274
Index
Page 54 of 274

Calling up drive status regulator (ABC)
X Press 000B.
X In the system menu, slide 00360012the
COMAND controller up until the display/
selectio nwindow is selected.
X Slide 003400120035 the COMAND controller
repeatedly until the drivin gconditions
menu (ABC) appears.
The corresponding displays appear in the
COMAND display.
Details on the displays:
R for all vehicles except AMG vehicles, see
the separate vehicle Operator's Manual
R for AMG vehicles, see the separate vehicle
Operator's Manual. Exiting the display
X Slide 003400120035 the COMAND controller until
the desired display (clock or fuel
consumption) is shown. Seat functions
Overview
Using the 0011button next to the COMAND
controller or the Seat menu item in the
system menu, you can call up different setting
functions. The following settings depend on
the type of seat and the vehicle model series:
R seat cushion length
R backrest side bolsters
R lumbar
R balance
R seat cushion side bolsters
R dynamics
R massage
i You can also store and recall the current
seat function settings using the memory
button and the corresponding memory
position switch; see the separate vehicle
Operator's Manual. The massage function cannot be started or
stopped using the memory button. Selecting the seat
First select the seat which you wish to adjust.
This function is not available for all vehicles.
X
Press the 0011or000B button.
X Select Seat and press
0037to confirm.
X To switch to the lower line, for both options
slide 00120008the COMAND controller.
X Select Driver's Seat or
Passenger Seat by turning
003C0012003Dthe COMAND
controller and press 0037to confirm. Adjustment functions
Adjusting the seat cushion length The availability of this function depends on
the type of seat and the vehicle model series.
This function allows you to adjust the height
of the seat cushion.52
Seat functionsVehicle functions
Page 71 of 274

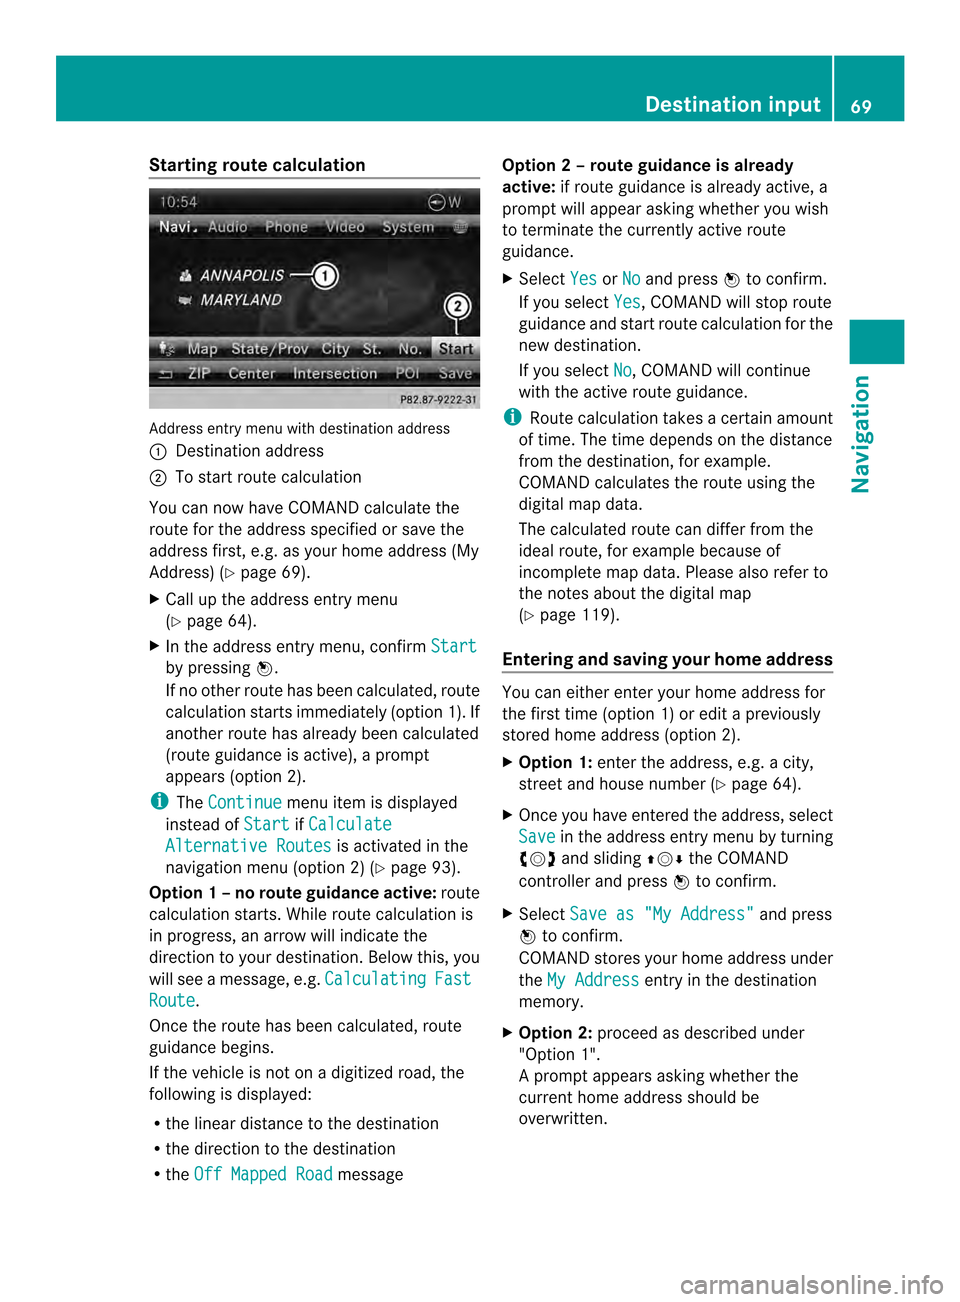
Starting route calculation
Address entry menu with destination address
0001
Destination address
0002 To start route calculation
You can now have COMAND calculate the
route for the address specified or save the
address first, e.g. as your home address (My
Address) (Y page 69).
X Call up the address entry menu
(Y page 64).
X In the address entry menu, confirm Startby pressing
0037.
If no other route has been calculated, route
calculation starts immediately (option 1). If
another route has already been calculated
(route guidance is active), a prompt
appears (option 2).
i The Continue menu item is displayed
instead of Start if
Calculate Alternative Routes is activated in the
navigation menu (option 2) (Y page 93).
Option 1 –no route guidance active: route
calculatio nstarts. While route calculatio nis
in progress, an arrow will indicate the
direction to your destination. Below this, you
will see a message, e.g. Calculating Fast
Route .
Once the route has been calculated, route
guidance begins.
If the vehicle is not on a digitized road, the
following is displayed:
R the linear distance to the destination
R the direction to the destination
R the Off Mapped Road messageOption 2 – route guidance is already
active:
if route guidance is already active, a
prompt will appear asking whether you wish
to terminate the currently active route
guidance.
X Select Yes or
No and press
0037to confirm.
If you select Yes , COMAND will stop route
guidance and start route calculation for the
new destination.
If you select No , COMAND will continue
with the active route guidance.
i Route calculation takes a certain amount
of time. The time depends on the distance
fro mt he destination, for example.
COMAND calculates the route using the
digital map data.
The calculated route can differ from the
ideal route, for example because of
incomplete map data. Please also refer to
the notes about the digital map
(Y page 119).
Entering and saving your home address You can either enter your home address for
the first time (option 1) or edit a previously
stored home address (option 2).
X
Option 1: enter the address, e.g. a city,
street and house number (Y page 64).
X Once you have entered the address, select
Save in the address entry menu by turning
003C0012003D and sliding 003600120008the COMAND
controller and press 0037to confirm.
X Select Save as "My Address" and press
0037 to confirm.
COMAND stores your home address under
the My Address entry in the destination
memory.
X Option 2: proceed as described under
"Option 1".
Ap rompt appears asking whethe rthe
current home address should be
overwritten. Destination input
69Navigation Z
Page 96 of 274

Menu functions
X
To selectt he next or previous
alternative route: selectNext or
Previous and press
0037to confirm.
X To start route guidance using the
selected alternative route: selectStart and press
0037to confirm.
COMAND begins route guidance on the
selected alternative route. Route information
Displaying destination information Example
:destination information
The example shows information on distance,
estimated time of arrival and estimated
remaining driving time to the destination 000B
and two way points.
X To switch to navigation mode: press the
0012 button.
X To show the menu: press0037the COMAND
controller.
X Select Route in the navigation system
menu bar by turning 003C0012003Dthe COMAND
controller and press 0037to confirm.
X Select Destination Information and
press 0037to confirm.
Destination information is displayed.
X To call up further destination
information: turn003C0012003D the COMAND
controller. X
To close the destination information:
slide 003400120035 the COMAND controller or press
the 000A back button.
i You can display destination information
for the destination, for both waypoints and
for the intermediate stop, if they are part of
the route.
If a mobile phone is connected to COMAND
and a phone number is included in the
destination information, you can call it
(Y page 128).
Route overview You can use the route overview to move along
the active route section by section and view
information and details about each section of
the route.
You can see information relevant to the
section of the route, such as the length of the
road section you will be driving along and the
road name. The highlighted route section is
marked in white with a red border on the map.
X
To switch to navigation mode: press the
0012 button.
X To show the menu: press0037the COMAND
controller.
X Select Route in the navigation system
menu bar by turning 003C0012003Dthe COMAND
controller and press 0037to confirm.
X Select Route Browser and press
0037to
confirm.
X To view the next or previous route
section: selectNext or
Previous and
press 0037to confirm.
i If the first or last route section is
highlighted, you cannot select Previous or
Next .
X To zoom in or out of the map: select000A
or 0007 and press 0037to confirm.
X To close the route overview: select
Back and press
0037to confirm. 94
Route guidanceNavigation
Page 97 of 274

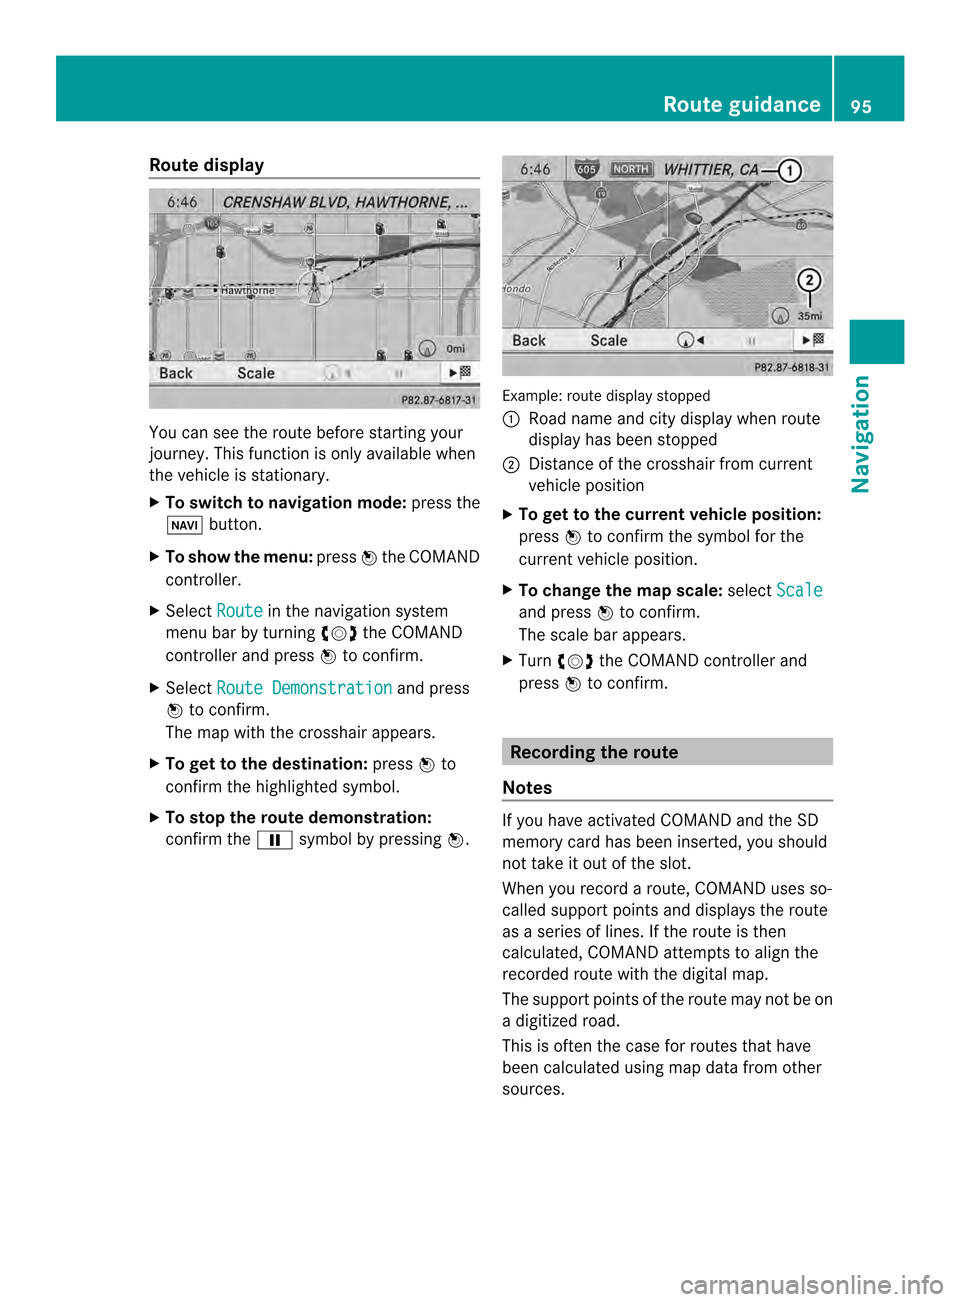
Route display
You can see the route before starting your
journey .This function is only available when
the vehicle is stationary.
X To switch to navigation mode: press the
0012 button.
X To show the menu: press0037the COMAND
controller.
X Select Route in the navigation system
menu bar by turning 003C0012003Dthe COMAND
controller and press 0037to confirm.
X Select Route Demonstration and press
0037 to confirm.
The map with the crosshair appears.
X To get to the destination: press0037to
confirm the highlighted symbol.
X To stop the route demonstration:
confirm the 0009symbol by pressing 0037. Example: route display stopped
0001
Road name and city display when route
display has been stopped
0002 Distance of the crosshair from current
vehicle position
X To get to the current vehicle position:
press 0037to confirm the symbol for the
current vehicle position.
X To change the map scale: selectScale and press
0037to confirm.
The scale bar appears.
X Turn 003C0012003D the COMAND controller and
press 0037to confirm. Recording the route
Notes If you have activated COMAND and the SD
memory card has been inserted, you should
not take it out of the slot.
When you record a route, COMAND uses so-
called support points and displays the route
as a series of lines. If the route is then
calculated, COMAND attemptst
o align the
recorded route with the digital map.
The support points of the route may not be on
a digitized road.
This is often the case for routes that have
been calculated using map data from other
sources. Route guidance
95Navigation Z
Page 98 of 274

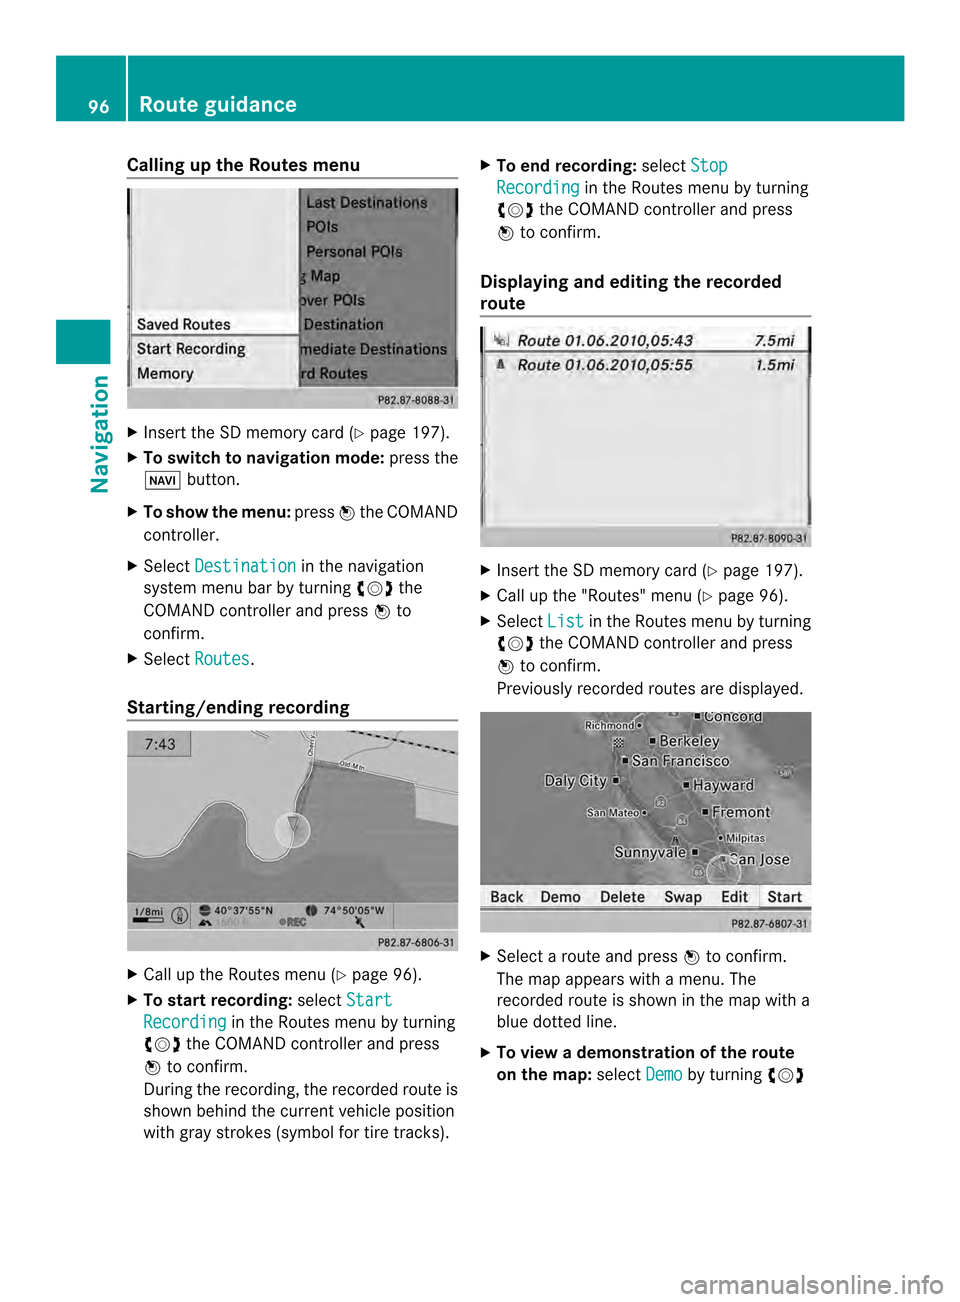
Calling up the Routes menu
X
Insert the SD memory car d(Ypage 197).
X To switch to navigation mode: press the
0012 button.
X To show the menu: press0037the COMAND
controller.
X Select Destination in the navigation
system menu bar by turning 003C0012003Dthe
COMAND controller and press 0037to
confirm.
X Select Routes .
Starting/ending recording X
Call up the Routes menu (Y page 96).
X To start recording: selectStart Recording in the Routes menu by turning
003C0012003D the COMAND controller and press
0037 to confirm.
During the recording, the recorded route is
shown behind the curren tvehicle position
with gray strokes (symbol for tire tracks). X
To end recording: selectStop Recording in the Routes menu by turning
003C0012003D the COMAND controller and press
0037 to confirm.
Displaying and editing the recorded
route X
Insert the SD memory card (Y page 197).
X Call up the "Routes" menu (Y page 96).
X Select List in the Routes menu by turning
003C0012003D the COMAND controller and press
0037 to confirm.
Previously recorded routes are displayed. X
Select a route and press 0037to confirm.
The map appears with a menu. The
recorded route is shown in the map with a
blue dotted line.
X To view a demonstration of the route
on the map: selectDemo by turning
003C0012003D 96
Route guidanceNavigation
Page 123 of 274

Problems with the navigation system
Problem Possible causes/consequences and
0005 Solutions
COMAND is unable to
continue route
guidance after the
journey has been
interrupted. Route guidance is canceled if you interrupt the journey for more
than two hours.
"Interrupting the journey" refers to stopping the vehicle.
"Continuing route guidance" refers to switching COMAND back on
and driving on.
X Continue route guidance (Y page 92).Problem Possible causes/consequences and
0005 Solutions
COMAND is unable to
determine the vehicle's
position. COMAND has to redetermine the position of the vehicle if the
vehicle has been transported.
Example:
R
After transporting the vehicle by ferry
R After transporting the vehicle by motorail
R After the vehicle has been towed
X Start the vehicle and pull away.
COMAND determines the vehicle's position. Depending on the
driving situation, this may take some time.
Route guidance may be restricted during the determination of
the vehicle's position.
When positioning is complete, route guidance is resumed with
navigation announcements and route guidance displays. Problems with the navigation system
121Navigation Z
Page 189 of 274

X
Directly in the station presets: press0037
the COMAND controller when the display/
selection window is active.
or
X Select Presets by sliding
00120008and turning
003C0012003D the COMAND controller and press
0037 to confirm.
In both cases, the station presets appear.
The 0027dot indicates under which preset
the currently selected station is stored.
X Selec tapreset by turning 003C0012003Dthe
COMAND controller and press and hold
0037 until you hear a tone.
The station is stored under the preset.
Storing stations automatically This function automatically stores stations
with adequate reception under the presets.
The search starts at the lowest frequency.
COMAND stores any stations found,
beginning with preset 1. When the highest
frequency is reached or 10 stations have
been found, the storing process ends. Any
stations stored manually under the presets
will be lost. COMAND may not occupy all
memory slots when storing.
X Option 1: press0037the COMAND controller
when the display/selection window is
active.
The station preset memory appears.
X Option 2: selectPresets by sliding
00120008
and turning 003C0012003Dthe COMAND controller
and press 0037to confirm.
The station preset memory appears.
X Irrespective of the option, select
Autostore and press
0037to confirm.
In both cases, COMAND searches for
stations that can be received. You will see
a message to this effect. The available
stations are automatically stored in the
preset positions.
X To cancel storing: selectCancel and
press 0037to confirm. Weather Band
Activating X
Press the 0006function button repeatedly
until the Weather Band is switched on.
or
X Select the currently set waveband FM or
AM by sliding
00120008and turning 003C0012003Dthe
COMAND controller and press 0037to
confirm.
X Select WB from the menu and press
0037to
confirm.
Searching for achannel X
Quic kselect: turn003C0012003D or slide 003400120035the
COMAND controller while th edisplay/
selection window is active.
or
X Press the 0001or0002 button.
Channel search scans up or down and
stops at the next channel found.
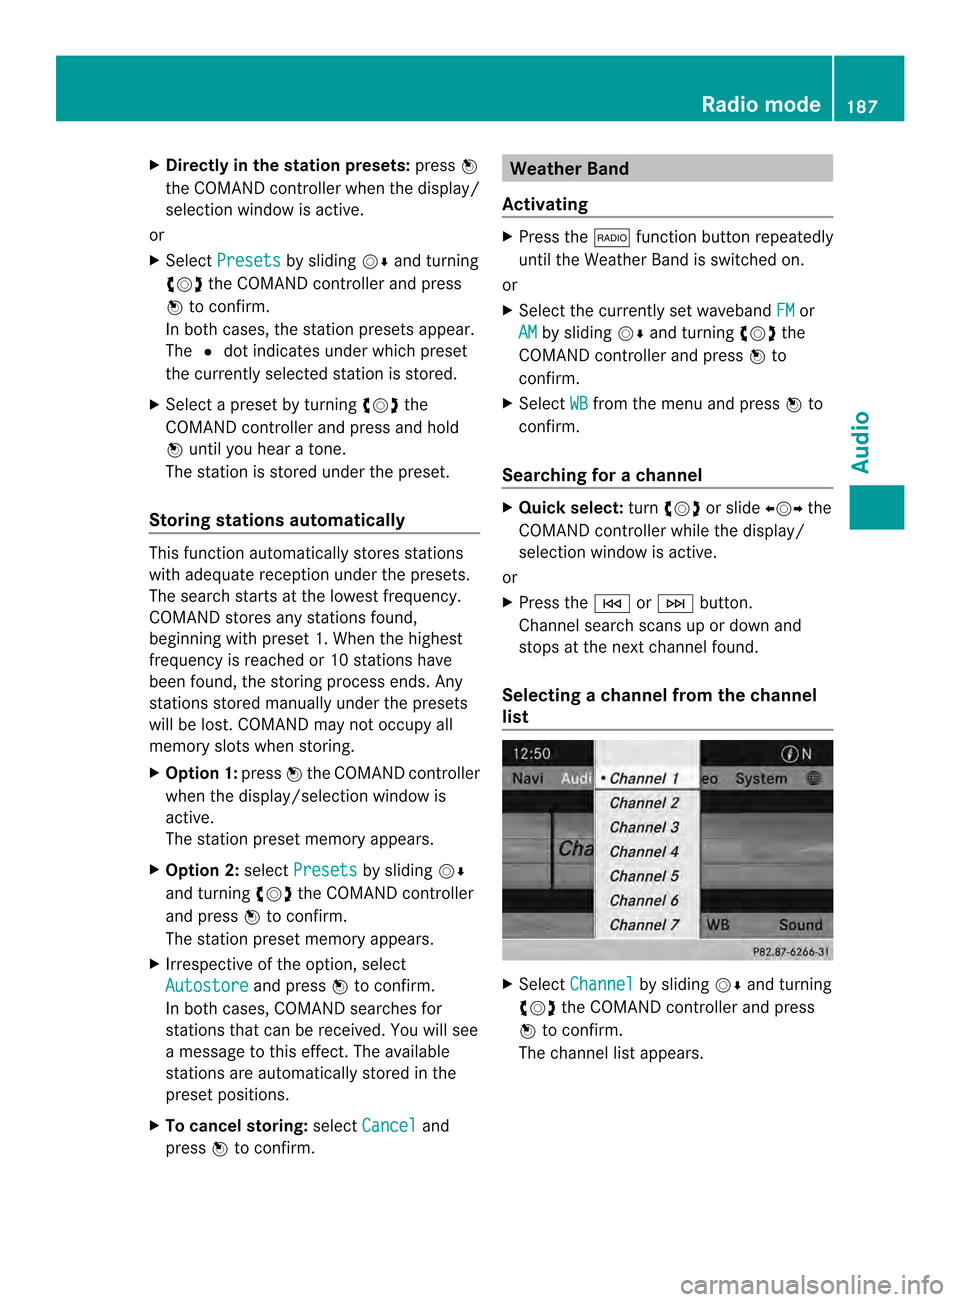
Selecting achannel from the channel
list X
Select Channel by sliding
00120008and turning
003C0012003D the COMAND controller and press
0037 to confirm.
The channel lis tappears. Radio mode
187Audio