2014 MERCEDES-BENZ SLS AMG ROADSTER clock
[x] Cancel search: clockPage 222 of 292
Adding engine oil
G
WARNING
Certain components in the engine
compartment, such as the engine, radiator
and parts of the exhaust system, can become
very hot. Working in the engine compartment
poses a risk of injury.
Where possible, let the engine cool down and
touch only the components described in the
following. G
WARNING
If engine oil comes into contact with hot
components in the engine compartment, it
may ignite. There is a risk of fire and injury.
Make sure that engine oil is not spilled next
to the filler neck. Let the engine cool down
and thoroughly clean the engine oil off the
components before starting the engine. H
Environmental note
When adding oil, take care not to spill any. If
oil enters the soil or waterways, it is harmful
to the environment.
! Only use engine oils and oil filters that
have been approved for vehicles with a
service system. You can obtain a list of the
engine oils and oil filters tested and
approved in accordance with the
Mercedes-Benz Specifications for Service
Products at any Mercedes-Benz Service
center.
Damage to the engine or exhaust system is
caused by the following:
R using engine oils and oil filters that have
not been specifically approved for the
service system
R replacing engine oil and oil filters after
the interval for replacement specified by
the service system has been exceeded
R using engine oil additives.
! Do not add too much oil. adding too much
engine oil can result in damage to the engine or to the catalytic converter. Have
excess engine oil siphoned off.
X
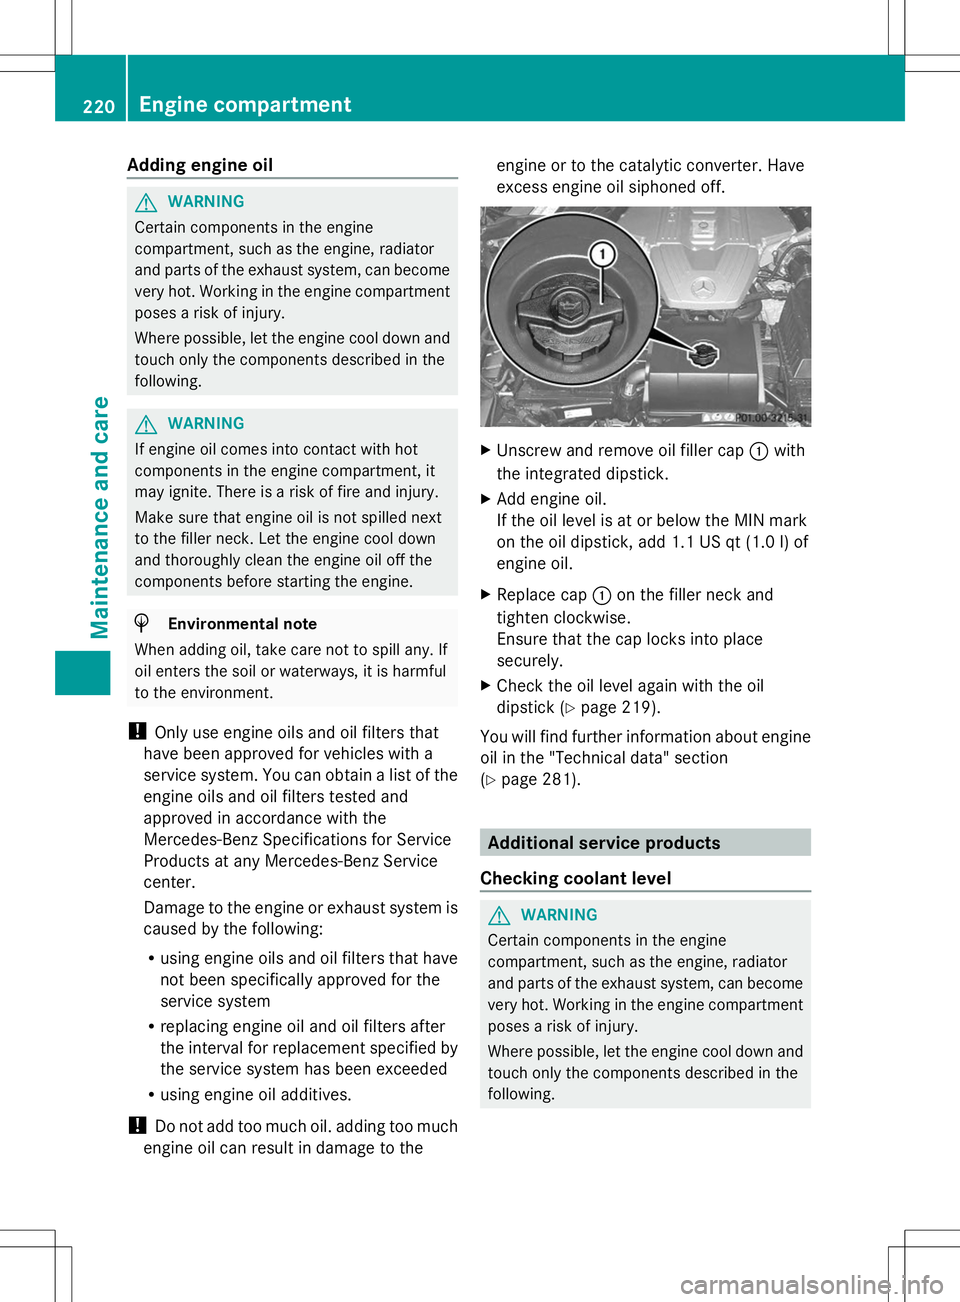
Unscrew and remove oil filler cap :with
the integrated dipstick.
X Add engine oil.
If the oil level is at or below the MIN mark
on the oil dipstick, add 1.1 US qt (1.0 l) of
engine oil.
X Replace cap :on the filler neck and
tighten clockwise.
Ensure that the cap locks into place
securely.
X Check the oil level again with the oil
dipstick (Y page 219).
You will find further information about engine
oil in the "Technical data" section
(Y page 281). Additional service products
Checking coolant level G
WARNING
Certain components in the engine
compartment, such as the engine, radiator
and parts of the exhaust system, can become
very hot. Working in the engine compartment
poses a risk of injury.
Where possible, let the engine cool down and
touch only the components described in the
following. 220
Engine compartmentMaintenance and care
Page 223 of 292
G
WARNING
The engine cooling system is pressurized,
particularly when the engine is warm. When
opening the cap, you could be scalded by hot
coolant spraying out. There is a risk of injury.
Let the engine cool down before opening the
cap. Wear eye and hand protection when
opening the cap. Open the cap slowly half a
turn to allow pressure to escape.
Only check the coolant level when the vehicle
is on a level surface and the engine has cooled
down.
X Set the Start/Stop button to key position
2.
X Check the coolant temperature display in
the "AMG" menu (Y page 161).
The coolant temperature must be below
158 ‡ (70 †). X
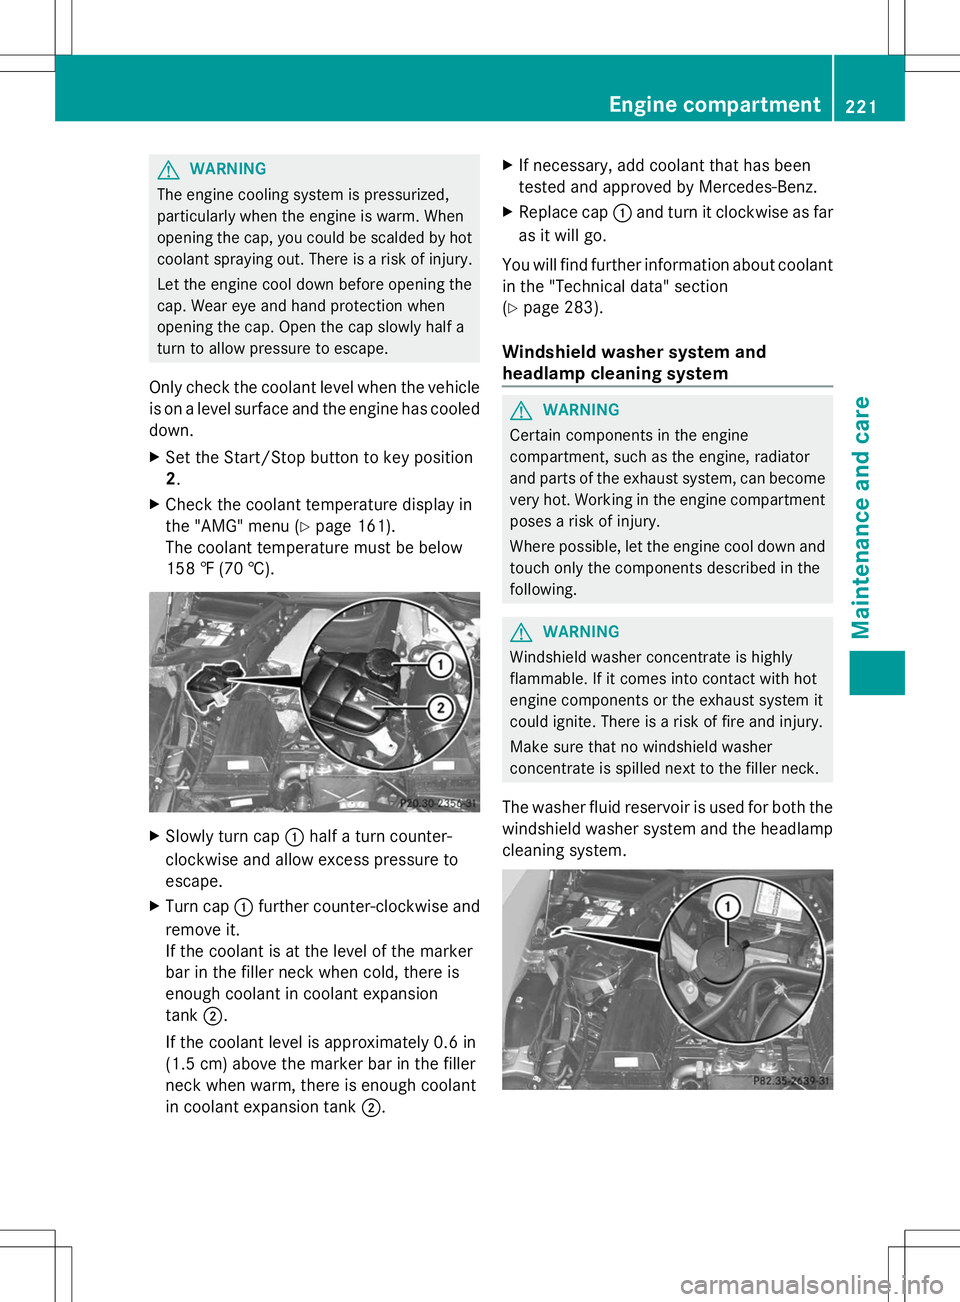
Slowly turn cap :half a turn counter-
clockwise and allow excess pressure to
escape.
X Turn cap :further counter-clockwise and
remove it.
If the coolant is at the level of the marker
bar in the filler neck when cold, there is
enough coolant in coolant expansion
tank ;.
If the coolant level is approximately 0.6 in
(1.5 cm) above the marker bar in the filler
neck when warm, there is enough coolant
in coolant expansion tank ;.X
If necessary, add coolant that has been
tested and approved by Mercedes-Benz.
X Replace cap :and turn it clockwise as far
as it will go.
You will find further information about coolant
in the "Technical data" section
(Y page 283).
Windshield washer system and
headlamp cleaning system G
WARNING
Certain components in the engine
compartment, such as the engine, radiator
and parts of the exhaust system, can become
very hot. Working in the engine compartment
poses a risk of injury.
Where possible, let the engine cool down and
touch only the components described in the
following. G
WARNING
Windshield washer concentrate is highly
flammable. If it comes into contact with hot
engine components or the exhaust system it
could ignite. There is a risk of fire and injury.
Make sure that no windshield washer
concentrate is spilled next to the filler neck.
The washer fluid reservoir is used for both the
windshield washer system and the headlamp
cleaning system. Engine compartment
221Maintenance and care Z
Page 236 of 292
X
Do not remove any foreign objects which
have penetrated the tire, e.g. screws or
nails.
X Take the TIREFIT kit out of the trunk
(Y page 232). X
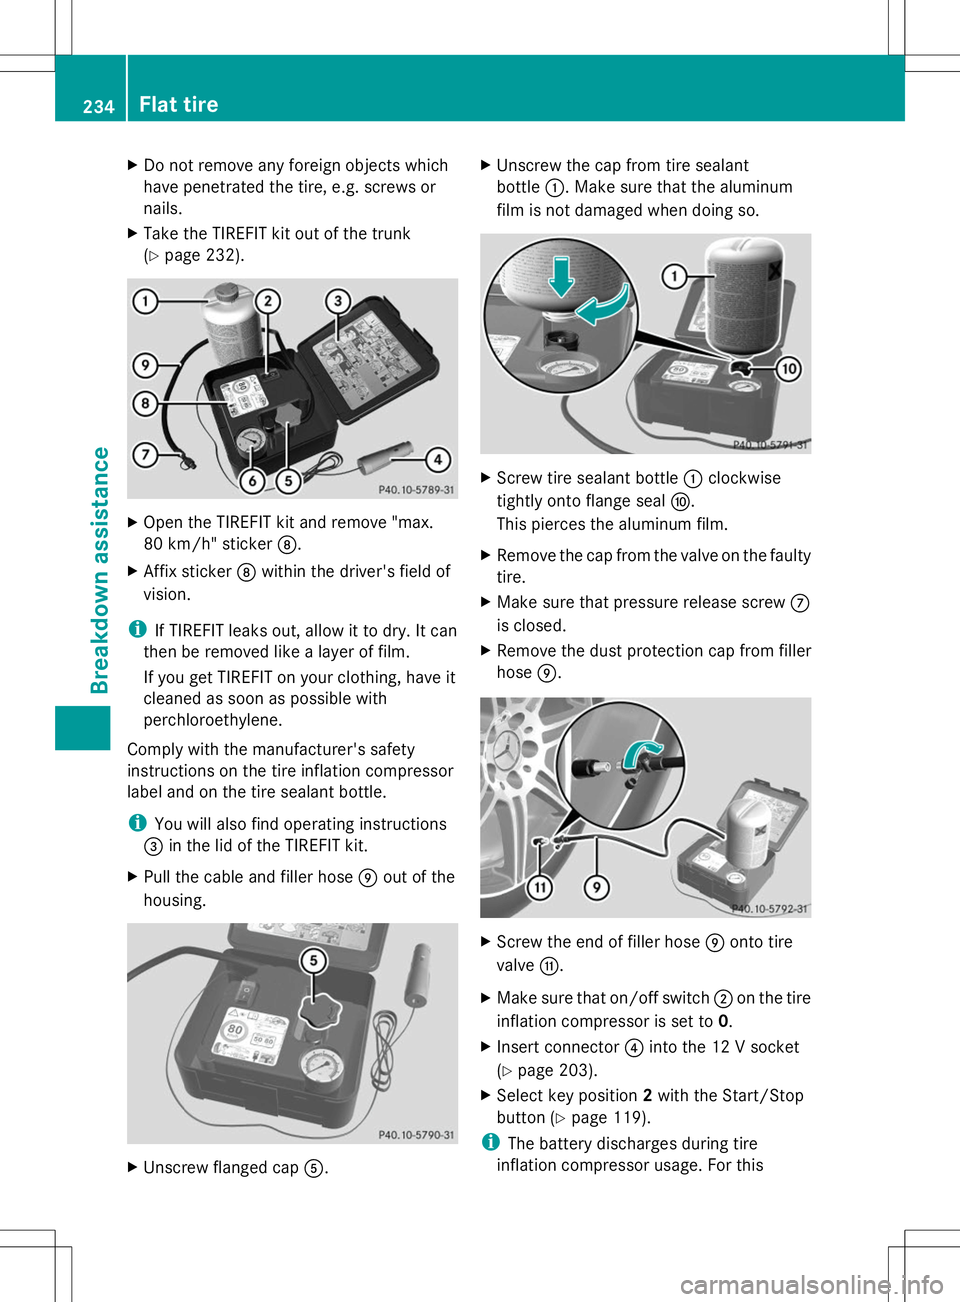
Open the TIREFIT kit and remove "max.
80 km/h" sticker D.
X Affix sticker Dwithin the driver's field of
vision.
i If TIREFIT leaks out, allow it to dry. It can
then be removed like a layer of film.
If you get TIREFIT on your clothing, have it
cleaned as soon as possible with
perchloroethylene.
Comply with the manufacturer's safety
instructions on the tire inflation compressor
label and on the tire sealant bottle.
i You will also find operating instructions
= in the lid of the TIREFIT kit.
X Pull the cable and filler hose Eout of the
housing. X
Unscrew flanged cap A. X
Unscrew the cap from tire sealant
bottle :. Make sure that the aluminum
film is not damaged when doing so. X
Screw tire sealant bottle :clockwise
tightly onto flange seal F.
This pierces the aluminum film.
X Remove the cap from the valve on the faulty
tire.
X Make sure that pressure release screw C
is closed.
X Remove the dust protection cap from filler
hose E. X
Screw the end of filler hose Eonto tire
valve G.
X Make sure that on/off switch ;on the tire
inflation compressor is set to 0.
X Insert connector ?into the 12 V socket
(Y page 203).
X Select key position 2with the Start/Stop
button ( Ypage 119).
i The battery discharges during tire
inflation compressor usage. For this 234
Flat tireBreakdown assistance
Page 245 of 292
!
Tow-starting the vehicle is not permitted.
The transmission may otherwise be
damaged.
If the vehicle can no longer be driven because
of an accident or breakdown, you have the
following options:
R transporting the vehicle
As a rule, you should have the vehicle
transported.
R towing the vehicle with the rear axle raised
Only tow the vehicle with the rear axle
raised in exceptional cases.
R towing the vehicle with a tow rope or tow
bar
Only tow the vehicle in exceptional cases.
The engine must be running if you tow the
vehicle with a tow rope or tow bar. Observe
the following notes.
Also observe the following notes:
R If the engine does not start, try jump-
starting it (Y page 240). Tow-starting the
vehicle is not permitted.
R If it is not possible to jump-start the vehicle,
have it transported to the nearest qualified
specialist workshop, e.g. an authorized
Mercedes-Benz Center.
R If the vehicle has transmission damage,
have it transported to a qualified specialist
workshop. Observe the display messages
in the instrument cluster. Installing/removing the towing eye
Installing the towing eye X
Take the towing eye and the wheel
wrench 6
out of the wheel-change tool kit
(Y page 232).
The bracket for the removable towing eye is
in the bumper at the front. It is located under
the cover. X
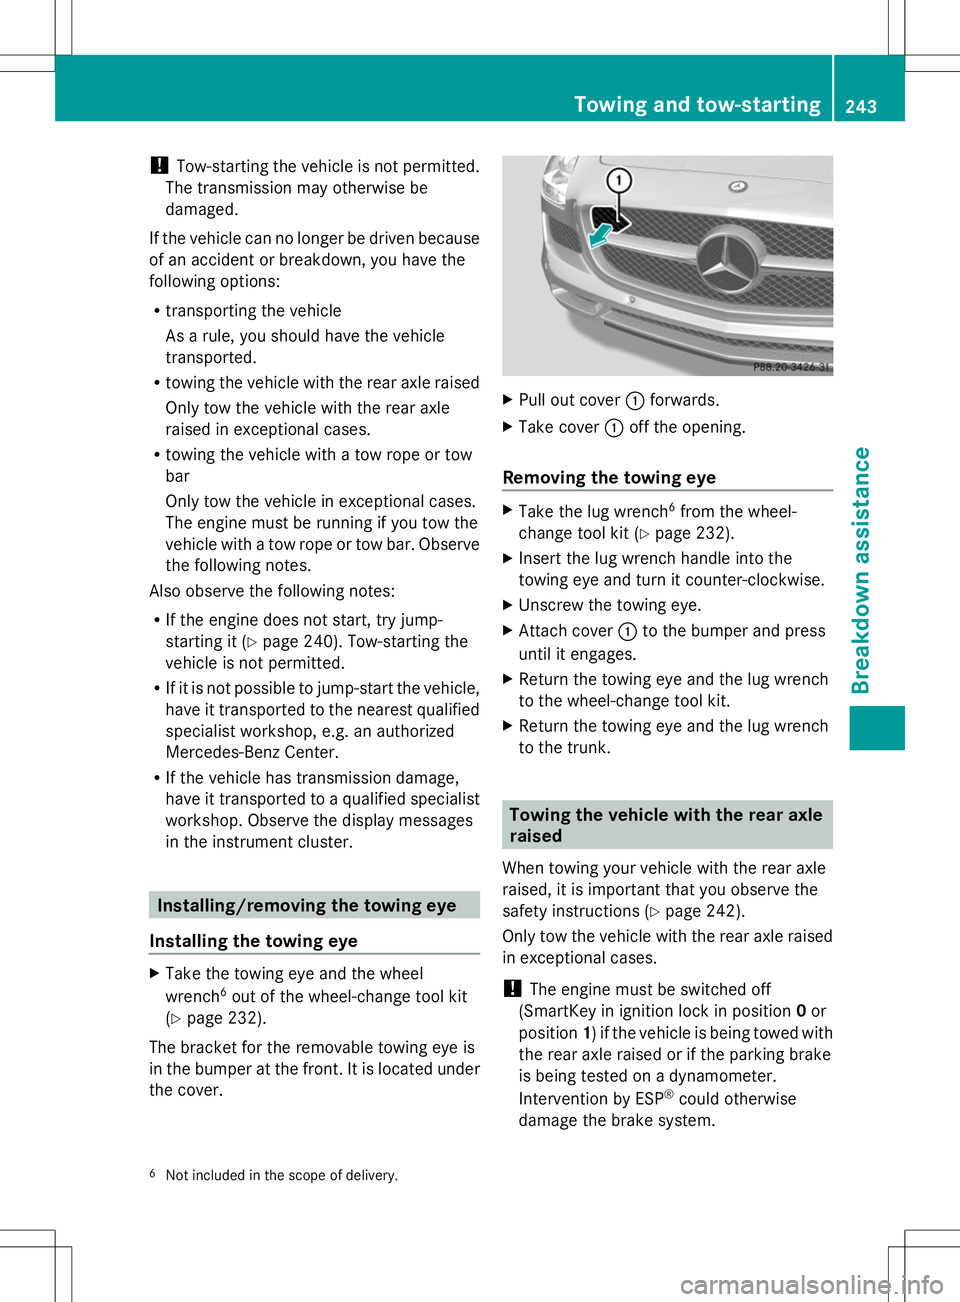
Pull out cover :forwards.
X Take cover :off the opening.
Removing the towing eye X
Take the lug wrench 6
from the wheel-
change tool kit (Y page 232).
X Insert the lug wrench handle into the
towing eye and turn it counter-clockwise.
X Unscrew the towing eye.
X Attach cover :to the bumper and press
until it engages.
X Return the towing eye and the lug wrench
to the wheel-change tool kit.
X Return the towing eye and the lug wrench
to the trunk. Towing the vehicle with the rear axle
raised
When towing your vehicle with the rear axle
raised, it is important that you observe the
safety instructions (Y page 242).
Only tow the vehicle with the rear axle raised
in exceptional cases.
! The engine must be switched off
(SmartKey in ignition lock in position 0or
position 1) if the vehicle is being towed with
the rear axle raised or if the parking brake
is being tested on a dynamometer.
Intervention by ESP ®
could otherwise
damage the brake system.
6 Not included in the scope of delivery. Towing and tow-starting
243Breakdown assistance Z
Page 273 of 292
R
never lie under the raised vehicle.
R never start the engine when the vehicle is
raised.
R never open or close a door or the trunk lid
when the vehicle is raised.
R make sure that no persons are present in
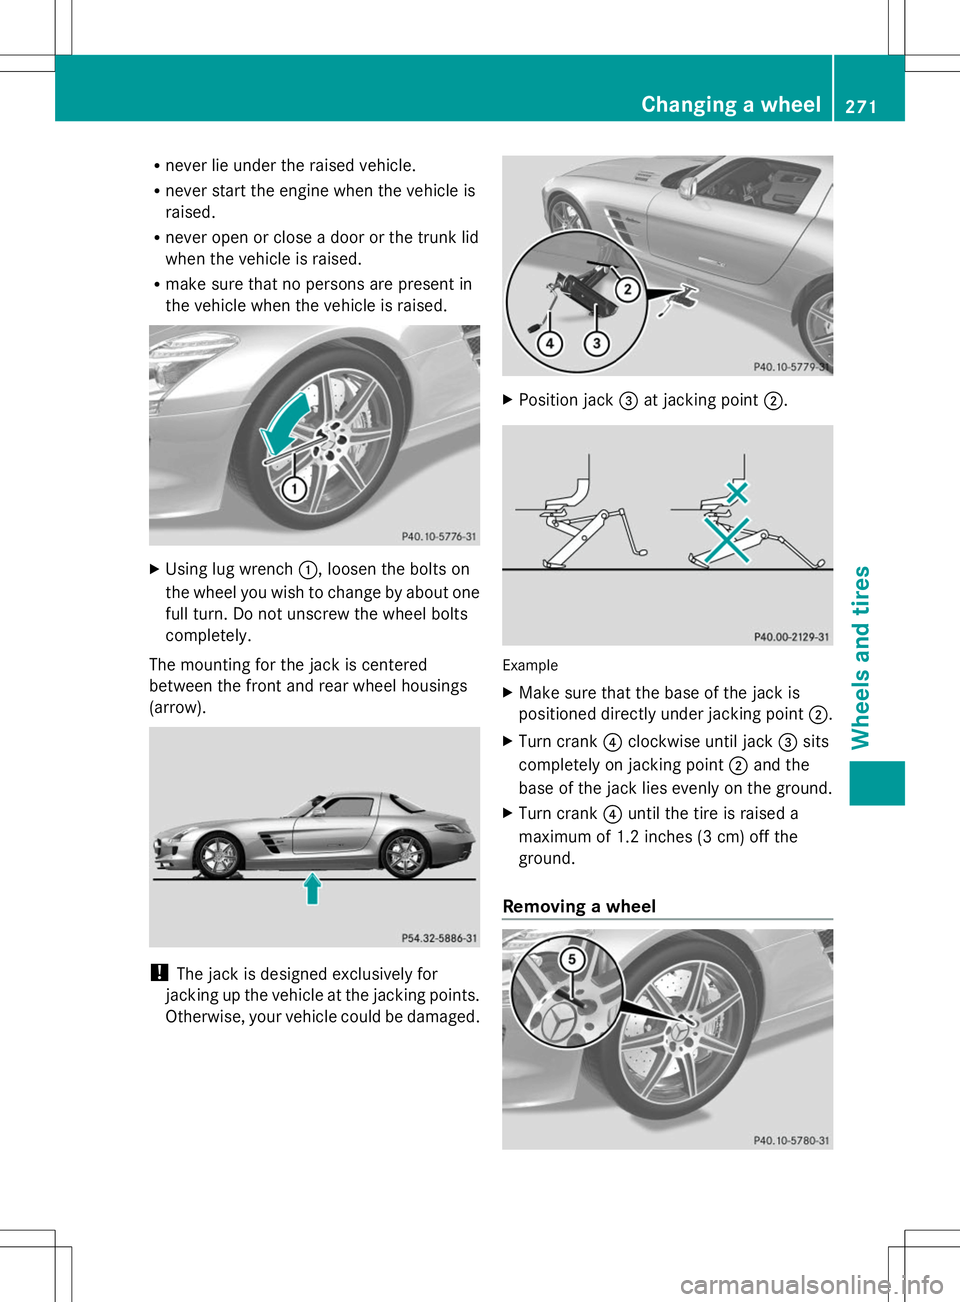
the vehicle when the vehicle is raised. X
Using lug wrench :, loosen the bolts on
the wheel you wish to change by about one
full turn. Do not unscrew the wheel bolts
completely.
The mounting for the jack is centered
between the front and rear wheel housings
(arrow). !
The jack is designed exclusively for
jacking up the vehicle at the jacking points.
Otherwise, your vehicle could be damaged. X
Position jack =at jacking point ;. Example
X
Make sure that the base of the jack is
positioned directly under jacking point ;.
X Turn crank ?clockwise until jack =sits
completely on jacking point ;and the
base of the jack lies evenly on the ground.
X Turn crank ?until the tire is raised a
maximum of 1.2 inches (3 cm) off the
ground.
Removing a wheel Changing a wheel
271Wheels and tires Z
Page 275 of 292
X
Tighten the wheel bolts until they are
finger-tight.
X Unscrew the alignment bolt.
X Tighten the last wheel bolt until it is finger-
tight.
Lowering the vehicle G
WARNING
The wheels could work loose if the wheel nuts
and bolts are not tightened to the specified
tightening torque. There is a risk of accident.
Have the tightening torque immediately
checked at a qualified specialist workshop
after a wheel is changed.
X Turn the crank of the jack counter-
clockwise until the vehicle is once again
standing firmly on the ground.
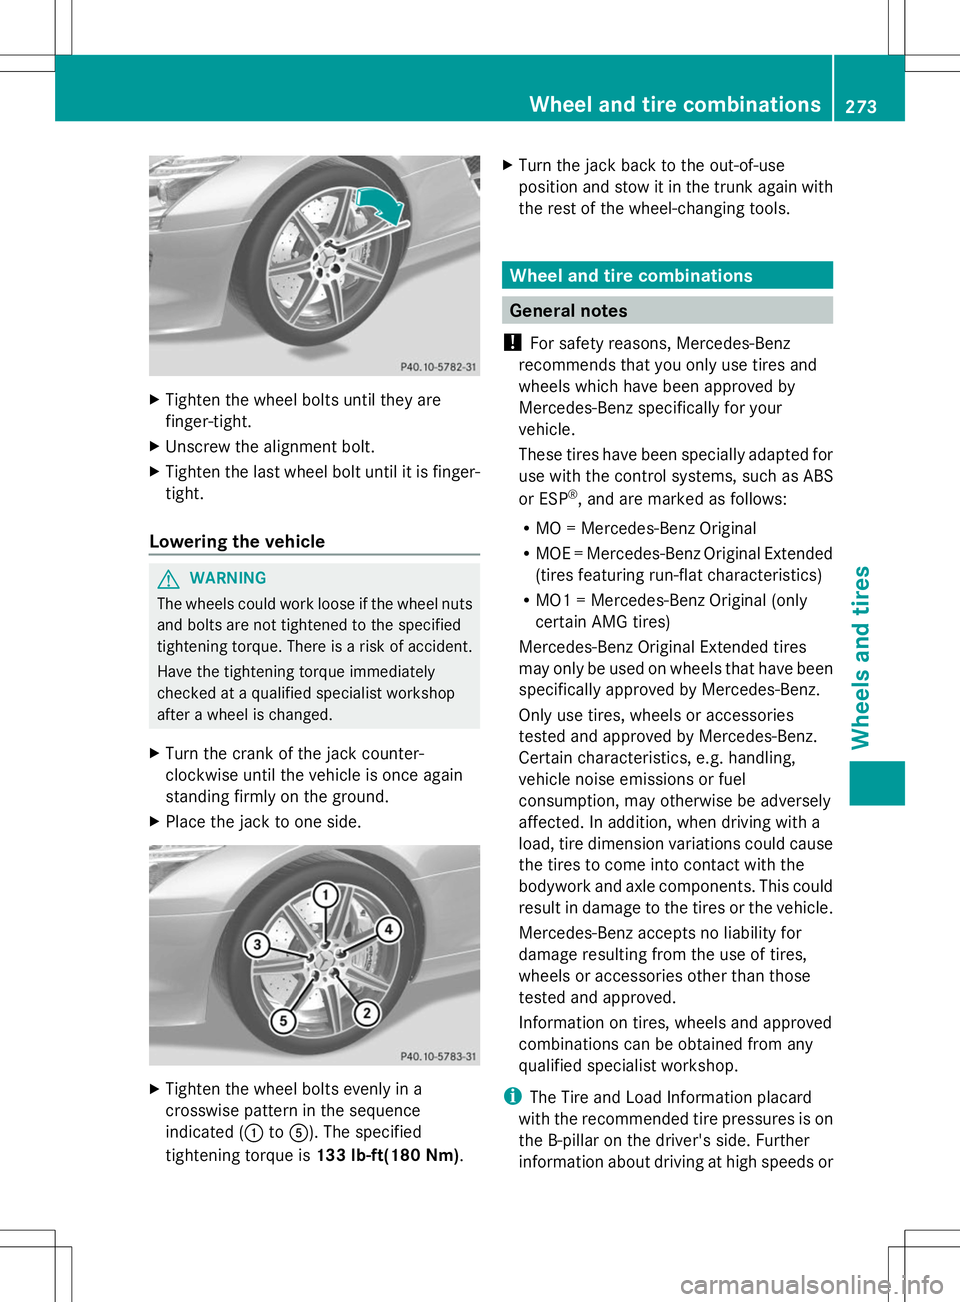
X Place the jack to one side. X
Tighten the wheel bolts evenly in a
crosswise pattern in the sequence
indicated (: toA). The specified
tightening torque is 133 lb-ft(180 Nm). X
Turn the jack back to the out-of-use
position and stow it in the trunk again with
the rest of the wheel-changing tools. Wheel and tire combinations
General notes
! For safety reasons, Mercedes-Benz
recommends that you only use tires and
wheels which have been approved by
Mercedes-Benz specifically for your
vehicle.
These tires have been specially adapted for
use with the control systems, such as ABS
or ESP ®
, and are marked as follows:
R MO = Mercedes-Benz Original
R MOE = Mercedes-Benz Original Extended
(tires featuring run-flat characteristics)
R MO1 = Mercedes-Benz Original (only
certain AMG tires)
Mercedes-Benz Original Extended tires
may only be used on wheels that have been
specifically approved by Mercedes-Benz.
Only use tires, wheels or accessories
tested and approved by Mercedes-Benz.
Certain characteristics, e.g. handling,
vehicle noise emissions or fuel
consumption, may otherwise be adversely
affected. In addition, when driving with a
load, tire dimension variations could cause
the tires to come into contact with the
bodywork and axle components. This could
result in damage to the tires or the vehicle.
Mercedes-Benz accepts no liability for
damage resulting from the use of tires,
wheels or accessories other than those
tested and approved.
Information on tires, wheels and approved
combinations can be obtained from any
qualified specialist workshop.
i The Tire and Load Information placard
with the recommended tire pressures is on
the B-pillar on the driver's side. Further
information about driving at high speeds or Wheel and tire combinations
273Wheels and tires Z