2014 MERCEDES-BENZ SLS AMG COUPE key
[x] Cancel search: keyPage 149 of 292
is always given when a vehicle enters the
blind spot monitoring range from behind or
from the side. When you overtake a vehicle,
the warning only occurs if the difference in
speed is less than 7 mph (12 km/h).
The yellow indicator lamp goes out if reverse
gear is engaged. In this event, Blind Spot
Assist is no longer active.
The brightness of the indicator/warning
lamps is adjusted automatically according to
the ambient light.
Collision warning If a vehicle is detected in the monitoring range
of Blind Spot Assist and you switch on the
corresponding turn signal, a double warning
tone sounds. Red warning lamp :flashes. If
the turn signal remains on, vehicles detected
are indicated by the flashing of red warning
lamp :. There are no further warning tones.
Switching on Blind Spot Assist X
Make sure that Blind Spot Assist
(Y page 157) is activated in the on-board
computer.
X Ensure that key position 2has been
selected with the Start/Stop button.
Warning lamps :in the exterior mirrors
light up red for approximately
1.5 seconds and then turn yellow. Driving systems
147Driving and parking Z
Page 153 of 292
Operating the on-board computer
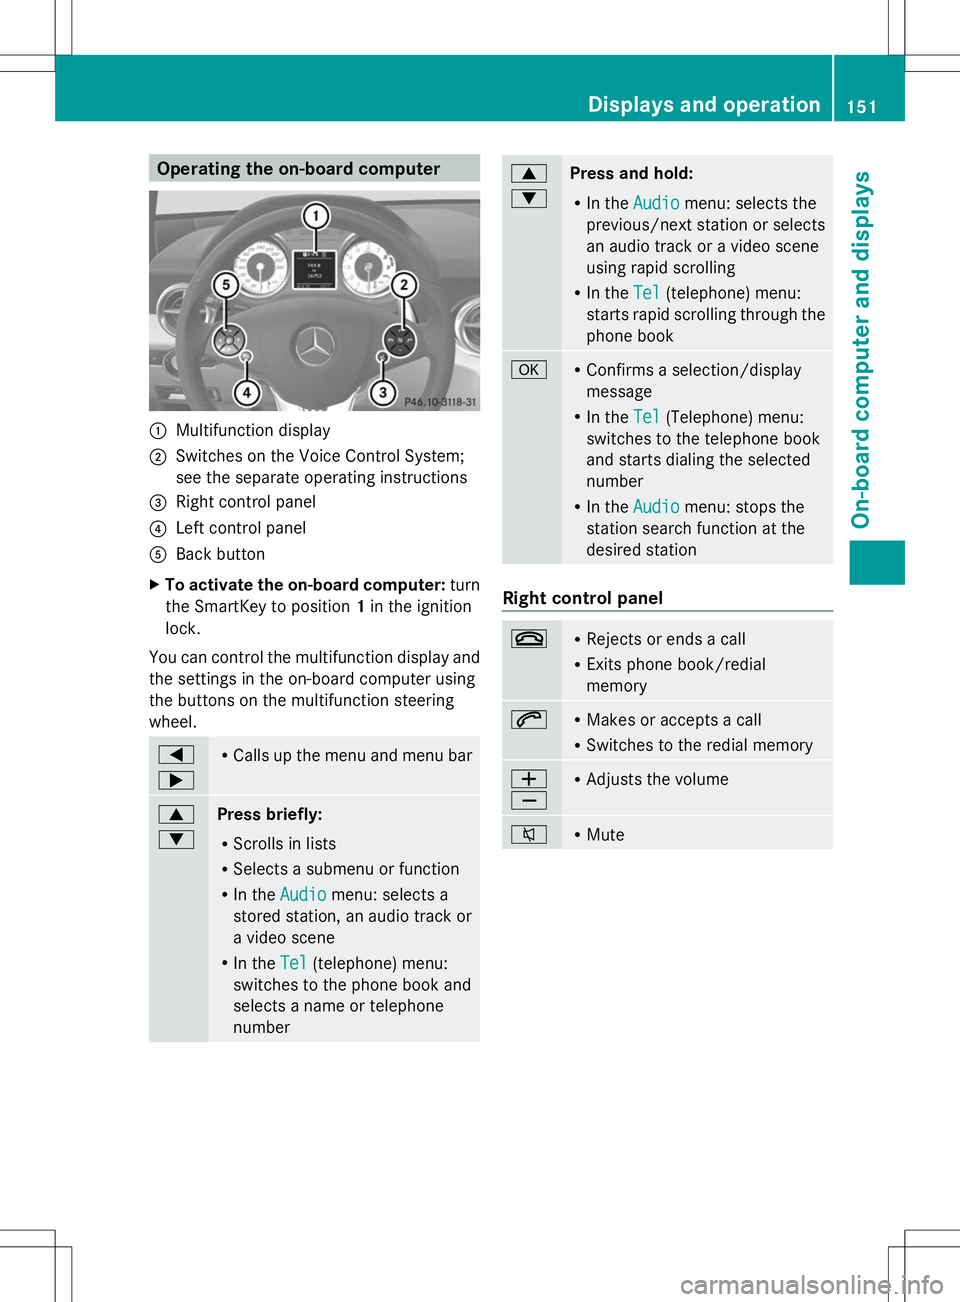
:
Multifunction display
; Switches on the Voice Control System;
see the separate operating instructions
= Right control panel
? Left control panel
A Back button
X To activate the on-board computer: turn
the SmartKey to position 1in the ignition
lock.
You can control the multifunction display and
the settings in the on-board computer using
the buttons on the multifunction steering
wheel. =
; R
Calls up the menu and menu bar 9
:
Press briefly:
R
Scrolls in lists
R Selects a submenu or function
R In the Audio Audio menu: selects a
stored station, an audio track or
a video scene
R In the Tel Tel(telephone) menu:
switches to the phone book and
selects a name or telephone
number 9
:
Press and hold:
R
In the Audio Audio menu: selects the
previous/next station or selects
an audio track or a video scene
using rapid scrolling
R In the Tel Tel(telephone) menu:
starts rapid scrolling through the
phone book a R
Confirms a selection/display
message
R In the Tel Tel(Telephone) menu:
switches to the telephone book
and starts dialing the selected
number
R In the Audio
Audio menu: stops the
station search function at the
desired station Right control panel
~ R
Rejects or ends a call
R Exits phone book/redial
memory 6 R
Makes or accepts a call
R Switches to the redial memory W
X R
Adjusts the volume 8 R
Mute Displays and operation
151On-board computer and displays Z
Page 161 of 292

Activating/deactivating surround
lighting and exterior lighting delayed
switch-off
The Locator Locator Lighting:
Lighting: function allows you
to set whether the exterior lighting should
come on when it is dark:
R for 40 seconds after unlocking the vehicle
with the key.
The exterior lighting switches off if you
open the driver’s door.
R for 15 seconds after switching off the
engine and closing the doors.
If the engine is switched off and no doors
are opened, or if an open door is not closed,
the exterior lighting goes out after
60 seconds.
If you activate the Locator Lighting:
Locator Lighting:
function, the following light up:
R the parking lamps
R the low-beam headlamps
R the license plate lamp
R the surround lighting in the exterior mirrors
X Press the =or; button on the
steering wheel to select the Settings
Settings
menu.
X Press the :or9 button to select the
LIGHTS
LIGHTS submenu.
X Press ato confirm.
X Press the :or9 button to select the
Locator Lighting:
Locator Lighting: function.
You will see the selected setting: Enabled Enabled
or Disabled
Disabled .
X Press the abutton to save the setting.
Deactivating the delayed switch-off
temporarily:
X Select key position 0with the Start/Stop
button before leaving the vehicle.
X Select key position 2and then key position
0 again with the Start/Stop button
The delayed shut-off is deactivated.
The delayed shut-off is reactivated the next
time you start the engine. Activating/deactivating the interior
lighting delayed switch-off
If you select key position
0with the Start/
Stop button when the Light. delay
Light. delay
function is activated, the interior lighting
lights up for approximately 20 seconds if it is
dark.
X Press the =or; button on the
steering wheel to select the Settings Settings
menu.
X Press the :or9 button to select the
Light
Light submenu.
X Press ato confirm.
X Press the :or9 button to select the
Light. delay
Light. delay function.
You will see the selected setting: on
onor
off
off .
X Press the abutton to save the setting.
Vehicle Activating/deactivating the automatic
door locking mechanism
If you select the
Automatic Door Lock: Automatic Door Lock:
function, the vehicle is centrally locked above
a speed of around 9 mph(15 km/h).
i For further information on the automatic
locking feature, see (Y page 70).
X Press the =or; button on the
steering wheel to select the Settings Settings
menu.
X Press the :or9 button to select the
Vehicle
Vehicle submenu.
X Press the abutton to confirm.
X Press the :or9 button to select the
Automatic door locks
Automatic door locks function.
You will see the selected setting: Enabled Enabled
or Disabled
Disabled .
X Press the abutton to save the setting. Menus and submenus
159On-board computer and displays Z
Page 163 of 292

AMG menu
AMG displays X
Press =or; on the steering wheel
to select the AMG
AMGmenu. :
Digital speedometer
; Engine oil temperature
= Coolant temperature
? Transmission fluid temperature
If the engine oil temperature is below 80 †
or if the transmission fluid temperature is
below 60 †, the corresponding temperature
gauge flashes. Avoid driving at full engine
output during this time.
SETUP SETUP displays the drive program, the AMG
adaptive sport suspension system setting
and the selected traction assist.
X Press the =or; button on the
steering wheel to select the AMG
AMG menu.
X Press the 9button repeatedly until
SETUP is displayed.
or
X Vehicles without AMG Performance
Media: press the AMG button on the center
console. :
Drive program (C/S/S+/M)
; ESP ®
mode (ON ON/SPORTSPORT handling handling mode
mode/
OFF
OFF )
= AMG adaptive sport suspension system
setting (COMFORT COMFORT/SPORT SPORT/SPORT +SPORT +)
RACETIMER Displaying and starting RACETIMER
You can use the RACETIMER to store lap
times.
X
Press the =or; button on the
steering wheel to select the AMG AMGmenu.
X Press the 9button repeatedly until the
RACETIMER is shown.
i If the RACETIMER is selected, the =
and ; buttons are inoperative. :
Digital speedometer
; RACETIMER
= Lap
You can start the RACETIMER when the
engine is running or if key position 2is
selected with the Start/Stop button.
X To start: start the RACETIMER with a. Menus and sub
menus
161On-board computer and displays Z
Page 164 of 292
Displaying the intermediate time
X
Press the =or; button to select
Interm. Time Interm. Time.
X Press ato confirm.
The intermediate time is displayed for five
seconds.
Starting a new lap
It is possible to store a maximum of sixteen
laps.
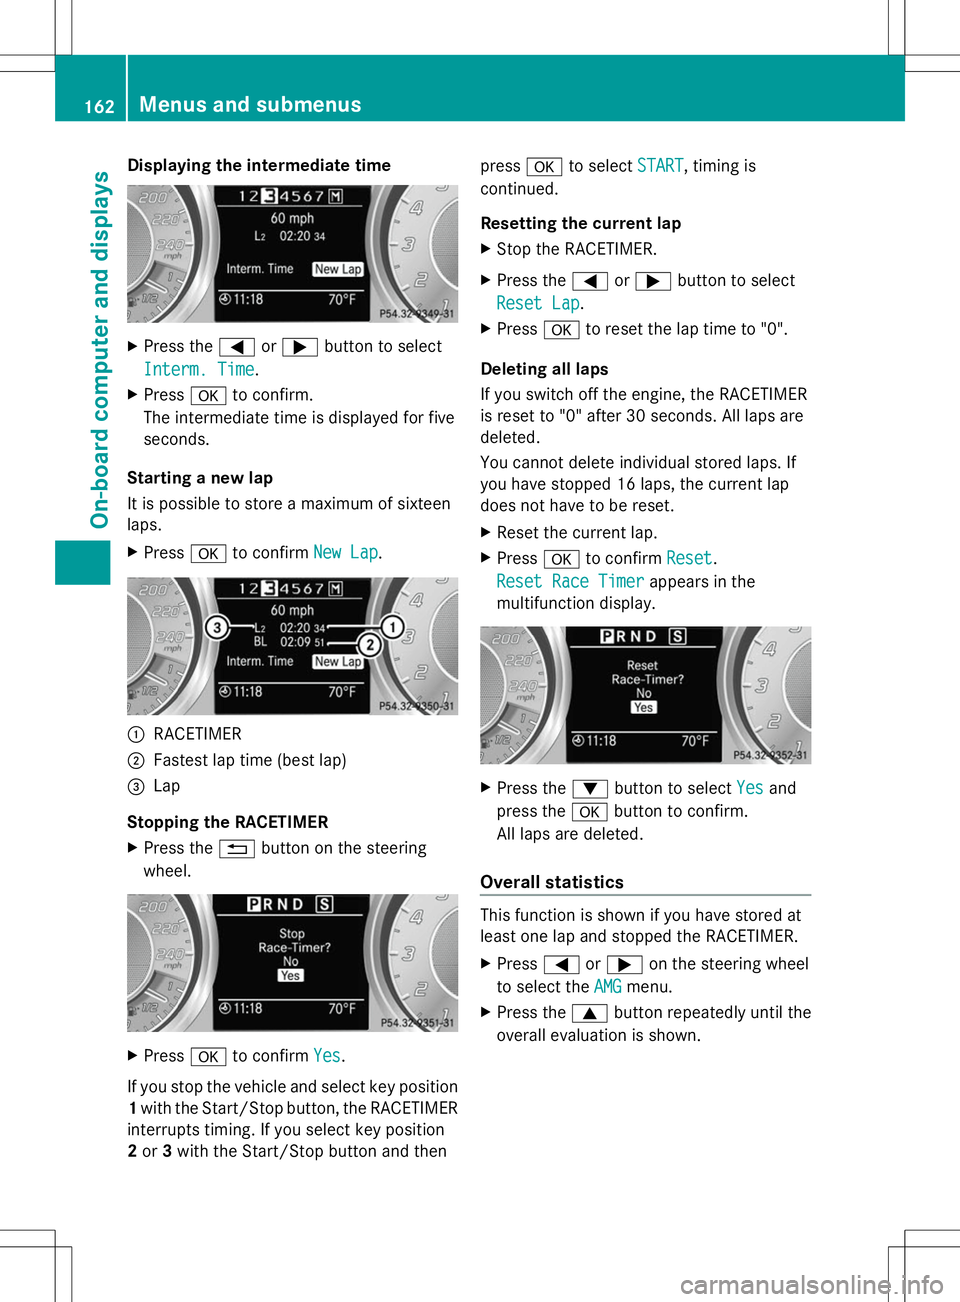
X Press ato confirm New Lap New Lap. :
RACETIMER
; Fastest lap time (best lap)
= Lap
Stopping the RACETIMER
X Press the %button on the steering
wheel. X
Press ato confirm Yes Yes.
If you stop the vehicle and select key position
1 with the Start/Stop button, the RACETIMER
interrupts timing. If you select key position
2 or 3with the Start/Stop button and then press
ato select START
START , timing is
continued.
Resetting the current lap
X Stop the RACETIMER.
X Press the =or; button to select
Reset Lap Reset Lap .
X Press ato reset the lap time to "0".
Deleting all laps
If you switch off the engine, the RACETIMER
is reset to "0" after 30 seconds. All laps are
deleted.
You cannot delete individual stored laps. If
you have stopped 16 laps, the current lap
does not have to be reset.
X Reset the current lap.
X Press ato confirm Reset
Reset .
Reset Race Timer Reset Race Timer appears in the
multifunction display. X
Press the :button to select Yes
Yesand
press the abutton to confirm.
All laps are deleted.
Overall statistics This function is shown if you have stored at
least one lap and stopped the RACETIMER.
X Press =or; on the steering wheel
to select the AMG AMGmenu.
X Press the 9button repeatedly until the
overall evaluation is shown. 162
Menus and sub
menusOn-board computer and displays
Page 187 of 292
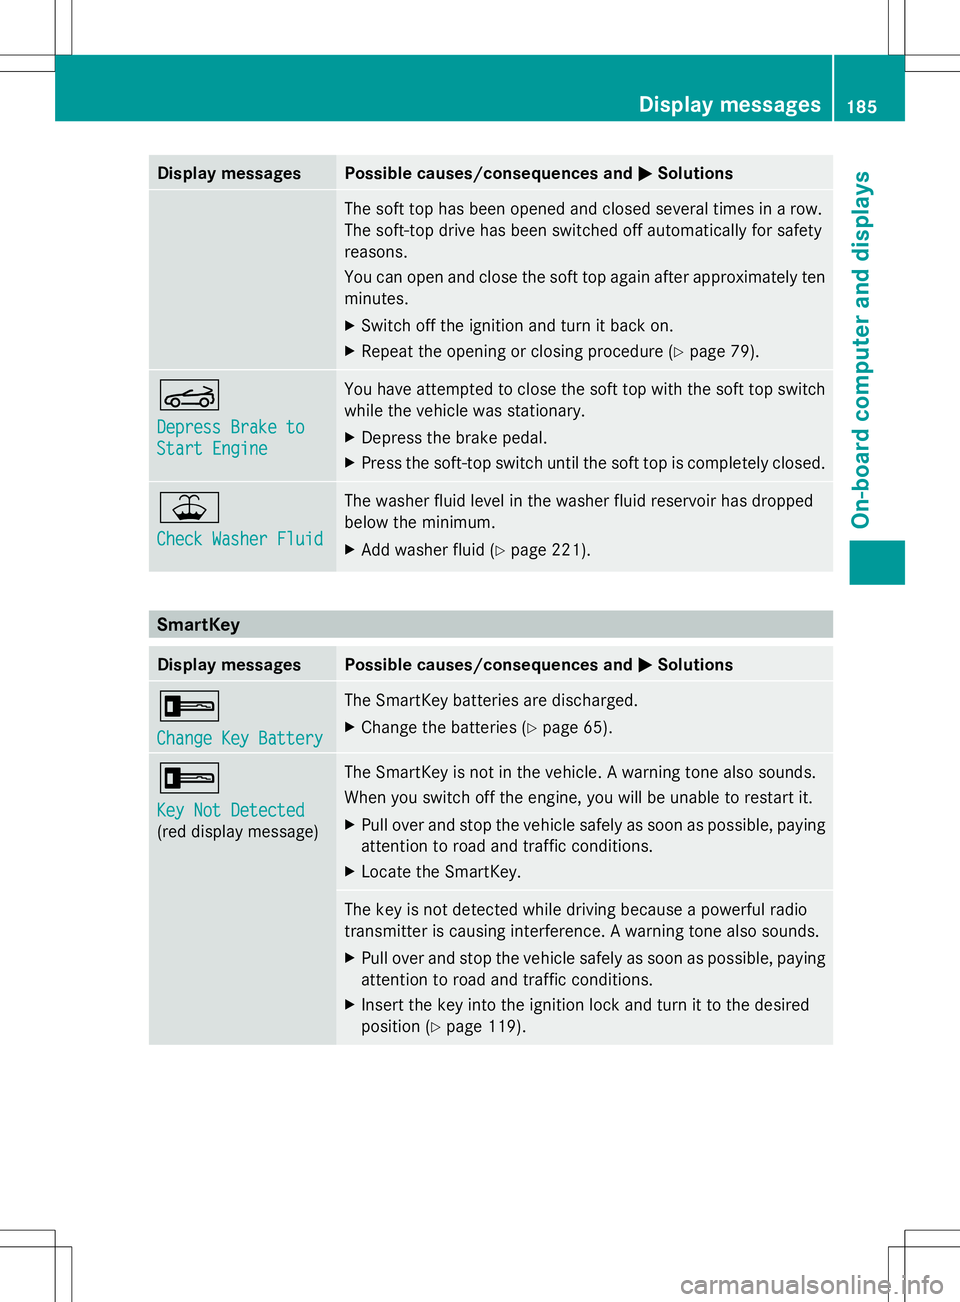
Display messages Possible causes/consequences and
M
MSolutions The soft top has been opened and closed several times in a row.
The soft-top drive has been switched off automatically for safety
reasons.
You can open and close the soft top again after approximately ten
minutes.
X
Switch off the ignition and turn it back on.
X Repeat the opening or closing procedure (Y page 79).K
Depress Brake to Depress Brake to
Start Engine Start Engine You have attempted to close the soft top with the soft top switch
while the vehicle was stationary.
X
Depress the brake pedal.
X Press the soft-top switch until the soft top is completely closed. ¥
Check Washer Fluid Check Washer Fluid The washer fluid level in the washer fluid reservoir has dropped
below the minimum.
X
Add washer fluid ( Ypage 221). SmartKey
Display messages Possible causes/consequences and
M MSolutions +
Change Key Battery Change Key Battery The SmartKey batteries are discharged.
X
Change the batteries ( Ypage 65). +
Key Not Detected Key Not Detected
(red display message) The SmartKey is not in the vehicle. A warning tone also sounds.
When you switch off the engine, you will be unable to restart it.
X
Pull over and stop the vehicle safely as soon as possible, paying
attention to road and traffic conditions.
X Locate the SmartKey. The key is not detected while driving because a powerful radio
transmitter is causing interference. A warning tone also sounds.
X
Pull over and stop the vehicle safely as soon as possible, paying
attention to road and traffic conditions.
X Insert the key into the ignition lock and turn it to the desired
position (Y page 119). Display
messages
185On-board computer and displays Z
Page 188 of 292
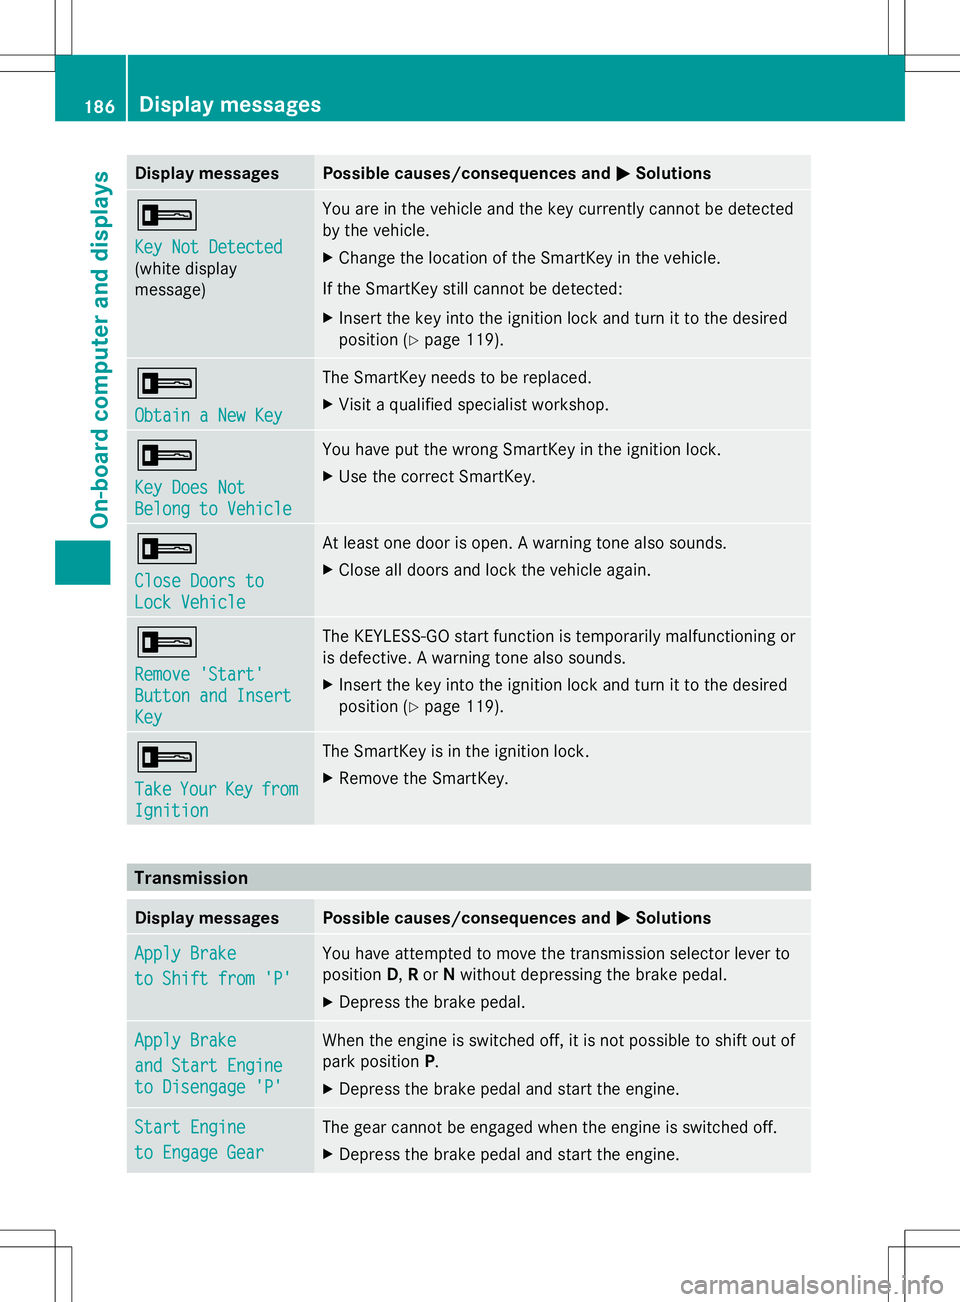
Display messages Possible causes/consequences and
M
MSolutions +
Key Not Detected Key Not Detected
(white display
message) You are in the vehicle and the key currently cannot be detected
by the vehicle.
X
Change the location of the SmartKey in the vehicle.
If the SmartKey still cannot be detected:
X Insert the key into the ignition lock and turn it to the desired
position (Y page 119). +
Obtain a New Key Obtain a New Key The SmartKey needs to be replaced.
X
Visit a qualified specialist workshop. +
Key Does Not Key Does Not
Belong to Vehicle Belong to Vehicle You have put the wrong SmartKey in the ignition lock.
X
Use the correct SmartKey. +
Close Doors to Close Doors to
Lock Vehicle Lock Vehicle At least one door is open. A warning tone also sounds.
X
Close all doors and lock the vehicle again. +
Remove 'Start' Remove 'Start'
Button and Insert Button and Insert
Key Key The KEYLESS-GO start function is temporarily malfunctioning or
is defective. A warning tone also sounds.
X
Insert the key into the ignition lock and turn it to the desired
position (Y page 119). +
Take Take
Your
YourKey
Keyfrom
from
Ignition
Ignition The SmartKey is in the ignition lock.
X
Remove the SmartKey. Transmission
Display messages Possible causes/consequences and
M MSolutions Apply Brake
Apply Brake
to Shift from 'P' to Shift from 'P' You have attempted to move the transmission selector lever to
position
D,Ror Nwithout depressing the brake pedal.
X Depress the brake pedal. Apply Brake Apply Brake
and Start Engine and Start Engine
to Disengage 'P' to Disengage 'P' When the engine is switched off, it is not possible to shift out of
park position
P.
X Depress the brake pedal and start the engine. Start Engine Start Engine
to Engage Gear to Engage Gear The gear cannot be engaged when the engine is switched off.
X
Depress the brake pedal and start the engine. 186
Display
messagesOn-board computer and displays
Page 202 of 292
Useful information
i This Operator's Manual describes all
models and all standard and optional
equipment of your vehicle available at the
time of publication of the Operator's
Manual. Country-specific differences are
possible. Please note that your vehicle may
not be equipped with all features
described. This also applies to safety-
related systems and functions.
i Please read the information on qualified
specialist workshops (Y page 22).Stowage areas
Stowage space
Important safety notes G
WARNING
If you do not correctly store objects in the
vehicle interior, they can slip or be flung
around, thus striking vehicle occupants.
There is a risk of injury, especially when
braking or abruptly changing directions.
R Always store objects so that they cannot be
flung around in these or in similar
situations.
R Always make sure that objects do not
protrude from stowage compartments,
parcel nets or stowage nets.
R Close lockable stowage compartments
while driving.
R Stow and secure objects that are heavy,
hard, pointy, sharp-edged, fragile or too
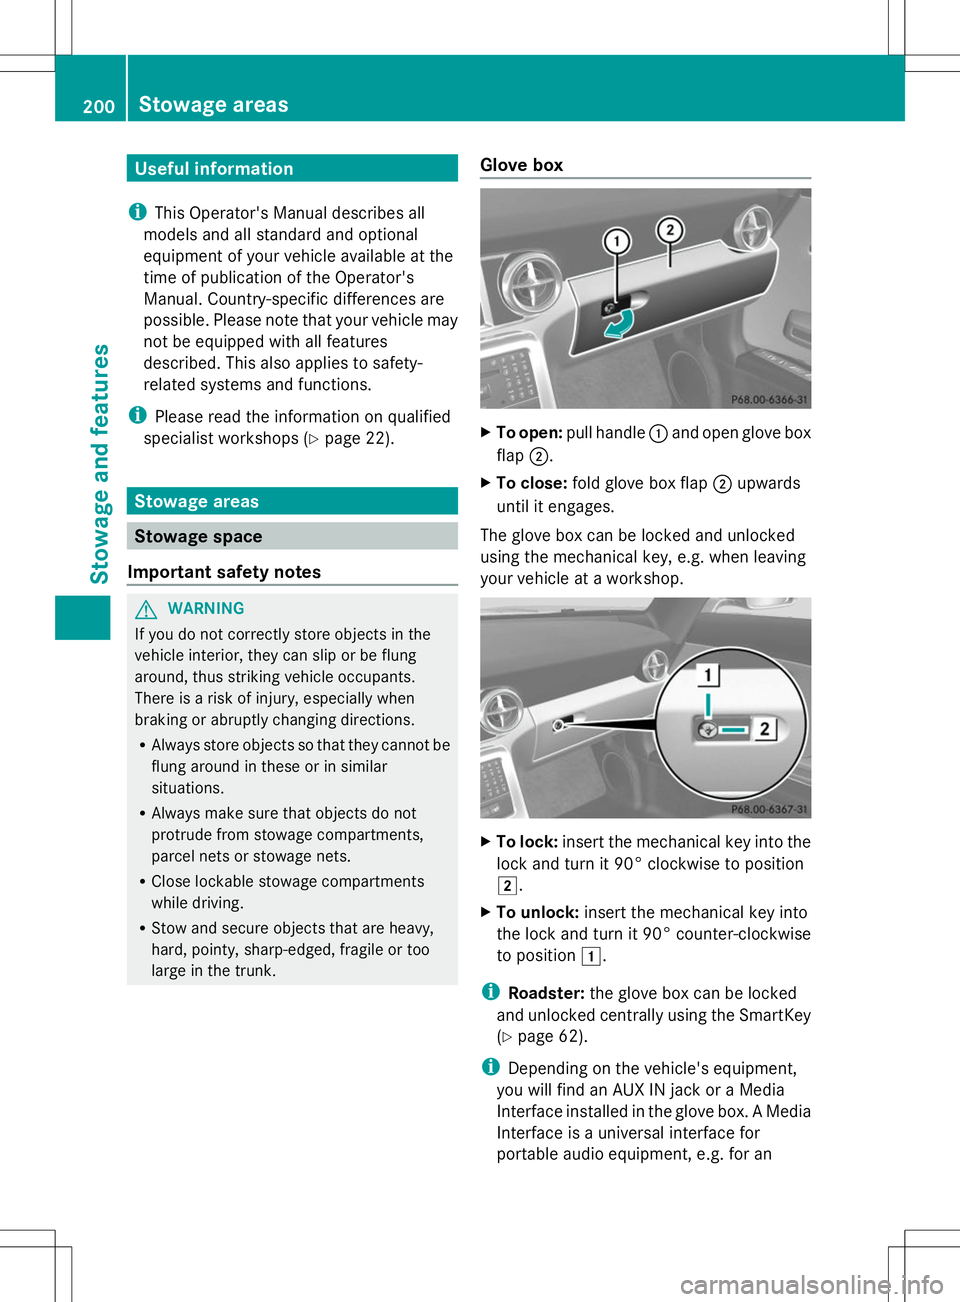
large in the trunk. Glove box X
To open: pull handle :and open glove box
flap ;.
X To close: fold glove box flap ;upwards
until it engages.
The glove box can be locked and unlocked
using the mechanical key, e.g. when leaving
your vehicle at a workshop. X
To lock: insert the mechanical key into the
lock and turn it 90° clockwise to position
2.
X To unlock: insert the mechanical key into
the lock and turn it 90° counter-clockwise
to position 1.
i Roadster: the glove box can be locked
and unlocked centrally using the SmartKey
(Y page 62).
i Depending on the vehicle's equipment,
you will find an AUX IN jack or a Media
Interface installed in the glove box. A Media
Interface is a universal interface for
portable audio equipment, e.g. for an 200
Stowage areasStowage and features