2014 MERCEDES-BENZ SLS AMG COUPE mirror
[x] Cancel search: mirrorPage 162 of 292
Convenience
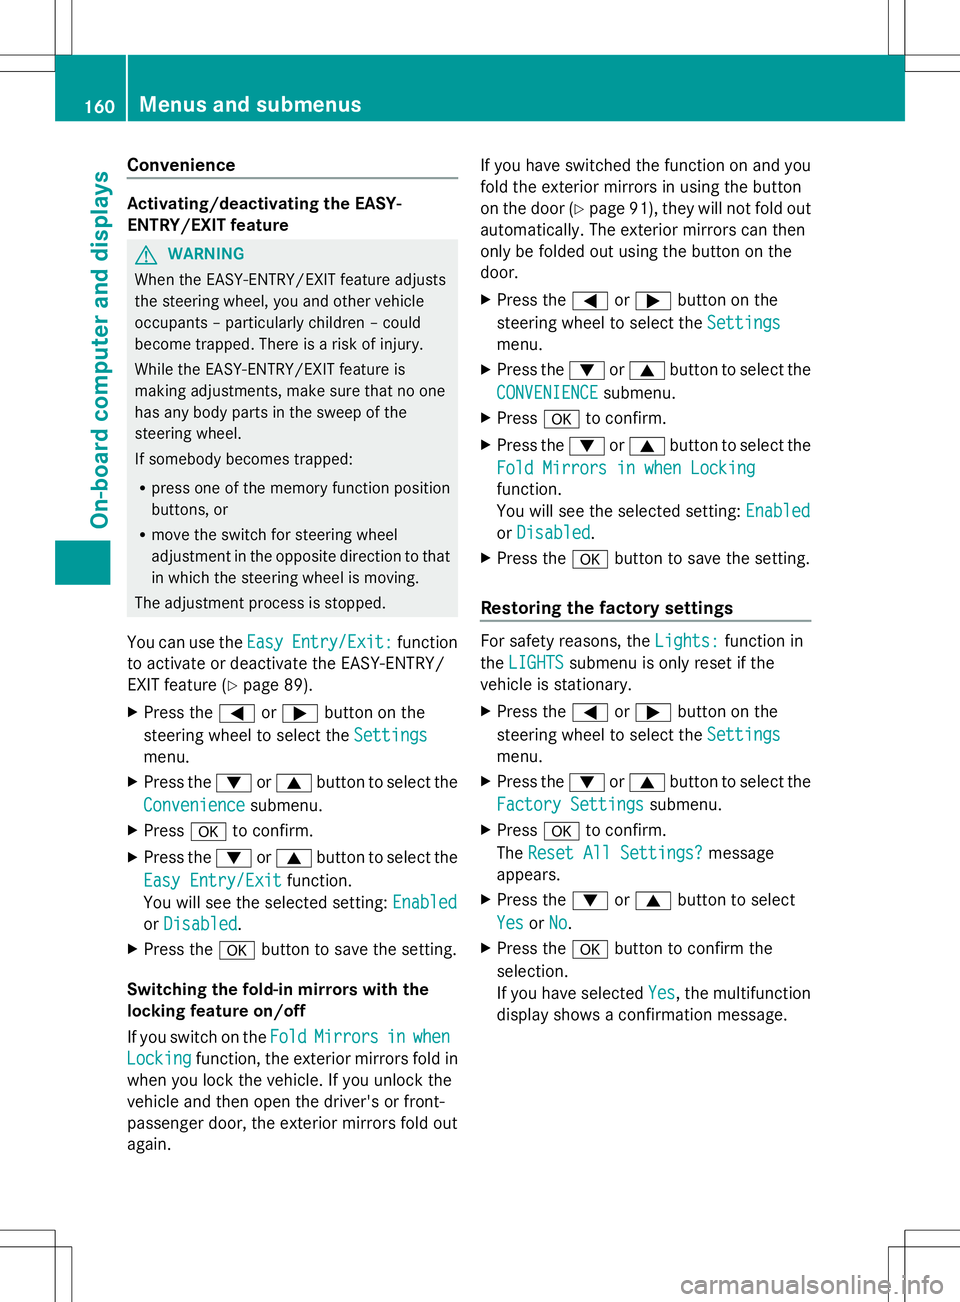
Activating/deactivating the EASY-
ENTRY/EXIT feature
G
WARNING
When the EASY-ENTRY/EXIT feature adjusts
the steering wheel, you and other vehicle
occupants – particularly children – could
become trapped. There is a risk of injury.
While the EASY-ENTRY/EXIT feature is
making adjustments, make sure that no one
has any body parts in the sweep of the
steering wheel.
If somebody becomes trapped:
R press one of the memory function position
buttons, or
R move the switch for steering wheel
adjustment in the opposite direction to that
in which the steering wheel is moving.
The adjustment process is stopped.
You can use the Easy EasyEntry/Exit:
Entry/Exit: function
to activate or deactivate the EASY-ENTRY/
EXIT feature (Y page 89).
X Press the =or; button on the
steering wheel to select the Settings
Settings
menu.
X Press the :or9 button to select the
Convenience Convenience submenu.
X Press ato confirm.
X Press the :or9 button to select the
Easy Entry/Exit
Easy Entry/Exit function.
You will see the selected setting: Enabled
Enabled
or Disabled
Disabled .
X Press the abutton to save the setting.
Switching the fold-in mirrors with the
locking feature on/off
If you switch on the Fold
Fold Mirrors
Mirrors in
inwhen
when
Locking
Locking function, the exterior mirrors fold in
when you lock the vehicle. If you unlock the
vehicle and then open the driver's or front-
passenger door, the exterior mirrors fold out
again. If you have switched the function on and you
fold the exterior mirrors in using the button
on the door (Y
page 91), they will not fold out
automatically. The exterior mirrors can then
only be folded out using the button on the
door.
X Press the =or; button on the
steering wheel to select the Settings Settings
menu.
X Press the :or9 button to select the
CONVENIENCE
CONVENIENCE submenu.
X Press ato confirm.
X Press the :or9 button to select the
Fold Mirrors in when Locking
Fold Mirrors in when Locking
function.
You will see the selected setting: Enabled Enabled
or Disabled
Disabled .
X Press the abutton to save the setting.
Restoring the factory settings For safety reasons, the
Lights:
Lights:function in
the LIGHTS
LIGHTS submenu is only reset if the
vehicle is stationary.
X Press the =or; button on the
steering wheel to select the Settings Settings
menu.
X Press the :or9 button to select the
Factory Settings
Factory Settings submenu.
X Press ato confirm.
The Reset All Settings?
Reset All Settings? message
appears.
X Press the :or9 button to select
Yes
Yes orNo
No.
X Press the abutton to confirm the
selection.
If you have selected Yes Yes, the multifunction
display shows a confirmation message. 160
Menus and submenusOn-board computer and displays
Page 176 of 292
Display messages Possible causes/consequences and
M
MSolutions b
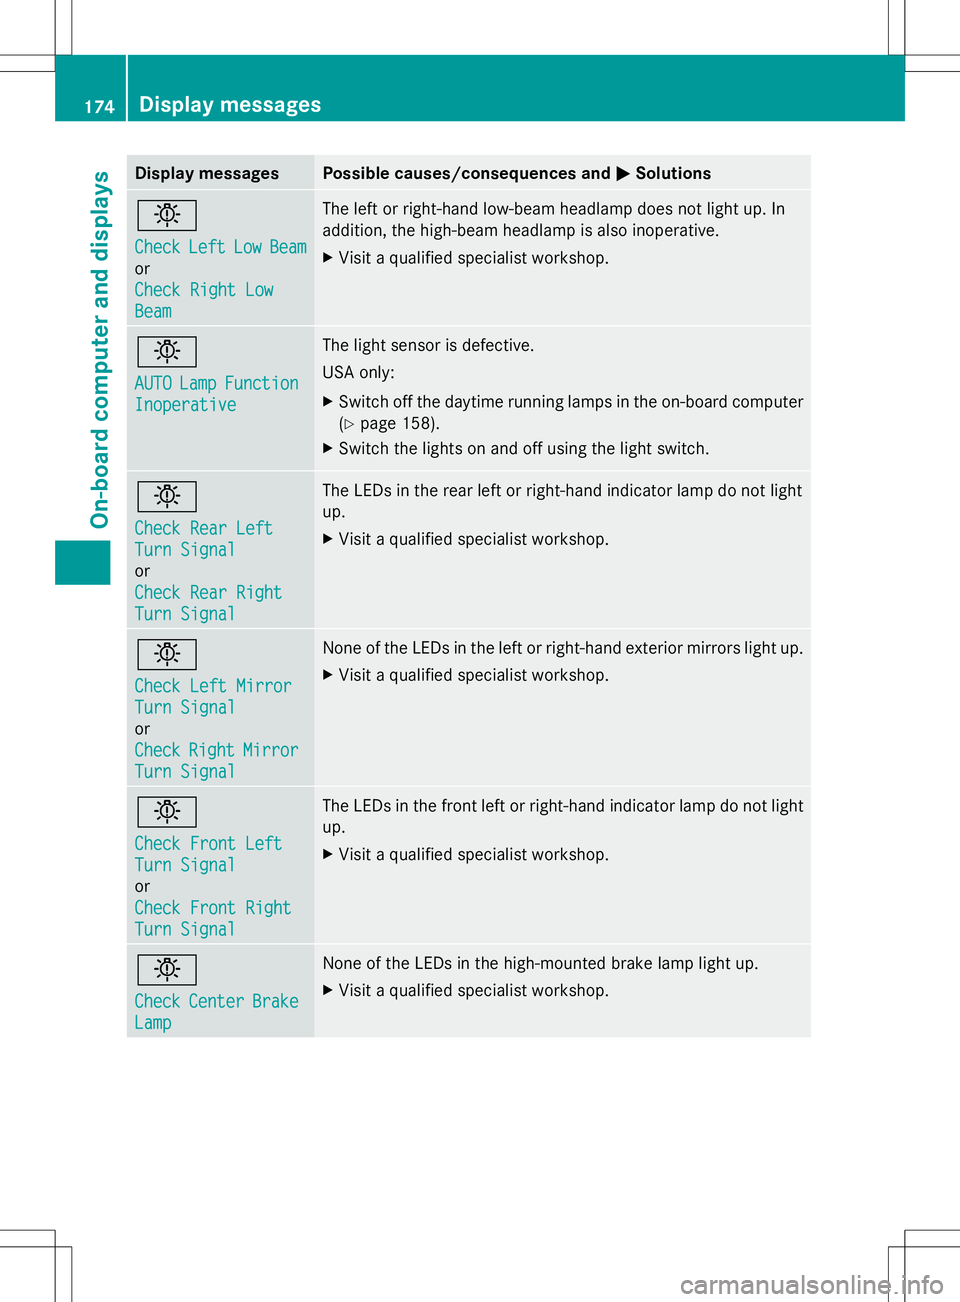
Check Check
Left
LeftLow
LowBeam
Beam
or
Check Right Low Check Right Low
Beam Beam The left or right-hand low-beam headlamp does not light up. In
addition, the high-beam headlamp is also inoperative.
X
Visit a qualified specialist workshop. b
AUTO AUTO
Lamp
LampFunction
Function
Inoperative
Inoperative The light sensor is defective.
USA only:
X
Switch off the daytime running lamps in the on-board computer
(Y page 158).
X Switch the lights on and off using the light switch. b
Check Rear Left Check Rear Left
Turn Signal Turn Signal
or
Check Rear Right Check Rear Right
Turn Signal Turn Signal The LEDs in the rear left or right-hand indicator lamp do not light
up.
X
Visit a qualified specialist workshop. b
Check Left Mirror Check Left Mirror
Turn Signal Turn Signal
or
Check Check
Right
RightMirror
Mirror
Turn Signal
Turn Signal None of the LEDs in the left or right-hand exterior mirrors light up.
X
Visit a qualified specialist workshop. b
Check Front Left Check Front Left
Turn Signal Turn Signal
or
Check Front Right Check Front Right
Turn Signal Turn Signal The LEDs in the front left or right-hand indicator lamp do not light
up.
X
Visit a qualified specialist workshop. b
Check Check
Center
Center Brake
Brake
Lamp
Lamp None of the LEDs in the high-mounted brake lamp light up.
X
Visit a qualified specialist workshop. 174
Display
messagesOn-board computer and displays
Page 183 of 292
Display messages Possible causes/consequences and
M
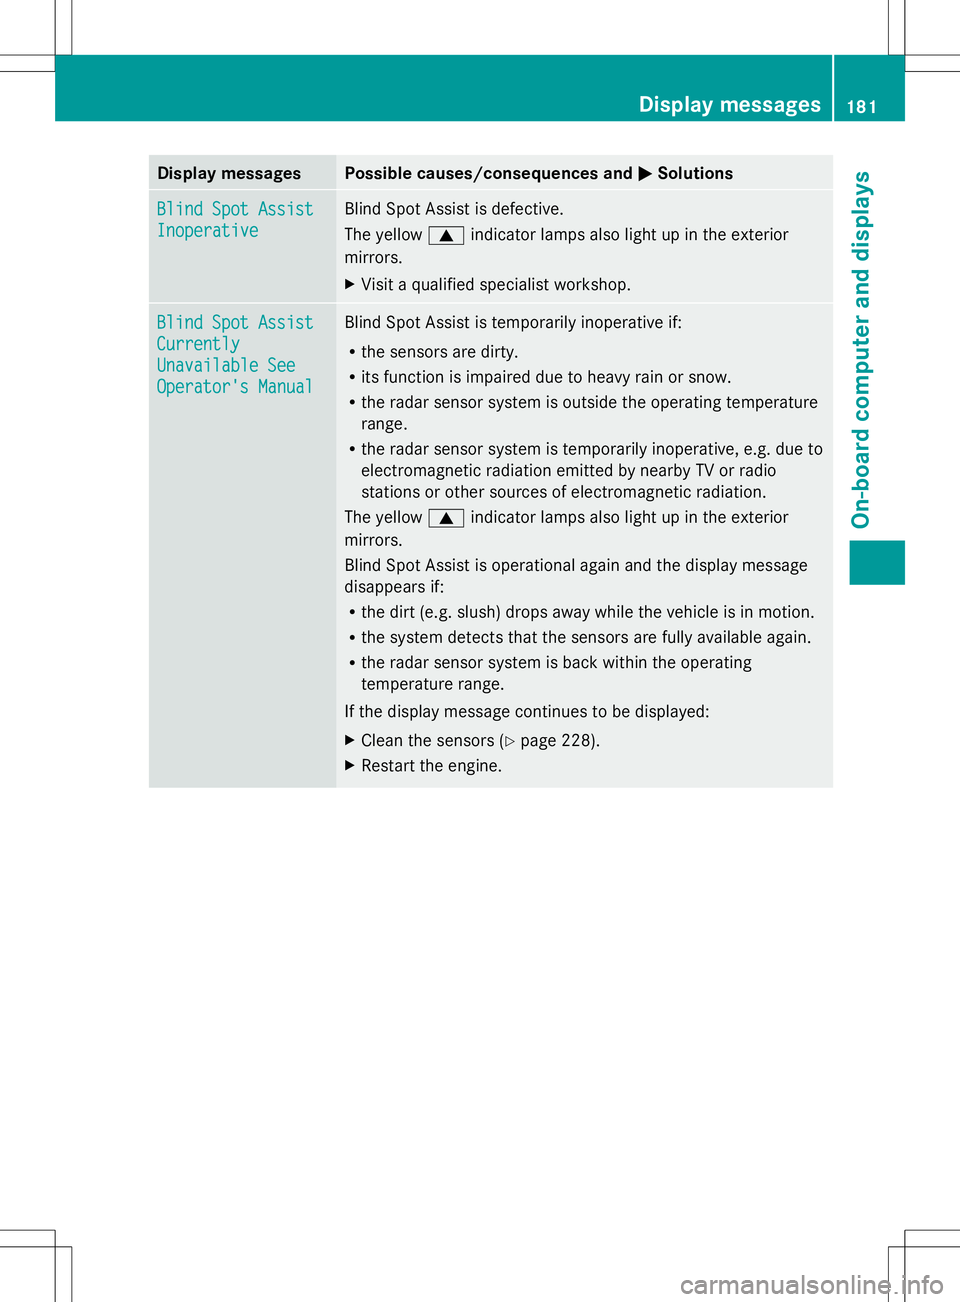
MSolutions Blind Spot Assist
Blind Spot Assist
Inoperative Inoperative Blind Spot Assist is defective.
The yellow
9indicator lamps also light up in the exterior
mirrors.
X Visit a qualified specialist workshop. Blind Spot Assist Blind Spot Assist
Currently Currently
Unavailable See Unavailable See
Operator's Manual Operator's Manual Blind Spot Assist is temporarily inoperative if:
R
the sensors are dirty.
R its function is impaired due to heavy rain or snow.
R the radar sensor system is outside the operating temperature
range.
R the radar sensor system is temporarily inoperative, e.g. due to
electromagnetic radiation emitted by nearby TV or radio
stations or other sources of electromagnetic radiation.
The yellow 9indicator lamps also light up in the exterior
mirrors.
Blind Spot Assist is operational again and the display message
disappears if:
R the dirt (e.g. slush) drops away while the vehicle is in motion.
R the system detects that the sensors are fully available again.
R the radar sensor system is back within the operating
temperature range.
If the display message continues to be displayed:
X Clean the sensors (Y page 228).
X Restart the engine. Display
messages
181On-board computer and displays Z
Page 204 of 292
Features
Cup holder
Important safety notes !
Only use the cup holders for containers of
the right size and which have lids. The
drinks could otherwise spill.
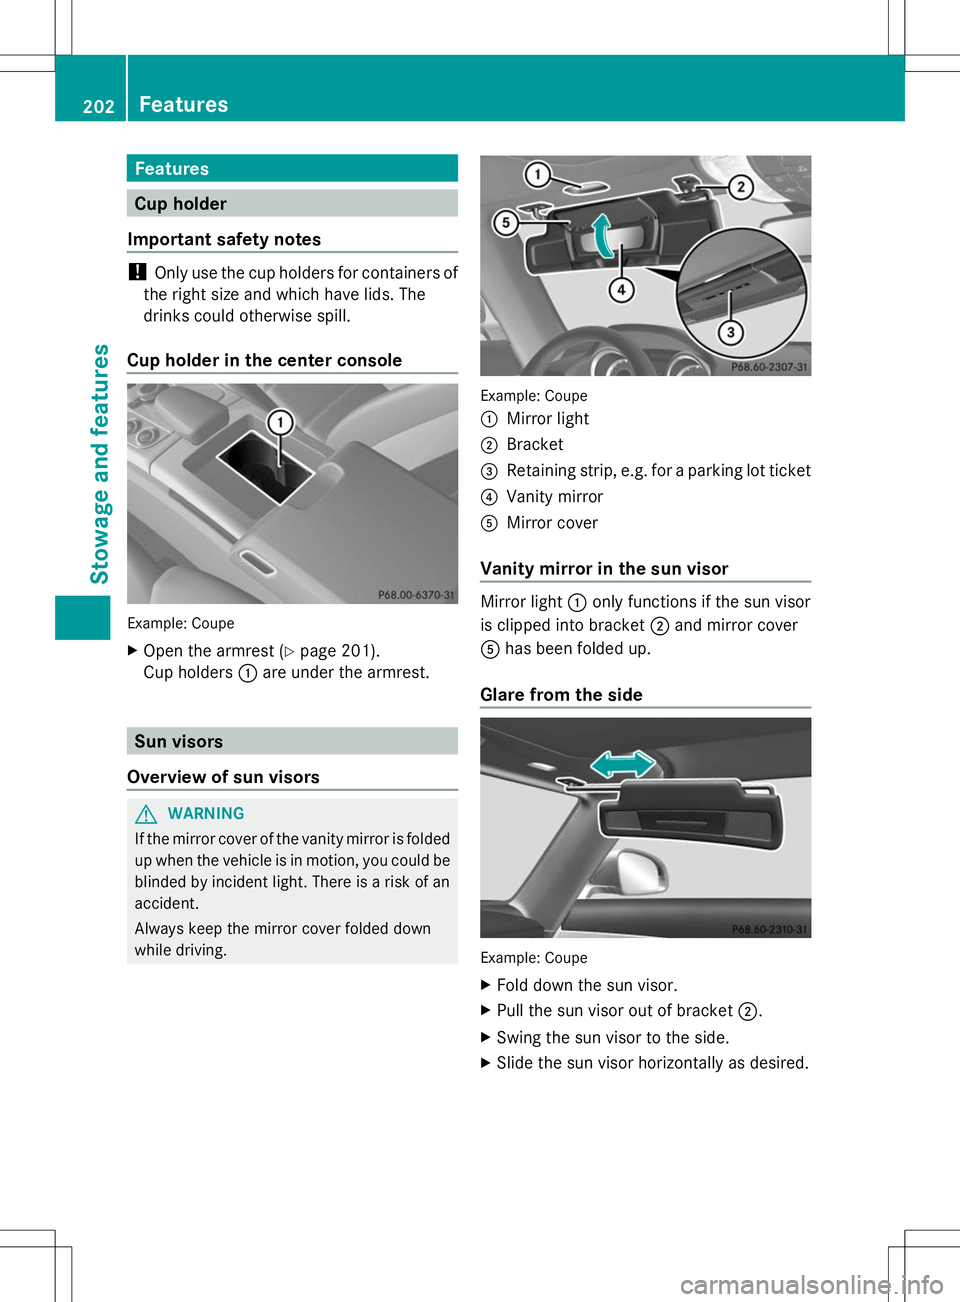
Cup holder in the center console Example: Coupe
X
Open the armrest (Y page 201).
Cup holders :are under the armrest. Sun visors
Overview of sun visors G
WARNING
If the mirror cover of the vanity mirror is folded
up when the vehicle is in motion, you could be
blinded by incident light. There is a risk of an
accident.
Always keep the mirror cover folded down
while driving. Example: Coupe
:
Mirror light
; Bracket
= Retaining strip, e.g. for a parking lot ticket
? Vanity mirror
A Mirror cover
Vanity mirror in the sun visor Mirror light
:only functions if the sun visor
is clipped into bracket ;and mirror cover
A has been folded up.
Glare from the side Example: Coupe
X
Fold down the sun visor.
X Pull the sun visor out of bracket ;.
X Swing the sun visor to the side.
X Slide the sun visor horizontally as desired. 202
FeaturesStowage and featu
res
Page 213 of 292
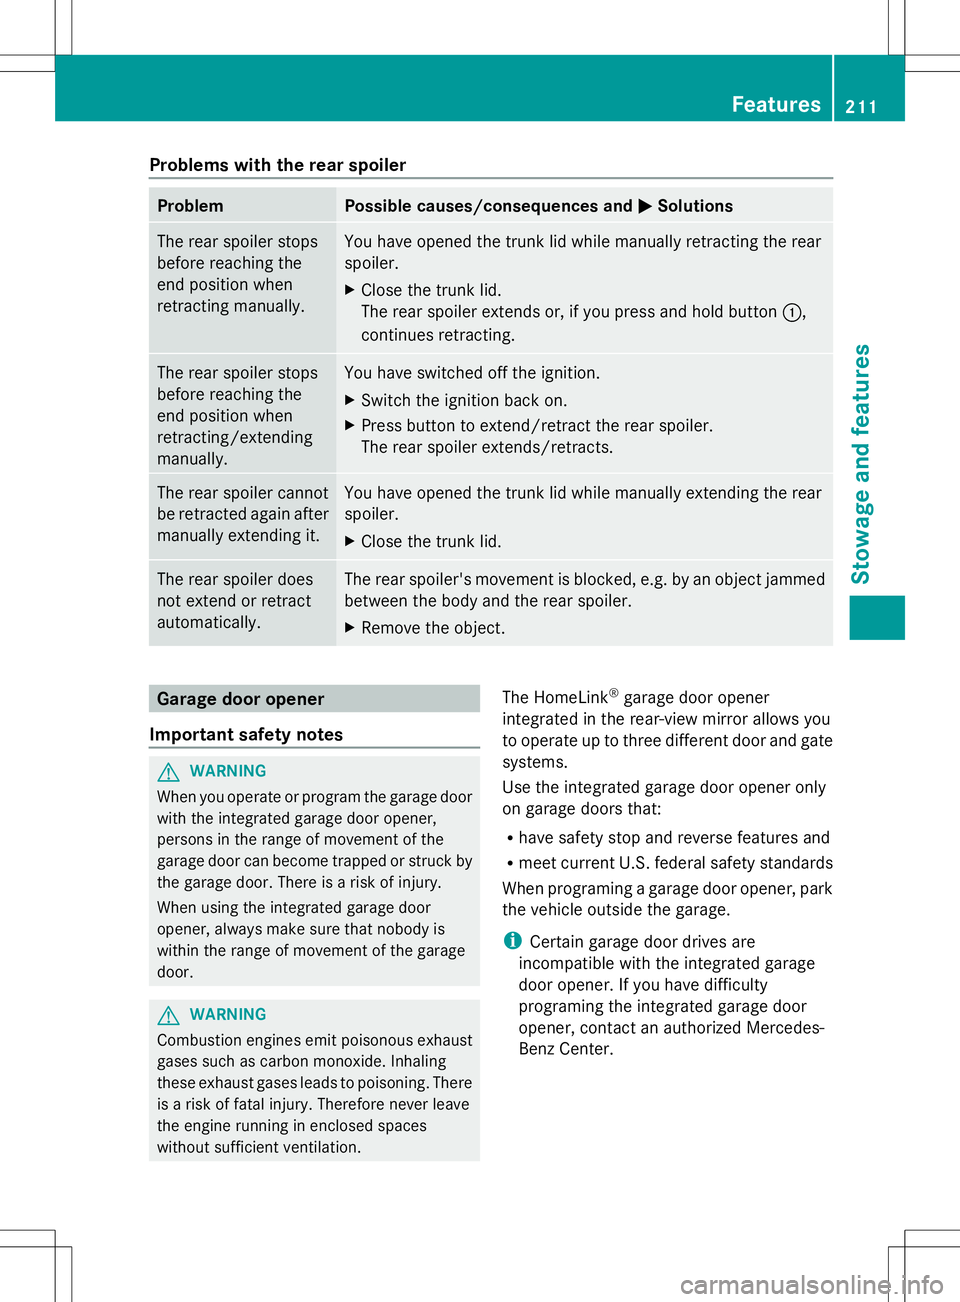
Problems with the rear spoiler
Problem Possible causes/consequences and
M
MSolutions The rear spoiler stops
before reaching the
end position when
retracting manually. You have opened the trunk lid while manually retracting the rear
spoiler.
X
Close the trunk lid.
The rear spoiler extends or, if you press and hold button :,
continues retracting. The rear spoiler stops
before reaching the
end position when
retracting/extending
manually. You have switched off the ignition.
X
Switch the ignition back on.
X Press button to extend/retract the rear spoiler.
The rear spoiler extends/retracts. The rear spoiler cannot
be retracted again after
manually extending it. You have opened the trunk lid while manually extending the rear
spoiler.
X
Close the trunk lid. The rear spoiler does
not extend or retract
automatically. The rear spoiler's movement is blocked, e.g. by an object jammed
between the body and the rear spoiler.
X
Remove the object. Garage door opener
Important safety notes G
WARNING
When you operate or program the garage door
with the integrated garage door opener,
persons in the range of movement of the
garage door can become trapped or struck by
the garage door. There is a risk of injury.
When using the integrated garage door
opener, always make sure that nobody is
within the range of movement of the garage
door. G
WARNING
Combustion engines emit poisonous exhaust
gases such as carbon monoxide. Inhaling
these exhaust gases leads to poisoning. There
is a risk of fatal injury. Therefore never leave
the engine running in enclosed spaces
without sufficient ventilation. The HomeLink
®
garage door opener
integrated in the rear-view mirror allows you
to operate up to three different door and gate
systems.
Use the integrated garage door opener only
on garage doors that:
R have safety stop and reverse features and
R meet current U.S. federal safety standards
When programing a garage door opener, park
the vehicle outside the garage.
i Certain garage door drives are
incompatible with the integrated garage
door opener. If you have difficulty
programing the integrated garage door
opener, contact an authorized Mercedes-
Benz Center. Features
211Stowage and features Z
Page 214 of 292
Alternatively, you can call the following
telephone assistance services:
R USA: Mercedes-Benz Customer
Assistance Center at
1-800-FOR-MERCedes
R Canada: Customer Service at
1-800-387-0100
i Notes about the declaration of conformity
can be found here (Y page 22).
USA: FCC ID: CB2HMIHL4
Canada: IC: 279B-HMIHL4
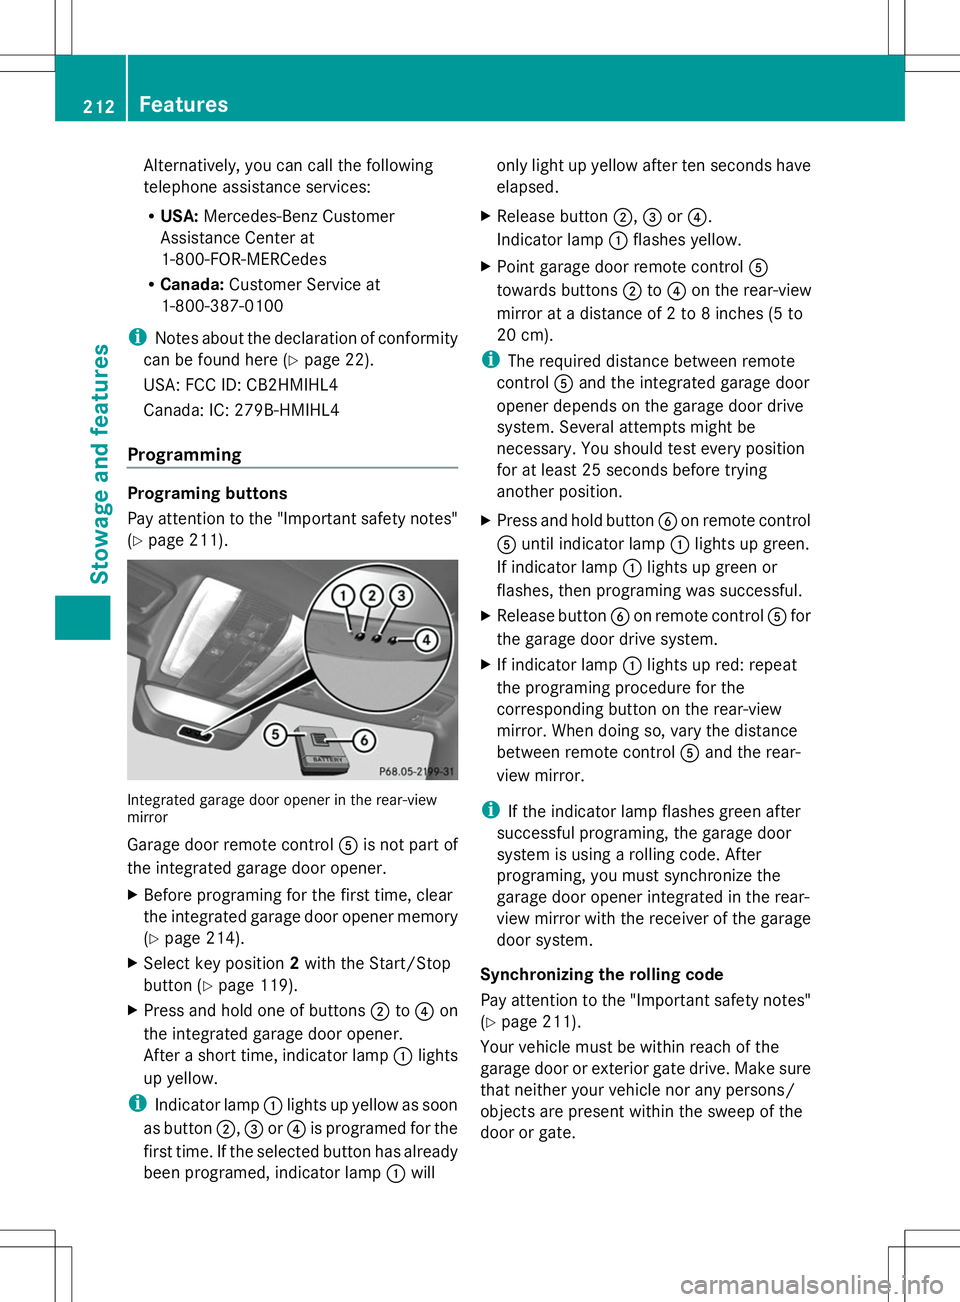
Programming Programing buttons
Pay attention to the "Important safety notes"
(Y page 211). Integrated garage door opener in the rear-view
mirror
Garage door remote control Ais not part of
the integrated garage door opener.
X Before programing for the first time, clear
the integrated garage door opener memory
(Y page 214).
X Select key position 2with the Start/Stop
button ( Ypage 119).
X Press and hold one of buttons ;to? on
the integrated garage door opener.
After a short time, indicator lamp :lights
up yellow.
i Indicator lamp :lights up yellow as soon
as button ;,=or? is programed for the
first time. If the selected button has already
been programed, indicator lamp :will only light up yellow after ten seconds have
elapsed.
X Release button ;,=or?.
Indicator lamp :flashes yellow.
X Point garage door remote control A
towards buttons ;to? on the rear-view
mirror at a distance of 2 to 8 inches (5 to
20 cm).
i The required distance between remote
control Aand the integrated garage door
opener depends on the garage door drive
system. Several attempts might be
necessary. You should test every position
for at least 25 seconds before trying
another position.
X Press and hold button Bon remote control
A until indicator lamp :lights up green.
If indicator lamp :lights up green or
flashes, then programing was successful.
X Release button Bon remote control Afor
the garage door drive system.
X If indicator lamp :lights up red: repeat
the programing procedure for the
corresponding button on the rear-view
mirror. When doing so, vary the distance
between remote control Aand the rear-
view mirror.
i If the indicator lamp flashes green after
successful programing, the garage door
system is using a rolling code. After
programing, you must synchronize the
garage door opener integrated in the rear-
view mirror with the receiver of the garage
door system.
Synchronizing the rolling code
Pay attention to the "Important safety notes"
(Y page 211).
Your vehicle must be within reach of the
garage door or exterior gate drive. Make sure
that neither your vehicle nor any persons/
objects are present within the sweep of the
door or gate. 212
FeaturesSto
wage an d features
Page 215 of 292
X
Select key position 2with the Start/Stop
button (Y page 119).
X Press the programing button of the door or
gate drive (see the door or gate drive
operating instructions, e.g. under
"Programing additional remote controls").
i Usually, you now have 30 seconds to
initiate the next step.
X Press previously programed button ;,=
or ? of the integrated garage door opener
until the door closes.
The rolling code synchronization is then
complete.
Notes on programing the remote control
Canadian radio frequency laws require a
"break" (or interruption) of the transmission
signals after broadcasting for a few seconds.
Therefore, these signals may not last long
enough for the integrated garage door
opener. The signal is not recognized during
programing. Comparable with Canadian law,
some U.S. garage door openers also feature
a "break".
Proceed as follows:
R if you live in Canada
R if you have difficulties programing the
garage door opener (regardless of where
you live) when using the programing steps
X Press and hold one of buttons ;to? on
the integrated garage door opener.
After a short time, indicator lamp :lights
up yellow.
X Release the button.
Indicator lamp :flashes yellow.
X Press button Bof garage door remote
control Afor two seconds, then release it
for two seconds.
X Press button Bagain for two seconds. X
Repeat this sequence on button Bof
remote control Auntil indicator lamp :
lights up green.
If indicator lamp :turns red, repeat the
process.
X Continue with the other programing steps
(see above).
Problems when programing
If you are experiencing problems programing
the integrated garage door opener on the
rear-view mirror, take note of the following
instructions:
R Check the transmitter frequency of garage
door drive remote control A. This can
usually be found on the back of the remote
control.
The integrated garage door opener is
compatible with devices that have units
which operate in the frequency range of
280 to 433 MHz .
R Replace the batteries in garage door
remote control A. This increases the
likelihood that garage door remote control
A will transmit a strong and precise signal
to the integrated garage door opener in the
rear-view mirror.
R When programing, hold remote control A
at varying distances and angles from the
button that you are programing. Try various
angles at a distance between 2and
12 inches (5to 30 cm) or at the same angle
but at varying distances.
R If another remote control for the same
garage door drive is available, repeat the
same programing steps with this remote
control. Before performing these steps,
make sure that new batteries have been
installed in garage door drive remote
control A.
R Note that some remote controls only
transmit for a limited amount of time (the
indicator lamp on the remote control goes Features
213Stowage and features Z
Page 226 of 292
Start the engine using the SmartKey.. Move
the transmission to Nwith the E-SELECT
lever. Use the SmartKey to switch the
engine off again and then turn the
SmartKey to position 2. Make sure that you
then leave the SmartKey in position 2. You
may otherwise damage the vehicle, the
transmission or the car wash.
Check the transmission position in the
instrument cluster.
! Use the E-SELECT lever to shift the
transmission to Nbefore switching the
engine off. If you open the driver's or front-
passenger door, the transmission remains
in this position for up to 30 minutes if the
SmartKey is in the ignition, even if the
engine is switched off. If you do not shift
the transmission to Nusing the E-SELECT
lever beforehand, it shifts automatically to
parking position Pand locks the wheels if
the driver's or front-passenger door is
opened and the engine is switched off. This
may damage the vehicle, the transmission
or the car wash.
Observe the information on maneuvering
(Y page 131).
! Before driving into an automatic car wash,
make sure that it is suitable for the
dimensions of the vehicle. In particular,
make sure that:
R there is enough ground clearance
between the vehicle underbody and the
guide rails of the automatic car wash.
R the clearance width of the automatic car
wash is sufficient, particularly the width
of the guide rails.
R you enter the automatic car wash
straight and in the center of the guide
rails in order to avoid damaging the tires
or wheel rims.
Fold in the exterior mirrors before the
vehicle is washed. The exterior mirrors
could otherwise be damaged. !
Make sure that:
R the side windows and the roof are
completely closed
R the climate control blower is switched off
R the windshield wiper switch is at position
0
The vehicle could otherwise be damaged.
! In portal car washes, the windshield
wipers may be moved up the windshield by
the cleaning brushes when the ignition is
switched off.
Set the Start/Stop button to key position
2 to reset the windshield wipers to their
original position.
! Preferably use automatic car washes with
adjustable high-pressure pre-cleaning. This
corresponds with the specification for the
Cabriolet program. In car washes that use
high water pressures, there is a risk that a
small amount of water may leak into the
vehicle.
! Cabriolet: do not treat the vehicle with
hot wax under any circumstances.
After using an automatic car wash, wipe off
wax and drying agents from the windshield
and the wiper blades. This will prevent smears
and reduce wiping noises caused by residue
on the windshield.
Washing by hand In some countries, washing by hand is only
allowed at specially equipped washing bays.
Observe the legal requirements in each
country.
X
Do not use hot water and do not wash the
vehicle in direct sunlight.
X Use a soft sponge to clean.
X Use a mild cleaning agent, such as a car
shampoo approved by Mercedes-Benz.
X Thoroughly hose down the vehicle with a
gentle jet of water.
X Do not point the water jet directly towards
the air inlet. 224
CareMaintenance and care