2014 MERCEDES-BENZ SLS AMG COUPE buttons
[x] Cancel search: buttonsPage 95 of 292
G
WARNING
Children could become trapped if they
activate the memory function, particularly
when unattended. There is a risk of injury.
When leaving the vehicle, always take the
SmartKey with you and lock the vehicle. Never
leave children unsupervised in the vehicle.
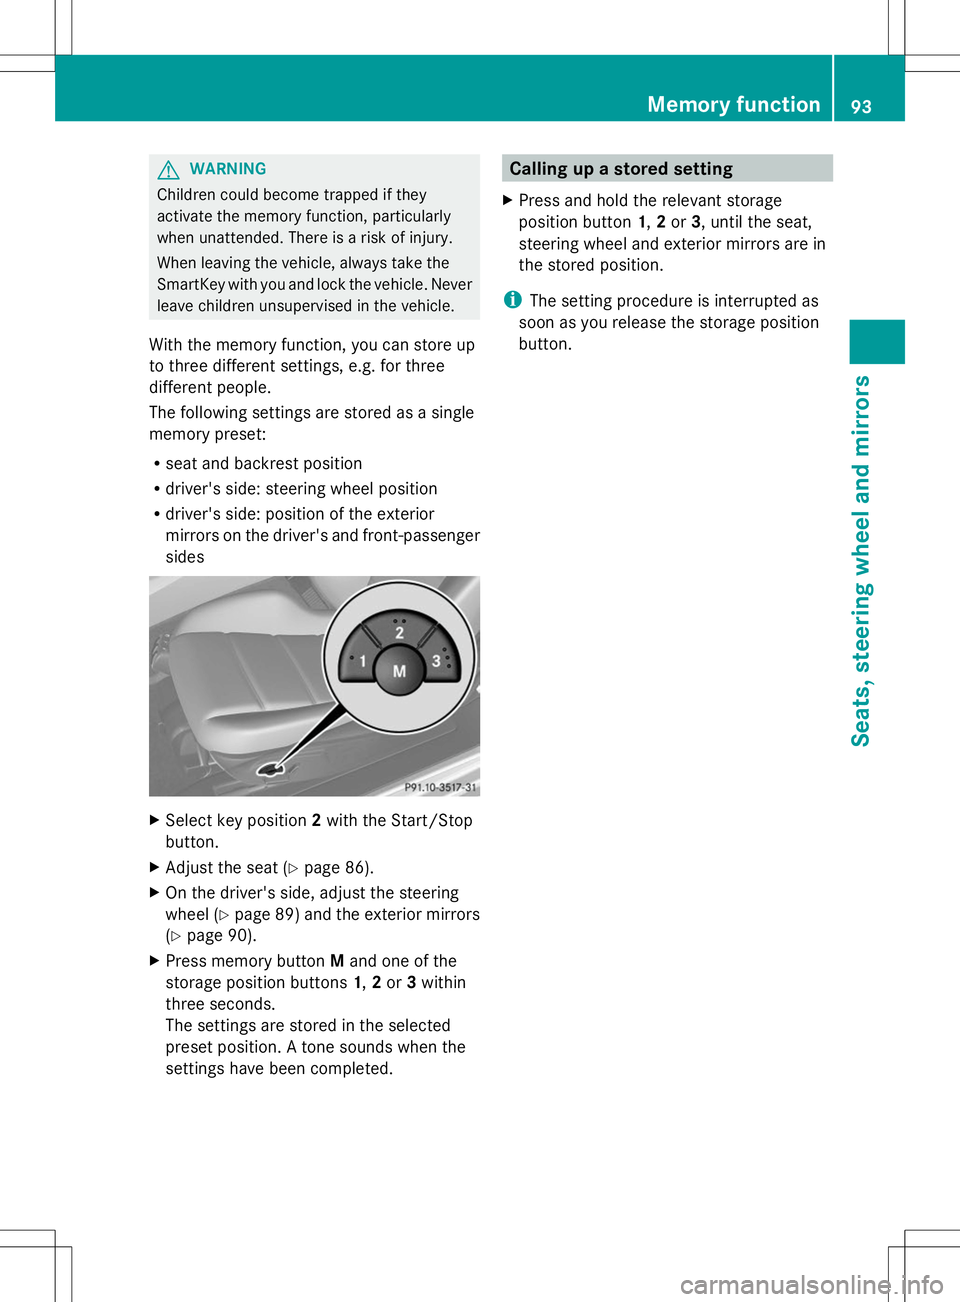
With the memory function, you can store up
to three different settings, e.g. for three
different people.
The following settings are stored as a single
memory preset:
R seat and backrest position
R driver's side: steering wheel position
R driver's side: position of the exterior
mirrors on the driver's and front-passenger
sides X
Select key position 2with the Start/Stop
button.
X Adjust the seat (Y page 86).
X On the driver's side, adjust the steering
wheel (Y page 89) and the exterior mirrors
(Y page 90).
X Press memory button Mand one of the
storage position buttons 1,2or 3within
three seconds.
The settings are stored in the selected
preset position. A tone sounds when the
settings have been completed. Calling up a stored setting
X Press and hold the relevant storage
position button 1,2or 3, until the seat,
steering wheel and exterior mirrors are in
the stored position.
i The setting procedure is interrupted as
soon as you release the storage position
button. Memory function
93Seats, steering wheel and mirrors Z
Page 110 of 292
B
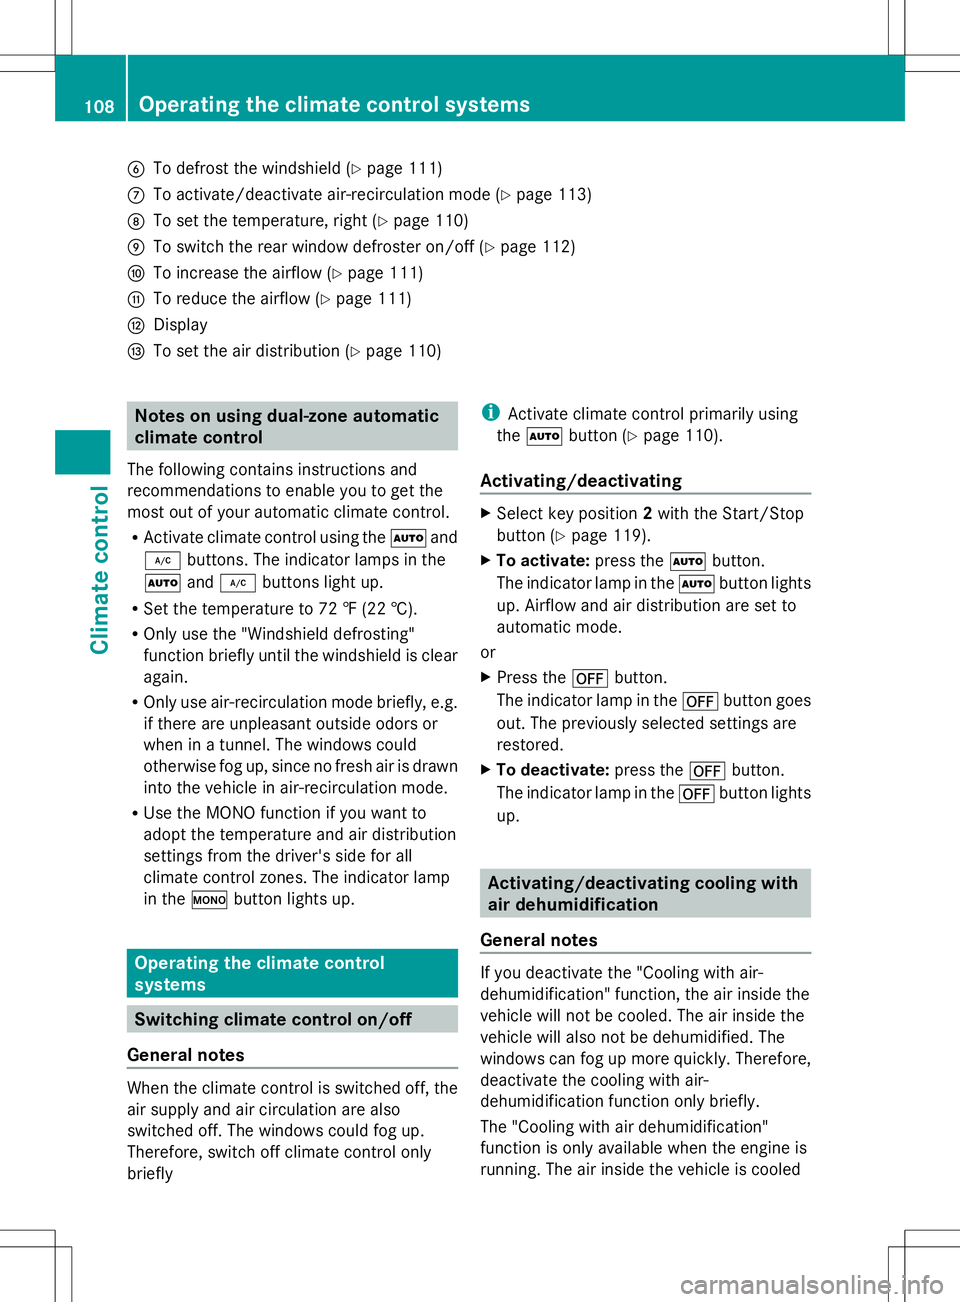
To defrost the windshield (Y page 111)
C To activate/deactivate air-recirculation mode (Y page 113)
D To set the temperature, right (Y page 110)
E To switch the rear window defroster on/off (Y page 112)
F To increase the airflow (Y page 111)
G To reduce the airflow (Y page 111)
H Display
I To set the air distribution (Y page 110)Notes on using dual-zone automatic
climate control
The following contains instructions and
recommendations to enable you to get the
most out of your automatic climate control.
R Activate climate control using the Ãand
¿ buttons. The indicator lamps in the
à and¿ buttons light up.
R Set the temperature to 72 ‡ (22 †).
R Only use the "Windshield defrosting"
function briefly until the windshield is clear
again.
R Only use air-recirculation mode briefly, e.g.
if there are unpleasant outside odors or
when in a tunnel. The windows could
otherwise fog up, since no fresh air is drawn
into the vehicle in air-recirculation mode.
R Use the MONO function if you want to
adopt the temperature and air distribution
settings from the driver's side for all
climate control zones. The indicator lamp
in the ºbutton lights up. Operating the climate control
systems
Switching climate control on/off
General notes When the climate control is switched off, the
air supply and air circulation are also
switched off. The windows could fog up.
Therefore, switch off climate control only
briefly i
Activate climate control primarily using
the à button (Y page 110).
Activating/deactivating X
Select key position 2with the Start/Stop
button (Y page 119).
X To activate: press theÃbutton.
The indicator lamp in the Ãbutton lights
up. Airflow and air distribution are set to
automatic mode.
or
X Press the ^button.
The indicator lamp in the ^button goes
out. The previously selected settings are
restored.
X To deactivate: press the^button.
The indicator lamp in the ^button lights
up. Activating/deactivating cooling with
air dehumidification
General notes If you deactivate the "Cooling with air-
dehumidification" function, the air inside the
vehicle will not be cooled. The air inside the
vehicle will also not be dehumidified. The
windows can fog up more quickly. Therefore,
deactivate the cooling with air-
dehumidification function only briefly.
The "Cooling with air dehumidification"
function is only available when the engine is
running. The air inside the vehicle is cooled108
Operating the climate control systemsClimate control
Page 153 of 292
Operating the on-board computer
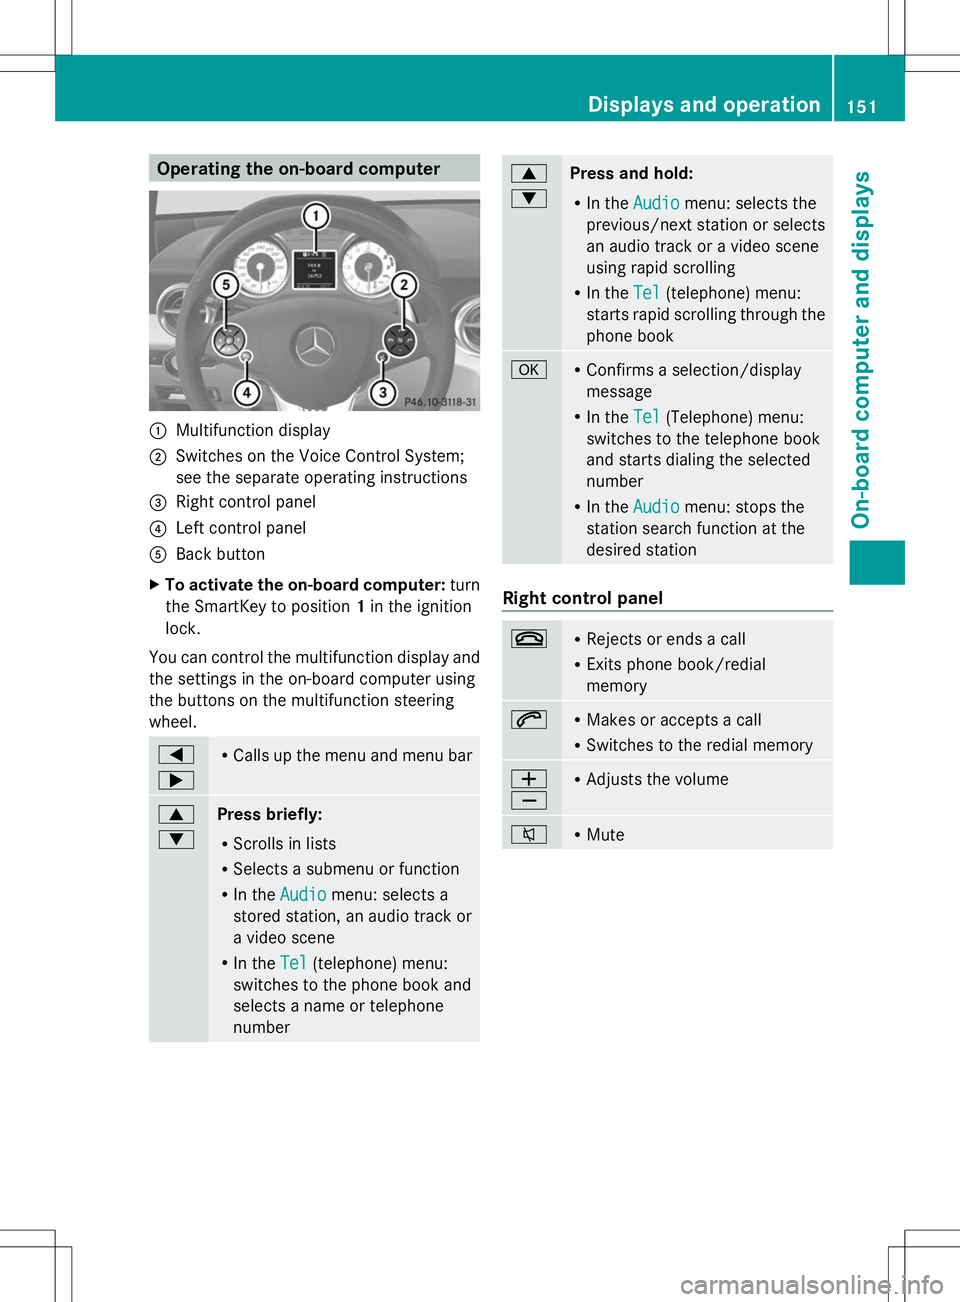
:
Multifunction display
; Switches on the Voice Control System;
see the separate operating instructions
= Right control panel
? Left control panel
A Back button
X To activate the on-board computer: turn
the SmartKey to position 1in the ignition
lock.
You can control the multifunction display and
the settings in the on-board computer using
the buttons on the multifunction steering
wheel. =
; R
Calls up the menu and menu bar 9
:
Press briefly:
R
Scrolls in lists
R Selects a submenu or function
R In the Audio Audio menu: selects a
stored station, an audio track or
a video scene
R In the Tel Tel(telephone) menu:
switches to the phone book and
selects a name or telephone
number 9
:
Press and hold:
R
In the Audio Audio menu: selects the
previous/next station or selects
an audio track or a video scene
using rapid scrolling
R In the Tel Tel(telephone) menu:
starts rapid scrolling through the
phone book a R
Confirms a selection/display
message
R In the Tel Tel(Telephone) menu:
switches to the telephone book
and starts dialing the selected
number
R In the Audio
Audio menu: stops the
station search function at the
desired station Right control panel
~ R
Rejects or ends a call
R Exits phone book/redial
memory 6 R
Makes or accepts a call
R Switches to the redial memory W
X R
Adjusts the volume 8 R
Mute Displays and operation
151On-board computer and displays Z
Page 162 of 292
Convenience
Activating/deactivating the EASY-
ENTRY/EXIT feature
G
WARNING
When the EASY-ENTRY/EXIT feature adjusts
the steering wheel, you and other vehicle
occupants – particularly children – could
become trapped. There is a risk of injury.
While the EASY-ENTRY/EXIT feature is
making adjustments, make sure that no one
has any body parts in the sweep of the
steering wheel.
If somebody becomes trapped:
R press one of the memory function position
buttons, or
R move the switch for steering wheel
adjustment in the opposite direction to that
in which the steering wheel is moving.
The adjustment process is stopped.
You can use the Easy EasyEntry/Exit:
Entry/Exit: function
to activate or deactivate the EASY-ENTRY/
EXIT feature (Y page 89).
X Press the =or; button on the
steering wheel to select the Settings
Settings
menu.
X Press the :or9 button to select the
Convenience Convenience submenu.
X Press ato confirm.
X Press the :or9 button to select the
Easy Entry/Exit
Easy Entry/Exit function.
You will see the selected setting: Enabled
Enabled
or Disabled
Disabled .
X Press the abutton to save the setting.
Switching the fold-in mirrors with the
locking feature on/off
If you switch on the Fold
Fold Mirrors
Mirrors in
inwhen
when
Locking
Locking function, the exterior mirrors fold in
when you lock the vehicle. If you unlock the
vehicle and then open the driver's or front-
passenger door, the exterior mirrors fold out
again. If you have switched the function on and you
fold the exterior mirrors in using the button
on the door (Y
page 91), they will not fold out
automatically. The exterior mirrors can then
only be folded out using the button on the
door.
X Press the =or; button on the
steering wheel to select the Settings Settings
menu.
X Press the :or9 button to select the
CONVENIENCE
CONVENIENCE submenu.
X Press ato confirm.
X Press the :or9 button to select the
Fold Mirrors in when Locking
Fold Mirrors in when Locking
function.
You will see the selected setting: Enabled Enabled
or Disabled
Disabled .
X Press the abutton to save the setting.
Restoring the factory settings For safety reasons, the
Lights:
Lights:function in
the LIGHTS
LIGHTS submenu is only reset if the
vehicle is stationary.
X Press the =or; button on the
steering wheel to select the Settings Settings
menu.
X Press the :or9 button to select the
Factory Settings
Factory Settings submenu.
X Press ato confirm.
The Reset All Settings?
Reset All Settings? message
appears.
X Press the :or9 button to select
Yes
Yes orNo
No.
X Press the abutton to confirm the
selection.
If you have selected Yes Yes, the multifunction
display shows a confirmation message. 160
Menus and submenusOn-board computer and displays
Page 163 of 292

AMG menu
AMG displays X
Press =or; on the steering wheel
to select the AMG
AMGmenu. :
Digital speedometer
; Engine oil temperature
= Coolant temperature
? Transmission fluid temperature
If the engine oil temperature is below 80 †
or if the transmission fluid temperature is
below 60 †, the corresponding temperature
gauge flashes. Avoid driving at full engine
output during this time.
SETUP SETUP displays the drive program, the AMG
adaptive sport suspension system setting
and the selected traction assist.
X Press the =or; button on the
steering wheel to select the AMG
AMG menu.
X Press the 9button repeatedly until
SETUP is displayed.
or
X Vehicles without AMG Performance
Media: press the AMG button on the center
console. :
Drive program (C/S/S+/M)
; ESP ®
mode (ON ON/SPORTSPORT handling handling mode
mode/
OFF
OFF )
= AMG adaptive sport suspension system
setting (COMFORT COMFORT/SPORT SPORT/SPORT +SPORT +)
RACETIMER Displaying and starting RACETIMER
You can use the RACETIMER to store lap
times.
X
Press the =or; button on the
steering wheel to select the AMG AMGmenu.
X Press the 9button repeatedly until the
RACETIMER is shown.
i If the RACETIMER is selected, the =
and ; buttons are inoperative. :
Digital speedometer
; RACETIMER
= Lap
You can start the RACETIMER when the
engine is running or if key position 2is
selected with the Start/Stop button.
X To start: start the RACETIMER with a. Menus and sub
menus
161On-board computer and displays Z
Page 207 of 292
The mbrace system
To adjust the volume during an mbrace call,
proceed as follows:
X Press the WorX button on the
multifunction steering wheel.
or
X Use the volume controller of COMAND.
The mbrace system provides various
services, e.g.:
R Automatic and manual emergency call
R Roadside Assistance call
R MB Info call
USA only: you can find information and a
description of all available features under
"Owners Online" at http://www.mbusa.com.
Self-diagnosis of the system After you have switched on the ignition, the
system carries out a self-diagnosis.
A malfunction in the system has been
detected if one of the following conditions
occurs:
R The indicator lamp in the SOS button does
not come on during the system self-test.
R The indicator lamp in the FRoadside
Assistance button does not light up during
self-diagnosis of the system.
R The indicator lamp in the ïMB Info call
button does not light up during self-
diagnosis of the system.
R The indicator lamp in one or more of the
following buttons continues to light up red
after the system self-diagnosis:
- SOS button
- F Roadside Assistance call button
- ï MB Info call button
R the Tele
Tele Aid AidInoperative
Inoperative orTele
Tele Aid
Aid
Not Activated Not Activated message appears in the
multifunction display after the system self-
diagnosis.
If a malfunction is indicated as outlined
above, the system may not operate as expected. In the event of an emergency, help
will have to be summoned by other means.
Have the system checked at the nearest
authorized Mercedes-Benz Center or contact
the following service hotlines:
R
USA: Mercedes-Benz Customer Assistance
Center at
1-800-FOR-MERCedes (1-800-367-6372)
or 1-866-990-9007
R Canada: Customer Service at
1-888-923-8367
Emergency call Important safety notes
!
You must have a license agreement to
activate the mbrace service. Ensure that
your system is activated and ready for use,
and press the ïMB Info call button to
register. If one of these steps is not carried
out, it may not be possible to activate the
system.
If you have questions about the activation,
contact one of the following telephone
hotlines:
R USA: Mercedes-Benz Customer
Assistance center at
1-800-FOR-MERCedes
(1-800-367-6372) or 1-866-990-9007
R Canada: Customer Service at
1-888-923-8367
General notes
An emergency call is dialed automatically if
an air bag or Emergency Tensioning Device is
triggered.
i You cannot end an automatically
triggered emergency call yourself.
An emergency call can also be initiated
manually.
As soon as the emergency call has been
initiated, the indicator lamp in the SOS button
flashes. The Connecting Call Connecting Call message
appears in the multifunction display.
The audio output is muted. Features
205Stowage an d features Z
Page 214 of 292
Alternatively, you can call the following
telephone assistance services:
R USA: Mercedes-Benz Customer
Assistance Center at
1-800-FOR-MERCedes
R Canada: Customer Service at
1-800-387-0100
i Notes about the declaration of conformity
can be found here (Y page 22).
USA: FCC ID: CB2HMIHL4
Canada: IC: 279B-HMIHL4
Programming Programing buttons
Pay attention to the "Important safety notes"
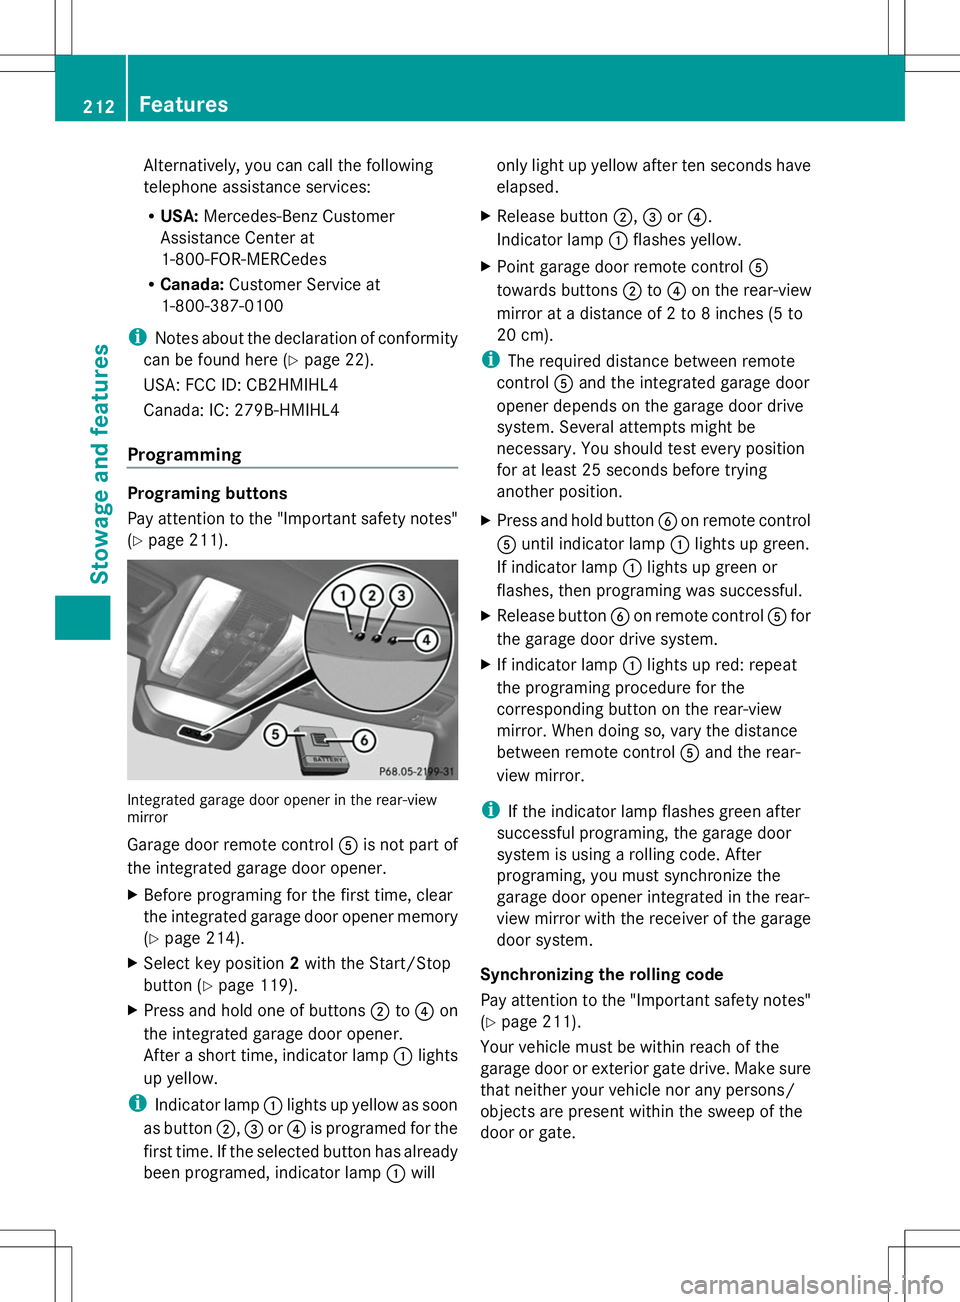
(Y page 211). Integrated garage door opener in the rear-view
mirror
Garage door remote control Ais not part of
the integrated garage door opener.
X Before programing for the first time, clear
the integrated garage door opener memory
(Y page 214).
X Select key position 2with the Start/Stop
button ( Ypage 119).
X Press and hold one of buttons ;to? on
the integrated garage door opener.
After a short time, indicator lamp :lights
up yellow.
i Indicator lamp :lights up yellow as soon
as button ;,=or? is programed for the
first time. If the selected button has already
been programed, indicator lamp :will only light up yellow after ten seconds have
elapsed.
X Release button ;,=or?.
Indicator lamp :flashes yellow.
X Point garage door remote control A
towards buttons ;to? on the rear-view
mirror at a distance of 2 to 8 inches (5 to
20 cm).
i The required distance between remote
control Aand the integrated garage door
opener depends on the garage door drive
system. Several attempts might be
necessary. You should test every position
for at least 25 seconds before trying
another position.
X Press and hold button Bon remote control
A until indicator lamp :lights up green.
If indicator lamp :lights up green or
flashes, then programing was successful.
X Release button Bon remote control Afor
the garage door drive system.
X If indicator lamp :lights up red: repeat
the programing procedure for the
corresponding button on the rear-view
mirror. When doing so, vary the distance
between remote control Aand the rear-
view mirror.
i If the indicator lamp flashes green after
successful programing, the garage door
system is using a rolling code. After
programing, you must synchronize the
garage door opener integrated in the rear-
view mirror with the receiver of the garage
door system.
Synchronizing the rolling code
Pay attention to the "Important safety notes"
(Y page 211).
Your vehicle must be within reach of the
garage door or exterior gate drive. Make sure
that neither your vehicle nor any persons/
objects are present within the sweep of the
door or gate. 212
FeaturesSto
wage an d features
Page 215 of 292
X
Select key position 2with the Start/Stop
button (Y page 119).
X Press the programing button of the door or
gate drive (see the door or gate drive
operating instructions, e.g. under
"Programing additional remote controls").
i Usually, you now have 30 seconds to
initiate the next step.
X Press previously programed button ;,=
or ? of the integrated garage door opener
until the door closes.
The rolling code synchronization is then
complete.
Notes on programing the remote control
Canadian radio frequency laws require a
"break" (or interruption) of the transmission
signals after broadcasting for a few seconds.
Therefore, these signals may not last long
enough for the integrated garage door
opener. The signal is not recognized during
programing. Comparable with Canadian law,
some U.S. garage door openers also feature
a "break".
Proceed as follows:
R if you live in Canada
R if you have difficulties programing the
garage door opener (regardless of where
you live) when using the programing steps
X Press and hold one of buttons ;to? on
the integrated garage door opener.
After a short time, indicator lamp :lights
up yellow.
X Release the button.
Indicator lamp :flashes yellow.
X Press button Bof garage door remote
control Afor two seconds, then release it
for two seconds.
X Press button Bagain for two seconds. X
Repeat this sequence on button Bof
remote control Auntil indicator lamp :
lights up green.
If indicator lamp :turns red, repeat the
process.
X Continue with the other programing steps
(see above).
Problems when programing
If you are experiencing problems programing
the integrated garage door opener on the
rear-view mirror, take note of the following
instructions:
R Check the transmitter frequency of garage
door drive remote control A. This can
usually be found on the back of the remote
control.
The integrated garage door opener is
compatible with devices that have units
which operate in the frequency range of
280 to 433 MHz .
R Replace the batteries in garage door
remote control A. This increases the
likelihood that garage door remote control
A will transmit a strong and precise signal
to the integrated garage door opener in the
rear-view mirror.
R When programing, hold remote control A
at varying distances and angles from the
button that you are programing. Try various
angles at a distance between 2and
12 inches (5to 30 cm) or at the same angle
but at varying distances.
R If another remote control for the same
garage door drive is available, repeat the
same programing steps with this remote
control. Before performing these steps,
make sure that new batteries have been
installed in garage door drive remote
control A.
R Note that some remote controls only
transmit for a limited amount of time (the
indicator lamp on the remote control goes Features
213Stowage and features Z