2014 MERCEDES-BENZ SLK-CLASS ROADSTER check oil
[x] Cancel search: check oilPage 11 of 356

Emergency spare wheel
Important safety note s.................. 337
Points to remember .......................337
Removing ....................................... 337
Stowing .......................................... 338
Technical data ............................... 340
Emergency Tensioning Devices
Function .......................................... .55
Safety guideline s............................. 39
Emissions control
Service and warranty information ....21
Engine
Check Engine warning lamp ........... 248
Display message ............................ 225
ECO start/stop function ................143
Engine number ............................... 343
Irregular running ............................ 147
Jump-starting ................................. 298
Starting problems ..........................147
Starting the engine with the
SmartKey ....................................... 142
Starting with KEYLESS-GO .............142
Switching off .................................. 160
Tow-starting (vehicle) ..................... 303
Engine electronics
Problem (malfunction) ...................147
Engine oil
Adding ........................................... 276
Additives ........................................ 346
Checking the oil level ..................... 275
Checking the oil level using the
dipstick .......................................... 275
Display message ............................ 226
Filling capacity ............................... 346
Notes about oil grades ................... 346
Notes on oil level/consumption ....275
Temperature (on-board computer) .206
Viscosity ........................................ 346
ESP ®
(Electronic Stability
Program) AMG menu (on-board computer) ...207
Deactivating/activating (AMG
vehicles) .......................................... 63
Deactivating/activating (notes;
except AMG vehicles) ......................62
Display message ............................ 211
ETS .................................................. 61
Function/notes ................................ 61 General notes
.................................. 61
Important safety information ...........62
Warning lamp ................................. 244
ETS (Electronic Traction System) ....... 61
Exhaust check ................................... 163
Exhaust pipe (cleaning instructions) 283
Exterior lighting Setting options .............................. 108
see Lights
Exterior mirrors
Adjusting ....................................... 103
Dipping (automatic) .......................104
Folding in/out (automatically). ......104
Folding in/out (electrically). ..........104
Folding in when locking (on-board
computer) ...................................... 206
Out of position (troubleshooting) ...104
Storing settings (memory function) 105
Storing the parking position ..........104
Eyeglasses compartment .................255 F
Filler cap see Fuel filler flap
Filling capacities (Technical data) ...344
Fire extinguisher ............................... 289
First-aid kit ......................................... 288
Flat tire MOExtended tires ..........................290
Preparing the vehicle .....................289
TIREFIT kit ...................................... 291
see Emergency spare wheel
Floormats ........................................... 272
Fog lamps Switching on/off ........................... 109
Front fog lamps
Display message ............................ 223
Switching on/off ........................... 109
Fuel
Additives ........................................ 345
Consumption statistics ..................195
Displaying the current
consumption .................................. 196
Displaying the range ......................196
Driving tips .................................... 162
Fuel gauge ....................................... 29
Grade (gasoline) ............................ 345 Index
9
Page 17 of 356

Seat belts
Adjusting the driver's and front-
passenger seat belt .........................53
Belt force limiters ............................ 55
Cleaning ......................................... 285
Correct usage .................................. 52
Emergency Tensioning Devices ....... .55
Fastening ......................................... 53
Important safety guidelines .............51
Releasing ......................................... 54
Safety guidelines ............................. 39
Switching belt adjustment on/off
(on-board computer) ......................206
Warning lamp ................................. 240
Warning lamp (function) ................... 54
Seats
Adjusting (electrically) .....................98
Adjusting (manually). .......................98
Adjusting the 4-way lumbar
support ............................................ 99
Adjusting the head restraint ............99
Cleaning the cover .........................285
Correct driver's seat position ........... 96
Important safety notes ....................97
Overview .......................................... 97
Seat heating problem ....................100
Storing settings (memory function) 105
Switching AIRSCARF on/off ..........100
Switching seat heating on/off .........99
Selector lever
Cleaning ......................................... 284
Sensors (cleaning instructions) .......283
Service menu (on-board computer) .201
Service products Brake fluid ..................................... 347
Coolant (engine) ............................ 347
Engine oil ....................................... 346
Fuel ................................................ 344
Important safety notes ..................344
Refrigerant (air-conditioning
system) .......................................... 349
Washer fluid .................................. .348
Settings
Factory (on-board computer) .........202
On-board computer .......................202
Setting the air distribution ...............130
Setting the airflow ............................130
SETUP (on-board computer) .............207Side impact air bag
.............................43
Side marker lamp Changing bulbs (rear) ....................116
Side marker lamp (display
message) ............................................ 223
Side windows Cleaning ......................................... 282
Convenience closing feature ............84
Important safety information ...........82
Opening/closing (all) .......................83
Opening/closing (front) ...................82
Overview .......................................... 82
Problem (malfunction) .....................86
Resetting ......................................... 84
SmartKey
Changing the battery .......................73
Changing the programming .............71
Checking the battery .......................73
Convenience opening feature ..........83
Display message ............................ 238
Door central locking/unlocking .......70
Important safety notes ....................70
Loss ................................................. 75
Mechanical key ................................ 72
Opening/closing the roof ................88
Overview .......................................... 70
Positions (ignition lock) .................139
Problem (malfunction) .....................75
Starting the engine ........................142
Snow chains ...................................... 309
Sockets Center console .............................. 259
General notes ................................ 258
Under the armrest .........................259
Spare wheel
Stowing .......................................... 338
see Emergency spare wheel
Specialist workshop ............................ 24
Special seat belt retractor .................. 58
Speed, controlling see Cruise control
Speedometer
Activating/deactivating the
additional speedometer .................203
Digital ............................................ 196
In the Instrument cluster .................29
Segments ...................................... 193
Selecting the unit of measurement 202 Index
15
Page 19 of 356
Temperature
Coolant .......................................... 192
Coolant (on-board computer) ......... 206
Engine oil (on-board computer) ...... 206
Outside temperature ..................... .193
Setting (climate control) ................129
Theft deterrent systems
ATA (Anti-Theft Alarm system) .........67
Immobilizer ...................................... 67
Time
see separate operating instructions
Timing (RACETIMER) .........................207
TIREFIT kit .......................................... 291
Tire pressure Calling up (on-board computer) .....314
Checking manually ........................313
Display message ............................ 233
Important safety notes ..................314
Maximum ....................................... 312
Notes ............................................. 311
Not reached (TIREFIT) ....................293
Reached (TIREFIT) ..........................293
Recommended ............................... 310
Tire pressure loss warning
system
Important safety notes ..................313
Restarting ...................................... 314
Tire pressure monitoring system
Checking the tire pressure
electronically ................................. 316
Function/notes ............................. 314
General notes ................................ 314
Important safety notes ..................315
Restarting ...................................... 317
Warning lamp ................................. 251
Warning message .......................... 316
Tires
Aspect ratio (definition) .................327
Average weight of the vehicle
occupants (definition) ....................326
Bar (definition) ............................... 326
Changing a wheel .......................... 328
Characteristics .............................. 325
Checking ........................................ 307
Definition of terms .........................326
Direction of rotatio n...................... 329
Display message ............................ 233Distribution of the vehicle
occupants (definition)
....................328
DOT, Tire Identification Number
(TIN) .............................................. .325
DOT (Department of
Transportation) (definition) ............326
GAWR (Gross Axle Weight Rating)
(definition) ..................................... 326
GVW (Gross Vehicle Weight)
(definition) ..................................... 326
GVWR (Gross Vehicle Weight
Rating) (definition) .........................326
Important safety notes ..................306
Increased vehicle weight due to
optional equipment (definition) ......326
Kilopascal (kPa) (definition) ...........327
Labeling (overview )........................ 322
Load bearing index (definition) ......328
Load index ..................................... 324
Load index (definition) ...................327
M+S tires ....................................... 308
Maximum loaded vehicle weight
(definition) ..................................... 327
Maximum load on a tire (definition) 327
Maximum permissible tire
pressure (definition) ....................... 327
Maximum tire loa d......................... 325
Maximum tire load (definition) .......327
MOExtended tires ..........................308
Optional equipment weight
(definition) ..................................... 327
Overview ........................................ 306
PSI (pounds per square inch)
(definition) ..................................... 327
Replacing ....................................... 328
Service life ..................................... 308
Sidewall (definition) .......................327
Speed rating (definition) ................326
Storing ........................................... 329
Structure and characteristics
(definition) ..................................... 326
Summer tires ................................. 308
Temperature .................................. 321
TIN (Tire Identification Number)
(definition) ..................................... 327
Tire bead (definition) ......................327
Tire pressure (definition) ................327
Tire pressures (recommended )...... 326 Index
17
Page 158 of 356
Problems with the transmission
Problem Possible causes/consequences and
M
MSolutions The transmission has
problems shifting gear. The transmission is losing oil.
X
Have the transmission checked at a qualified specialist
workshop immediately. The acceleration ability
is deteriorating.
The transmission no
longer changes gear. The transmission is in emergency mode.
It is only possible to shift into
secondgear and reverse gear.
X Stop the vehicle.
X Shift the transmission to position P.
X Switch off the engine.
X Wait at least ten seconds before restarting the engine.
X Shift the transmission to position Dor R.
If D is selected, the transmission shifts into secondgear; ifRis
selected, the transmission shifts into reverse gear.
X Have the transmission checked at a qualified specialist
workshop, e.g. an authorized Mercedes-Benz Center,
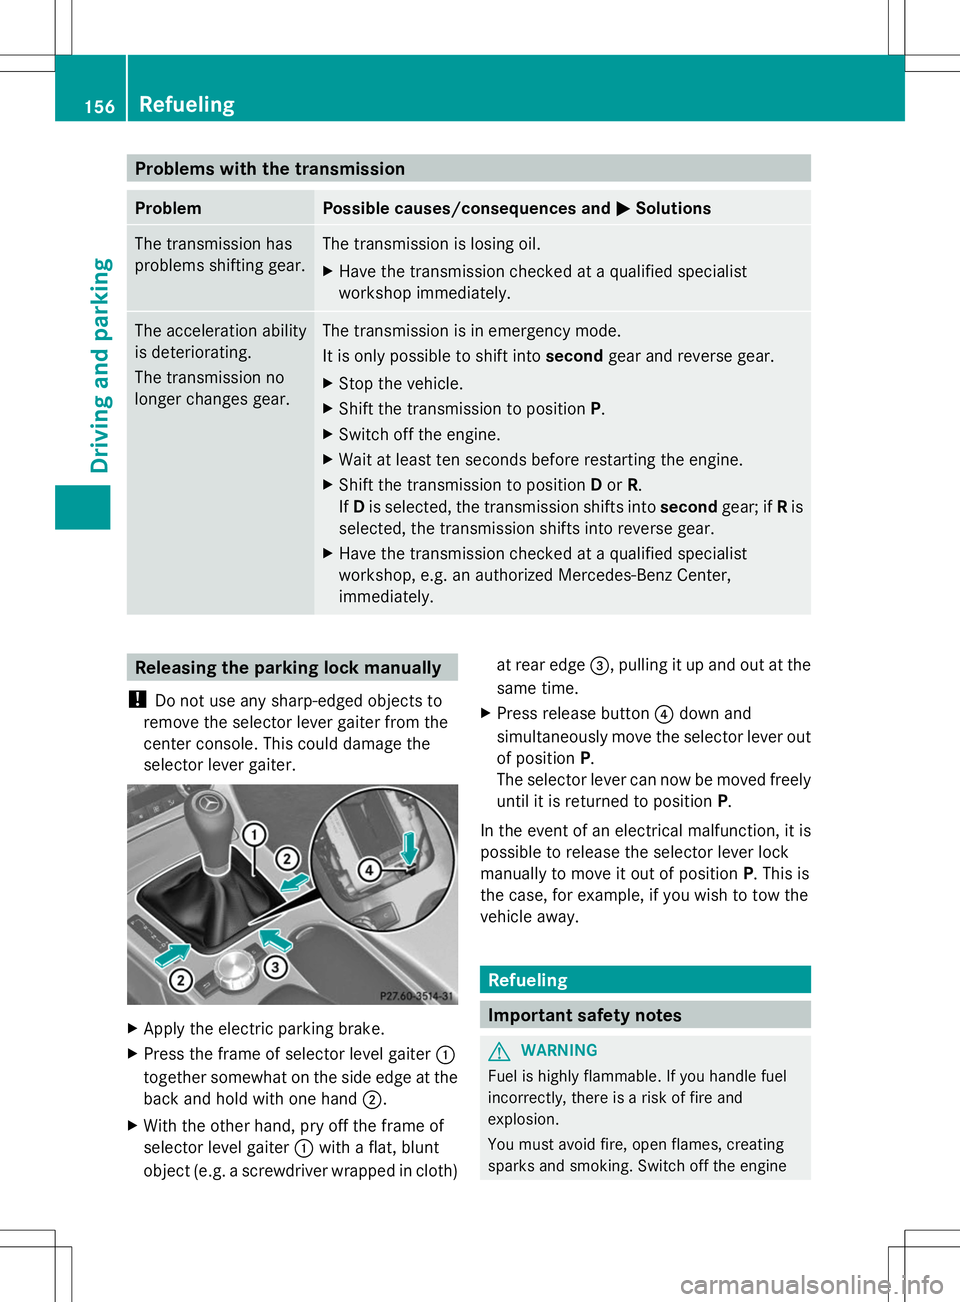
immediately. Releasing the parking lock manually
! Do not use any sharp-edged objects to
remove the selector lever gaiter from the
center console. This could damage the
selector lever gaiter. X
Apply the electric parking brake.
X Press the frame of selector level gaiter :
together somewhat on the side edge at the
back and hold with one hand ;.
X With the other hand, pry off the frame of
selector level gaiter :with a flat, blunt
object (e.g. a screwdriver wrapped in cloth) at rear edge
=, pulling it up and out at the
same time.
X Press release button ?down and
simultaneously move the selector lever out
of position P.
The selector lever can now be moved freely
until it is returned to position P.
In the event of an electrical malfunction, it is
possible to release the selector lever lock
manually to move it out of position P. This is
the case, for example, if you wish to tow the
vehicle away. Refueling
Important safety notes
G
WARNING
Fuel is highly flammable. If you handle fuel
incorrectly, there is a risk of fire and
explosion.
You must avoid fire, open flames, creating
sparks and smoking. Switch off the engine 156
RefuelingDriving and parking
Page 228 of 356
Display messages Possible causes/consequences and
M
MSolutions # The battery is not being charged.
A warning tone also sounds.
Possible causes are:
R
a defective alternator
R a torn poly-V-belt
R a malfunction in the electronics
X Pull over and stop the vehicle safely and switch off the engine,
paying attention to road and traffic conditions.
X Secure the vehicle against rolling away ( Ypage 159).
X Open the hood.
X Check whether the poly-V-belt is torn.
If the poly-V-belt is torn:
! Do not continue driving. The engine could otherwise overheat.
X Consult a qualified specialist workshop.
If the poly-V-belt is not damaged:
X Visit a qualified specialist workshop. 4
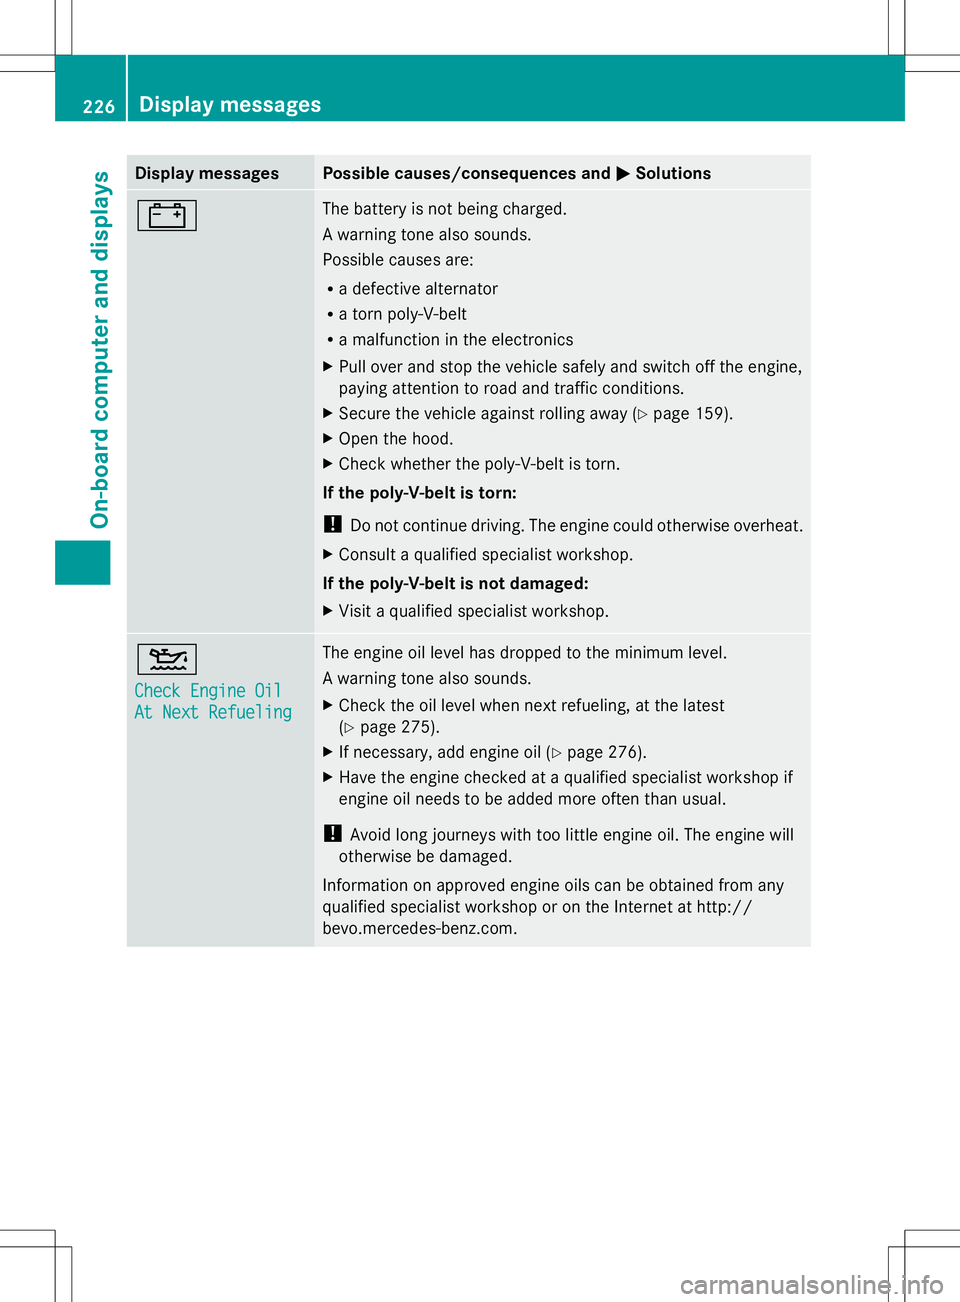
Check Engine Oil Check Engine Oil
At Next Refueling At Next Refueling The engine oil level has dropped to the minimum level.
A warning tone also sounds.
X
Check the oil level when next refueling, at the latest
(Y page 275).
X If necessary, add engine oil ( Ypage 276).
X Have the engine checked at a qualified specialist workshop if
engine oil needs to be added more often than usual.
! Avoid long journeys with too little engine oil. The engine will
otherwise be damaged.
Information on approved engine oils can be obtained from any
qualified specialist workshop or on the Internet at http://
bevo.mercedes-benz.com. 226
Display
messagesOn-board computer and displays
Page 229 of 356
Display messages Possible causes/consequences and
M
MSolutions 4
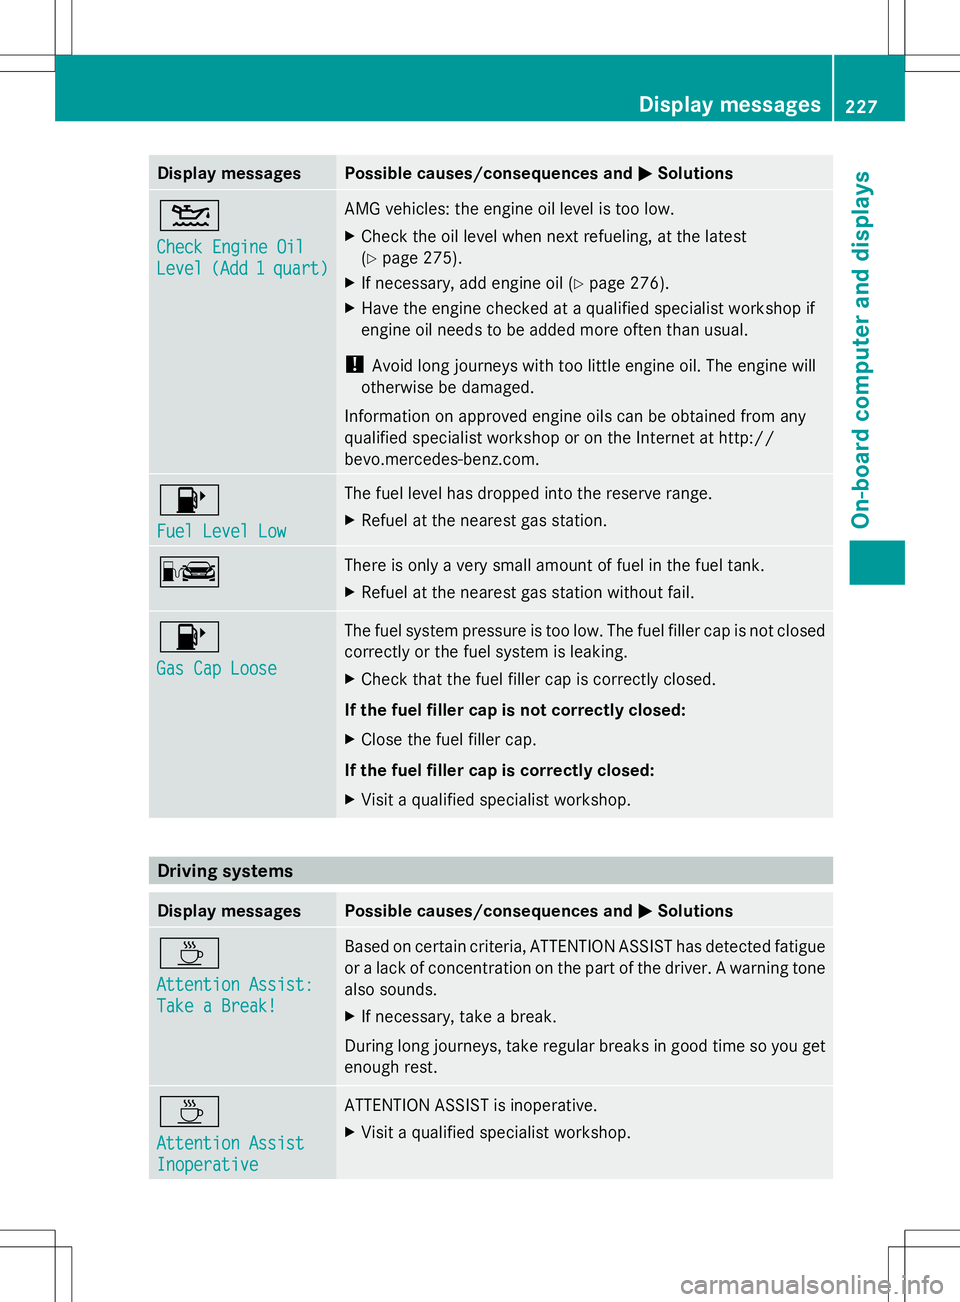
Check Engine Oil Check Engine Oil
Level Level
(Add 1
(Add 1 quart)
quart) AMG vehicles: the engine oil level is too low.
X
Check the oil level when next refueling, at the latest
(Y page 275).
X If necessary, add engine oil ( Ypage 276).
X Have the engine checked at a qualified specialist workshop if
engine oil needs to be added more often than usual.
! Avoid long journeys with too little engine oil. The engine will
otherwise be damaged.
Information on approved engine oils can be obtained from any
qualified specialist workshop or on the Internet at http://
bevo.mercedes-benz.com. 8
Fuel Level Low Fuel Level Low The fuel level has dropped into the reserve range.
X
Refuel at the nearest gas station. C There is only a very small amount of fuel in the fuel tank.
X
Refuel at the nearest gas station without fail. 8
Gas Cap Loose Gas Cap Loose The fuel system pressure is too low. The fuel filler cap is not closed
correctly or the fuel system is leaking.
X
Check that the fuel filler cap is correctly closed.
If the fuel filler cap is not correctly closed:
X Close the fuel filler cap.
If the fuel filler cap is correctly closed:
X Visit a qualified specialist workshop. Driving systems
Display messages Possible causes/consequences and
M MSolutions À
Attention Assist: Attention Assist:
Take a Break! Take a Break! Based on certain criteria, ATTENTION ASSIST has detected fatigue
or a lack of concentration on the part of the driver. A warning tone
also sounds.
X
If necessary, take a break.
During long journeys, take regular breaks in good time so you get
enough rest. À
Attention Assist Attention Assist
Inoperative Inoperative ATTENTION ASSIST is inoperative.
X
Visit a qualified specialist workshop. Display
messages
227On-board computer and displays Z
Page 277 of 356
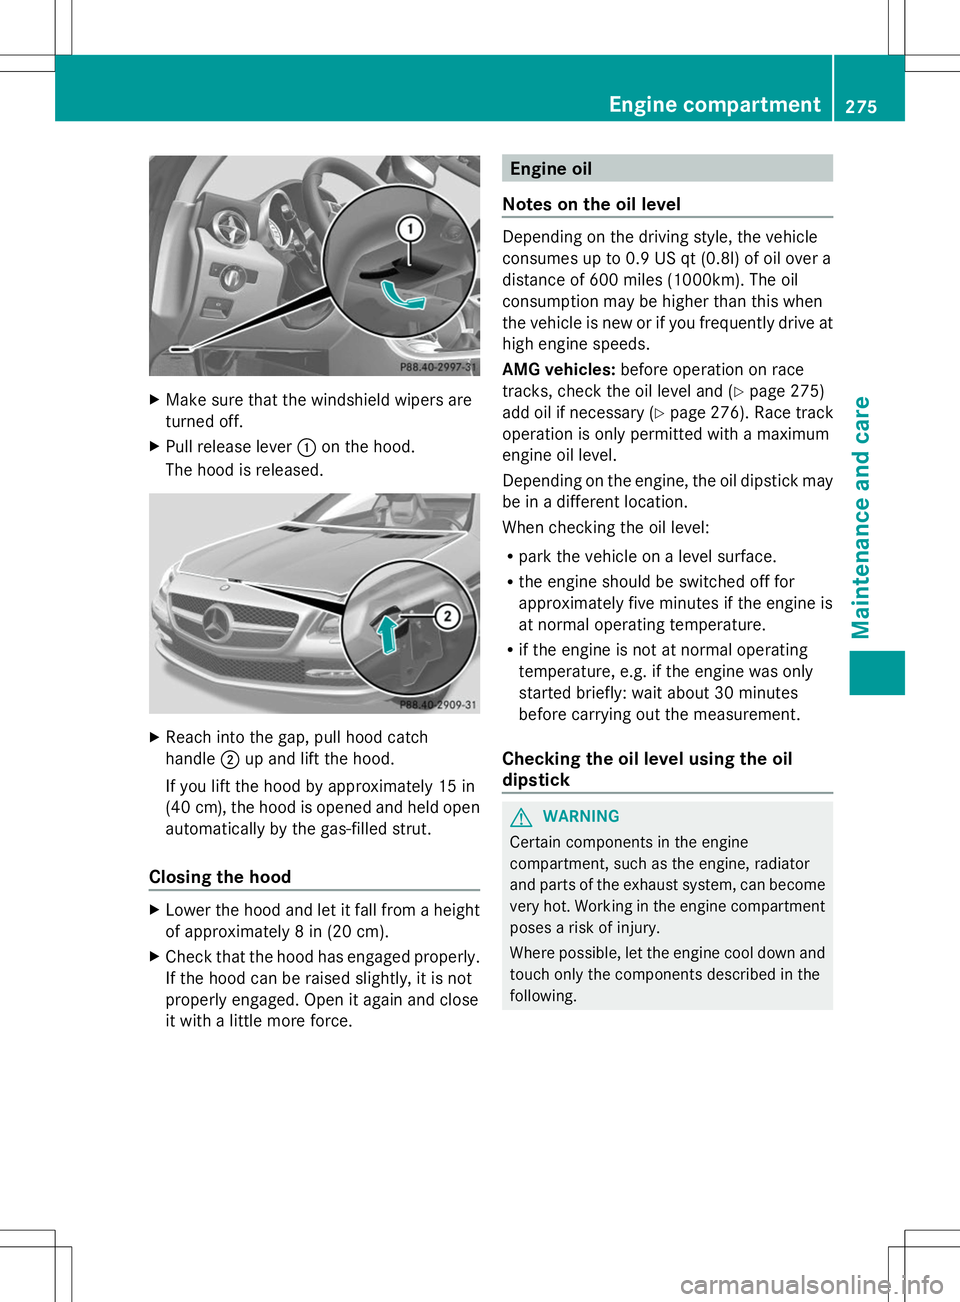
X
Make sure that the windshield wipers are
turned off.
X Pull release lever :on the hood.
The hood is released. X
Reach into the gap, pull hood catch
handle ;up and lift the hood.
If you lift the hood by approximately 15 in
(40 cm), the hood is opened and held open
automatically by the gas-filled strut.
Closing the hood X
Lower the hood and let it fall from a height
of approximately 8 in (20 cm).
X Check that the hood has engaged properly.
If the hood can be raised slightly, it is not
properly engaged. Open it again and close
it with a little more force. Engine oil
Notes on the oil level Depending on the driving style, the vehicle
consumes up to 0.9 US qt
(0.8l) of oil over a
distance of 600 miles (1000km). The oil
consumption may be higher than this when
the vehicle is new or if you frequently drive at
high engine speeds.
AMG vehicles: before operation on race
tracks, check the oil level and (Y page 275)
add oil if necessary (Y page 276). Race track
operation is only permitted with a maximum
engine oil level.
Depending on the engine, the oil dipstick may
be in a different location.
When checking the oil level:
R park the vehicle on a level surface.
R the engine should be switched off for
approximately five minutes if the engine is
at normal operating temperature.
R if the engine is not at normal operating
temperature, e.g. if the engine was only
started briefly: wait about 30 minutes
before carrying out the measurement.
Checking the oil level using the oil
dipstick G
WARNING
Certain components in the engine
compartment, such as the engine, radiator
and parts of the exhaust system, can become
very hot. Working in the engine compartment
poses a risk of injury.
Where possible, let the engine cool down and
touch only the components described in the
following. Engine compartment
275Maintenance and care Z
Page 279 of 356
X
Replace cap :on the filler neck and turn
clockwise.
Ensure that the cap locks into place
securely.
X Check the oil level again with the oil
dipstick (Y page 275).
Further information on engine oil
(Y page 346). Checking and adding other service
products
Checking coolant level G
WARNING
Certain components in the engine
compartment, such as the engine, radiator
and parts of the exhaust system, can become
very hot. Working in the engine compartment
poses a risk of injury.
Where possible, let the engine cool down and
touch only the components described in the
following. G
WARNING
The engine cooling system is pressurized,
particularly when the engine is warm. When
opening the cap, you could be scalded by hot
coolant spraying out. There is a risk of injury.
Let the engine cool down before opening the
cap. Wear eye and hand protection when
opening the cap. Open the cap slowly half a
turn to allow pressure to escape. Example X
Park the vehicle on a level surface.
Only check the coolant level when the
vehicle is on a level surface and the engine
has cooled down.
X Turn the SmartKey to position 2in the
ignition lock (Y page 139).
On vehicles with KEYLESS-GO, press the
Start/Stop button twice (Y page 139).
X Check the coolant temperature gauge in
the multifunction display.
The coolant temperature must be below
158 ‡ (70 †).
X Turn the SmartKey to position
0(Y page 139) in the ignition lock.
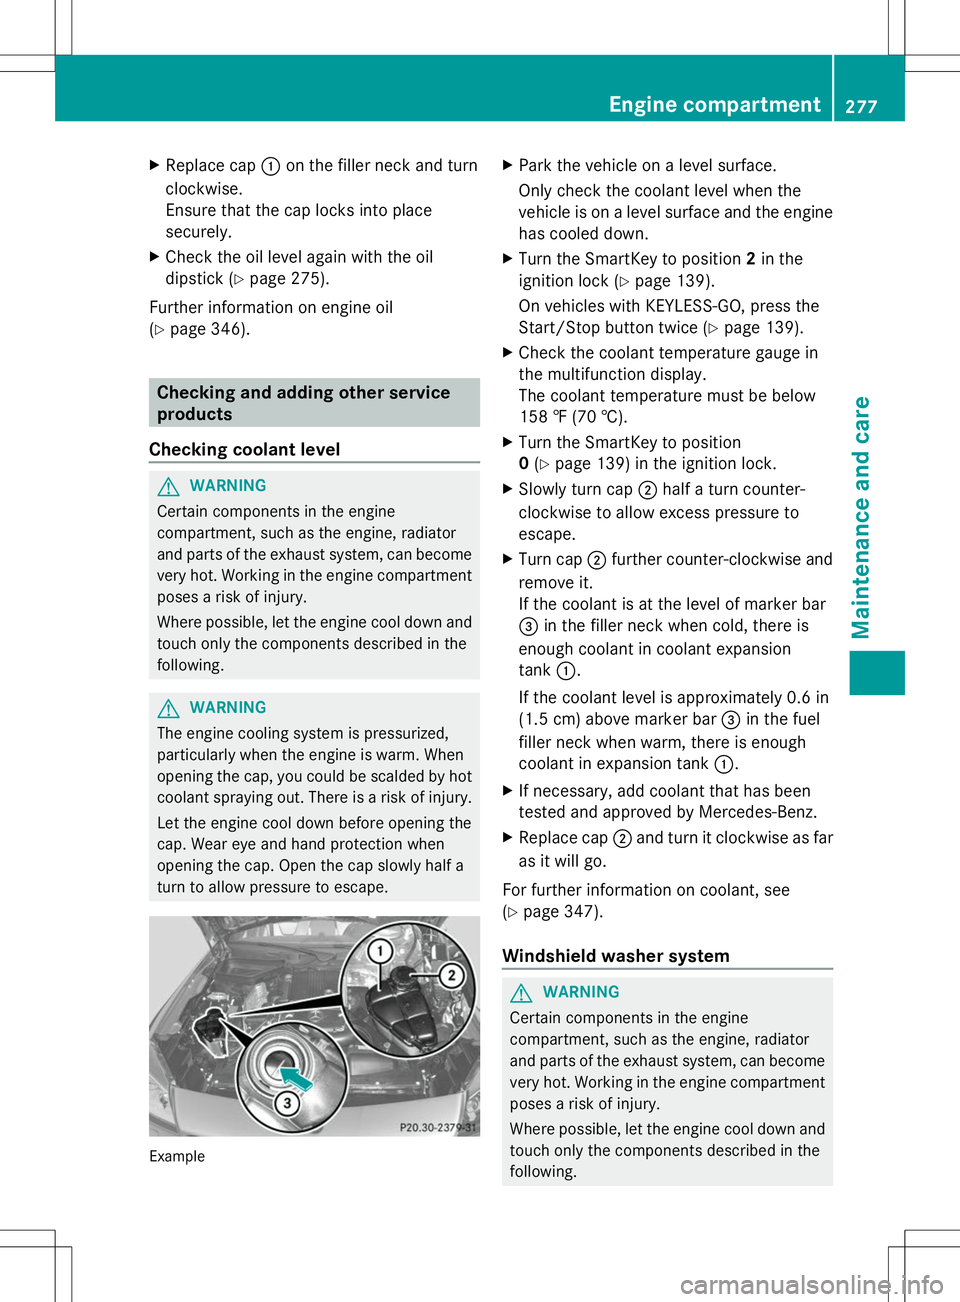
X Slowly turn cap ;half a turn counter-
clockwise to allow excess pressure to
escape.
X Turn cap ;further counter-clockwise and
remove it.
If the coolant is at the level of marker bar
= in the filler neck when cold, there is
enough coolant in coolant expansion
tank :.
If the coolant level is approximately 0.6 in
(1.5 cm) above marker bar =in the fuel
filler neck when warm, there is enough
coolant in expansion tank :.
X If necessary, add coolant that has been
tested and approved by Mercedes-Benz.
X Replace cap ;and turn it clockwise as far
as it will go.
For further information on coolant, see
(Y page 347).
Windshield washer system G
WARNING
Certain components in the engine
compartment, such as the engine, radiator
and parts of the exhaust system, can become
very hot. Working in the engine compartment
poses a risk of injury.
Where possible, let the engine cool down and
touch only the components described in the
following. Engine compartment
277Maintenance and care Z