2014 MERCEDES-BENZ SLK-CLASS ROADSTER engine
[x] Cancel search: enginePage 78 of 356
Problem Possible causes/consequences and
M
MSolutions The engine can no
longer be started using
the SmartKey. The on-board voltage is too low.
X
Switch off non-essential consumers, e.g. seat heating or interior
lighting, and try to start the engine again.
If this does not work:
X Check the starter battery and charge it if necessary
(Y page 296).
or
X Jump-start the vehicle (Y page 298).
or
X Consult a qualified specialist workshop. The engine can no
longer be started using
KEYLESS-GO. The
SmartKey is in the
vehicle. The vehicle is locked.
X
Unlock the vehicle and try to start the vehicle again. There is interference from a powerful source of radio waves.
X
Start your vehicle with the SmartKey in the ignition lock. Doors
Important safety notes
G
WARNING
If children are left unsupervised in the vehicle,
they could:
R open the doors, thus endangering other
people or road users.
R get out and disrupt traffic.
R operate the vehicle's equipment.
Additionally, children could set the vehicle in
motion if, for example, they:
R release the parking brake.
R shift the automatic transmission out of
parking position P.
R shift the manual transmission into neutral.
R starting the engine.
There is a risk of an accident and injury.
When leaving the vehicle, always take the
SmartKey with you and lock the vehicle. Never
leave children or animals unattended in the
vehicle. Always keep the SmartKey out of
reach of children. G
WARNING
If children are left unsupervised in the vehicle,
they could:
R open the doors, thus endangering other
people or road users.
R get out and disrupt traffic.
R operate the vehicle's equipment.
Additionally, children could set the vehicle in
motion if, for example, they:
R release the parking brake.
R shifting the automatic transmission out of
park position P
R Start the engine.
There is a risk of an accident and injury.
When leaving the vehicle, always take the
SmartKey with you and lock the vehicle. Never
leave children or animals unattended in the
vehicle. Always keep the SmartKey out of
reach of children. 76
DoorsOpening and closing
Page 79 of 356
G
WARNING
If children are left unsupervised in the vehicle,
they could:
R open the doors, thus endangering other
people or road users.
R get out and disrupt traffic.
R operate the vehicle's equipment.
Additionally, children could set the vehicle in
motion if, for example, they:
R release the parking brake.
R shifting the automatic transmission out of
park position P
R Start the engine.
There is a risk of an accident and injury.
When leaving the vehicle, always take the
SmartKey with you and lock the vehicle. Never
leave children or animals unattended in the
vehicle. Always keep the SmartKey out of
reach of children. G
WARNING
If persons, particularly children are subjected
to prolonged exposure to extreme heat or
cold, there is a risk of injury, possibly even
fatal. Never leave children unattended in the
vehicle. Unlocking and opening doors from
the inside
! The side windows will not open/close if
the battery is discharged or if the side
windows have iced up. It will then not be
possible to close the door. Do not attempt
to force the door closed. You could
otherwise damage the door or the side
window.
You can open a door from inside the vehicle
even if it has been locked.
If the vehicle was previously locked with the
SmartKey or with KEYLESS-GO, opening the
vehicle from the inside will activate the anti-
theft alarm system. Switch off the alarm
(Y page 67). X
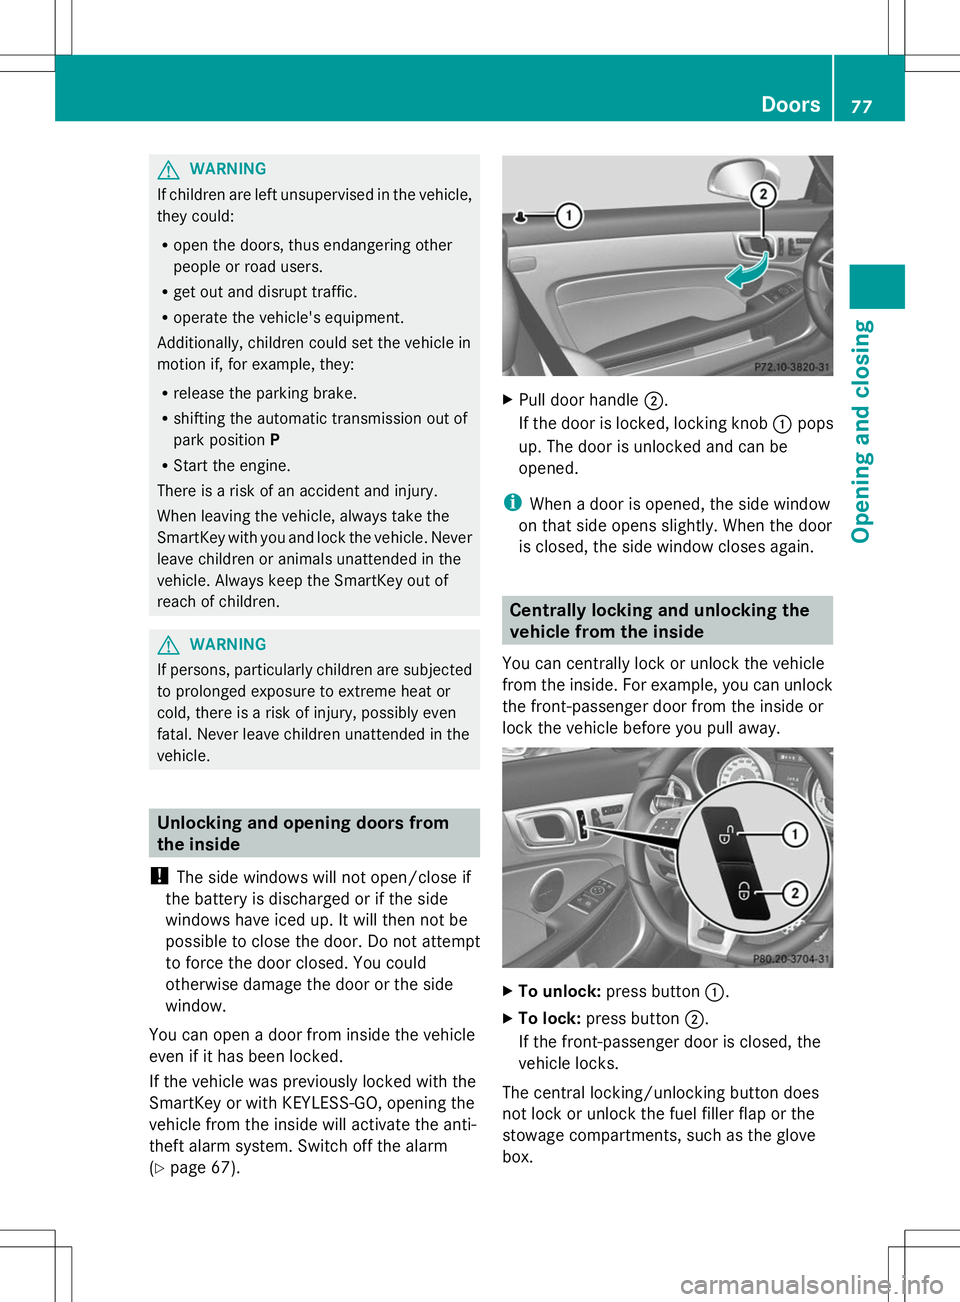
Pull door handle ;.
If the door is locked, locking knob :pops
up. The door is unlocked and can be
opened.
i When a door is opened, the side window
on that side opens slightly. When the door
is closed, the side window closes again. Centrally locking and unlocking the
vehicle from the inside
You can centrally lock or unlock the vehicle
from the inside. For example, you can unlock
the front-passenger door from the inside or
lock the vehicle before you pull away. X
To unlock: press button :.
X To lock: press button ;.
If the front-passenger door is closed, the
vehicle locks.
The central locking/unlocking button does
not lock or unlock the fuel filler flap or the
stowage compartments, such as the glove
box. Doors
77Opening and closing Z
Page 85 of 356
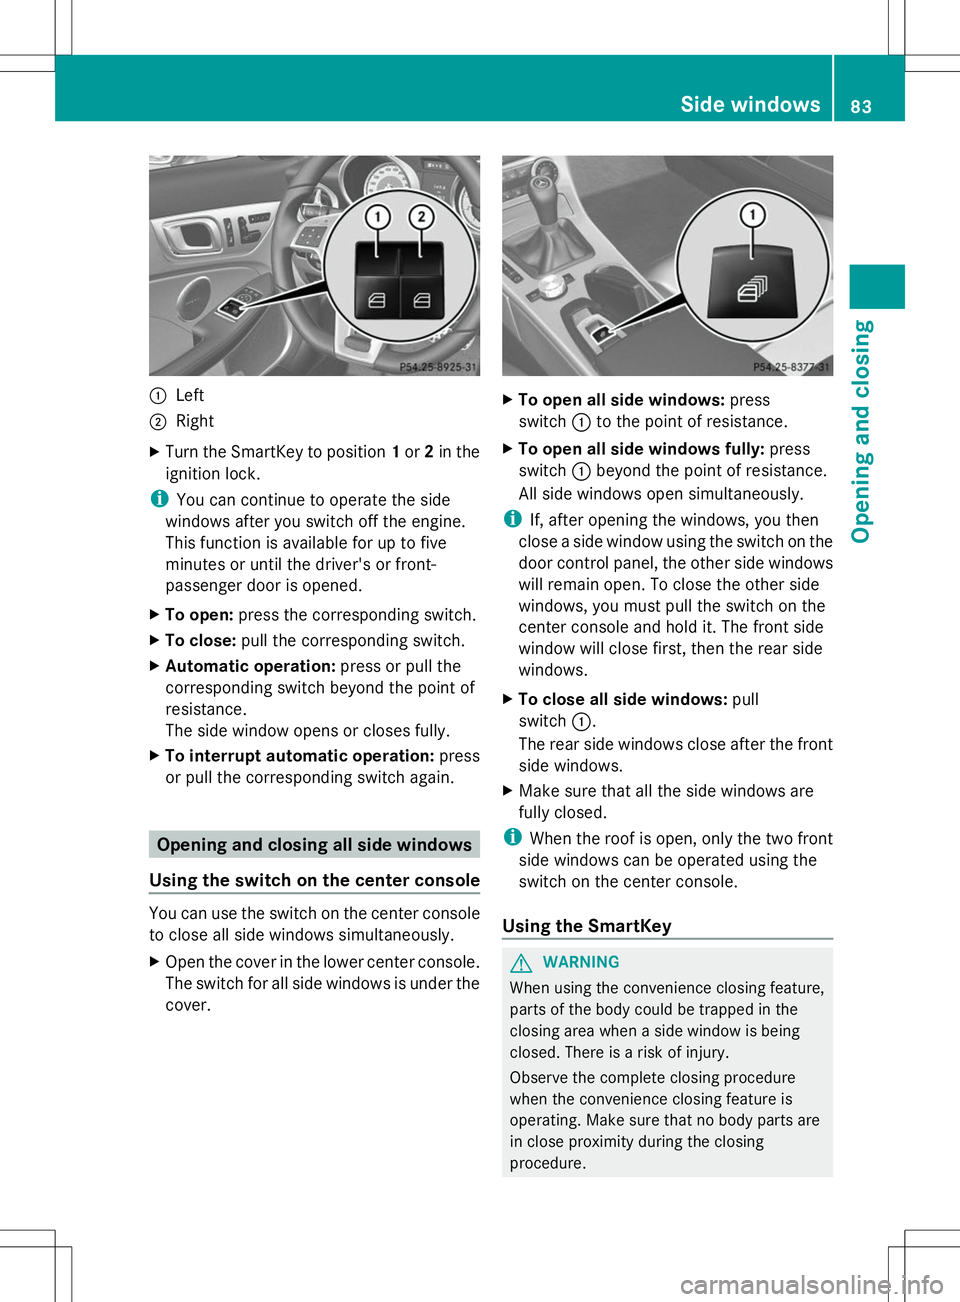
:
Left
; Right
X Turn the SmartKey to position 1or 2in the
ignition lock.
i You can continue to operate the side
windows after you switch off the engine.
This function is available for up to five
minutes or until the driver's or front-
passenger door is opened.
X To open: press the corresponding switch.
X To close: pull the corresponding switch.
X Automatic operation: press or pull the
corresponding switch beyond the point of
resistance.
The side window opens or closes fully.
X To interrupt automatic operation: press
or pull the corresponding switch again. Opening and closing all side windows
Using the switch on the center console You can use the switch on the center console
to close all side windows simultaneously.
X Open the cover in the lower center console.
The switch for all side windows is under the
cover. X
To open all side windows: press
switch :to the point of resistance.
X To open all side windows fully: press
switch :beyond the point of resistance.
All side windows open simultaneously.
i If, after opening the windows, you then
close a side window using the switch on the
door control panel, the other side windows
will remain open. To close the other side
windows, you must pull the switch on the
center console and hold it. The front side
window will close first, then the rear side
windows.
X To close all side windows: pull
switch :.
The rear side windows close after the front
side windows.
X Make sure that all the side windows are
fully closed.
i When the roof is open, only the two front
side windows can be operated using the
switch on the center console.
Using the SmartKey G
WARNING
When using the convenience closing feature,
parts of the body could be trapped in the
closing area when a side window is being
closed. There is a risk of injury.
Observe the complete closing procedure
when the convenience closing feature is
operating. Make sure that no body parts are
in close proximity during the closing
procedure. Side windows
83Opening and closing Z
Page 94 of 356
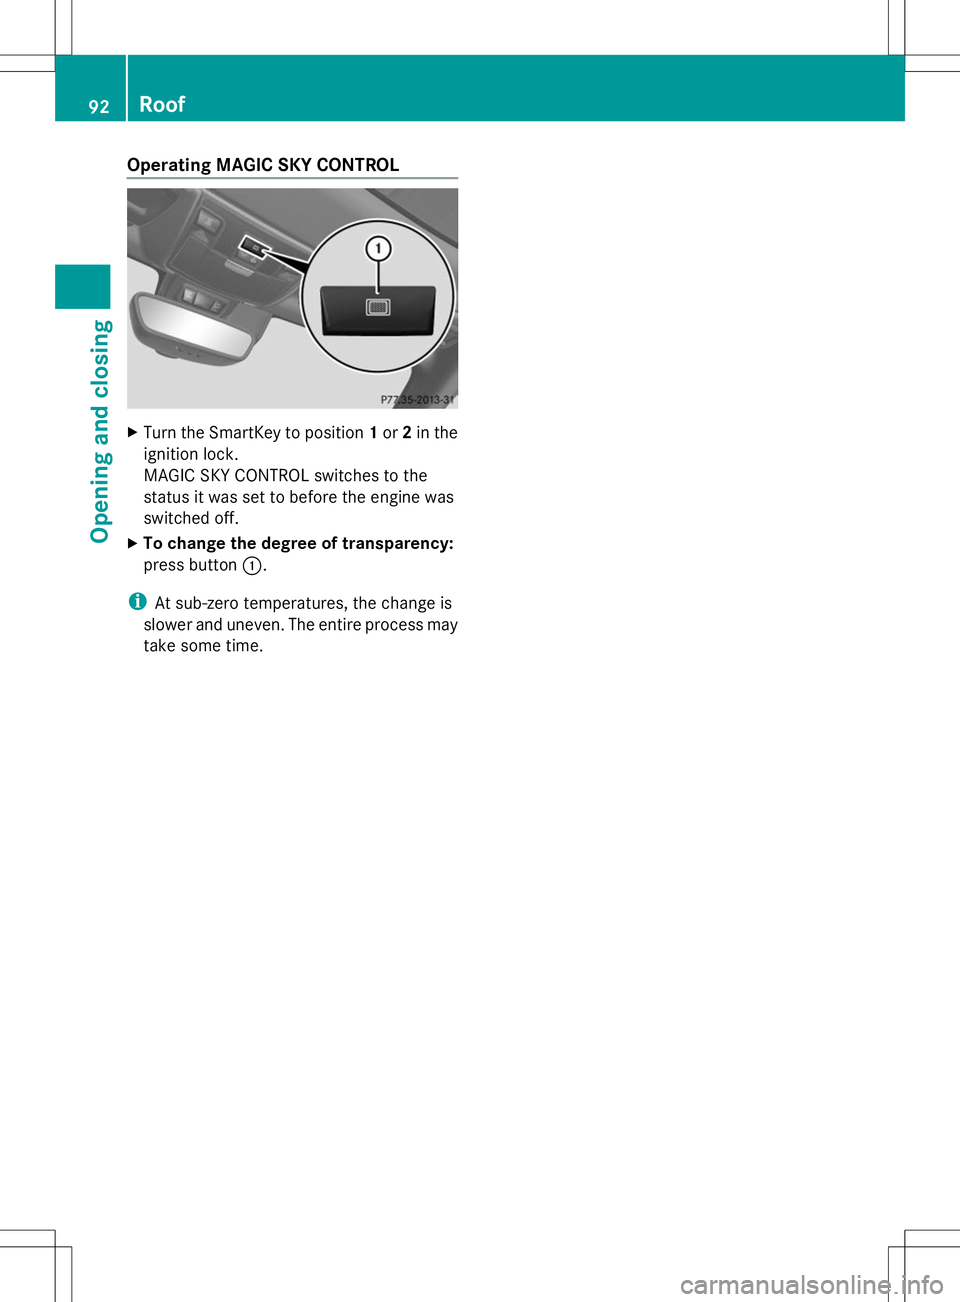
Operating MAGIC SKY CONTROL
X
Turn the SmartKey to position 1or 2in the
ignition lock.
MAGIC SKY CONTROL switches to the
status it was set to before the engine was
switched off.
X To change the degree of transparency:
press button :.
i At sub-zero temperatures, the change is
slower and uneven. The entire process may
take some time. 92
RoofOpening and closing
Page 95 of 356
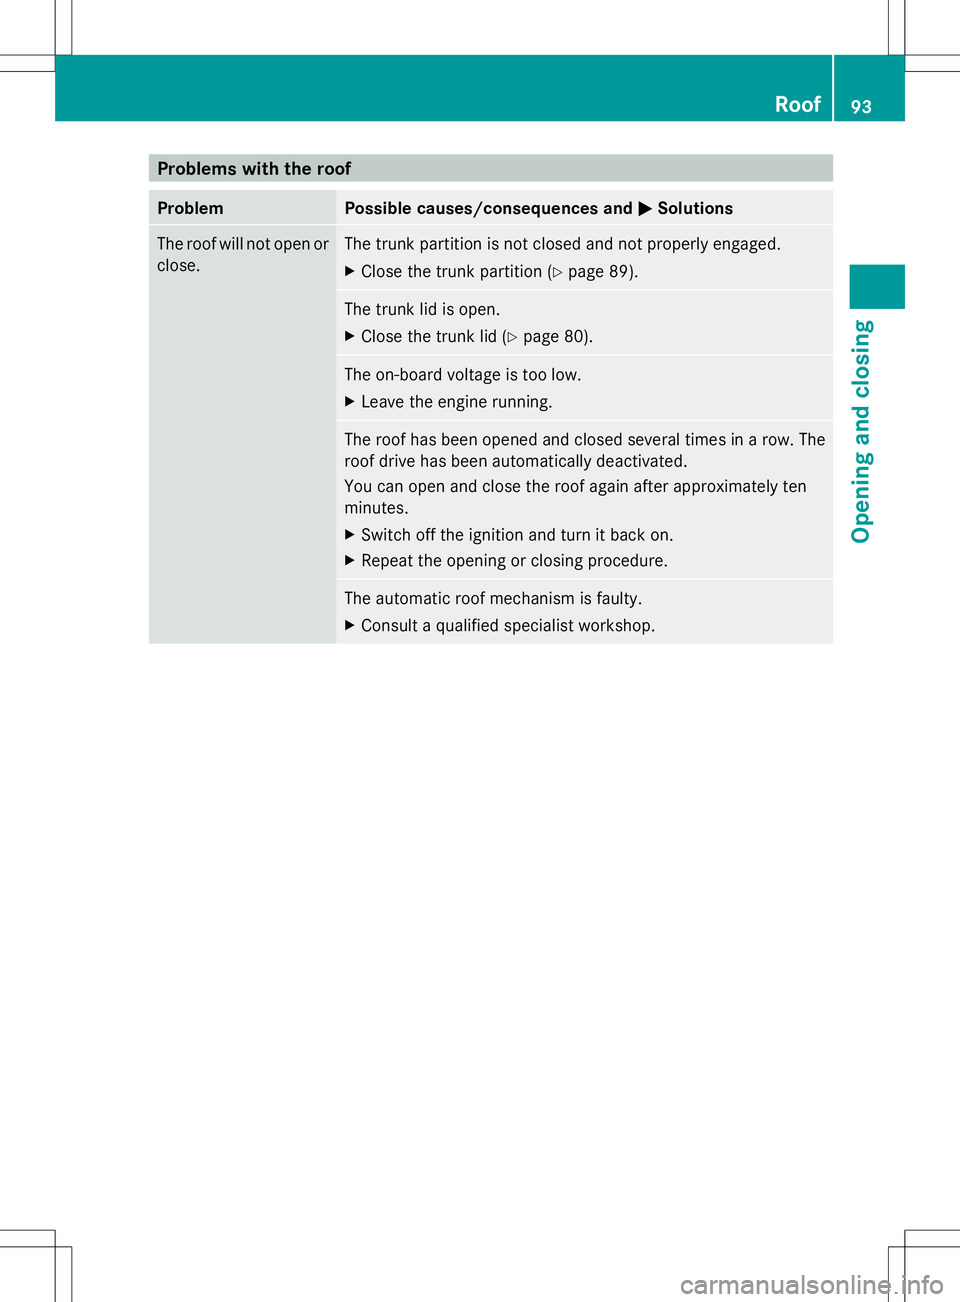
Problems with the roof
Problem Possible causes/consequences and
M
MSolutions The roof will not open or
close. The trunk partition is not closed and not properly engaged.
X
Close the trunk partition (Y page 89). The trunk lid is open.
X
Close the trunk lid (Y page 80). The on-board voltage is too low.
X
Leave the engine running. The roof has been opened and closed several times in a row. The
roof drive has been automatically deactivated.
You can open and close the roof again after approximately ten
minutes.
X
Switch off the ignition and turn it back on.
X Repeat the opening or closing procedure. The automatic roof mechanism is faulty.
X
Consult a qualified specialist workshop. Roof
93Opening and closing Z
Page 99 of 356
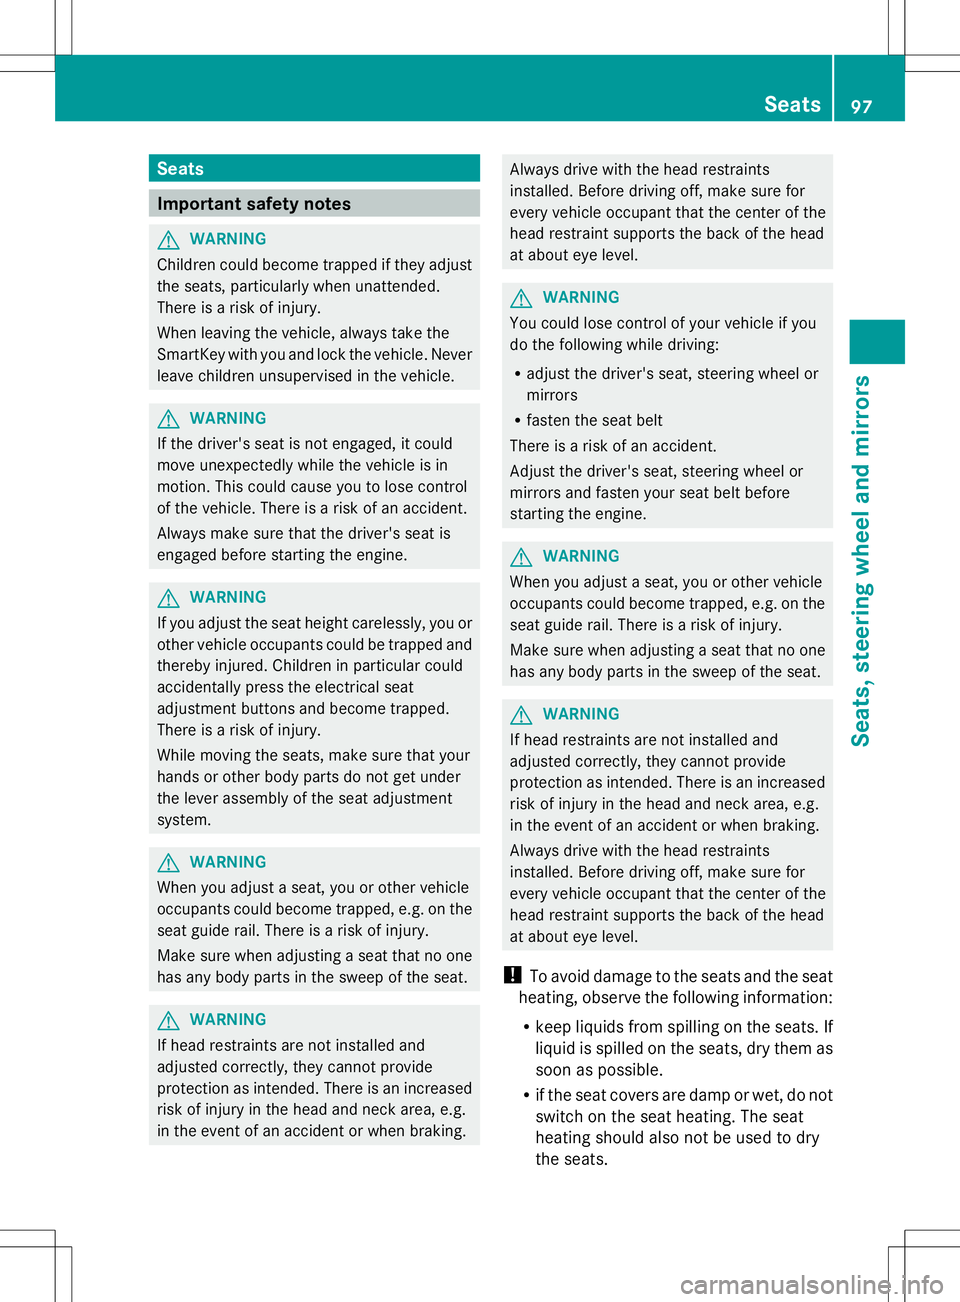
Seats
Important safety notes
G
WARNING
Children could become trapped if they adjust
the seats, particularly when unattended.
There is a risk of injury.
When leaving the vehicle, always take the
SmartKey with you and lock the vehicle. Never
leave children unsupervised in the vehicle. G
WARNING
If the driver's seat is not engaged, it could
move unexpectedly while the vehicle is in
motion. This could cause you to lose control
of the vehicle. There is a risk of an accident.
Always make sure that the driver's seat is
engaged before starting the engine. G
WARNING
If you adjust the seat height carelessly, you or
other vehicle occupants could be trapped and
thereby injured. Children in particular could
accidentally press the electrical seat
adjustment buttons and become trapped.
There is a risk of injury.
While moving the seats, make sure that your
hands or other body parts do not get under
the lever assembly of the seat adjustment
system. G
WARNING
When you adjust a seat, you or other vehicle
occupants could become trapped, e.g. on the
seat guide rail. There is a risk of injury.
Make sure when adjusting a seat that no one
has any body parts in the sweep of the seat. G
WARNING
If head restraints are not installed and
adjusted correctly, they cannot provide
protection as intended. There is an increased
risk of injury in the head and neck area, e.g.
in the event of an accident or when braking. Always drive with the head restraints
installed. Before driving off, make sure for
every vehicle occupant that the center of the
head restraint supports the back of the head
at about eye level.
G
WARNING
You could lose control of your vehicle if you
do the following while driving:
R adjust the driver's seat, steering wheel or
mirrors
R fasten the seat belt
There is a risk of an accident.
Adjust the driver's seat, steering wheel or
mirrors and fasten your seat belt before
starting the engine. G
WARNING
When you adjust a seat, you or other vehicle
occupants could become trapped, e.g. on the
seat guide rail. There is a risk of injury.
Make sure when adjusting a seat that no one
has any body parts in the sweep of the seat. G
WARNING
If head restraints are not installed and
adjusted correctly, they cannot provide
protection as intended. There is an increased
risk of injury in the head and neck area, e.g.
in the event of an accident or when braking.
Always drive with the head restraints
installed. Before driving off, make sure for
every vehicle occupant that the center of the
head restraint supports the back of the head
at about eye level.
! To avoid damage to the seats and the seat
heating, observe the following information:
R keep liquids from spilling on the seats. If
liquid is spilled on the seats, dry them as
soon as possible.
R if the seat covers are damp or wet, do not
switch on the seat heating. The seat
heating should also not be used to dry
the seats. Seats
97Seats, steering wheel and mirrors Z
Page 102 of 356
Problems with the seat heating
The seat heating has switched off
prematurely or cannot be switched on. The
vehicle's electrical system voltage is too low
because too many electrical consumers are
switched on.
X Switch off electrical consumers that you do
not need, such as the rear window
defroster or interior lighting.
X Once the battery is sufficiently charged,
switch on the seat heating again. AIRSCARF
Activating/deactivating G
WARNING
When AIRSCARF is switched on, very hot air
can flow from the vents in the head restraints.
This could result in burns in the immediate
vicinity of the air vents. There is a risk of injury.
Reduce the heater output before it becomes
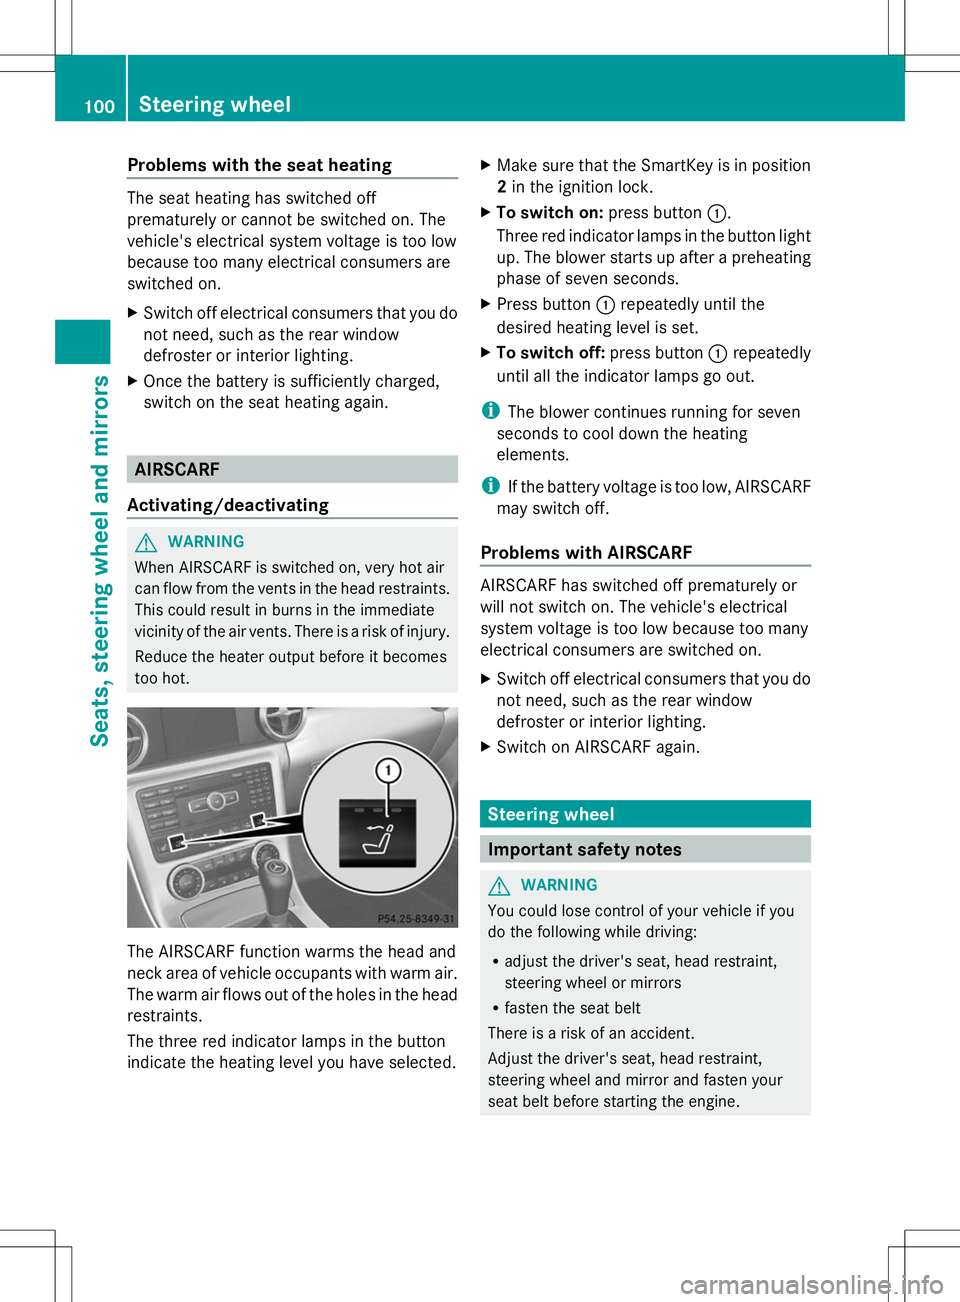
too hot. The AIRSCARF function warms the head and
neck area of vehicle occupants with warm air.
The warm air flows out of the holes in the head
restraints.
The three red indicator lamps in the button
indicate the heating level you have selected. X
Make sure that the SmartKey is in position
2in the ignition lock.
X To switch on: press button:.
Three red indicator lamps in the button light
up. The blower starts up after a preheating
phase of seven seconds.
X Press button :repeatedly until the
desired heating level is set.
X To switch off: press button:repeatedly
until all the indicator lamps go out.
i The blower continues running for seven
seconds to cool down the heating
elements.
i If the battery voltage is too low, AIRSCARF
may switch off.
Problems with AIRSCARF AIRSCARF has switched off prematurely or
will not switch on. The vehicle's electrical
system voltage is too low because too many
electrical consumers are switched on.
X Switch off electrical consumers that you do
not need, such as the rear window
defroster or interior lighting.
X Switch on AIRSCARF again. Steering wheel
Important safety notes
G
WARNING
You could lose control of your vehicle if you
do the following while driving:
R adjust the driver's seat, head restraint,
steering wheel or mirrors
R fasten the seat belt
There is a risk of an accident.
Adjust the driver's seat, head restraint,
steering wheel and mirror and fasten your
seat belt before starting the engine. 100
Steering wheelSeats, steering wheel and mirrors
Page 111 of 356

Automatic headlamp mode
G
WARNING
When the light switch is set to Ã, the low-
beam headlamps may not be switched on
automatically if there is fog, snow or other
causes of poor visibility due to the weather
conditions such as spray. There is a risk of an
accident.
In such situations, turn the light switch to
L.
The automatic headlamp feature is only an
aid. The driver is responsible for the vehicle's
lighting at all times.
à is the favored light switch setting. The
light setting is automatically selected
according to the brightness of the ambient
light (exception: poor visibility due to weather
conditions such as fog, snow or spray):
R SmartKey in position 1in the ignition lock:
the parking lamps are switched on or off
automatically depending on the brightness
of the ambient light.
R With the engine running: if you have
activated the daytime running lamps
function via the on-board computer, the
daytime running lamps or the low-beam
headlamps and parking lamps are switched
on or off automatically depending on the
brightness of the ambient light.
X To switch on automatic headlamp
mode: turn the light switch to Ã.
Only for Canada:
The daytime running lamps improve the
visibility of your vehicle during the day. The
daytime running lamps function is required by
law in Canada. It cannot therefore be
deactivated.
When the engine is running and the vehicle is
stationary: if you move the selector lever from
a drive position to P, the daytime running
lamps/low-beam headlamps go out after
three minutes.
When the engine is running, the vehicle is
stationary and in bright ambient light: if you turn the light switch to
T, the daytime
running lamps and parking lamps switch on.
If the engine is running and you turn the light
switch to L, the manual settings take
precedence over the daytime running lamps.
USA only:
The daytime running lamps improve the
visibility of your vehicle during the day. To do
this, the daytime running lamps function must
be switched on using the on-board computer
(Y page 203).
If the engine is running and you turn the light
switch to TorL, the manual settings
take precedence over the daytime running
lamps.
Low-beam headlamps G
WARNING
When the light switch is set to Ã, the low-
beam headlamps may not be switched on
automatically if there is fog, snow or other
causes of poor visibility due to the weather
conditions such as spray. There is a risk of an
accident.
In such situations, turn the light switch to
L.
Even if the light sensor does not detect that
it is dark, the parking lamps and low-beam
headlamps switch on when the ignition is
switched on and the light switch is set to the
L position. This is a particularly useful
function in the event of rain and fog.
X To switch on the low-beam headlamps:
turn the SmartKey in the ignition lock to
position 2or start the engine.
X Turn the light switch to L.
The green Lindicator lamp in the
instrument cluster lights up.
Front fog lamps
In conditions where visibility is poor due to
fog, snow or rain, the fog lamps improve
visibility as well as making it easier for other
road users to see you. They can be operated
together with the parking lamps or together Exterior lighting
109Lights and windshield wipers Z