2014 MERCEDES-BENZ SL-CLASS ROADSTER fuel consumption
[x] Cancel search: fuel consumptionPage 11 of 284

Driving on flooded roads
................131
Driving on wet roads ......................131
Exhaust check ............................... 131
Fuel ................................................ 131
General .......................................... 131
Hydroplaning ................................. 131
Icy road surfaces ........................... 131
Limited braking efficiency on
salted road s................................... 131
Symmetrical low bea m.................. 106
Wet road surface ........................... 131
DVD audio
Operating (on-board
computer) ...................................... 161
see also Digital Operator's Manual 188
DVD video
Operating (on-board
computer) ...................................... 161
see also Digital Operator's Manual 188 E
EASY-ENTRY feature Activating/deactivating .................161
Function/notes ............................. 102
EASY-EXIT feature
Function/notes ............................. 102
Switching on/off ........................... 161
EBD (electronic brake force
distribution)
Display message ............................ 166
Function/notes ................................ 72
ECO display
Function/notes ............................. 131
ECO start/stop function
Automatic engine start ..................125
Automatic engine switch-off ..........125
Deactivating/activating .................125
General information .......................125
Important safety notes ..................125
Introduction ................................... 125
Electronic Stability Program
see ESP ®
(Electronic Stability Program)
Emergency release
Driver's door .................................... 84
Trunk ............................................... 89
Vehicle ............................................. 84Emergency Tensioning Devices
Function .......................................... .62
Safety guideline s............................. 45
Emissions control
Service and warranty information ....27
Engine
Check Engine warning lamp ........... 175
Display message ............................ 172
ECO start/stop function ................125
Engine number ............................... 274
Irregular running ............................ 126
Jump-starting ................................. 235
Starting problems ..........................126
Starting the engine with the
SmartKey ....................................... 123
Starting with KEYLESS-GO .............123
Switching off .................................. 131
Tow-starting (vehicle) ..................... 240
Engine electronics
Problem (malfunction) ...................126
Engine oil
Adding ........................................... 218
Additives ........................................ 276
Checking the oil level ..................... 217
Checking the oil level using the
dipstick .......................................... 217
Display message ............................ 163
Filling capacity ............................... 276
Notes about oil grades ................... 276
Notes on oil level/consumption ....217
Temperature (on-board
computer) ...................................... 161
Viscosity ........................................ 276
Entering a city
see also Digital Operator's Manual 188
Entering an address
see also Digital Operator's Manual 188
ESP ®
(Electronic Stability
Program) AMG menu (on-board
computer) ...................................... 161
Deactivating/activating (AMG
vehicles) .......................................... 71
Deactivating/activating (notes;
except AMG vehicles) ......................70
Display message ............................ 164
ETS .................................................. 69
Function/notes ................................ 69 Index
9
Page 12 of 284

General notes
.................................. 69
Important safety information ...........69
Warning lamp ................................. 179
ETS (Electronic Traction System) ....... 69
Exhaust check ................................... 131
Exhaust tail pipe (cleaning
instructions) ...................................... 222
Exterior lighting Setting options .............................. 106
see Lights
Exterior mirrors
Adjusting ....................................... 102
Dipping (automatic) .......................102
Folding in when locking (on-board
computer) ...................................... 161
Storing settings (memory function) 103
Storing the parking position ..........102
Eyeglasses compartment .................204 F
Filler cap see Fuel filler flap
Filling capacities (Technical data) ...275
First-aid kit ......................................... 226
Flat tire MOExtended tires ..........................227
Preparing the vehicle .....................227
TIREFIT kit ...................................... 228
Floormats ........................................... 214
Front fog lamps Display message ............................ 163
Fuel
Consumption statistics ..................161
Displaying the current
consumption .................................. 161
Displaying the range ......................161
Driving tips .................................... 131
Fuel gauge ....................................... 35
Grade (gasoline) ............................ 276
Important safety notes ..................275
Premium-grade unleaded gasoline .276
Problem (malfunction) ...................130
Refueling ........................................ 127
Tank content/reserve fuel .............275
Fuel filler flap
Opening/closing ............................ 128Fuel level
Calling up the range (on-board
computer) ...................................... 161
Fuel tank
Capacity ........................................ 275
Problem (malfunction) ...................130
Fuse allocation chart (vehicle tool
kit) ...................................................... 226
Fuses Allocation chart ............................. 240
Before changing ............................. 240
Dashboard fuse box .......................241
Fuse box in the engine
compartment ................................. 241
Fuse box in the rear compartment .242
Important safety notes ..................240 G
Garage door opener Clearing the memory .....................214
Important safety notes ..................211
Opening/closing the garage door ..214
Programming (button in the rear-
view mirror) ................................... 212
Gasoline ............................................. 276
Gear indicator (on-board
computer) .......................................... 161
Gear or selector lever (cleaning
guidelines) ......................................... 223
Genuine parts ...................................... 26
Glass roof (sunblind) ...........................97
Glove box ........................................... 204
Google™ Local Search see also Digital Operator's Manual 188 H
HANDS-FREE ACCESS .......................... 86
Hazard warning lamps ......................106
Head bags Display message ............................ 168
Operation ........................................ .50
Headlamps
Cleaning system (notes) ................278
Fogging up ..................................... 106
see Automatic headlamp mode
Head level heating (AIRSCARF) ........101 10
Index
Page 28 of 284

Protection of the environment
General notes
H
Environmental note
Daimler's declared policy is one of
comprehensive environmental protection.
The objectives are for the natural resources
that form the basis of our existence on this
planet to be used sparingly and in a manner
that takes the requirements of both nature
and humanity into account.
You too can help to protect the environment
by operating your vehicle in an
environmentally responsible manner.
Fuel consumption and the rate of engine,
transmission, brake and tire wear are affected
by these factors:
R operating conditions of your vehicle
R your personal driving style
You can influence both factors. You should
bear the following in mind:
Operating conditions:
R avoid short trips as these increase fuel
consumption.
R always make sure that the tire pressures
are correct.
R do not carry any unnecessary weight.
R remove roof racks once you no longer need
them.
R a regularly serviced vehicle will contribute
to environmental protection. You should
therefore adhere to the service intervals.
R always have service work carried out at a
qualified specialist workshop.
Personal driving style:
R do not depress the accelerator pedal when
starting the engine.
R do not warm up the engine when the vehicle
is stationary.
R drive carefully and maintain a safe distance
from the vehicle in front.
R avoid frequent, sudden acceleration and
braking. R
change gear in good time and use each gear
only up to Ôof its maximum engine speed.
R switch off the engine in stationary traffic.
R keep an eye on the vehicle's fuel
consumption. Environmental concerns and
recommendations
Wherever the operating instructions require
you to dispose of materials, first try to
regenerate or re-use them. Observe the
relevant environmental rules and regulations
when disposing of materials. In this way you
will help to protect the environment. Genuine Mercedes-Benz parts
H
Environmental note
Daimler AG also supplies reconditioned major
assemblies and parts which are of the same
quality as new parts. They are covered by the
same Limited Warranty entitlements as new
parts.
! Air bags and Emergency Tensioning
Devices, as well as control units and
sensors for these restraint systems, may be
installed in the following areas of your
vehicle:
R doors
R door pillars
R door sills
R seats
R cockpit
R instrument cluster
R center console
Do not install accessories such as audio
systems in these areas. Do not carry out
repairs or welding. You could impair the
operating efficiency of the restraint
systems. 26
Introduction
Page 127 of 284

ECO start/stop function
Introduction The ECO start/stop function switches the
engine off automatically if the vehicle is
stopped under certain conditions.
The engine starts automatically when the
driver wants to pull away again. The ECO
start/stop function thereby helps you to
reduce the fuel consumption and emissions
of your vehicle.
Important safety notes G
WARNING
If the engine is switched off automatically and
you exit the vehicle, the engine is restarted
automatically. The vehicle may begin moving.
There is a risk of accident and injury.
If you wish to exit the vehicle, always turn off
the ignition and secure the vehicle against
rolling away.
General notes :
ECO start/stop display
If the ¤ symbol is shown in green in the
multifunction display, the ECO start/stop
function switches the engine off
automatically if the vehicle stops moving.
Every time you switch on the engine using the
SmartKey or the Start/Stop button, the ECO
start/stop function is activated.
If the ECO start/stop function has been
manually deactivated (Y page 125) or a
malfunction has caused the system to be
deactivated, the ¤symbol is not
displayed. AMG vehicles:
the ECO start/stop function
is only available in drive program C.
i AMG vehicles: if automatic cylinder shut-
off is active in drive program C, the number
of active cylinders 4is also shown in the
¤ symbol. This means that the engine
is operating with four cylinders.
If cylinder shut-off is not active, the engine
will operate with all eight cylinders. In this
case, the number of active cylinders 8is
shown in the ¤symbol.
Information in the Digital Operator's
Manual In the Digital Operator's Manual you will find
information on the following topics:
R
Automatic engine switch-off
R Automatic engine start
R Deactivating/activating the ECO start/
stop function Driving
125Driving and parking Z
Page 144 of 284

Active Body Control (except AMG
vehicles)
Vehicle level General notes
In order to reduce fuel consumption and
improve the driving dynamics, the vehicle is
lowered as its speed increases. With the
SPORT suspension tuning, it is lowered by up
to 0.5 in (13 mm), with COMFORT by up to
0.2 in (5 mm). As the speed is reduced, the
vehicle is raised up to the set vehicle height.
Select the "Normal" setting for normal road
surfaces and "Raised" for driving with snow
chains or on particularly poor road surfaces.
Your selection remains stored even if you
remove the SmartKey from the ignition lock.
Important safety notes G
WARNING
The vehicle is slightly lowered if you:
R have selected the SPORT suspension
tuning at normal level and
R switch off the engine
Persons in the vicinity of the wheel arch or the
underbody may thus become trapped. There
is a risk of injury.
Make sure that nobody is in the vicinity of the
wheel arch or the underbody when you switch
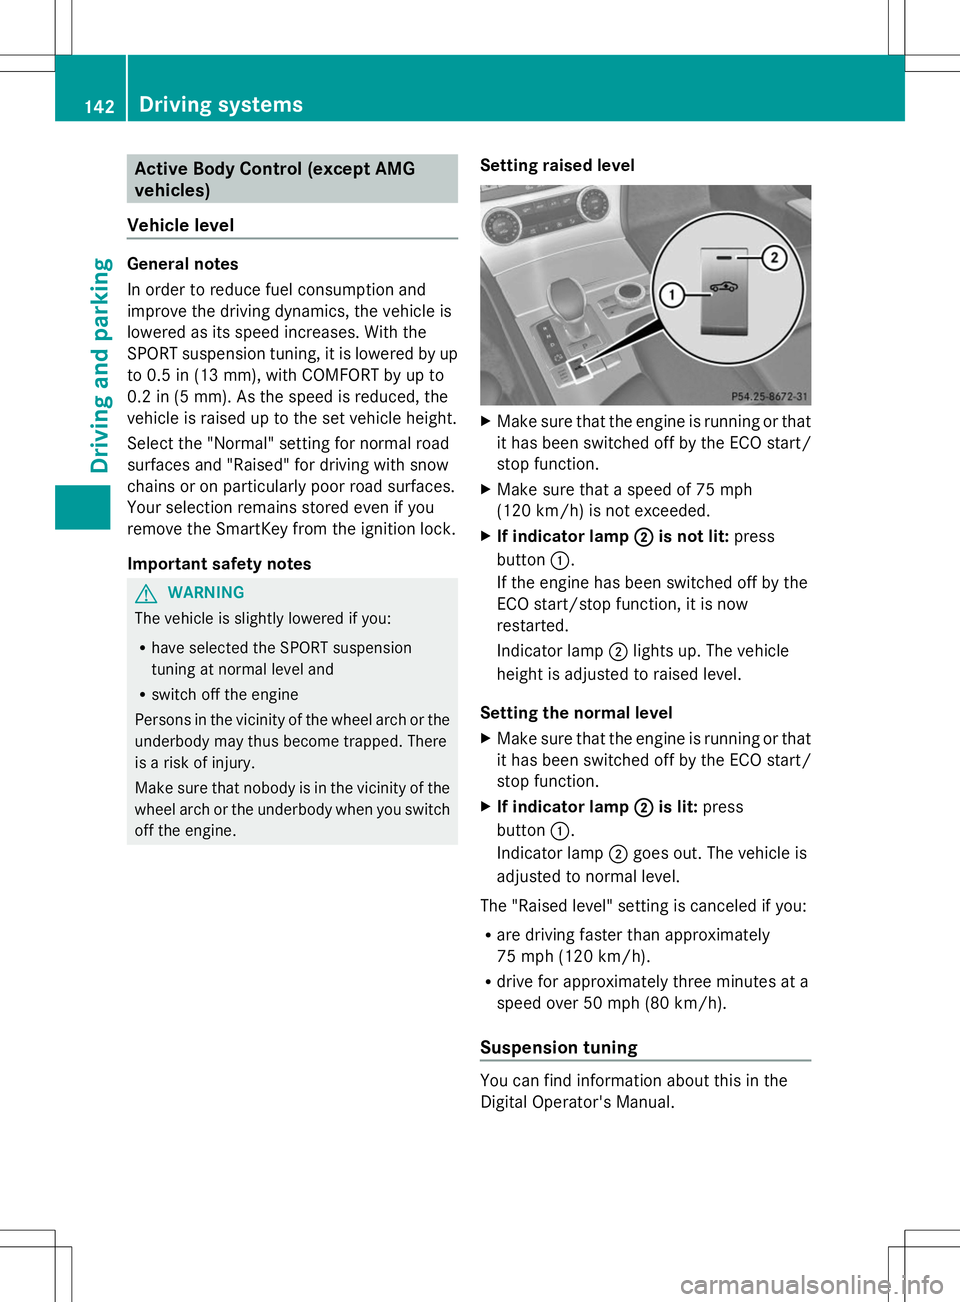
off the engine. Setting raised level X
Make sure that the engine is running or that
it has been switched off by the ECO start/
stop function.
X Make sure that a speed of 75 mph
(120 km/h) is not exceeded.
X If indicator lamp ; ;is not lit: press
button :.
If the engine has been switched off by the
ECO start/stop function, it is now
restarted.
Indicator lamp ;lights up. The vehicle
height is adjusted to raised level.
Setting the normal level
X Make sure that the engine is running or that
it has been switched off by the ECO start/
stop function.
X If indicator lamp ; ;is lit: press
button :.
Indicator lamp ;goes out. The vehicle is
adjusted to normal level.
The "Raised level" setting is canceled if you:
R are driving faster than approximately
75 mph (120 km/h).
R drive for approximately three minutes at a
speed over 50 mph (80 km/h).
Suspension tuning You can find information about this in the
Digital Operator's Manual.142
Driving systemsDriving and pa
rking
Page 145 of 284

Driving conditions menu in the
COMAND display You can find information about this in the
Digital Operator's Manual. Active Body Control (AMG vehicles)
Vehicle level General notes
In order to reduce fuel consumption and
improve the driving dynamics, the vehicle is
lowered as its speed increases. With the
SPORT suspension tuning, it is lowered by up
to 0.5 in (13 mm), with COMFORT by up to
0.2 in (5 mm). As the speed is reduced, the
vehicle is raised up to the set vehicle height.
Select the "Normal" setting for normal road
surfaces and "Raised" for driving with snow
chains or on particularly poor road surfaces.
Important safety notes
The vehicle is slightly lowered when the
engine is switched off. G
WARNING
When the vehicle is being lowered, people
could become trapped if their limbs are
between the vehicle body and the wheels or
underneath the vehicle. There is a risk of
injury.
Make sure no one is underneath the vehicle
or in the immediate vicinity of the wheel
arches when the vehicle is being lowered. Setting raised level X
Make sure that the engine is running or that
it has been switched off by the ECO start/
stop function.
X Make sure that a speed of 75 mph
(120 km/h) is not exceeded.
X If icon ; ;is not shown: press=
or ; on the steering wheel to select the
DriveAssist
DriveAssist menu.
X Press the 9or: button to select
Vehicle Level
Vehicle Level .
X Press the abutton.
The following message appears: Vehicle
Vehicle
Level Press 'OK' to Raise
Level Press 'OK' to Raise .
X Press the abutton.
If the engine has been switched off by the
ECO start/stop function, it is now
restarted.
Icon ;appears. The vehicle height is
adjusted to raised level.
Setting the normal level Driving syste
ms
143Driving an d parking Z
Page 251 of 284

Underinflated tires may:
R
overheat, leading to tire defects
R have an adverse effect on handling
characteristics
R wear quickly and unevenly
R have an adverse effect on fuel consumption
Overinflation G
WARNING
Tires with excessively high pressure can burst
because they are damaged more easily by
road debris, potholes etc. In addition, they
also suffer from irregular wear, which can
severely impair the braking properties and the
driving characteristics. There is a risk of an
accident.
Avoid tire pressures that are too high in all the
tires, including the spare wheel.
Overinflated tires may:
R increase the braking distance
R have an adverse effect on handling
characteristics
R wear quickly and unevenly
R have an adverse effect on ride comfort
R be more susceptible to damage
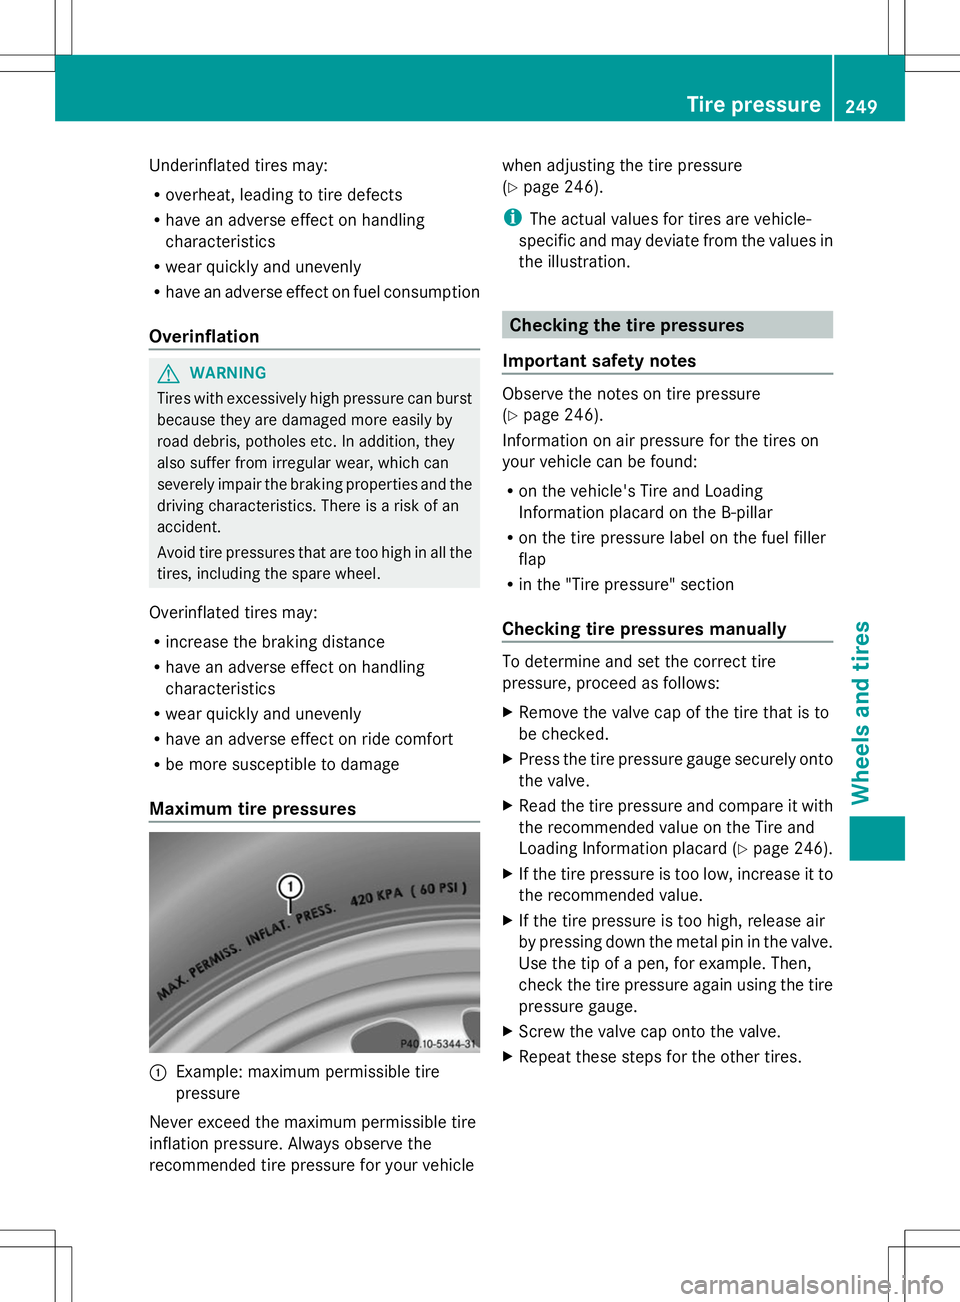
Maximum tire pressures :
Example: maximum permissible tire
pressure
Never exceed the maximum permissible tire
inflation pressure. Always observe the
recommended tire pressure for your vehicle when adjusting the tire pressure
(Y
page 246).
i The actual values for tires are vehicle-
specific and may deviate from the values in
the illustration. Checking the tire pressures
Important safety notes Observe the notes on tire pressure
(Y
page 246).
Information on air pressure for the tires on
your vehicle can be found:
R on the vehicle's Tire and Loading
Information placard on the B-pillar
R on the tire pressure label on the fuel filler
flap
R in the "Tire pressure" section
Checking tire pressures manually To determine and set the correct tire
pressure, proceed as follows:
X
Remove the valve cap of the tire that is to
be checked.
X Press the tire pressure gauge securely onto
the valve.
X Read the tire pressure and compare it with
the recommended value on the Tire and
Loading Information placard (Y page 246).
X If the tire pressure is too low, increase it to
the recommended value.
X If the tire pressure is too high, release air
by pressing down the metal pin in the valve.
Use the tip of a pen, for example. Then,
check the tire pressure again using the tire
pressure gauge.
X Screw the valve cap onto the valve.
X Repeat these steps for the other tires. Tire pressure
249Wheels and tires Z
Page 270 of 284

X
Turn the crank of the jack counter-
clockwise until the vehicle is once again
standing firmly on the ground.
X Place the jack to one side.
X Tighten the wheel bolts evenly in a
crosswise pattern in the sequence
indicated (: toA). The specified
tightening torque is 96 lb-ft (130 Nm).
X Turn the jack back to its initial position.
X Stow the jack and the rest of the vehicle
tools in the trunk again.
X AMG vehicles and vehicles with AMG
equipment: insert the cover into the outer
sill.
X Check the tire pressure of the newly
installed wheel and adjust it if necessary.
Observe the recommended tire pressure
(Y page 246).
i Vehicles with tire pressure loss warning
system: as long as you are driving with an
emergency spare wheel, the tire pressure
loss warning system cannot function
reliably. Only restart the tire pressure loss
warning system when the defective wheel
has been replaced with a new wheel.
i Vehicles with tire pressure monitor: all
wheels mounted must be equipped with
functioning sensors. Wheel and tire combinations
General notes
! For safety reasons, Mercedes-Benz
recommends that you only use tires and
wheels which have been approved by
Mercedes-Benz specifically for your
vehicle. These tires have been specially adapted for
use with the control systems, such as ABS
or ESP
®
, and are marked as follows:
R MO = Mercedes-Benz Original
R MOE = Mercedes-Benz Original Extended
(tires featuring run-flat characteristics)
R MO1 = Mercedes-Benz Original (only
certain AMG tires)
Mercedes-Benz Original Extended tires
may only be used on wheels that have been
specifically approved by Mercedes-Benz.
Only use tires, wheels or accessories
tested and approved by Mercedes-Benz.
Certain characteristics, e.g. handling,
vehicle noise emissions or fuel
consumption, may otherwise be adversely
affected. In addition, when driving with a
load, tire dimension variations could cause
the tires to come into contact with the
bodywork and axle components. This could
result in damage to the tires or the vehicle.
Mercedes-Benz accepts no liability for
damage resulting from the use of tires,
wheels or accessories other than those
tested and approved.
Information on tires, wheels and approved
combinations can be obtained from any
qualified specialist workshop.
! Retreaded tires are neither tested nor
recommended by Mercedes-Benz, since
previous damage cannot always be
detected on retreaded tires. As a result,
Mercedes-Benz cannot guarantee vehicle
safety if retreaded tires are mounted. Do
not mount used tires if you have no
information about their previous usage.
Overview of abbreviations used in the
following tire tables:
R BA: both axles
R FA: front axle
R RA: rear axle 268
Wheel and tire combinationsWheels and tires