2014 MERCEDES-BENZ SL-CLASS ROADSTER light
[x] Cancel search: lightPage 253 of 284
must first be taught-in to the tire pressure
monitor. If there is a substantial loss of
pressure, the warning threshold for the
warning message is aligned to the reference
values taught-in. Restart the tire pressure
monitor after adjusting the pressure of the
cold tires (Y page 252). The current
pressures are saved as new reference values.
As a result, a warning message will appear if
the tire pressure drops significantly.
The tire pressure monitor does not warn you
of an incorrectly set tire pressure. Observe
the notes on the recommended tire pressure
(Y page 246).
The tire pressure monitor is not able to warn
you of a sudden loss of pressure, e.g. if the
tire is penetrated by a foreign object. In the
event of a sudden loss of pressure, bring the
vehicle to a halt by braking carefully. Avoid
abrupt steering maneuvers.
The tire pressure monitor has a yellow
warning lamp in the instrument cluster for
indicating a pressure loss or malfunction.
Whether the warning lamp flashes or lights up
indicates whether a tire pressure is too low or
the tire pressure monitor is malfunctioning:
R if the warning lamp is lit continuously, the
tire pressure on one or more tires is
significantly too low. The tire pressure
monitor is not malfunctioning.
R if the warning lamp flashes for around a
minute and then remains lit constantly, the
tire pressure monitor is malfunctioning.
i In addition to the warning lamp, a
message appears in the multifunction
display.
Further information can be found on
(Y page 174).
If the tire pressure monitor is malfunctioning,
it may take more than ten minutes for the tire
pressure warning lamp to inform you of the
malfunction by flashing for approximately one
minute and then remaining lit. When the
malfunction has been rectified, the tire
pressure warning lamp goes out after a few
minutes of driving. The tire pressure values indicated by the on-
board computer may differ from those
measured at a gas station with a pressure
gauge. The tire pressures shown by the on-
board computer refer to those measured at
sea level. At high altitudes, the tire pressure
values indicated by a pressure gauge are
higher than those shown by the on-board
computer. In this case, do not reduce the tire
pressures.
The operation of the tire pressure monitor can
be affected by interference from radio
transmitting equipment (e.g. radio
headphones, two-way radios) that may be
being operated in or near the vehicle.
Checking the tire pressure
electronically X
Make sure that the SmartKey is in position
2in the ignition lock (Y page 121).
X Press the =or; button on the
steering wheel to select the Service
Service
menu.
X Press the 9or: button to select
Tire Pressure Tire Pressure .
X Press the abutton.
The current tire pressure of each tire is
shown in the multifunction display.
If the vehicle has been parked for over
20 minutes, the Tire pressure will be Tire pressure will be
displayed after driving a few
displayed after driving a few
minutes minutes message appears.
After a teach-in process, the tire pressure
monitor automatically detects new wheels or
new sensors. As long as a clear allocation of
the tire pressure value to the individual
wheels is not possible, the Tire Pressure Tire Pressure
Monitor Active
Monitor Active display message is shown
instead of the tire pressure display. The tire
pressures are already being monitored. Tire pressure
251Wheels and tires Z
Page 259 of 284

Tire labeling
Overview :
Uniform Tire Quality Grading Standard
(Y page 261)
; DOT, Tire Identification Number
(Y page 260)
= Maximum tire load (Y page 260)
? Maximum tire pressure (Y page 249)
A Manufacturer
B Tire material (Y page 260)
C Tire size designation, load-bearing
capacity and speed index (Y page 257)
D Load index (Y page 259)
E Tire name
The markings described above are on the tire
in addition to the tire name (sales
designation) and the manufacturer's name.
i Tire data is vehicle-specific and may
deviate from the data in the example.
Tire size designation, load-bearing
capacity and speed rating G
WARNING
Exceeding the stated tire load-bearing
capacity and the approved maximum speed
could lead to tire damage or the tire bursting.
There is a risk of accident. Therefore, only use tire types and sizes
approved for your vehicle model. Observe the
tire load rating and speed rating required for
your vehicle.
:
Tire width
; Nominal aspect ratio in %
= Tire code
? Rim diameter
A Load bearing index
B Speed rating
General: depending on the manufacturer's
standards, the size imprinted in the tire wall
may not contain any letters or may contain
one letter that precedes the size description.
If there is no letter preceding the size
description (as shown above): these are
passenger vehicle tires according to
European manufacturing standards.
If "P" precedes the size description: these are
passenger vehicle tires according to U.S.
manufacturing standards.
If "LT" precedes the size description: these
are light truck tires according to U.S.
manufacturing standards.
If "T" precedes the size description: these are
compact emergency spare wheels at high tire
pressure, to be used only temporarily in an
emergency.
Tire width: tire width:shows the nominal
tire width in millimeters.
Height-width ratio: aspect ratio;is the
size ratio between the tire height and tire
width and is shown in percent. The aspect All about
wheels and tires
257Wheels and tires Z
Page 261 of 284

275/40 ZR 18 (99 Y). Speed rating "(Y)"
indicates that the maximum speed of the
tire is over 186 mph (300 km/h). Ask the
tire manufacturer about the maximum
speed. All-
weather
tires
and
winter
tires
Index Speed rating
Q M+S
1 up to 100 mph (160 km/h)
T M+S
1 up to 118 mph (190 km/h)
H M+S
1 up to 130 mph (210 km/h)
V M+S
1 up to 149 mph (240 km/h)
i
Not all tires with the M+S marking provide
the driving characteristics of winter tires.
In addition to the M+S marking, winter tires
also have the isnowflake symbol on
the tire wall. Tires with this marking fulfill
the requirements of the Rubber
Manufacturers Association (RMA) and the
Rubber Association of Canada (RAC)
regarding the tire traction on snow. They
have been especially developed for driving
on snow.
An electronic speed limiter prevents your
vehicle from exceeding the following speeds:
R 130 mph (210 km/h):
-All vehicles (except AMG vehicles)
R 155 mph (250 km/h):
-SL 63 AMG
- SL 65 AMG
R 186 mph (300 km/h):
-SL 63 AMG (Performance Package)
- SL 65 AMG with increased maximum
speed The speed rating of tires mounted at the
factory may be higher than the maximum
speed that the electronic speed limiter
permits.
Make sure that your tires have the required
speed rating, e.g. when buying new tires. The
required speed rating for your vehicle can be
found in the "tires" section (Y
page 268).
Further information about reading tire data
can be obtained from any qualified specialist
workshop.
Load index In addition to the load bearing index, load
rating
:may be imprinted after the letters
that identify speed rating on the sidewall of
the tire (Y page 257).
R If no specification is given: no text (as in the
example above), represents a standard
load (SL) tire
R XL or Extra Load: represents a reinforced
tire
R Light Load: represents a light load tire
R C, D, E: represents a load range that
depends on the maximum load that the tire
can carry at a certain pressure
i Tire data is vehicle-specific and may
deviate from the data in the example.
1 Or M+Si for winter tires. All about wheels and tires
259Wheels and tires Z
Page 264 of 284

Maximum loaded vehicle weight
The maximum weight is the sum of:
R
the curb weight of the vehicle
R the weight of the accessories
R the load limit
R the weight of the factory installed optional
equipment
Kilopascal (kPa)
Metric unit for tire pressure. 6.9 kPa
corresponds to 1 psi. Another unit for tire
pressure is bar. There are 100 kilopascals
(kPa) to 1 bar.
Load index
In addition to the load-bearing index, the load
index may also be imprinted on the sidewall
of the tire. This specifies the load-bearing
capacity more precisely.
Curb weight
The weight of a vehicle with standard
equipment including the maximum capacity
of fuel, oil and coolant. It also includes the air-
conditioning system and optional equipment
if these are installed in the vehicle, but does
not include passengers or luggage.
Maximum load rating
The maximum tire load is the maximum
permissible weight in kilograms or lbs for
which a tire is approved.
Maximum permissible tire pressure
Maximum permissible tire pressure for one
tire.
Maximum load on one tire
Maximum load on one tire. This is calculated
by dividing the maximum axle load of one axle
by two.
PSI (pounds per square inch)
A standard unit of measure for tire pressure. Aspect ratio
Relationship between tire height and tire
width in percent.
Tire pressure
This is pressure inside the tire applying an
outward force to each square inch of the tire's
surface. The tire pressure is specified in
pounds per square inch (psi), in kilopascal
(kPa) or in bar. The tire pressure should only
be corrected when the tires are cold.
Cold tire pressure
The tires are cold:
R if the vehicle has been parked without
direct sunlight on the tires for at least three
hours and
R if the vehicle has been driven for less than
1 mile (1.6 km).
Tread
The part of the tire that comes into contact
with the road.
Bead
The tire bead ensures that the tire sits
securely on the wheel. There are several steel
wires in the bead to prevent the tire from
coming loose from the wheel rim.
Sidewall
The part of the tire between the tread and the
bead.
Weight of optional extras
The combined weight of those optional extras
that weigh more than the replaced standard
parts and more than 2.3 kilograms (5 lbs).
These optional extras, such as high-
performance brakes, level control, a roof rack
or a high-performance battery, are not
included in the curb weight and the weight of
the accessories.
TIN (Tire Identification Number)
This is a unique identifier which can be used
by a tire manufacturer to identify tires, for
example for a product recall, and thus identify 262
All about wheels and tiresWheels and tires
Page 267 of 284
the wheel that is diagonally opposite the
wheel you wish to change.
Securing the vehicle on slight downhill gradients
X On light downhill gradients: place
chocks or other suitable items in front of
the wheels of the front and rear axle.
Raising the vehicle G
WARNING
If you do not position the jack correctly at the
appropriate jacking point of the vehicle, the
jack could tip over with the vehicle raised.
There is a risk of injury.
Only position the jack at the appropriate
jacking point of the vehicle. The base of the
jack must be positioned vertically, directly
under the jacking point of the vehicle.
! The jack is designed exclusively for
jacking up the vehicle at the jacking points.
Otherwise, your vehicle could be damaged.
The following must be observed when raising
the vehicle:
R to raise the vehicle, only use the vehicle-
specific jack that has been tested and
approved by Mercedes-Benz. If used
incorrectly, the jack could tip over with the
vehicle raised.
R the jack is designed only to raise and hold
the vehicle for a short time while a wheel
is being changed. It is not suited for
performing maintenance work under the
vehicle. R
avoid changing the wheel on uphill and
downhill slopes.
R before raising the vehicle, secure it from
rolling away by applying the parking brake
and inserting wheel chocks. Never
disengage the parking brake while the
vehicle is raised.
R the jack must be placed on a firm, flat and
non-slip surface. On a loose surface, a
large, load-bearing underlay must be used.
On a slippery surface, a non-slip underlay
must be used, e.g. rubber mats.
R do not use wooden blocks or similar
objects as a jack underlay. Otherwise, the
jack will not be able to achieve its load-
bearing capacity due to the restricted
height.
R make sure that the distance between the
underside of the tires and the ground does
not exceed 1.2 in (3 cm).
R never place your hands and feet under the
raised vehicle.
R never lie under the raised vehicle.
R never start the engine when the vehicle is
raised.
R never open or close a door or the trunk lid
when the vehicle is raised.
R make sure that no persons are present in
the vehicle when the vehicle is raised. X
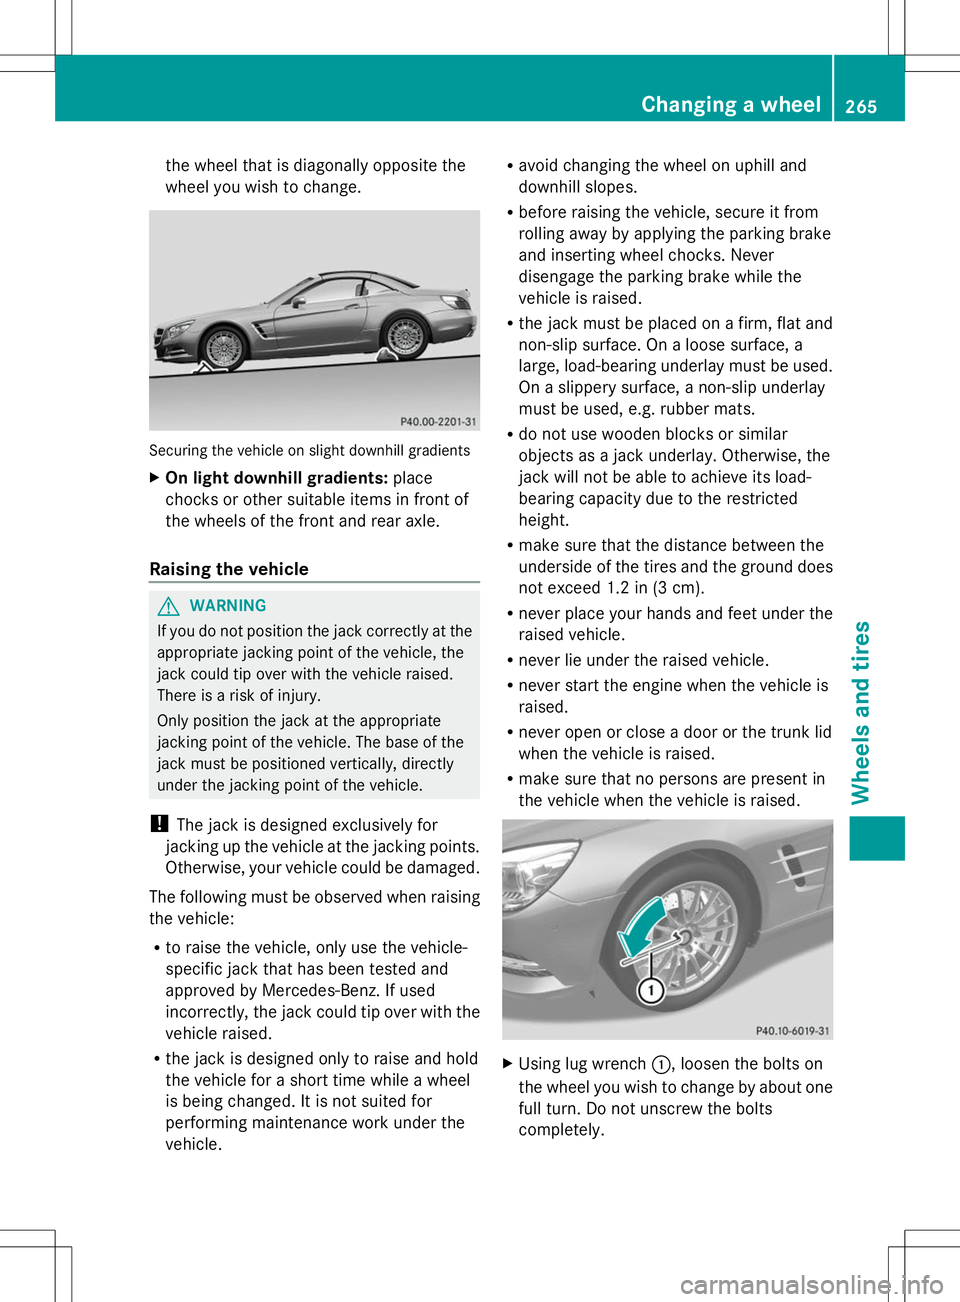
Using lug wrench :, loosen the bolts on
the wheel you wish to change by about one
full turn. Do not unscrew the bolts
completely. Changing a
wheel
265Wheels an d tires Z