2014 MERCEDES-BENZ S-CLASS COUPE seats
[x] Cancel search: seatsPage 121 of 413
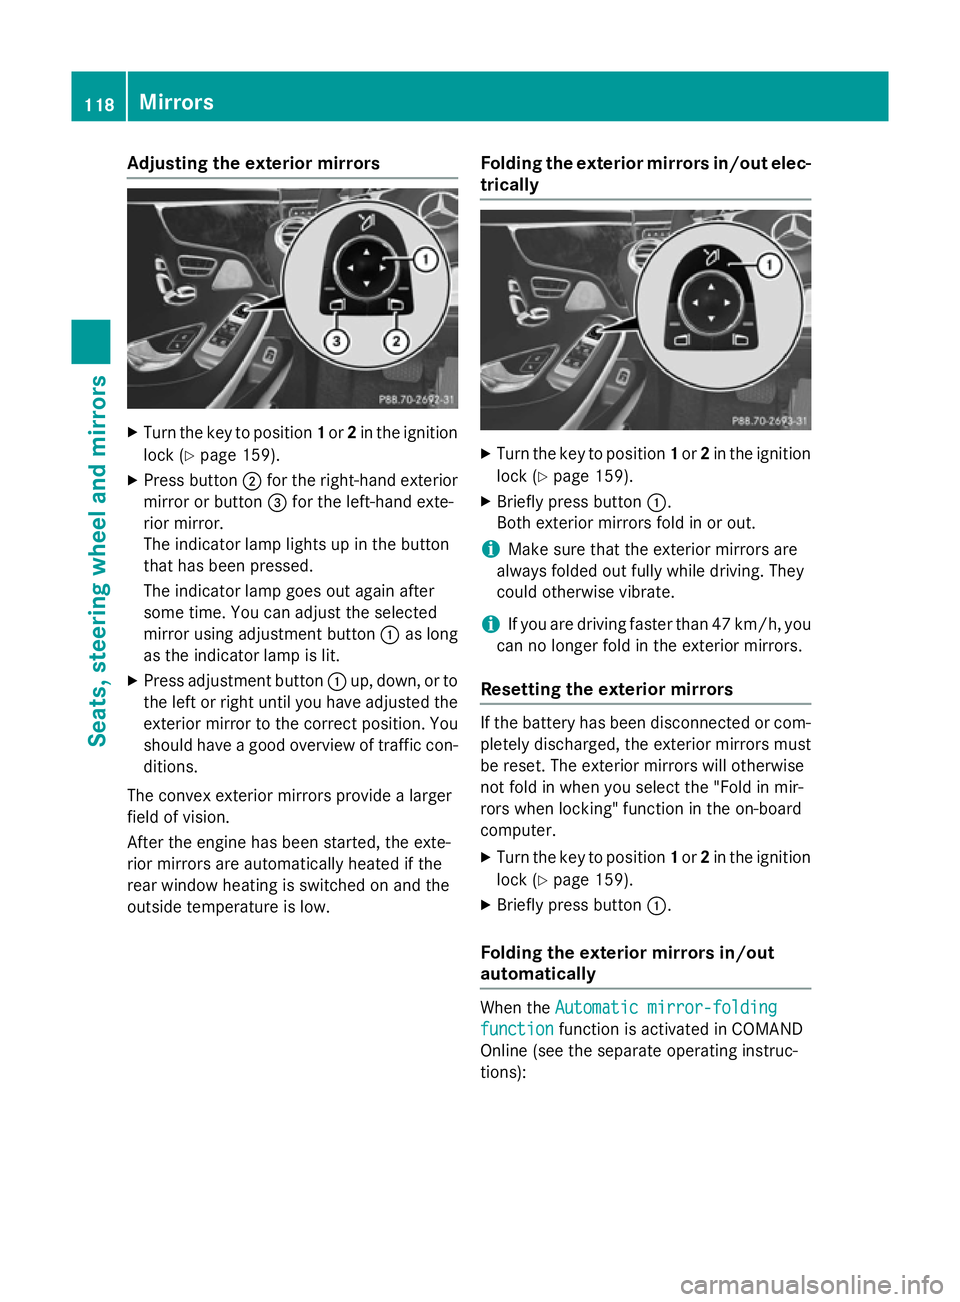
Adjusting the exterior mirrors
X
Turn the key to position 1or 2in the ignition
lock (Y page 159).
X Press button ;for the right-hand exterior
mirror or button =for the left-hand exte-
rior mirror.
The indicator lamp lights up in the button
that has been pressed.
The indicator lamp goes out again after
some time. You can adjust the selected
mirror using adjustment button :as long
as the indicator lamp is lit.
X Press adjustment button :up, down, or to
the left or right until you have adjusted the
exterior mirror to the correct position. You
should have a good overview of traffic con- ditions.
The convex exterior mirrors provide a larger
field of vision.
After the engine has been started, the exte-
rior mirrors are automatically heated if the
rear window heating is switched on and the
outside temperature is low. Folding the exterior mirrors in/out elec-
trically X
Turn the key to position 1or 2in the ignition
lock (Y page 159).
X Briefly press button :.
Both exterior mirrors fold in or out.
i Make sure that the exterior mirrors are
always folded out fully while driving. They
could otherwise vibrate.
i If you are driving faster than 47 km/h, you
can no longer fold in the exterior mirrors.
Resetting the exterior mirrors If the battery has been disconnected or com-
pletely discharged, the exterior mirrors must
be reset. The exterior mirrors will otherwise
not fold in when you select the "Fold in mir-
rors when locking" function in the on-board
computer.
X Turn the key to position 1or 2in the ignition
lock (Y page 159).
X Briefly press button :.
Folding the exterior mirrors in/out
automatically When the
Automatic mirror-folding Automatic mirror-folding
function
function function is activated in COMAND
Online (see the separate operating instruc-
tions): 118
MirrorsSeats
, steering wheel and mirrors
Page 122 of 413
R
the exterior mirrors fold in automatically as
soon as you lock the vehicle from the out-
side
R the exterior mirrors fold out automatically
again as soon as you unlock the vehicle
i If the exterior mirrors have been folded in
manually, they do not fold out.
Exterior mirror pushed out of position If an exterior mirror has been pushed out of
position (forwards or backwards), proceed as
follows:
X Press and hold button :until you hear a
click and the mirror engages audibly into
position (Y page 118).
The mirror housing is engaged again and
you can adjust the exterior mirrors as usual
(Y page 118). Automatic anti-dazzle mirrors
The rear-view mirror and the exterior mirror
on the driver's side automatically go into anti- dazzle mode if the following conditions are
met simultaneously:
R the ignition is switched on.
R incident light from headlamps strikes the
sensor in the rear-view mirror.
The mirrors do not dip if reverse gear is
engaged or if the interior lighting is switched
on. Parking position of the exterior mirror
on the front-passenger side
Setting and storing the parking position Using reverse gear
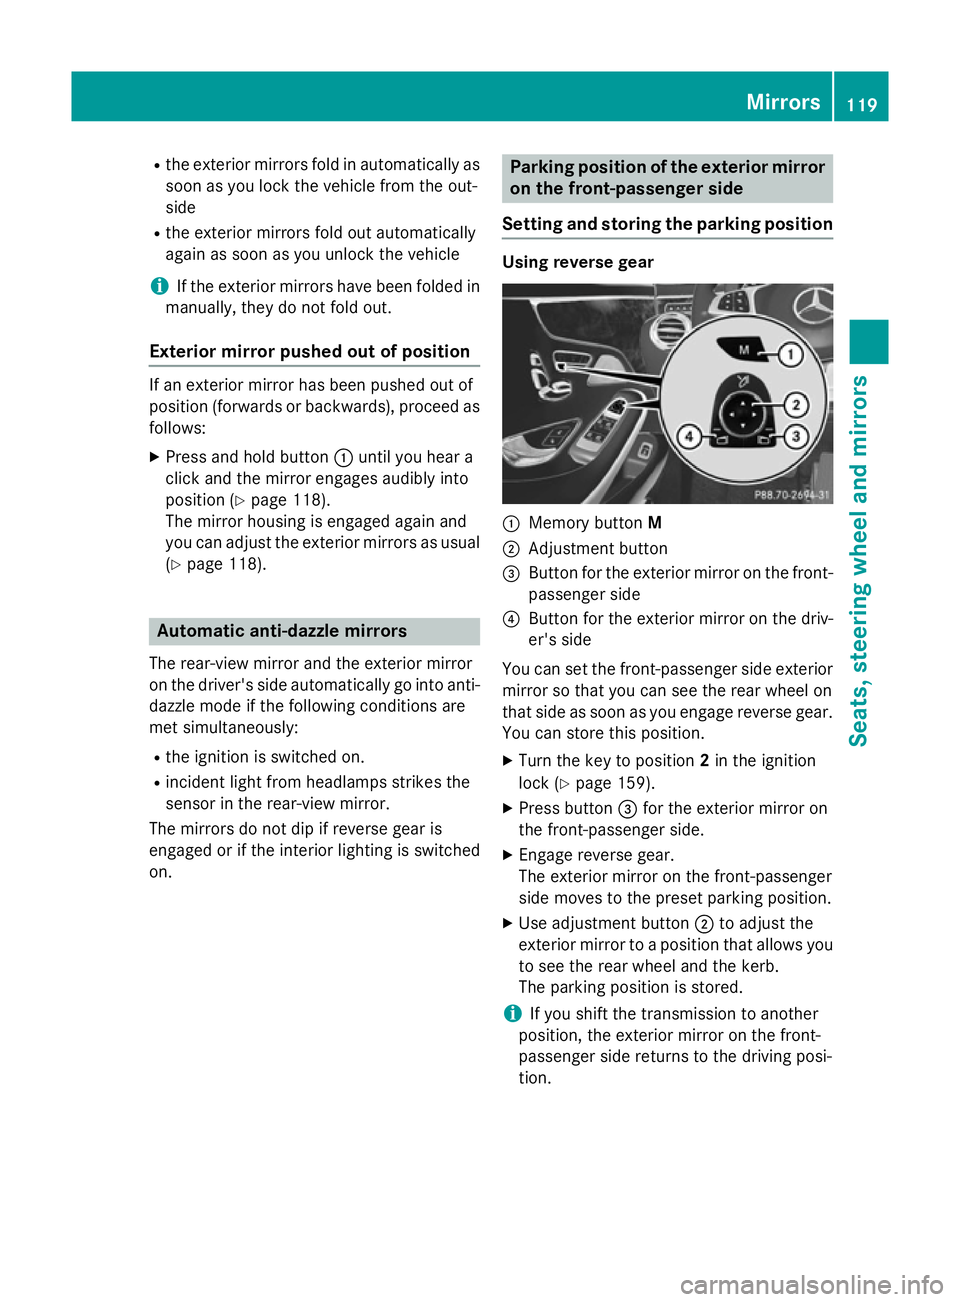
:
Memory button M
; Adjustment button
= Button for the exterior mirror on the front-
passenger side
? Button for the exterior mirror on the driv-
er's side
You can set the front-passenger side exterior
mirror so that you can see the rear wheel on
that side as soon as you engage reverse gear. You can store this position.
X Turn the key to position 2in the ignition
lock (Y page 159).
X Press button =for the exterior mirror on
the front-passenger side.
X Engage reverse gear.
The exterior mirror on the front-passenger
side moves to the preset parking position.
X Use adjustment button ;to adjust the
exterior mirror to a position that allows you
to see the rear wheel and the kerb.
The parking position is stored.
i If you shift the transmission to another
position, the exterior mirror on the front-
passenger side returns to the driving posi-
tion. Mirrors
119Seats, steering wheel and mirrors Z
Page 123 of 413
Using the memory button
You can set the front-passenger side exterior
mirror so that you can see the rear wheel on
that side as soon as you engage reverse gear.
This setting can be stored using memory but-
ton M:.
X Turn the key to position 2in the ignition
lock (Y page 159).
X Press button =for the exterior mirror on
the front-passenger side.
X Use adjustment button ;to adjust the
exterior mirror to a position that allows you to see the rear wheel and the kerb.
X Press memory button M: and one of the
arrows on adjustment button ;within
three seconds.
The parking position is stored if the exterior
mirror does not move.
X If the mirror moves out of position, repeat
the steps.
Calling up a stored parking position set- ting X
Turn the key to position 2in the ignition
lock (Y page 159).
X Adjust the exterior mirror on the front-
passenger side using button =.
X Engage reverse gear.
The exterior mirror on the front-passenger
side moves to the stored parking position.
The exterior mirror on the front-passenger
side moves back to its original position:
R as soon as you exceed a speed of
15 km/h
R about ten seconds after you have disen-
gaged reverse gear
R if you press button ?for the exterior mir-
ror on the driver's side Memory function
Important safety notes
G
WARNING
If you use the memory function on the driver's side while driving, the adjustments could
cause you to lose control of the vehicle. There
is a risk of an accident.
Only use the memory function on the driver's
side while the vehicle is stationary. G
WARNING
When the memory function adjusts the seat or steering wheel, you and other vehicle occu-
pants – particularly children – could become
trapped. There is a risk of injury.
While the memory function is making adjust-
ments, make sure that no one has any body
parts in the sweep of the seat or steering
wheel. If somebody becomes trapped, imme-
diately release the memory function position
button. The adjustment process is stopped. G
WARNING
If children activate the memory function, they
could become trapped, especially if they are
unattended. There is a risk of injury.
When leaving the vehicle, always take the key with you and lock the vehicle. Never leave
children unattended in the vehicle. Storing settings
With the memory function, you can store up
to three different settings, e.g. for three dif-
ferent people.
The following settings are stored as a single
memory preset:
R seat, backrest, head restraint position and
contour of the backrest in the lumbar
region
R active multicontour seat: side bolsters of
the backrest, shoulder of the backrest, con-
tour of the backrest, dynamic function level 120
Memory functionSeats, steering wheel and mirrors
Page 124 of 413
R
seat heating: distribution of the heated sec-
tions of the seat cushion and backrest
R driver's side: position of the exterior mir-
rors on the driver's and front-passenger
sides
R position of the head-up display X
Adjust the seat accordingly (Y page 108).
X On the driver's side, adjust the steering
wheel (Y page 114) and the exterior mirrors
(Y page 118).
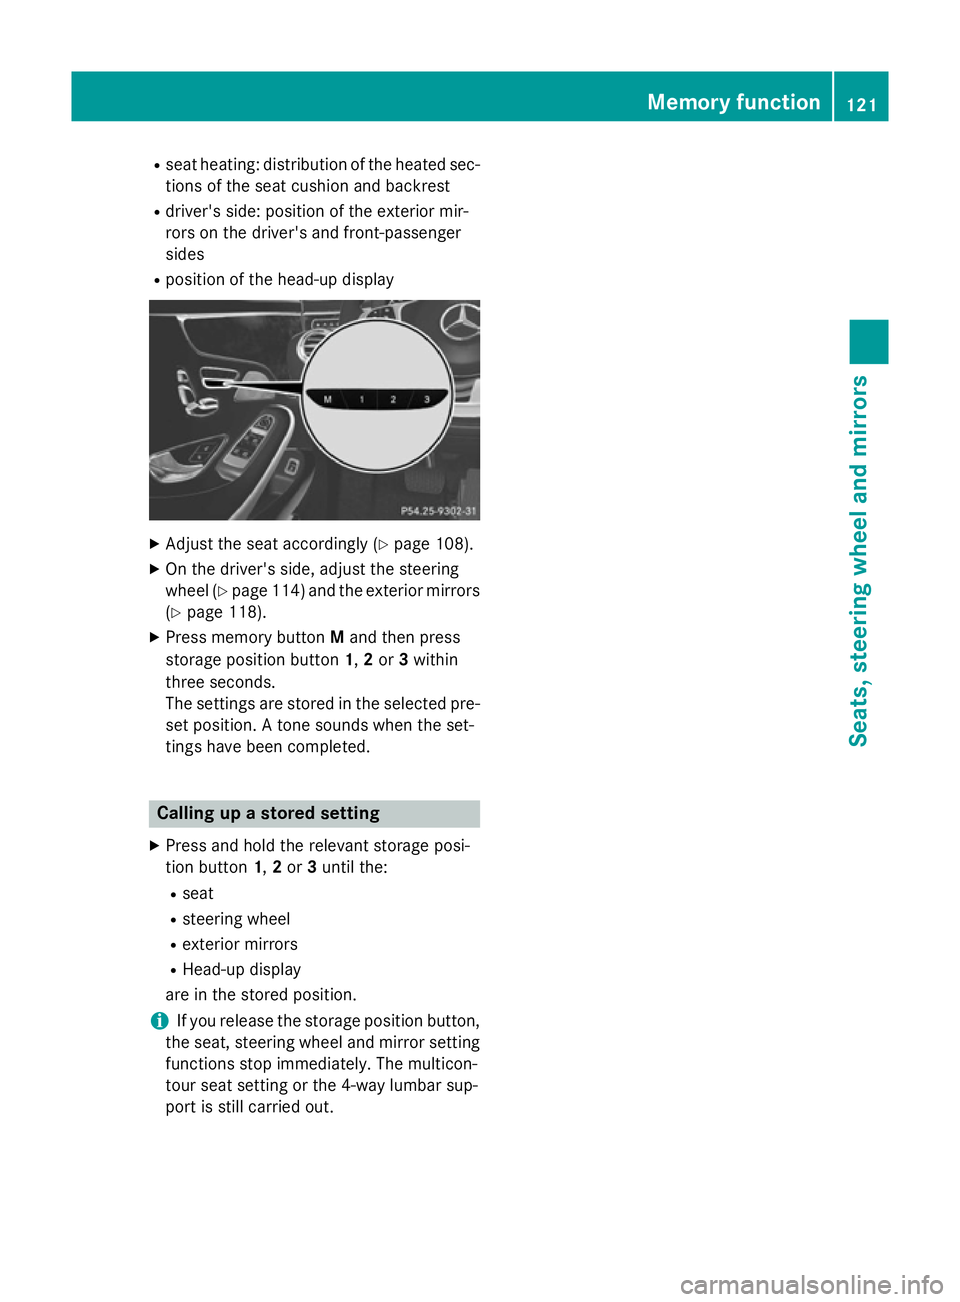
X Press memory button Mand then press
storage position button 1,2or 3within
three seconds.
The settings are stored in the selected pre- set position. A tone sounds when the set-
tings have been completed. Calling up a stored setting
X Press and hold the relevant storage posi-
tion button 1,2or 3until the:
R seat
R steering wheel
R exterior mirrors
R Head-up display
are in the stored position.
i If you release the storage position button,
the seat, steering wheel and mirror setting
functions stop immediately. The multicon-
tour seat setting or the 4-way lumbar sup-
port is still carried out. Memory function
121Seats, steering wheel and mirrors Z
Page 317 of 413
Useful information
i This Owner's Manual describes all mod-
els, series and optional equipment for your
vehicle that were available at the time of
going to press. National variations are pos- sible. Note that your vehicle may not be
equipped with all of the functions descri-
bed. This is also the case for systems and
functions relevant to safety.
i Read the information on qualified special-
ist workshops: (Y page 25). Stowage areas
Loading guidelines
G
WARNING
Combustion engines emit poisonous exhaust
gases such as carbon monoxide. Exhaust
gases can enter the vehicle interior if the boot
lid is open when the engine is running, espe-
cially if the vehicle is in motion. There is a risk of poisoning.
Always switch off the engine before opening
the boot lid. Never drive with the boot lid
open. G
WARNING
If objects, luggage or loads are not secured or not secured sufficiently, they could slip, tip
over or be flung around and thereby hit vehicle
occupants. There is a risk of injury, especially when braking or abruptly changing directions.
Always store objects so that they cannot be
flung around. Secure objects, luggage or
loads against slipping or tipping before the
journey. G
WARNING
The exhaust tail pipe and tail pipe trim can
become very hot. If you come into contact
with these parts of the vehicle, you could burn
yourself. There is a risk of injury. Always be particularly careful around the
exhaust tail pipe and the tail pipe trim. Allow
these components to cool down before touch-
ing them.
The handling characteristics of a laden vehi-
cle are dependent on the distribution of the
load within the vehicle. For this reason, you
should observe the following notes when
transporting a load:
R never exceed the maximum permissible
gross vehicle weight or the permissible axle
loads for the vehicle (including occupants).
R the boot is the preferred place to carry
objects.
R position heavy loads as far forwards as pos-
sible and as low down in the boot as pos-
sible.
R the load must not protrude above the upper
edge of the seat backrests.
R always place the load behind unoccupied
seats if possible.
R secure the load with sufficiently strong and
wear-resistant lashing material. Pad sharp
edges for protection.
i Load restraints are available at any quali-
fied specialist workshop, e.g. a Mercedes-
Benz Service Centre. Stowage spaces
Important safety notes G
WARNING
If you do not correctly store objects in the
vehicle interior, they can slip or be flung
around, thus striking vehicle occupants.
There is a risk of injury, especially when brak- ing or abruptly changing directions.
R Always store objects so that they cannot be
flung around in these or in similar situa-
tions.
R Always make sure that objects do not pro-
trude from stowage compartments, lug-
gage nets or stowage nets. 314
Stowage areasStowing and features
Page 337 of 413
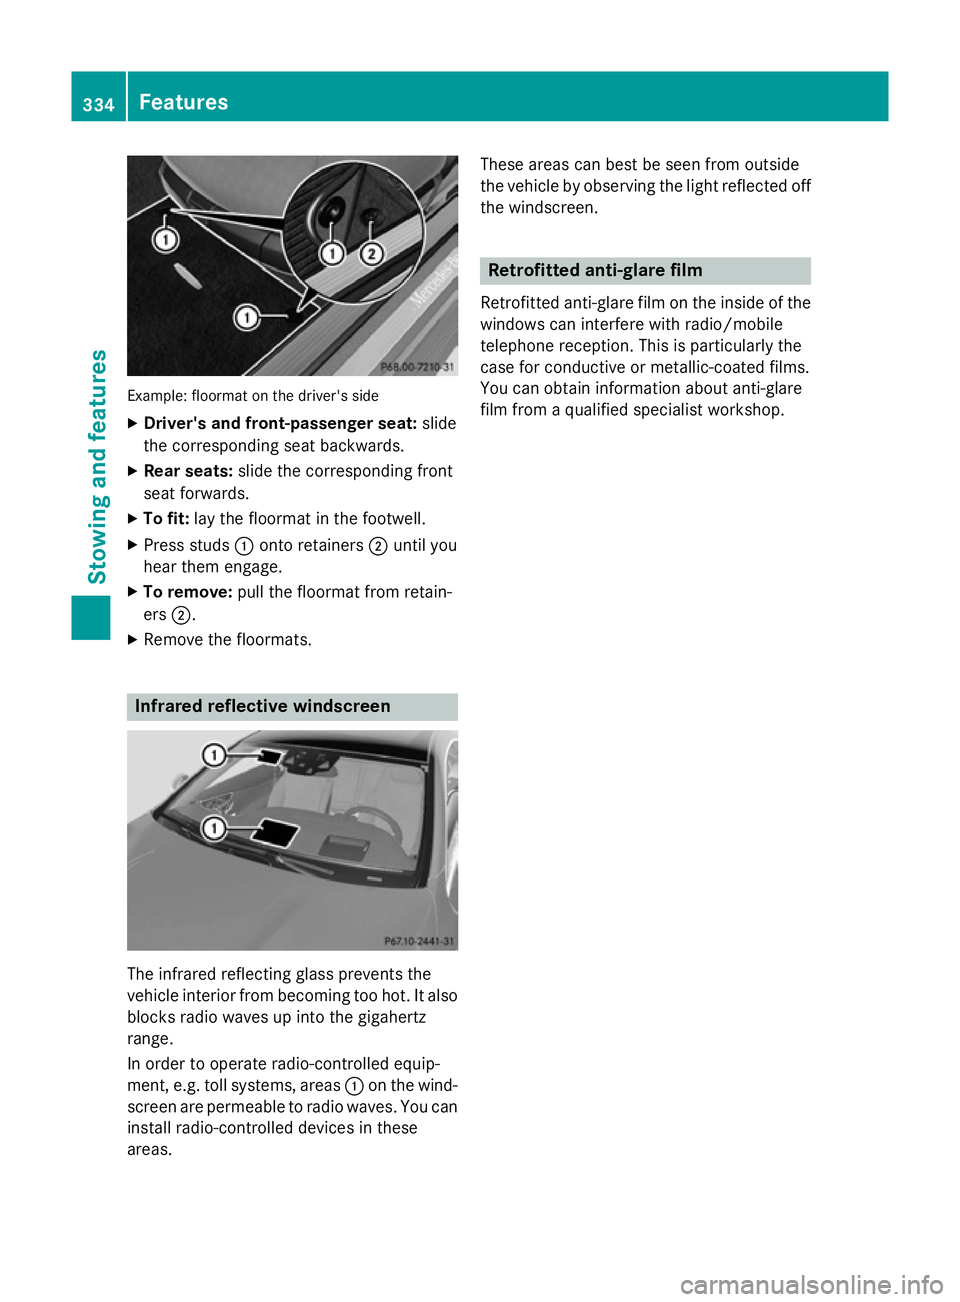
Example: floormat on the driver's side
X Driver's and front-passenger seat: slide
the corresponding seat backwards.
X Rear seats: slide the corresponding front
seat forwards.
X To fit: lay the floormat in the footwell.
X Press studs :onto retainers ;until you
hear them engage.
X To remove: pull the floormat from retain-
ers ;.
X Remove the floormats. Infrared reflective windscreen
The infrared reflecting glass prevents the
vehicle interior from becoming too hot. It also
blocks radio waves up into the gigahertz
range.
In order to operate radio-controlled equip-
ment, e.g. toll systems, areas :on the wind-
screen are permeable to radio waves. You can install radio-controlled devices in these
areas. These areas can best be seen from outside
the vehicle by observing the light reflected off
the windscreen. Retrofitted anti-glare film
Retrofitted anti-glare film on the inside of the windows can interfere with radio/mobile
telephone reception. This is particularly the
case for conductive or metallic-coated films.
You can obtain information about anti-glare
film from a qualified specialist workshop. 334
FeaturesSto
wing an d features
Page 383 of 413
Tyre pressure
Tyre pressure specifications
G
WARNING
Tyres with insufficient or excessive tyre pres- sure harbour the following hazards:
R the tyres may burst, especially as the load
and vehicle speed increase.
R the tyres may wear excessively or unevenly
which can severely impair tyre traction.
R the handling as well as steering and braking
characteristics may be severely affected.
There is a risk of an accident.
Observe the recommended tyre pressures
and check the tyre pressure of all the tyres
including the spare wheel:
R every day before starting a journey
R when the load changes
R prior to long journey
R for changed operating conditions, e.g. off-
road driving
If necessary, correct the tyre pressure. G
WARNING
If you fit unsuitable accessories onto tyre
valves, the tyre valves may be overloaded and malfunction, which can cause tyre pressure
loss. Due to their design, retrofitted tyre pres-
sure monitors keep the tyre valve open. This
can also result in tyre pressure loss. There is a risk of accident.
Only screw standard valve caps or valve caps
specifically provided by Mercedes-Benz for
your vehicle onto the tyre valve. G
WARNING
If the tyre pressure drops repeatedly, the
wheel, valve or tyre may be damaged. Tyre
pressure that is too low may result in a tyre
blow-out. There is a risk of accident.
R Check the tyre for foreign objects.
R Check whether the wheel is losing air or the
valve is leaking. If you are unable to rectify the damage, con-
tact a qualified specialist workshop.
H
Environmental note
Check the tyre pressure regularly, at least
every 14 days.
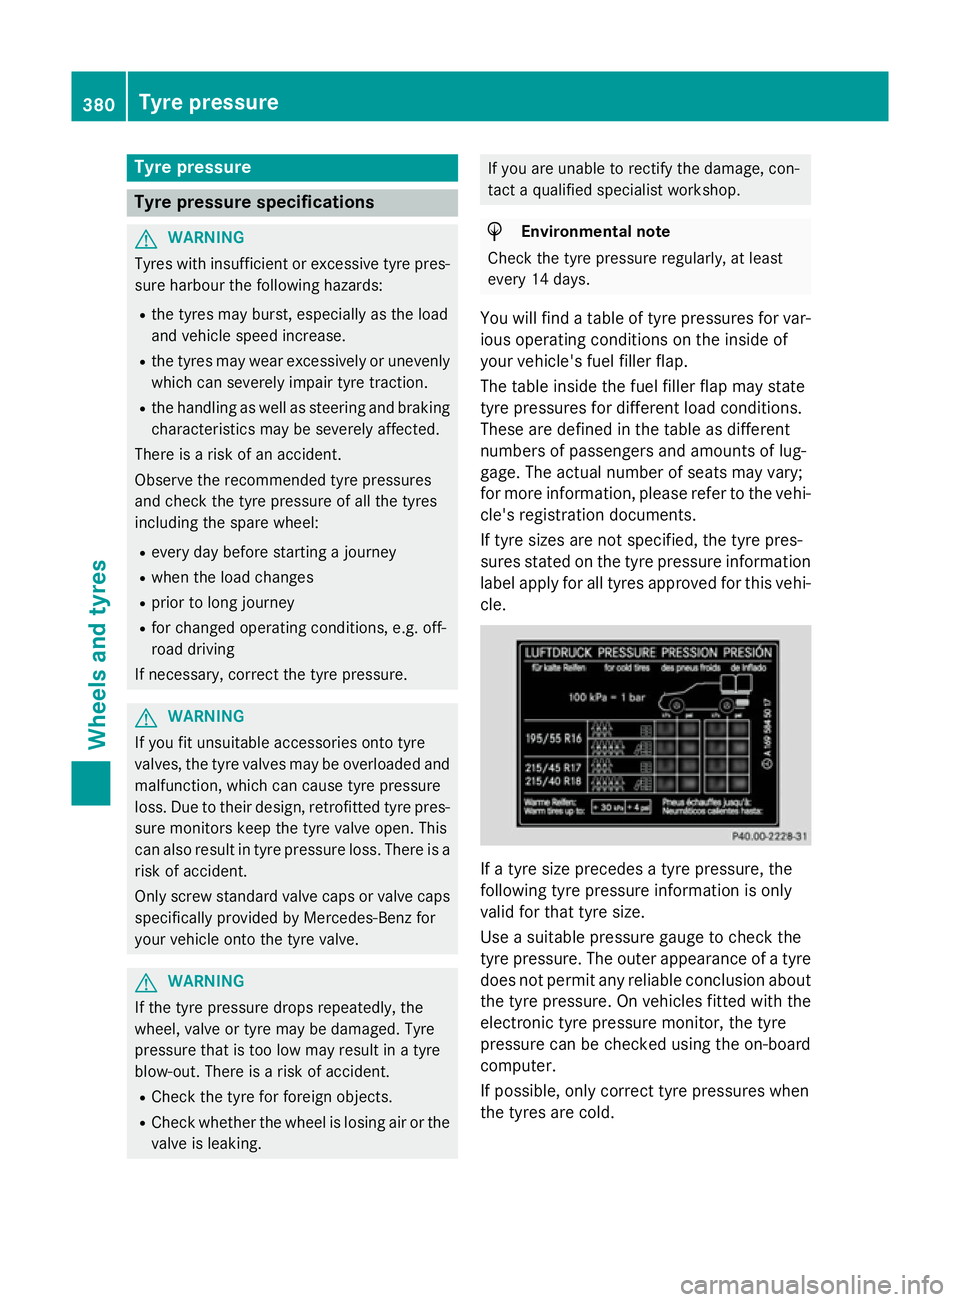
You will find a table of tyre pressures for var- ious operating conditions on the inside of
your vehicle's fuel filler flap.
The table inside the fuel filler flap may state
tyre pressures for different load conditions.
These are defined in the table as different
numbers of passengers and amounts of lug-
gage. The actual number of seats may vary;
for more information, please refer to the vehi-
cle's registration documents.
If tyre sizes are not specified, the tyre pres-
sures stated on the tyre pressure information
label apply for all tyres approved for this vehi- cle. If a tyre size precedes a tyre pressure, the
following tyre pressure information is only
valid for that tyre size.
Use a suitable pressure gauge to check the
tyre pressure. The outer appearance of a tyre
does not permit any reliable conclusion aboutthe tyre pressure. On vehicles fitted with the
electronic tyre pressure monitor, the tyre
pressure can be checked using the on-board
computer.
If possible, only correct tyre pressures when
the tyres are cold. 380
Tyre pressureWheels and tyres