Page 350 of 462

X
Attach hook =to the cargo
compartment's upper seal ?.
X To close: detach hook =from the cargo
compartment's upper seal ?.
X Fasten hook =to the bracket on the
underside of the cargo compartment floor.
X Fold the trunk floor down.
X Press the cargo compartment floor
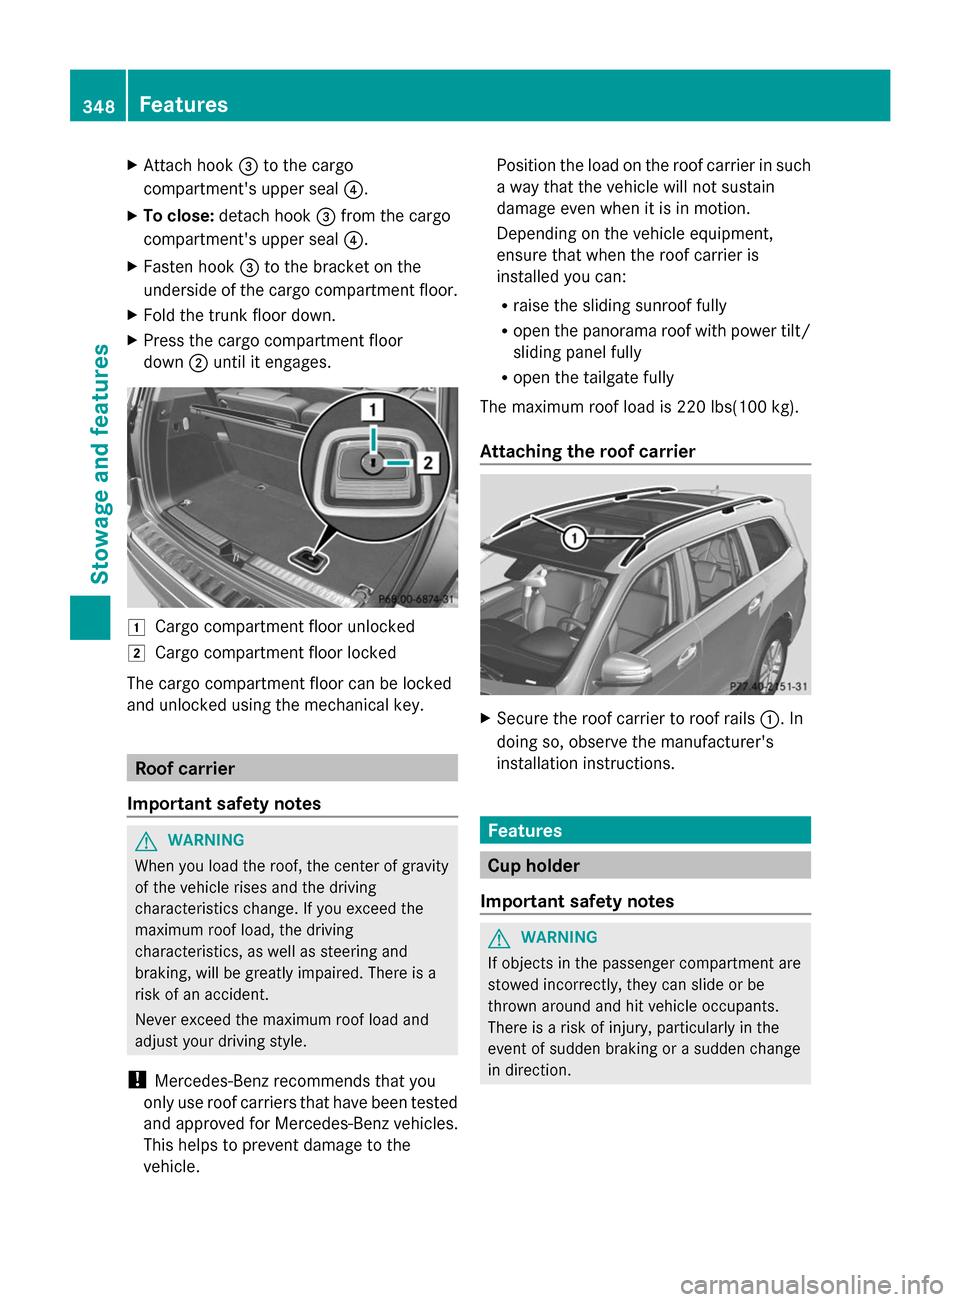
down ;until it engages. 1
Cargo compartment floor unlocked
2 Cargo compartment floor locked
The cargo compartment floor can be locked
and unlocked using the mechanical key. Roof carrier
Important safety notes G
WARNING
When you load the roof, the center of gravity
of the vehicle rises and the driving
characteristics change. If you exceed the
maximum roof load, the driving
characteristics, as well as steering and
braking, will be greatly impaired. There is a
risk of an accident.
Never exceed the maximum roof load and
adjust your driving style.
! Mercedes-Benz recommends that you
only use roof carriers that have been tested
and approved for Mercedes-Benz vehicles.
This helps to prevent damage to the
vehicle. Position the load on the roof carrier in such
a way that the vehicle will not sustain
damage even when it is in motion.
Depending on the vehicle equipment,
ensure that when the roof carrier is
installed you can:
R raise the sliding sunroof fully
R open the panorama roof with power tilt/
sliding panel fully
R open the tailgate fully
The maximum roof load is 220 lbs(100 kg).
Attaching the roof carrier X
Secure the roof carrier to roof rails :. In
doing so, observe the manufacturer's
installation instructions. Features
Cup holder
Important safety notes G
WARNING
If objects in the passenger compartment are
stowed incorrectly, they can slide or be
thrown around and hit vehicle occupants.
There is a risk of injury, particularly in the
event of sudden braking or a sudden change
in direction. 348
FeaturesSto
wage an d features
Page 432 of 462

R
before raising the vehicle, secure it from
rolling away by applying the parking brake
and inserting wheel chocks. Do not
disengage the parking brake while the
vehicle is raised.
R the jack must be placed on a firm, flat and
non-slip surface. On a loose surface, a
large, flat, load-bearing underlay must be
used. On a slippery surface, a non-slip
underlay must be used, e.g. rubber mats.
R do not use wooden blocks or similar
objects as a jack underlay. Otherwise, the
jack will not be able to achieve its load-
bearing capacity due to the restricted
height.
R make sure that the distance between the
underside of the tires and the ground does
not exceed 1.2 in (3 cm).
R never place your hands and feet under the
raised vehicle.
R do not lie under the vehicle.
R do not start the engine when the vehicle is
raised.
R never open or close a door or the tailgate
when the vehicle is raised.
R make sure that no persons are present in
the vehicle when the vehicle is raised. X
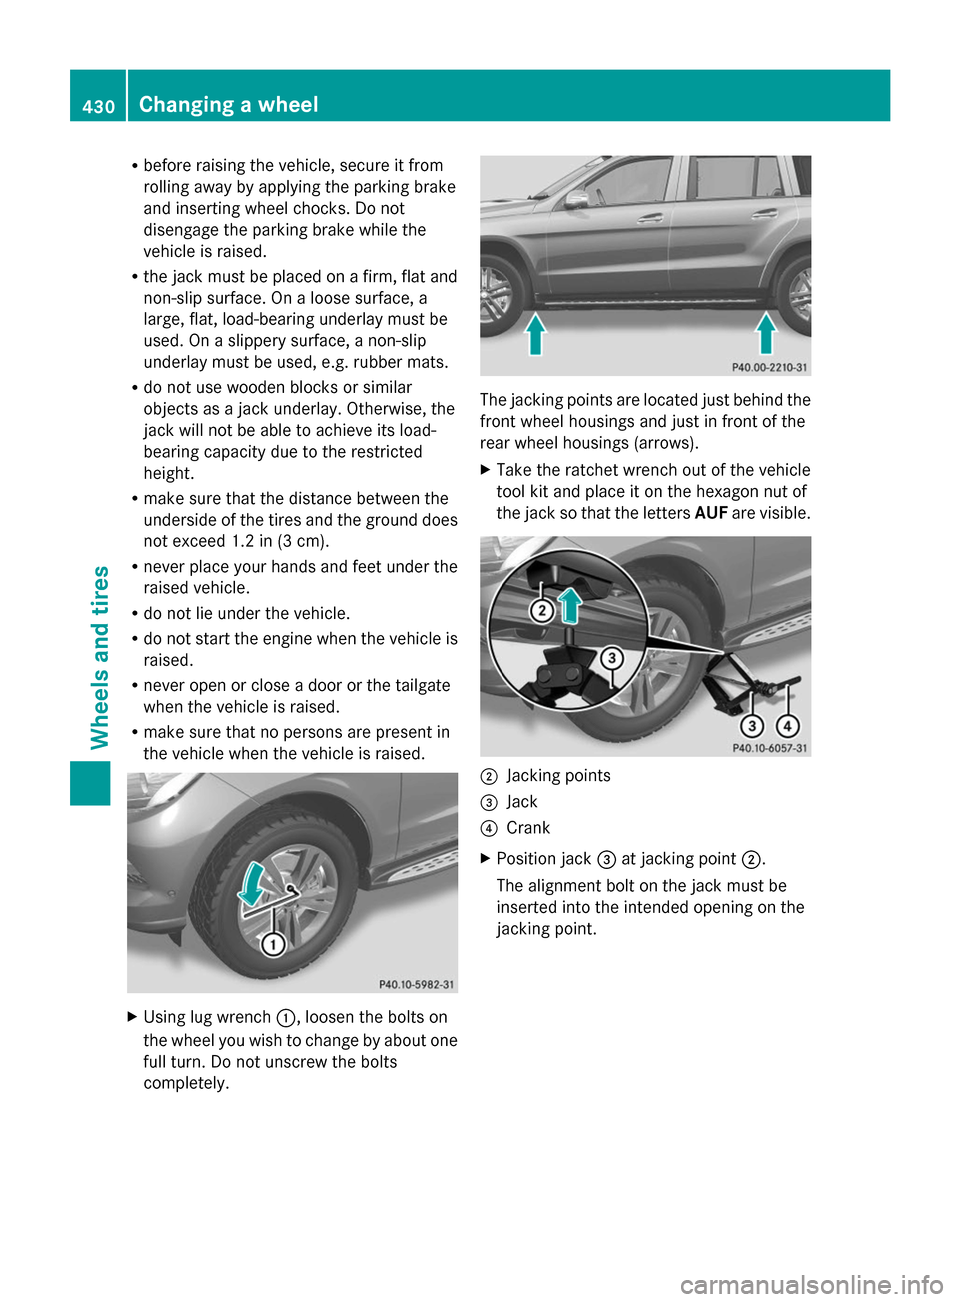
Using lug wrench :, loosen the bolts on
the wheel you wish to change by about one
full turn. Do not unscrew the bolts
completely. The jacking points are located just behind the
front wheel housings and just in front of the
rear wheel housings (arrows).
X
Take the ratchet wrench out of the vehicle
tool kit and place it on the hexagon nut of
the jack so that the letters AUFare visible. ;
Jacking points
= Jack
? Crank
X Position jack =at jacking point ;.
The alignment bolt on the jack must be
inserted into the intended opening on the
jacking point. 430
Changing a wheelWheels and tires
Page 442 of 462

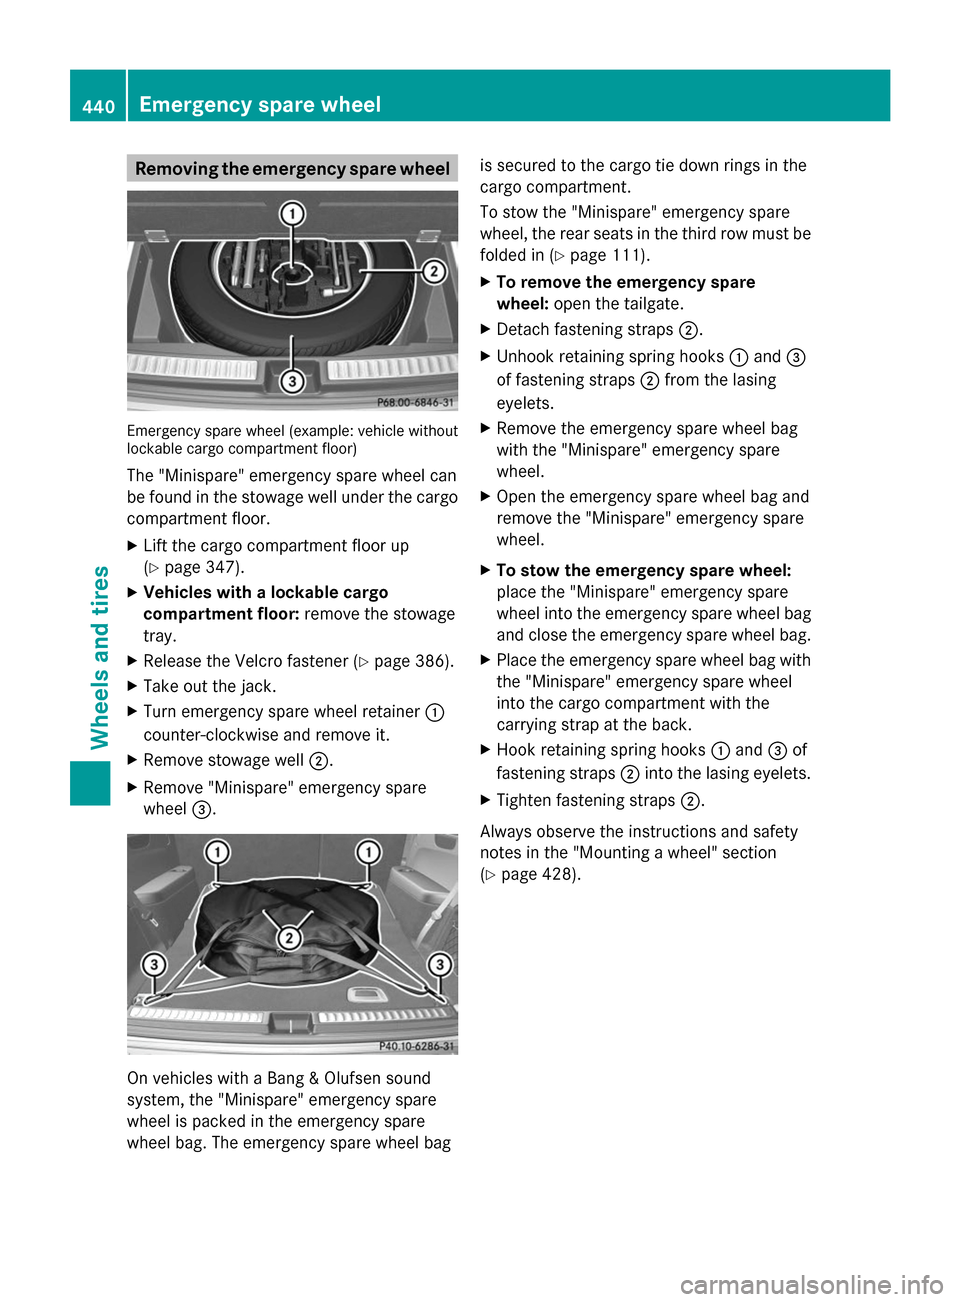
Removing the emergency spare wheel
Emergency spare wheel (example: vehicle without
lockable cargo compartment floor)
The "Minispare" emergency spare wheel can
be found in the stowage well under the cargo
compartment floor.
X Lift the cargo compartment floor up
(Y page 347).
X Vehicles with a lockable cargo
compartment floor: remove the stowage
tray.
X Release the Velcro fastener (Y page 386).
X Take out the jack.
X Turn emergency spare wheel retainer :
counter-clockwise and remove it.
X Remove stowage well ;.
X Remove "Minispare" emergency spare
wheel =. On vehicles with a Bang & Olufsen sound
system, the "Minispare" emergency spare
wheel is packed in the emergency spare
wheel bag. The emergency spare wheel bag is secured to the cargo tie down rings in the
cargo compartment.
To stow the "Minispare" emergency spare
wheel, the rear seats in the third row must be
folded in (Y page 111).
X To remove the emergency spare
wheel: open the tailgate.
X Detach fastening straps ;.
X Unhook retaining spring hooks :and =
of fastening straps ;from the lasing
eyelets.
X Remove the emergency spare wheel bag
with the "Minispare" emergency spare
wheel.
X Open the emergency spare wheel bag and
remove the "Minispare" emergency spare
wheel.
X To stow the emergency spare wheel:
place the "Minispare" emergency spare
wheel into the emergency spare wheel bag
and close the emergency spare wheel bag.
X Place the emergency spare wheel bag with
the "Minispare" emergency spare wheel
into the cargo compartment with the
carrying strap at the back.
X Hook retaining spring hooks :and =of
fastening straps ;into the lasing eyelets.
X Tighten fastening straps ;.
Always observe the instructions and safety
notes in the "Mounting a wheel" section
(Y page 428). 440
Emergency spare wheelWheels and tires