2014 MERCEDES-BENZ GL-Class fold seats
[x] Cancel search: fold seatsPage 116 of 462
X
Pull release handle ;again in the direction
of the arrow to the pressure point and hold
it in this position.
or
X Pull on release loop :in the direction of
the arrow and hold in this position.
X Lift up the seat until it folds forwards.
i Vehicles with memory function:
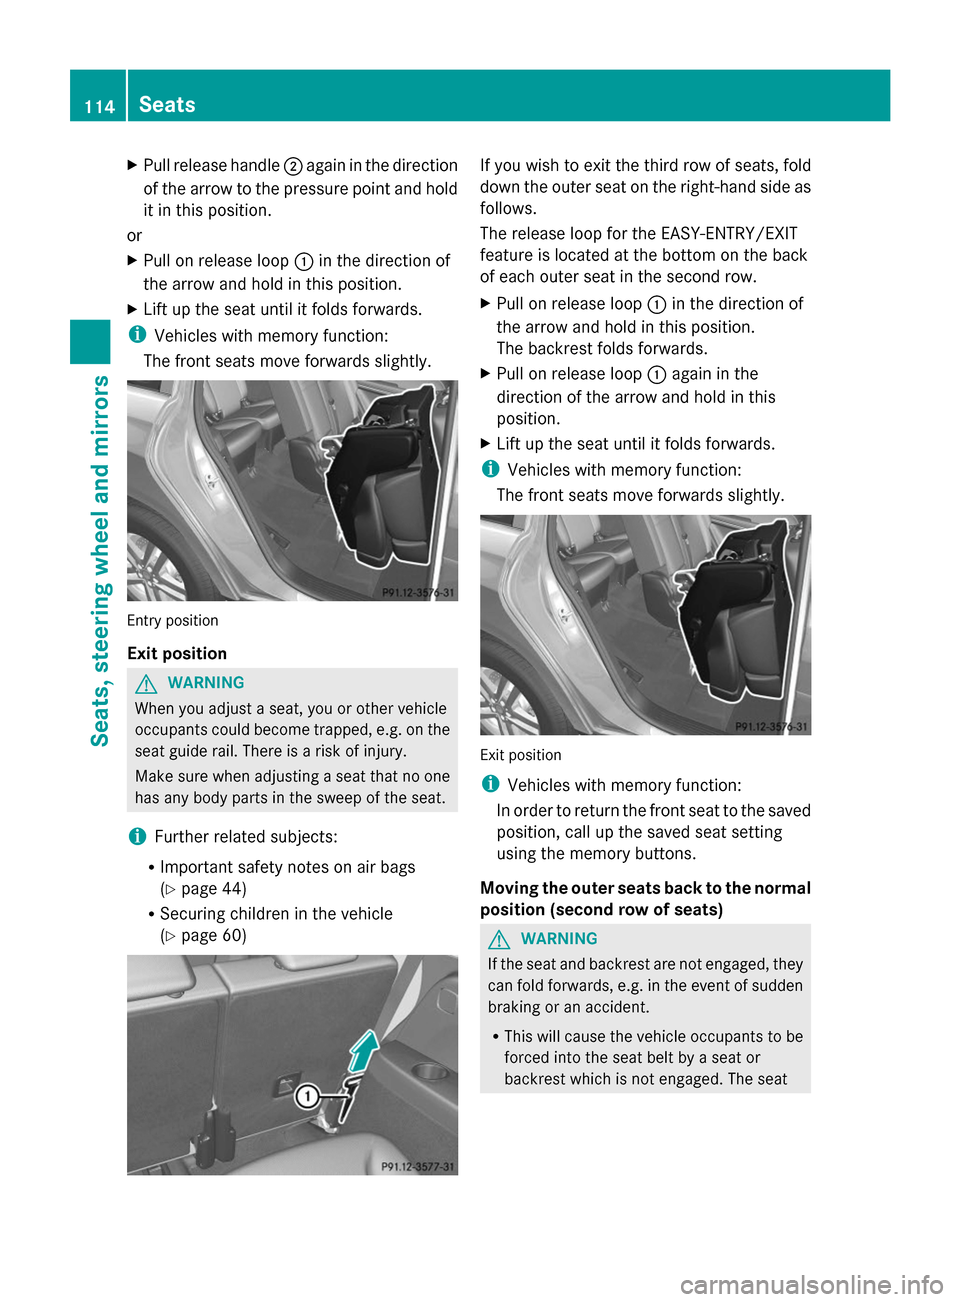
The front seats move forwards slightly. Entry position
Exit position
G
WARNING
When you adjust a seat, you or other vehicle
occupants could become trapped, e.g. on the
seat guide rail. There is a risk of injury.
Make sure when adjusting a seat that no one
has any body parts in the sweep of the seat.
i Further related subjects:
R Important safety notes on air bags
(Y page 44)
R Securing children in the vehicle
(Y page 60) If you wish to exit the third row of seats, fold
down the outer seat on the right-hand side as
follows.
The release loop for the EASY-ENTRY/EXIT
feature is located at the bottom on the back
of each outer seat in the second row.
X
Pull on release loop :in the direction of
the arrow and hold in this position.
The backrest folds forwards.
X Pull on release loop :again in the
direction of the arrow and hold in this
position.
X Lift up the seat until it folds forwards.
i Vehicles with memory function:
The front seats move forwards slightly. Exit position
i
Vehicles with memory function:
In order to return the front seat to the saved
position, call up the saved seat setting
using the memory buttons.
Moving the outer seats back to the normal
position (second row of seats) G
WARNING
If the seat and backrest are not engaged, they
can fold forwards, e.g. in the event of sudden
braking or an accident.
R This will cause the vehicle occupants to be
forced into the seat belt by a seat or
backrest which is not engaged. The seat 114
SeatsSeats, steering wheel and mirrors
Page 117 of 462

belt can no longer offer the intended level
of protection and could even cause injuries.
R A child restraint system would no longer be
anchored or positioned correctly and would
not be able to perform its required function.
R The seat backrests cannot restrain objects
or loads in the cargo compartment.
There is an increased risk of injury.
Always make sure that the seat and backrest
are engaged as described:
R before traveling with a passenger on a seat
with the EASY-ENTRY/EXIT feature
R after you have adjusted the seat
R after the EASY-ENTRY/EXIT feature has
been used
R after the cargo compartment enlargement
has been folded forwards G
WARNING
The seat does not engage in the entry/exit
position. The seat could fold back suddenly,
e.g. when accelerating, braking, changing
direction suddenly or in the event of an
accident. Persons in the sweep of the seat
could become trapped. There is a risk of
injury.
Always fold back a seat which has been folded
forwards before you pull away. Make sure that
the seat and backrest engage fully.
X To lock the seat: fold back the seat until
it engages.
X Fold back the backrest until it engages.
Folding down the seats in the second
row electrically Important safety notes
G
WARNING
If the seat and backrest are not engaged, they
can fold forwards, e.g. in the event of sudden
braking or an accident.
R This will cause the vehicle occupants to be
forced into the seat belt by a seat or backrest which is not engaged. The seat
belt can no longer offer the intended level
of protection and could even cause injuries.
R A child restraint system would no longer be
anchored or positioned correctly and would
not be able to perform its required function.
R The seat backrests cannot restrain objects
or loads in the cargo compartment.
There is an increased risk of injury.
Always make sure that the seat and backrest
are engaged as described:
R before traveling with a passenger on a seat
with the EASY-ENTRY/EXIT feature
R after you have adjusted the seat
R after the EASY-ENTRY/EXIT feature has
been used
R after the cargo compartment enlargement
has been folded forwards G
WARNING
The seat does not engage in the entry/exit
position. The seat could fold back suddenly,
e.g. when accelerating, braking, changing
direction suddenly or in the event of an
accident. Persons in the sweep of the seat
could become trapped. There is a risk of
injury.
Always fold back a seat which has been folded
forwards before you pull away. Make sure that
the seat and backrest engage fully.
General notes
To enter or exit the third row of seats: the
outer left and right seats of the second row
can be folded down electrically.
One of the outer seats of the second row is in
the entry/exit position: the multifunction
display shows, e.g. the 2nd Seat Row, 2nd Seat Row,
Right Not locked
Right Not locked display message.
If you fold the seat back until it engages, the
display message disappears.
Pull the backrest firmly to ensure that it is fully
engaged. Seats
115Seats, steering wheel and mirrors Z
Page 118 of 462
i
Further related subjects:
R Cargo compartment enlargement
(folding the second row of seats
forwards) (Y page 344)
R Folding the seats in the third row
forwards/back (Y page 111)
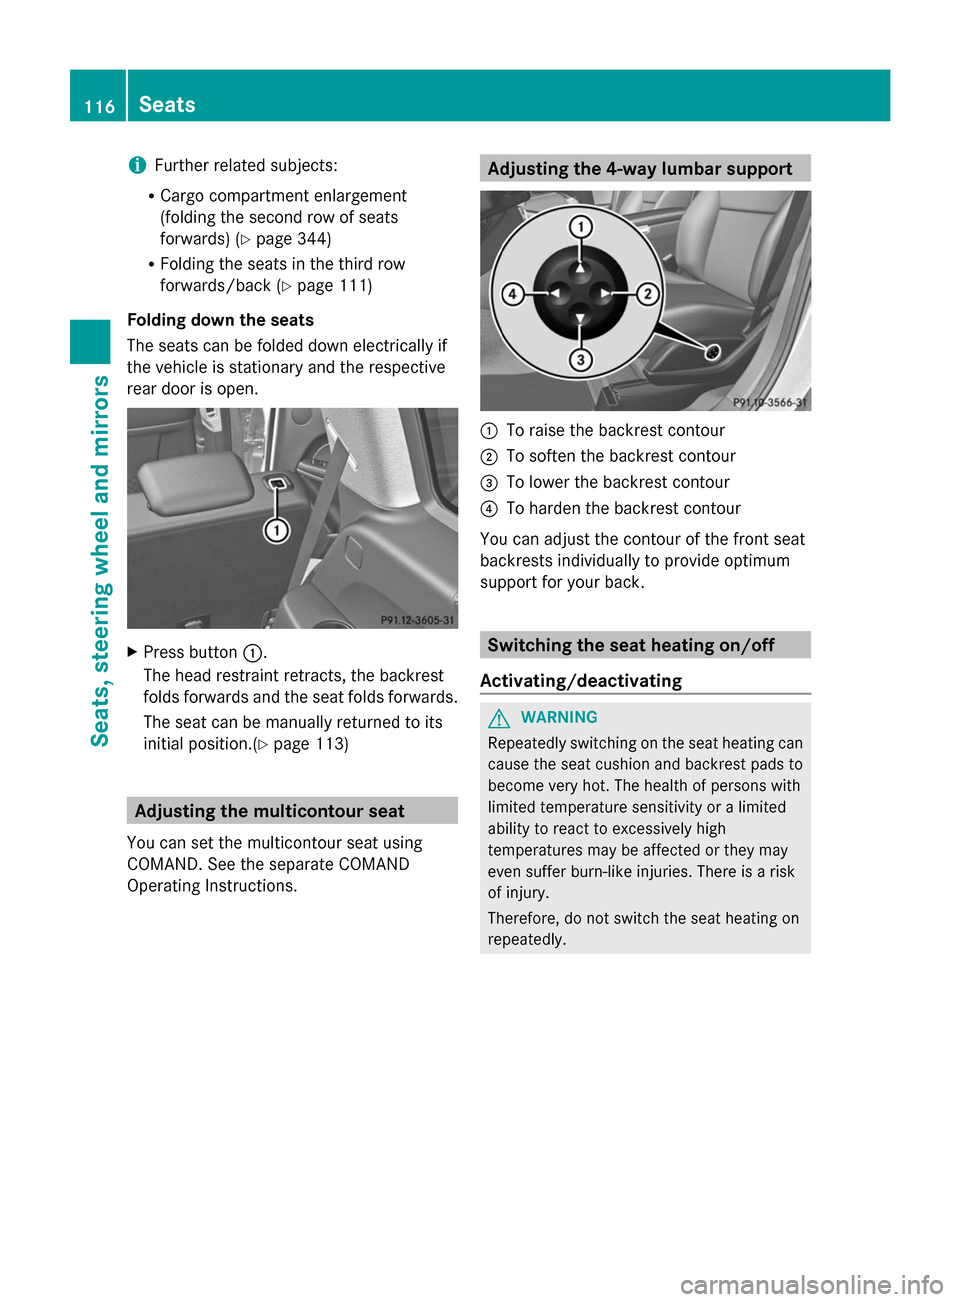
Folding down the seats
The seats can be folded down electrically if
the vehicle is stationary and the respective
rear door is open. X
Press button :.
The head restraint retracts, the backrest
folds forwards and the seat folds forwards.
The seat can be manually returned to its
initial position.(Y page 113) Adjusting the multicontour seat
You can set the multicontour seat using
COMAND. See the separate COMAND
Operating Instructions. Adjusting the 4-way lumbar support
:
To raise the backrest contour
; To soften the backrest contour
= To lower the backrest contour
? To harden the backrest contour
You can adjust the contour of the front seat
backrests individually to provide optimum
support for your back. Switching the seat heating on/off
Activating/deactivating G
WARNING
Repeatedly switching on the seat heating can
cause the seat cushion and backrest pads to
become very hot. The health of persons with
limited temperature sensitivity or a limited
ability to react to excessively high
temperatures may be affected or they may
even suffer burn-like injuries. There is a risk
of injury.
Therefore, do not switch the seat heating on
repeatedly. 116
SeatsSeats, steering wheel and mirrors
Page 125 of 462

Folding the exterior mirrors in or out
electrically X
Make sure that the SmartKey is in position
1or 2in the ignition lock.
X Briefly press button :.
Both exterior mirrors fold in or out.
i Make sure that the exterior mirrors are
always folded out fully while driving. They
could otherwise vibrate.
i If you are driving faster than 30 mph
(47 km/h), you can no longer fold in the
exterior mirrors.
Setting the exterior mirrors If the battery has been disconnected or
completely discharged, the exterior mirrors
must be reset. The exterior mirrors will
otherwise not fold in when you select the
"Fold in mirrors when locking" function in the
on-board computer (Y page 286).
X Make sure that the SmartKey is in
position 1in the ignition lock.
X Briefly press button :.
Folding the exterior mirrors in or out
automatically If the "Fold in mirrors when locking" function
is activated in the on-board computer:
(Y
page 286) R
the exterior mirrors fold in automatically as
soon as you lock the vehicle from the
outside.
R the exterior mirrors fold out again
automatically as soon as you unlock the
vehicle and then open the driver's or front-
passenger door.
Exterior mirror pushed out of position If an exterior mirror has been pushed out of
position, proceed as follows:
X
Vehicles without electrically folding
exterior mirrors: move the exterior mirror
into the correct position manually.
X Vehicles with electrically folding
exterior mirrors: press and hold button for
folding the mirrors :(Ypage 123) until
you hear a click and then the mirror engage
in position.
The mirror housing is engaged again and
you can adjust the exterior mirrors as usual
(Y page 122). Automatic anti-glare mirrors
The rear-view mirror and the exterior mirror
on the driver's side automatically go into anti-
glare mode if the following conditions are met
simultaneously:
R the ignition is switched on and
R incident light from headlamps strikes the
sensor in the rear-view mirror.
i The mirrors do not go into anti-glare mode
if reverse gear is engaged or if the interior
lighting is switched on. Mirrors
123Seats, steering wheel and mirrors Z
Page 324 of 462
Display messages Possible causes/consequences and
M
MSolutions _
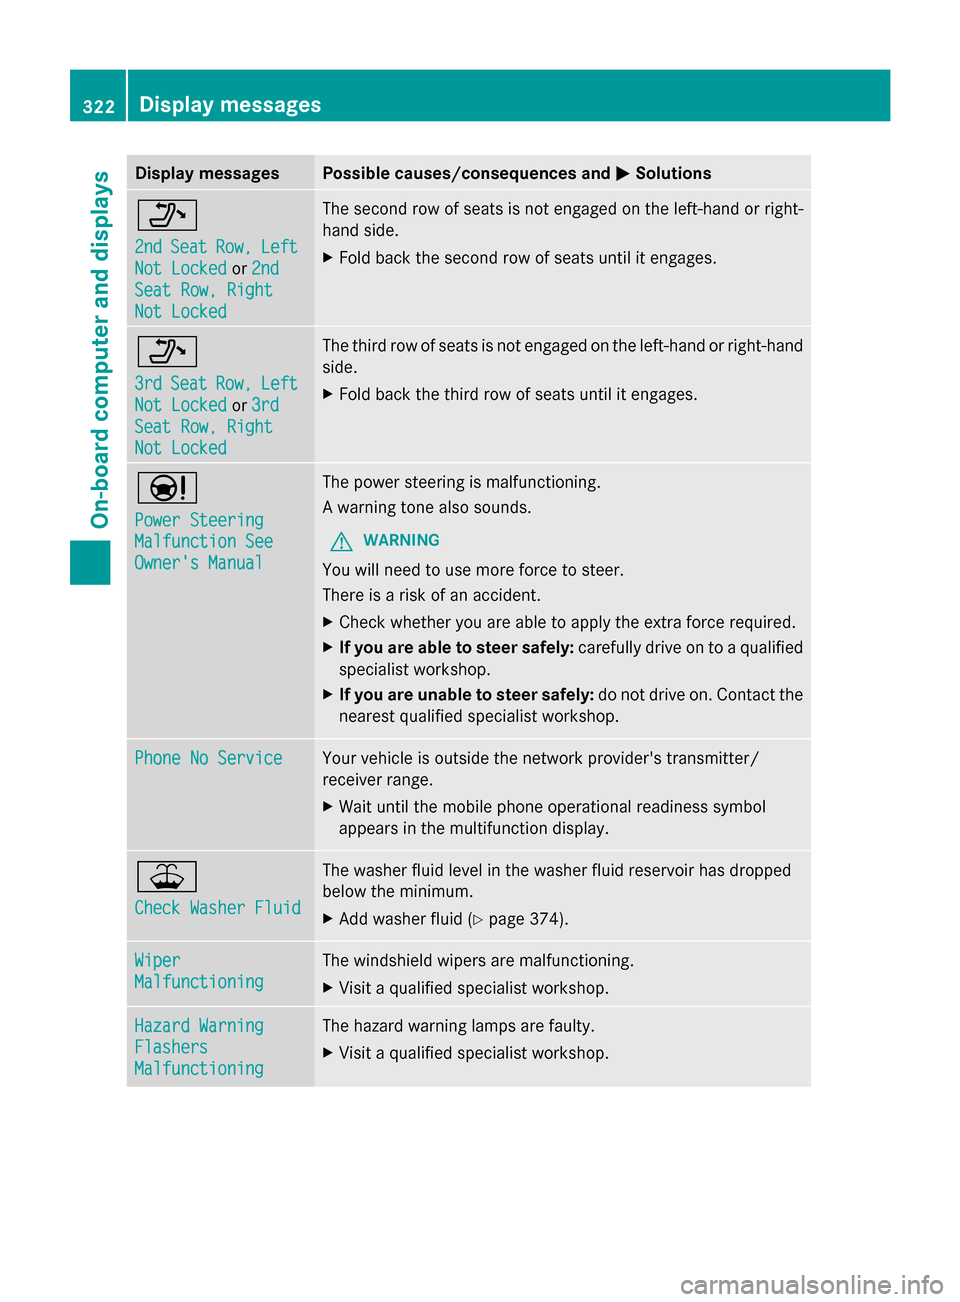
2nd 2nd
Seat
Seat Row,
Row,Left
Left
Not Locked
Not Locked or2nd
2nd
Seat Row, Right
Seat Row, Right
Not Locked Not Locked The second row of seats is not engaged on the left-hand or right-
hand side.
X
Fold back the second row of seats until it engages. _
3rd 3rd
Seat
Seat Row,
Row,Left
Left
Not Locked
Not Locked or3rd
3rd
Seat Row, Right
Seat Row, Right
Not Locked Not Locked The third row of seats is not engaged on the left-hand or right-hand
side.
X
Fold back the third row of seats until it engages. Ð
Power Steering Power Steering
Malfunction See Malfunction See
Owner's Manual Owner's Manual The power steering is malfunctioning.
A warning tone also sounds.
G WARNING
You will need to use more force to steer.
There is a risk of an accident.
X Check whether you are able to apply the extra force required.
X If you are able to steer safely: carefully drive on to a qualified
specialist workshop.
X If you are unable to steer safely: do not drive on. Contact the
nearest qualified specialist workshop. Phone No Service Phone No Service Your vehicle is outside the network provider's transmitter/
receiver range.
X
Wait until the mobile phone operational readiness symbol
appears in the multifunction display. ¥
Check Washer Fluid Check Washer Fluid The washer fluid level in the washer fluid reservoir has dropped
below the minimum.
X
Add washer fluid ( Ypage 374). Wiper Wiper
Malfunctioning Malfunctioning The windshield wipers are malfunctioning.
X
Visit a qualified specialist workshop. Hazard Warning Hazard Warning
Flashers Flashers
Malfunctioning Malfunctioning The hazard warning lamps are faulty.
X
Visit a qualified specialist workshop. 322
Display
messagesOn-board computer and displays
Page 345 of 462
i
Depending on the vehicle's equipment,
there may be open stowage spaces above
and below the stowage compartment. Stowage nets
G
WARNING
Vehicles with the Occupant Classification
System (OCS):
If the gross weight of the objects in the
stowage net on the back of the front-
passenger seat is greater than 4.4 lb (2 kg),
OCS cannot correctly assess the occupant's
weight category. The front-passenger front air
bag could deploy without cause, or may fail to
deploy in the event of an accident. This poses
an increased risk of injury or even fatal injury.
Never exceed the permissible gross weight of
4.4 lb (2 kg). Stow and secure heavy objects
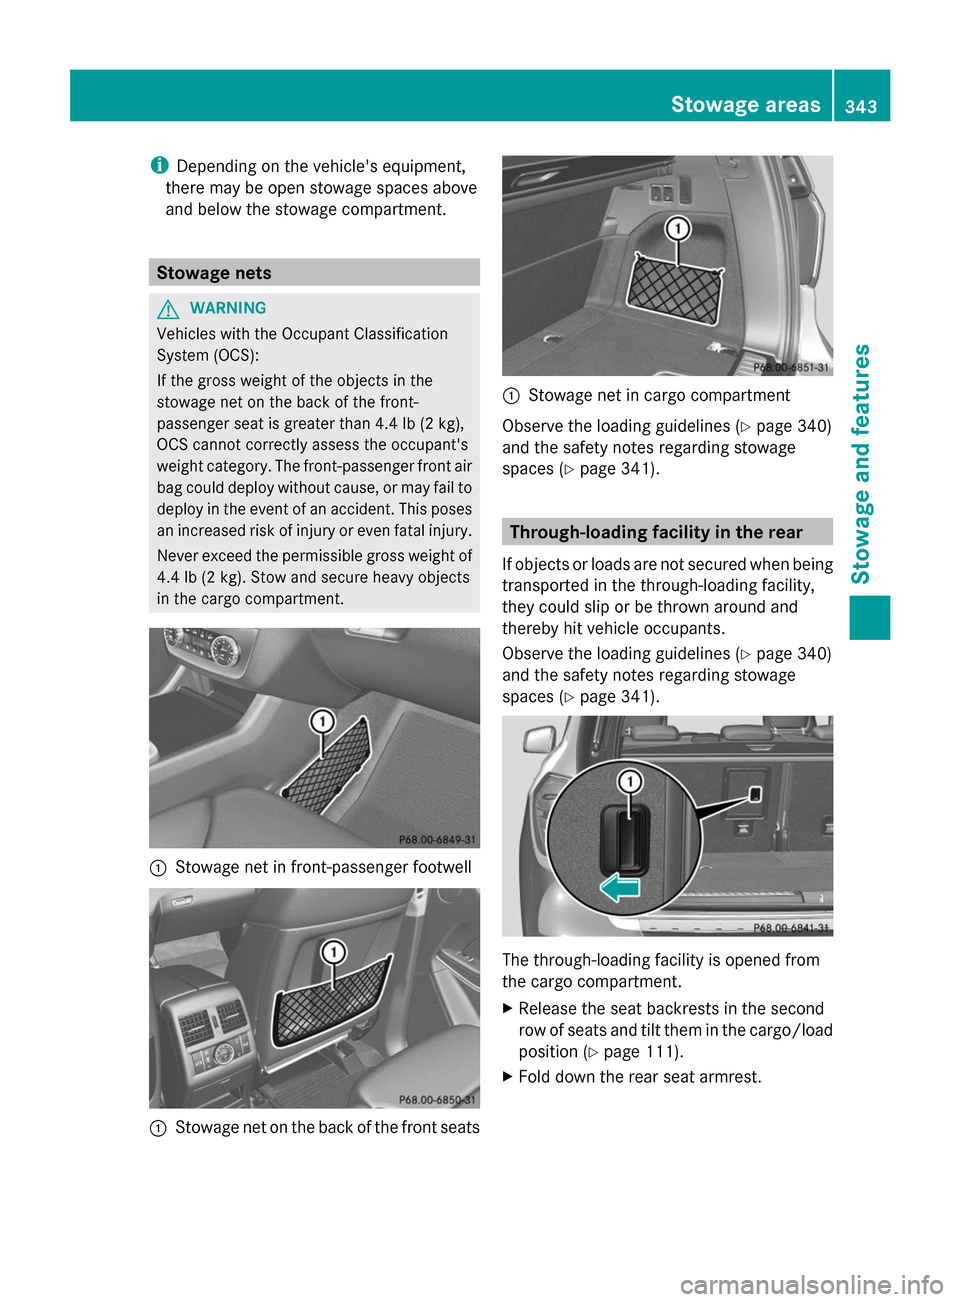
in the cargo compartment. :
Stowage net in front-passenger footwell :
Stowage net on the back of the front seats :
Stowage net in cargo compartment
Observe the loading guidelines (Y page 340)
and the safety notes regarding stowage
spaces (Y page 341). Through-loading facility in the rear
If objects or loads are not secured when being
transported in the through-loading facility,
they could slip or be thrown around and
thereby hit vehicle occupants.
Observe the loading guidelines (Y page 340)
and the safety notes regarding stowage
spaces (Y page 341). The through-loading facility is opened from
the cargo compartment.
X
Release the seat backrests in the second
row of seats and tilt them in the cargo/load
position (Y page 111).
X Fold down the rear seat armrest. Sto
wage areas
343Stowage and features Z
Page 346 of 462
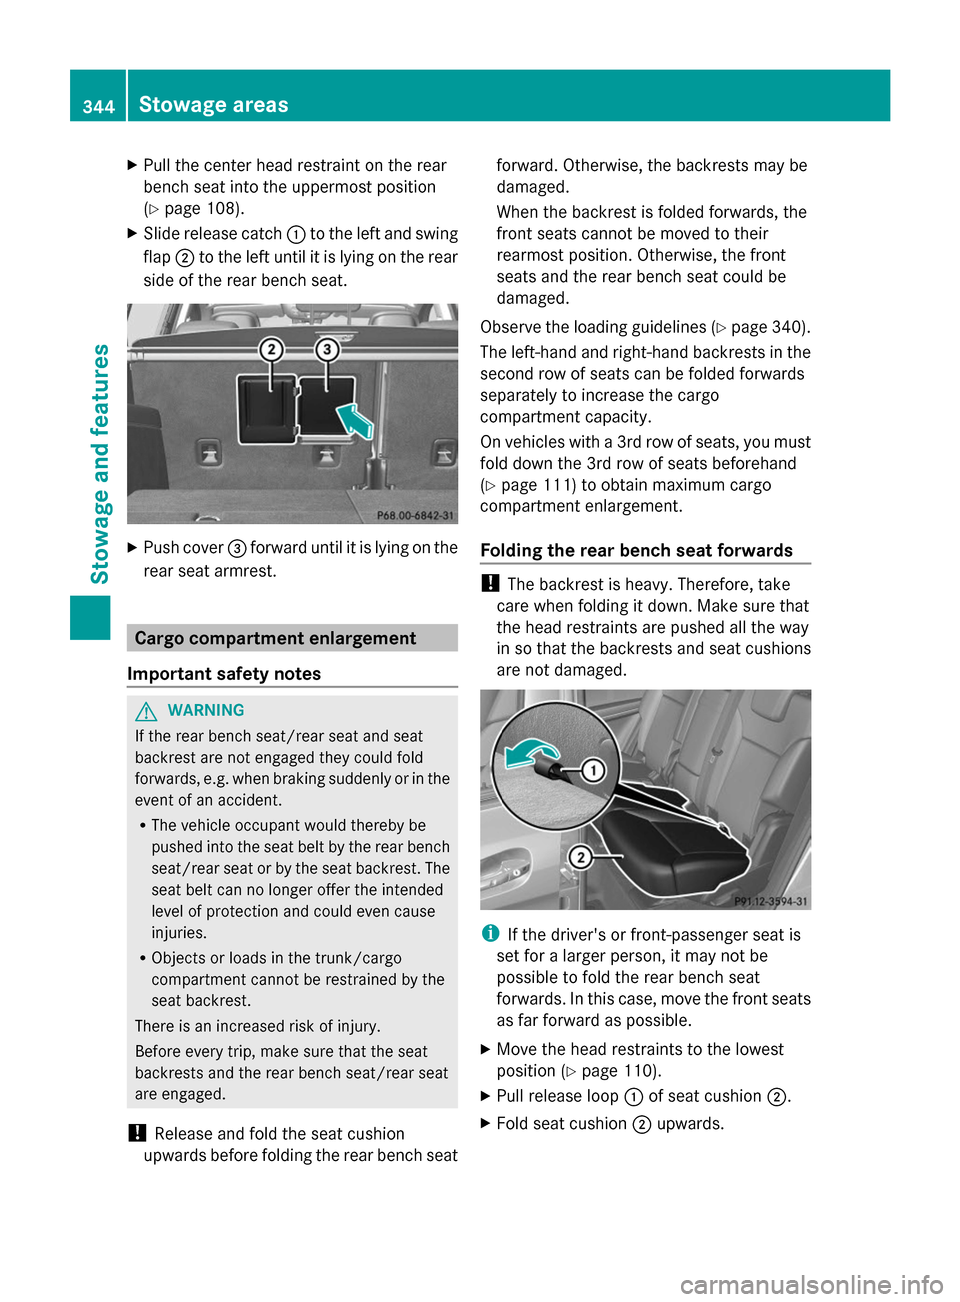
X
Pull the center head restraint on the rear
bench seat into the uppermost position
(Y page 108).
X Slide release catch :to the left and swing
flap ;to the left until it is lying on the rear
side of the rear bench seat. X
Push cover =forward until it is lying on the
rear seat armrest. Cargo compartment enlargement
Important safety notes G
WARNING
If the rear bench seat/rear seat and seat
backrest are not engaged they could fold
forwards, e.g. when braking suddenly or in the
event of an accident.
R The vehicle occupant would thereby be
pushed into the seat belt by the rear bench
seat/rear seat or by the seat backrest. The
seat belt can no longer offer the intended
level of protection and could even cause
injuries.
R Objects or loads in the trunk/cargo
compartment cannot be restrained by the
seat backrest.
There is an increased risk of injury.
Before every trip, make sure that the seat
backrests and the rear bench seat/rear seat
are engaged.
! Release and fold the seat cushion
upwards before folding the rear bench seat forward. Otherwise, the backrests may be
damaged.
When the backrest is folded forwards, the
front seats cannot be moved to their
rearmost position. Otherwise, the front
seats and the rear bench seat could be
damaged.
Observe the loading guidelines (Y page 340).
The left-hand and right-hand backrests in the
second row of seats can be folded forwards
separately to increase the cargo
compartment capacity.
On vehicles with a 3rd row of seats, you must
fold down the 3rd row of seats beforehand
(Y page 111) to obtain maximum cargo
compartment enlargement.
Folding the rear bench seat forwards !
The backrest is heavy. Therefore, take
care when folding it down. Make sure that
the head restraints are pushed all the way
in so that the backrests and seat cushions
are not damaged. i
If the driver's or front-passenger seat is
set for a larger person, it may not be
possible to fold the rear bench seat
forwards. In this case, move the front seats
as far forward as possible.
X Move the head restraints to the lowest
position (Y page 110).
X Pull release loop :of seat cushion ;.
X Fold seat cushion ;upwards. 344
Stowage areasStowage and features
Page 352 of 462
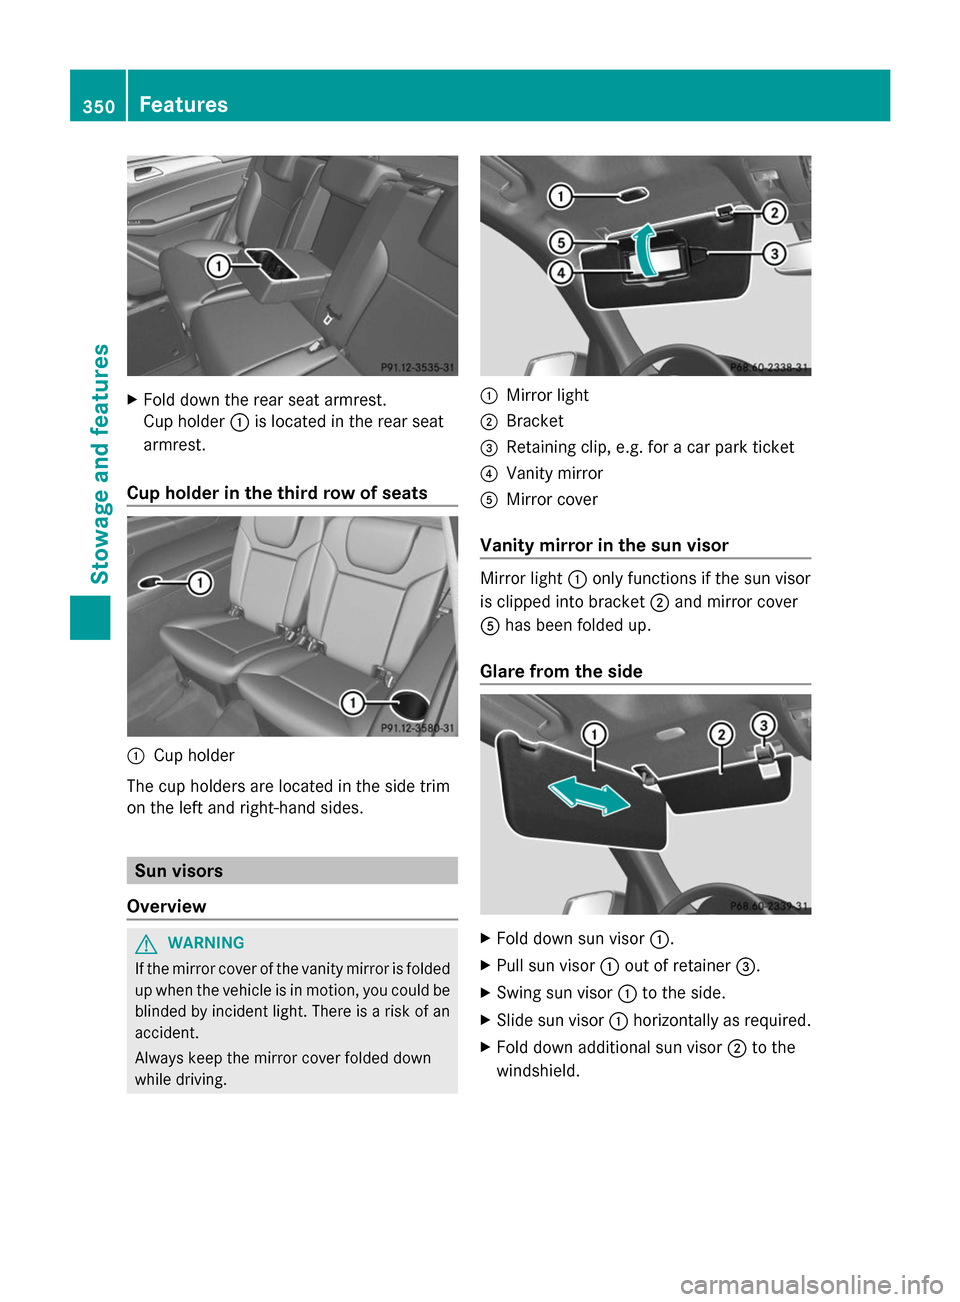
X
Fold down the rear seat armrest.
Cup holder :is located in the rear seat
armrest.
Cup holder in the third row of seats :
Cup holder
The cup holders are located in the side trim
on the left and right-hand sides. Sun visors
Overview G
WARNING
If the mirror cover of the vanity mirror is folded
up when the vehicle is in motion, you could be
blinded by incident light. There is a risk of an
accident.
Always keep the mirror cover folded down
while driving. :
Mirror light
; Bracket
= Retaining clip, e.g. for a car park ticket
? Vanity mirror
A Mirror cover
Vanity mirror in the sun visor Mirror light
:only functions if the sun visor
is clipped into bracket ;and mirror cover
A has been folded up.
Glare from the side X
Fold down sun visor :.
X Pull sun visor :out of retainer =.
X Swing sun visor :to the side.
X Slide sun visor :horizontally as required.
X Fold down additional sun visor ;to the
windshield. 350
FeaturesStowage and features