2014 MERCEDES-BENZ CLS SHOOTING BRAKE instrument cluster
[x] Cancel search: instrument clusterPage 194 of 417
speed is set. Press the cruise control lever
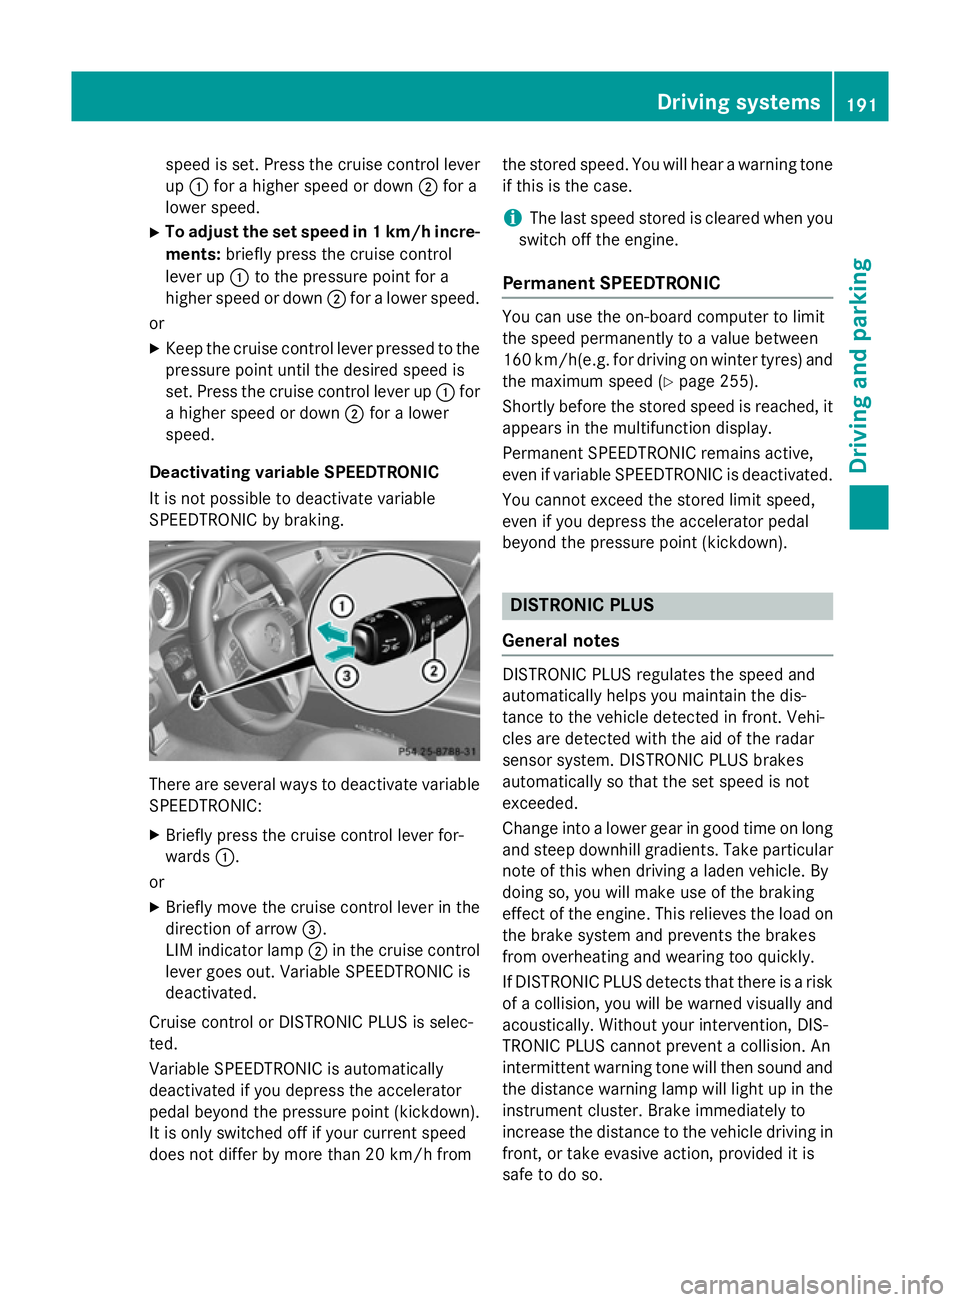
up : for a higher speed or down ;for a
lower speed.
X To adjust the set speed in 1 km/h incre-
ments: briefly press the cruise control
lever up :to the pressure point for a
higher speed or down ;for a lower speed.
or
X Keep the cruise control lever pressed to the
pressure point until the desired speed is
set. Press the cruise control lever up :for
a higher speed or down ;for a lower
speed.
Deactivating variable SPEEDTRONIC
It is not possible to deactivate variable
SPEEDTRONIC by braking. There are several ways to deactivate variable
SPEEDTRONIC:
X Briefly press the cruise control lever for-
wards :.
or X Briefly move the cruise control lever in the
direction of arrow =.
LIM indicator lamp ;in the cruise control
lever goes out. Variable SPEEDTRONIC is
deactivated.
Cruise control or DISTRONIC PLUS is selec-
ted.
Variable SPEEDTRONIC is automatically
deactivated if you depress the accelerator
pedal beyond the pressure point (kickdown).
It is only switched off if your current speed
does not differ by more than 20 km/h from the stored speed. You will hear a warning tone
if this is the case.
i The last speed stored is cleared when you
switch off the engine.
Permanent SPEEDTRONIC You can use the on-board computer to limit
the speed permanently to a value between
160 km/h(e.g. for driving on winter tyres) and
the maximum speed (Y page 255).
Shortly before the stored speed is reached, it
appears in the multifunction display.
Permanent SPEEDTRONIC remains active,
even if variable SPEEDTRONIC is deactivated.
You cannot exceed the stored limit speed,
even if you depress the accelerator pedal
beyond the pressure point (kickdown). DISTRONIC PLUS
General notes DISTRONIC PLUS regulates the speed and
automatically helps you maintain the dis-
tance to the vehicle detected in front. Vehi-
cles are detected with the aid of the radar
sensor system. DISTRONIC PLUS brakes
automatically so that the set speed is not
exceeded.
Change into a lower gear in good time on long
and steep downhill gradients. Take particular note of this when driving a laden vehicle. By
doing so, you will make use of the braking
effect of the engine. This relieves the load on
the brake system and prevents the brakes
from overheating and wearing too quickly.
If DISTRONIC PLUS detects that there is a risk
of a collision, you will be warned visually and acoustically. Without your intervention, DIS-
TRONIC PLUS cannot prevent a collision. An
intermittent warning tone will then sound and
the distance warning lamp will light up in the instrument cluster. Brake immediately to
increase the distance to the vehicle driving in
front, or take evasive action, provided it is
safe to do so. Driving systems
191Driving and parking Z
Page 197 of 417
R
the driver's door must be closed when you
shift from Pto Dor your seat belt must be
fastened.
R the front-passenger door and the rear
doors must be closed.
R the vehicle must not be skidding.
R the DISTRONIC PLUS function must be
selected with the cruise control lever
(Y page 193).
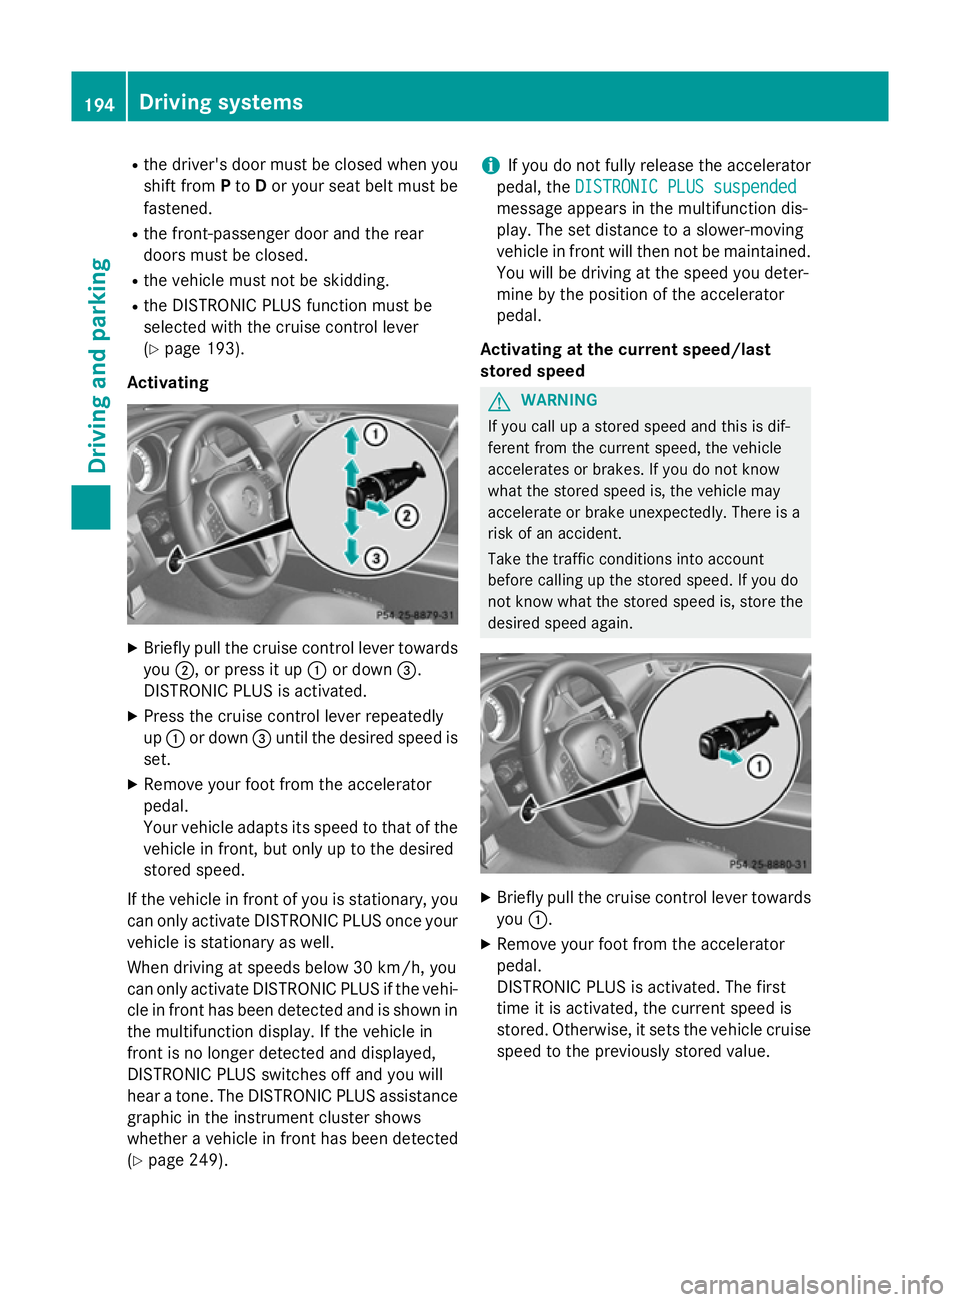
Activating X
Briefly pull the cruise control lever towards
you ;, or press it up :or down =.
DISTRONIC PLUS is activated.
X Press the cruise control lever repeatedly
up : or down =until the desired speed is
set.
X Remove your foot from the accelerator
pedal.
Your vehicle adapts its speed to that of the vehicle in front, but only up to the desired
stored speed.
If the vehicle in front of you is stationary, you can only activate DISTRONIC PLUS once your
vehicle is stationary as well.
When driving at speeds below 30 km/h, you
can only activate DISTRONIC PLUS if the vehi- cle in front has been detected and is shown in
the multifunction display. If the vehicle in
front is no longer detected and displayed,
DISTRONIC PLUS switches off and you will
hear a tone. The DISTRONIC PLUS assistance
graphic in the instrument cluster shows
whether a vehicle in front has been detected
(Y page 249). i
If you do not fully release the accelerator
pedal, the DISTRONIC PLUS suspended
DISTRONIC PLUS suspended
message appears in the multifunction dis-
play. The set distance to a slower-moving
vehicle in front will then not be maintained. You will be driving at the speed you deter-
mine by the position of the accelerator
pedal.
Activating at the current speed/last
stored speed G
WARNING
If you call up a stored speed and this is dif-
ferent from the current speed, the vehicle
accelerates or brakes. If you do not know
what the stored speed is, the vehicle may
accelerate or brake unexpectedly. There is a
risk of an accident.
Take the traffic conditions into account
before calling up the stored speed. If you do
not know what the stored speed is, store the
desired speed again. X
Briefly pull the cruise control lever towards
you :.
X Remove your foot from the accelerator
pedal.
DISTRONIC PLUS is activated. The first
time it is activated, the current speed is
stored. Otherwise, it sets the vehicle cruise
speed to the previously stored value. 194
Driving systemsDriving an
d parking
Page 215 of 417
When driving at speeds below 30 km/h, you
will see parking symbol ;as a status indi-
cator in the instrument cluster. When a park-
ing space has been detected, an arrow
towards the right or the left also appears.
Active Parking Assist only displays parking
spaces on the front-passenger side as stand- ard. Parking spaces on the driver's side are
displayed as soon as the turn signal on the
driver's side is activated. When parking on thedriver's side, this must remain switched on
until you acknowledge the use of Active Park-
ing Assist by pressing the abutton on the
multifunction steering wheel.
i In the case of parking spaces that are at
right angles to the direction of travel,
please ensure that the parking space is
long enough to accommodate your vehicle.
A parking space is displayed while you are
driving past it, and until you are approx-
imately 15 m away from it.
Parking G
WARNING
Active Parking Assist merely aids you by inter- vening actively in the steering. There is a risk
of accident if you do not apply the brakes
yourself.
Always apply the brakes yourself when park-
ing and manoeuvring.
X Stop the vehicle when the parking symbol
shows the desired parking space in the
instrument cluster.
X Shift the transmission to position R.
The Start Park Assist? Yes: OK No:
Start Park Assist? Yes: OK No:
% message appears in the multifunction
display. X
To cancel the procedure: press the%
button on the multifunction steering wheel or pull away.
or
X To park using Active Parking Assist:
press the abutton on the multifunction
steering wheel.
The Park Assist active Accelerate
Park Assist active Accelerate
and and brake
brake Observe
Observe surroundings
surroundings mes-
sage appears in the multifunction display.
X Release the multifunction steering wheel.
X Reverse the vehicle, being ready to brake at
all times. When reversing, drive at a speed
below 10 km/h. Otherwise, Active Parking
Assist will be cancelled.
i In tight parking spaces, you will achieve
the best parking results by backing up as
far as possible. When doing so, also
observe the PARKTRONIC messages.
X Stop as soon as PARKTRONIC sounds the
continuous warning tone, if not before.
Manoeuvring may be required in tight park-
ing spaces.
The Park Assist active Select D
Park Assist active Select D
Observe Observe surroundings
surroundings message appears in
the multifunction display.
X Shift the transmission to position Dwhile
the vehicle is stationary.
Active Parking Assist immediately steers in
the other direction.
The Park Assist active Accelerate Park Assist active Accelerate
and
and brake
brake Observe
Observe surroundings
surroundings mes-
sage appears in the multifunction display.
i You will achieve the best results by wait-
ing for the steering procedure to complete before pulling away.
X Drive forwards and be ready to brake at all
times.
X Stop as soon as PARKTRONIC sounds the
continuous warning tone, if not before.
The Park Assist active Select R
Park Assist active Select R
Observe
Observe surroundings
surroundings message appears in
the multifunction display. 212
Driving systemsDriving and parking
Page 216 of 417
Additional transmission shifts may be neces-
sary.
As soon as the parking procedure is com-
plete, the Park
Park Assist Assist switched
switched off
offmes-
sage appears in the multifunction display and
you will hear a tone. PARKTRONIC continues
to be available.
X Manoeuvre if necessary.
X Always observe the warning messages dis-
played by PARKTRONIC (Y page 208).
Parking tips: R The way your vehicle is positioned in the
parking space after parking is dependent
on various factors. These include the posi-
tion and shape of the vehicles parked in
front and behind it and the conditions of the
location. It may be the case that Active
Parking Assist guides you too far into a
parking space, or not far enough into it. In
some cases, it may also lead you across or
onto the kerb. If necessary, you should can-
cel the parking procedure with Active Park- ing Assist.
R You can also engage forward gear prema-
turely. The vehicle redirects and does not
drive as far into the parking space. Should a gear be changed too early, the parking pro-
cedure will be cancelled. A sensible parking position can no longer be achieved from
this position.
Cancelling Active Parking Assist You can cancel Active Parking Assist at any
time.
X Stop the movement of the multifunction
steering wheel or steer yourself.
Active Parking Assist will be cancelled at
once. The Park Assist cancelled
Park Assist cancelled mes-
sage appears in the multifunction display.
or X Press the PARKTRONIC button on the
centre console (Y page 209).
PARKTRONIC is switched off and Active
Parking Assist is immediately cancelled. The
Park Assist cancelled Park Assist cancelled message
appears in the multifunction display.
Active Parking Assist is cancelled automati-
cally if:
R the transmission is shifted too early
R the electric parking brake is applied
R transmission position Pis selected
R parking using Active Parking Assist is no
longer possible
R you are driving faster than 10 km/h
R a wheel spins and ESP ®
intervenes or fails.
In such cases the ÷warning lamp lights
up in the instrument cluster.
A warning tone sounds. The parking symbol
goes out and the Park Assist cancelled Park Assist cancelled
message appears in the multifunction dis-
play.
When Active Parking Assist is cancelled, you
must steer again yourself.
Towing a trailer For vehicles with a trailer tow hitch, the min-
imum length for parking spaces is slightly
increased.
If you have attached a trailer to your vehicle,
you should not use Active Parking Assist.
Once the electrical connection is established between your vehicle and the trailer, Active
Parking Assist is no longer available. PARK-
TRONIC is deactivated for the rear area. Driving systems
213Driving and parking Z
Page 242 of 417
Useful information
............................240
Important safety notes ....................240
Displays and operation ....................240
Menus and submenus ......................243
Display messages ............................. 261
Warning and indicator lamps in the instrument cluster ............................287 239On-board computer and displays
Page 243 of 417
Useful information
i This Owner's Manual describes all mod-
els, series and optional equipment for your
vehicle that were available at the time of
going to press. National variations are pos- sible. Note that your vehicle may not be
equipped with all of the functions descri-
bed. This is also the case for systems and
functions relevant to safety.
i Read the information on qualified special-
ist workshops: (Y page 26). Important safety notes
G
WARNING
Operating the integrated information systems and communications equipment in the vehicle
while driving will distract you from traffic con-
ditions. You could then lose control of the
vehicle. There is a risk of an accident.
Only operate these devices if road traffic con-
ditions permit. If you are unsure about the
surrounding conditions, pull over to a safe
location and make entries only while the vehi-
cle is stationary. G
WARNING
If the instrument cluster has failed or mal-
functioned, you may not recognise function
restrictions relevant to safety. The operating
safety of your vehicle may be impaired. There is a risk of an accident.
Drive on carefully. Have the vehicle checked
at a qualified specialist workshop immedi-
ately.
You must observe the legal requirements for
the country in which you are currently driving when operating the on-board computer.
The on-board computer only shows messages
or warnings from certain systems in the mul- tifunction display. You should therefore make
sure your vehicle is operating safely at all times. Otherwise, a vehicle that is not oper-
ating safely may cause an accident.
For an overview, see the instrument cluster
illustration (Y
page 32). Displays and operation
Coolant temperature gauge
G
WARNING
If you open the bonnet while the engine is
overheating or while there is a fire in the
engine compartment, you could come into
contact with hot gases or other leaking ser-
vice products. There is a danger of injury.
Allow an overheating engine to cool down
before opening the bonnet. If there is a fire in the engine compartment, leave the bonnet
closed and notify the fire brigade.
The coolant temperature gauge is in the
instrument cluster on the left-hand side
(Y page 32).
Under normal operating conditions and with
the specified coolant level, the coolant tem-
perature may rise to 120 †.
At high outside temperatures and when driv-
ing uphill, the coolant temperature may rise
to the end of the scale. Rev counter
! Do not drive in the overrevving range.
Doing so will damage the engine.
The red band in the rev counter indicates the
engine's overrevving range.
The fuel supply is interrupted to protect the
engine when the red band is reached. Outside temperature display
You should pay special attention to road con-
ditions when temperatures are around the
freezing point. 240
Displays and operationOn-board computer and displays
Page 253 of 417
items in the multifunction display are not
shown during this time.
Deactivating/activating ESP ®i
Observe the "Important safety notes" sec-
tion in the description of ESP ®
(Y page 73). G
WARNING
If you deactivate ESP ®
, ESP ®
no longer sta-
bilises the vehicle. There is an increased risk
of skidding and an accident.
Only deactivate ESP ®
in the situations descri-
bed in the following.
It may be best to deactivate ESP ®
in the fol-
lowing situations:
R when using snow chains
R in deep snow
R on sand or gravel
Deactivating/activating ESP ®
on AMG vehi-
cles (Y page 74).
Further information about ESP ®
(Y page 72)
X Start the engine.
X Press the =or; button on the steer-
ing wheel to select the Assist.
Assist. menu.
X Press the 9or: button to select
ESP
ESP.
X Press the abutton.
The current selection is displayed.
X To activate/deactivate: press thea
button again.
ESP ®
is deactivated if the åwarning lamp
in the instrument cluster lights up continu-
ously when the engine is running.
If the ÷ warning lamp and the åwarn-
ing lamp are lit continuously, ESP ®
is not
available due to a malfunction.
Observe the information on warning lamps
(Y page 291).
Observe the information on display messages (Y page 262). Activating/deactivating PRE-SAFE
®
Brake PRE‑SAFE
®
Brake is only available in vehicles
with DISTRONIC PLUS.
X Press the =or; button on the steer-
ing wheel to select the Assist. Assist.menu.
X Press the 9or: button to select
PRE-SAFE Brake
PRE-SAFE Brake.
X Press the abutton.
The current selection is displayed.
X To activate/deactivate: press thea
button again.
When PRE-SAFE ®
Brake is deactivated, the
assistance graphic shows the æsymbol
in the multifunction display.
For more information on PRE‑SAFE ®
Brake,
see (Y page 76).
Activating/deactivating ATTENTION
ASSIST X
Press the =or; button on the steer-
ing wheel to select the Assist.
Assist. menu.
X Press the 9or: button to select
Attention Assist Attention Assist.
X Press the abutton.
The current selection is displayed.
X To activate/deactivate: press thea
button again.
When ATTENTION ASSIST is deactivated, the é symbol appears in the multifunction
display in the assistance graphic display.
For further information about ATTENTION
ASSIST, see (Y page 218).
Activating/deactivating Blind Spot
Assist X
Press the =or; button on the steer-
ing wheel to select the Assist. Assist.menu.
X Press the 9or: button to select
Blind Spot Assist
Blind Spot Assist. 250
Menus and submenusOn-board computer and displays
Page 254 of 417
X
Press the abutton.
The current selection is displayed.
X To activate/deactivate: press thea
button again.
If the Blind Spot Assist Sensors deac‐
Blind Spot Assist Sensors deac‐
tivated
tivated orAct. B. Spot Assist Sen‐
Act. B. Spot Assist Sen‐
sors deactivated
sors deactivated message appears, the
radar sensor system is deactivated.
X Switch on the radar sensor system
(Y page 255).
Further information about Blind Spot Assist
(Y page 223).
Further information about Active Blind Spot
Assist (Y page 227).
Activating/deactivating Lane Keeping
Assist X
Press the =or; button on the steer-
ing wheel to select the Assist. Assist.menu.
X Press the 9or: button to select
Lane Keep. Assist
Lane Keep. Assist
X Press the abutton.
The current selection is displayed.
X Press ato confirm.
X Press the :or9 button to set Off
Off,
Standard
Standard orAdaptive
Adaptive.
X Press the abutton to save the setting.
When Lane Keeping Assist or Active Lane
Keeping Assist is activated, the multifunc-
tion display shows the lane markings as
bright lines in the assistance graphic.
For further information about Lane Keeping
Assist, see (Y page 225).
For further information about Active Lane
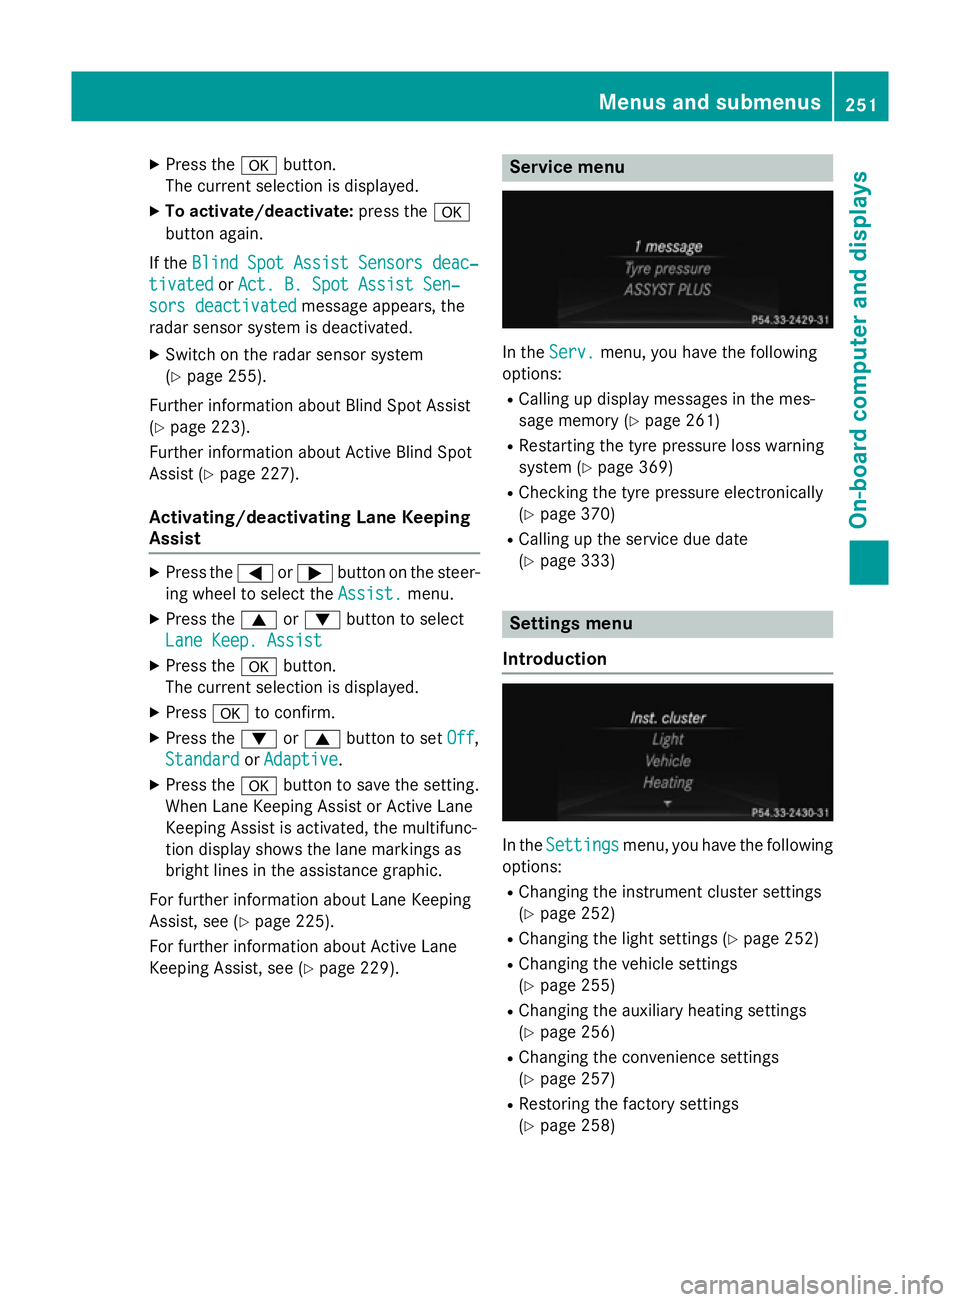
Keeping Assist, see (Y page 229). Service menu
In the
Serv. Serv. menu, you have the following
options:
R Calling up display messages in the mes-
sage memory (Y page 261)
R Restarting the tyre pressure loss warning
system (Y page 369)
R Checking the tyre pressure electronically
(Y page 370)
R Calling up the service due date
(Y page 333) Settings menu
Introduction In the
Settings Settings menu, you have the following
options:
R Changing the instrument cluster settings
(Y page 252)
R Changing the light settings (Y page 252)
R Changing the vehicle settings
(Y page 255)
R Changing the auxiliary heating settings
(Y page 256)
R Changing the convenience settings
(Y page 257)
R Restoring the factory settings
(Y page 258) Menus and submenus
251On-board computer and displays Z