2014 MERCEDES-BENZ CLS COUPE bonnet
[x] Cancel search: bonnetPage 9 of 417

Auxiliary ventilation
Activating/deactivating ................ .150
Activating/deactivating (on the
centre console ).............................. 151
Problem (display message) ............ 154
Remote control .............................. 151
Axle load, permissible (trailer tow-
ing) ...................................................... 410 B
Ball coupling Folding in ....................................... 236
Folding out ..................................... 234
BAS (Brake Assist System) ................. 70
BAS PLUS (Brake Assist System
PLUS) .................................................... 71
Battery (key)
Checking .......................................... 85
Important safety notes .................... 85
Replacing ......................................... 86
Battery (vehicle)
Charging ........................................ 353
Display message ............................ 271
Important safety notes .................. 351
Jump starting ................................. 355
Belt
see Seat belts
Belt tensioner
Activation ......................................... 51
Blind Spot Assist
Activating/deactivating ................. 250
Display message ............................ 276
Notes/function .............................. 223
Trailer towing ................................. 225
see Active Blind Spot Assist
BlueTEC (AdBlue®) ............................ 403
Bluetooth® SAP V3 telephone
module
see Separate operating instructions
Bonnet
Closing ........................................... 329
Display message ............................ 283
Important safety notes .................. 328
Opening ......................................... 328
Boot
Emergency release .......................... 95
Important safety notes .................... 91 Opening/closing (automatically
from inside) ...................................... 94
Opening/closing (automatically
from outside) ................................... 92
Opening/closing (manually from
outside) ............................................ 92
Boot lid
Display message ............................ 283
Opening dimensions ...................... 407
Boot load (maximum) ........................ 407
Bottle holders .................................... 314
Box (boot) ........................................... 308
Brake Assist
see BAS (Brake Assist System)
Brake fluid
Display message ............................ 264
Notes ............................................. 405
Brake lamps
Adaptive ........................................... 72
Display message ............................ 268
Brakes
ABS .................................................. 70
BAS .................................................. 70
BAS PLUS ........................................ 71
Brake fluid (notes) ......................... 405
Display message ............................ 262
Driving tips .................................... 183
High-performance brake system .... 184
HOLD function ............................... 200
Important safety notes .................. 183
Parking brake ................................ 181
Warning lamp ................................. 288
Breakdown
see Flat tyre
see Towing away
Bulbs
see Replacing bulbs C
Calling up a fault see Display messages
Car
see Vehicle
Car key
see Key
Car wash (care) ................................. 3346
Index
Page 33 of 417

Cockpit
Function Page
:
Steering wheel gearshift
paddles
173
;
Combination switch 125
=
Instrument cluster 32
?
Horn
A
DIRECT SELECT lever 168
B
PARKTRONIC warning dis-
play
207
C
Overhead control panel 39
D
Climate control systems 138
E
Ignition lock 159
Start/Stop button 159 Function Page
F
Adjusts the steering wheel
manually
113
G
Adjusts the steering wheel
electrically
113
Steering wheel heating 114
H
Cruise control lever 186
I
Parking brake 181
J
Diagnostics connection 25
K
Opens the bonnet 328
L
Releases the parking brake 181
M
Light switch 122
N
Night View Assist Plus 22030
CockpitAt a glance
Page 34 of 417

Function Page
:
Overhead control panel 39
;
PARKTRONIC warning dis-
play 207
=
Combination switch 125
?
Instrument cluster 32
A
Horn
B
DIRECT SELECT lever 168
C
Steering wheel gearshift
paddles
173
D
Light switch 122
E
Night View Assist Plus 220
F
Releases the parking brake 181 Function Page
G
Opens the bonnet 328
H
Diagnostics connection 25
I
Ignition lock 159
Start/Stop button 159
J
Adjusts the steering wheel
manually
113
K
Adjusts the steering wheel
electrically
113
Steering wheel heating 114
L
Cruise control lever 186
M
Parking brake 181
N
Climate control systems 138Cockpit
31At a glance
Page 81 of 417
The braking action of PRE-SAFE
®
Brake is
ended automatically if:
R you manoeuvre to avoid the obstacle
R there is no longer any danger of a collision
R there is no longer an obstacle detected in
front of your vehicle
If you approach an obstacle and PRE-SAFE ®
Brake detects a risk of a collision, the system
will alert you both visually and acoustically. If you do not brake or take evasive action, the
system will warn you by automatically braking
the vehicle gently. If there is an increased risk
of collision, preventive passenger protection
measures (PRE-SAFE ®
) are activated
(Y page 54). If a risk of collision remains at
speeds over 30 km/h and you do not brake,
take evasive action or significantly acceler-
ate, automatic braking may be performed up
to a level of automatic emergency braking.
Automatic emergency braking is not per-
formed until immediately prior to an accident
that can no longer be avoided. Anti-theft systems
Immobiliser
The immobiliser prevents your vehicle from
being started without the correct key.
X To activate with the key: remove the key
from the ignition lock.
X To activate with KEYLESS-GO: switch the
ignition off and open the driver's door.
X To deactivate: switch on the ignition.
When leaving the vehicle, always take the key with you and lock the vehicle. Anyone can
start the engine if a valid key has been left
inside the vehicle.
i The immobiliser is always deactivated
when you start the engine. ATA (Anti-Theft Alarm system)
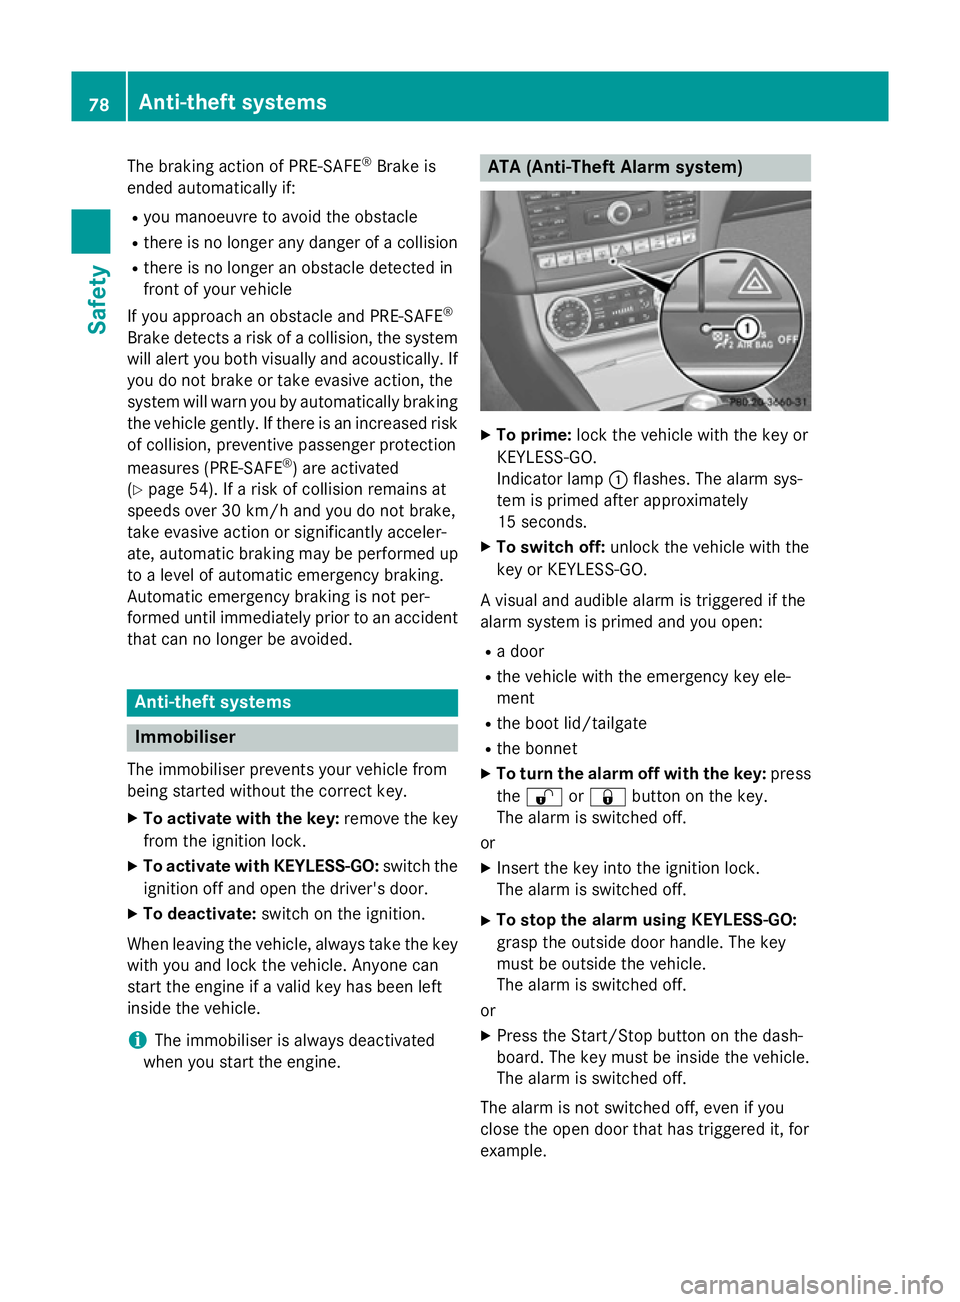
X
To prime: lock the vehicle with the key or
KEYLESS-GO.
Indicator lamp :flashes. The alarm sys-
tem is primed after approximately
15 seconds.
X To switch off: unlock the vehicle with the
key or KEYLESS-GO.
A visual and audible alarm is triggered if the
alarm system is primed and you open: R a door
R the vehicle with the emergency key ele-
ment
R the boot lid/tailgate
R the bonnet
X To turn the alarm off with the key: press
the % or& button on the key.
The alarm is switched off.
or X Insert the key into the ignition lock.
The alarm is switched off.
X To stop the alarm using KEYLESS-GO:
grasp the outside door handle. The key
must be outside the vehicle.
The alarm is switched off.
or
X Press the Start/Stop button on the dash-
board. The key must be inside the vehicle.
The alarm is switched off.
The alarm is not switched off, even if you
close the open door that has triggered it, for
example. 78
Anti-theft systemsSafety
Page 137 of 417
Switching the rear window wiper on/
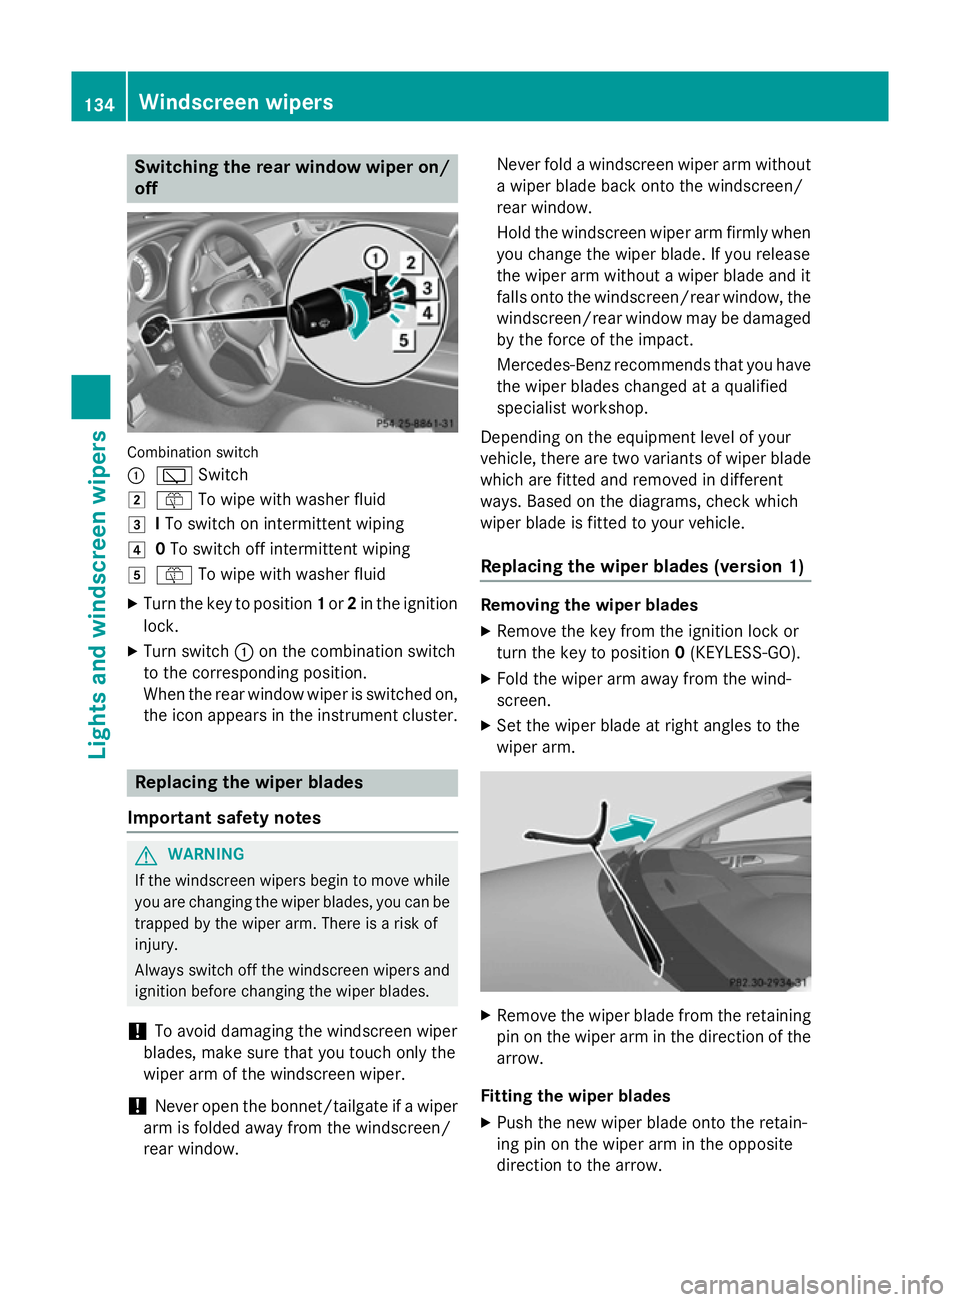
off Combination switch
:
è Switch
2 ô To wipe with washer fluid
3 ITo switch on intermittent wiping
4 0To switch off intermittent wiping
5 ô To wipe with washer fluid
X Turn the key to position 1or 2in the ignition
lock.
X Turn switch :on the combination switch
to the corresponding position.
When the rear window wiper is switched on,
the icon appears in the instrument cluster. Replacing the wiper blades
Important safety notes G
WARNING
If the windscreen wipers begin to move while
you are changing the wiper blades, you can be trapped by the wiper arm. There is a risk of
injury.
Always switch off the windscreen wipers and
ignition before changing the wiper blades.
! To avoid damaging the windscreen wiper
blades, make sure that you touch only the
wiper arm of the windscreen wiper.
! Never open the bonnet/tailgate if a wiper
arm is folded away from the windscreen/
rear window. Never fold a windscreen wiper arm without
a wiper blade back onto the windscreen/
rear window.
Hold the windscreen wiper arm firmly when
you change the wiper blade. If you release
the wiper arm without a wiper blade and it
falls onto the windscreen/rear window, the windscreen/rear window may be damaged
by the force of the impact.
Mercedes-Benz recommends that you have
the wiper blades changed at a qualified
specialist workshop.
Depending on the equipment level of your
vehicle, there are two variants of wiper blade which are fitted and removed in different
ways. Based on the diagrams, check which
wiper blade is fitted to your vehicle.
Replacing the wiper blades (version 1) Removing the wiper blades
X Remove the key from the ignition lock or
turn the key to position 0(KEYLESS-GO).
X Fold the wiper arm away from the wind-
screen.
X Set the wiper blade at right angles to the
wiper arm. X
Remove the wiper blade from the retaining
pin on the wiper arm in the direction of thearrow.
Fitting the wiper blades
X Push the new wiper blade onto the retain-
ing pin on the wiper arm in the opposite
direction to the arrow. 134
Windscreen wipersLights and windscreen wipers
Page 157 of 417
Problems with the auxiliary heating/ventilation
Display messages
Possible causes/consequences and
M
MSolutions FAIL The starter battery is not charged sufficiently or the system is
faulty.
X Charge the starter battery.
X Make another attempt to switch on the auxiliary heating using
the remote control.
X Have the auxiliary heating checked at a qualified specialist
workshop. $
FAIL The signal transmission between the transmitter and the vehicle is
faulty.
X Change your position in relation to the vehicle, moving closer if
necessary.
X Make another attempt to switch the auxiliary heating on or off
using the remote control. ©
FAIL There is not enough fuel in the fuel tank, i.e. the fuel tank is not
filled to the reserve fuel level.
X Refuel at the nearest filling station.
X Make another attempt to switch on the auxiliary heating using
the remote control. The auxiliary heating is faulty.
X Have the auxiliary heating checked at a qualified specialist
workshop. Adjusting the air vents
Important safety notes
G
WARNING
Very hot or very cold air can flow from the air vents. This could result in burns or frostbite in the immediate vicinity of the air vents. There
is a risk of injury.
Make sure that all vehicle occupants always
maintain a sufficient distance to the air out-
lets. If necessary, redirect the airflow to
another area of the vehicle interior. In order to ensure the direct flow of fresh air
through the air vents into the vehicle interior,
please observe the following notes:
R keep the air inlet between the windscreen
and the bonnet free of blockages, such as
ice, snow or leaves.
R never cover the vents or ventilation grilles
in the vehicle interior. 154
Adjusting the air ventsClimate control
Page 166 of 417
ECO start/stop function
Introduction The ECO start/stop function switches the
engine off automatically if the vehicle is stop-
ped under certain conditions.
When pulling away again, the engine starts
automatically. The ECO start/stop function
thereby helps you to reduce the fuel con-
sumption and emissions of your vehicle.
Important safety notes G
WARNING
If the engine is switched off automatically and you exit the vehicle, the engine is restarted
automatically. The vehicle may begin moving. There is a risk of accident and injury.
If you wish to exit the vehicle, always turn off
the ignition and secure the vehicle against
rolling away.
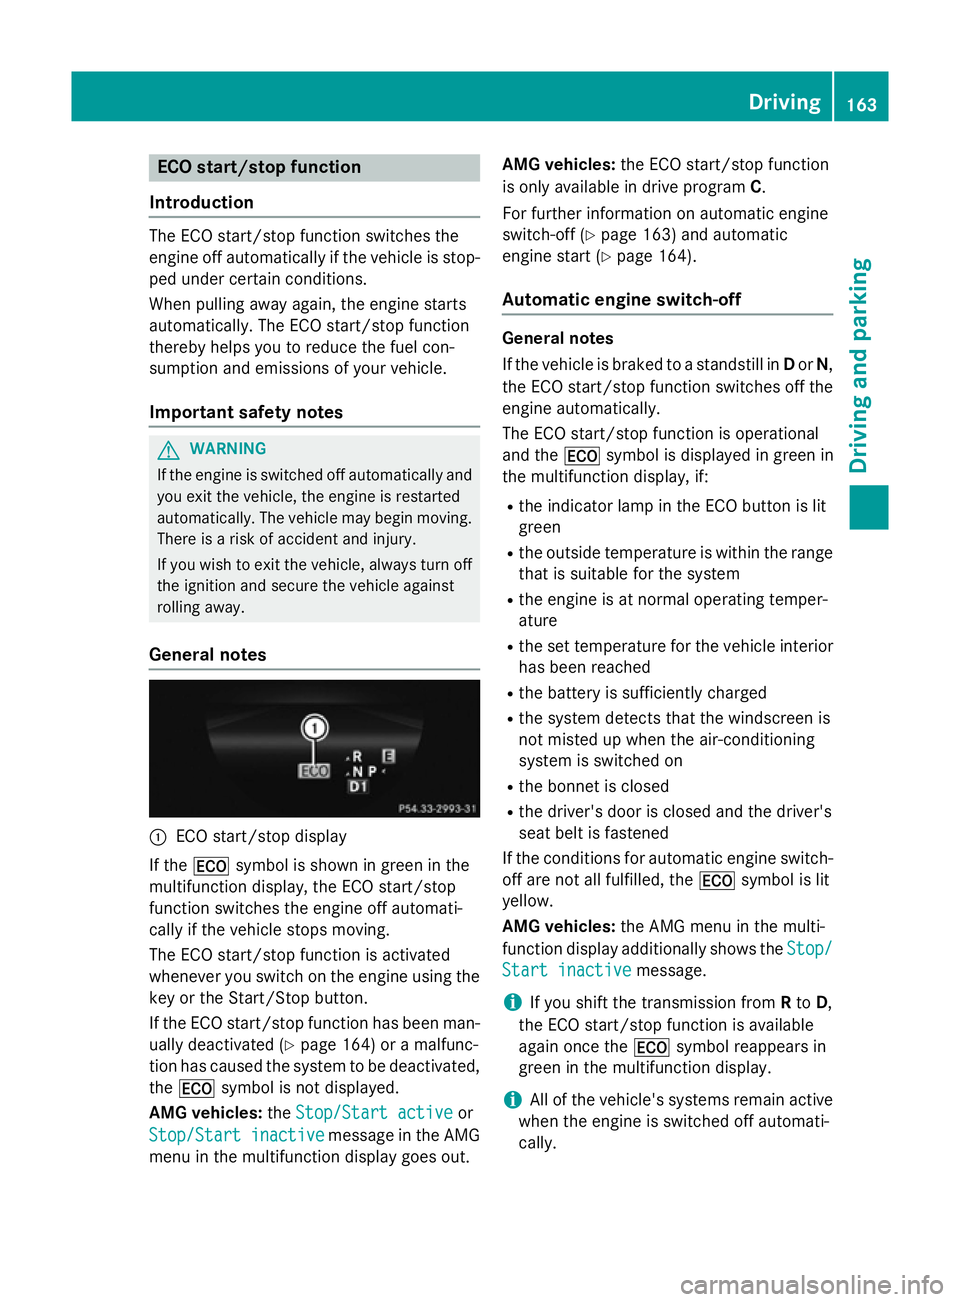
General notes :
ECO start/stop display
If the ¤ symbol is shown in green in the
multifunction display, the ECO start/stop
function switches the engine off automati-
cally if the vehicle stops moving.
The ECO start/stop function is activated
whenever you switch on the engine using the
key or the Start/Stop button.
If the ECO start/stop function has been man- ually deactivated (Y page 164) or a malfunc-
tion has caused the system to be deactivated, the ¤ symbol is not displayed.
AMG vehicles: theStop/Start active
Stop/Start active or
Stop/Start inactive
Stop/Start inactive message in the AMG
menu in the multifunction display goes out. AMG vehicles:
the ECO start/stop function
is only available in drive program C.
For further information on automatic engine
switch-off (Y page 163) and automatic
engine start (Y page 164).
Automatic engine switch-off General notes
If the vehicle is braked to a standstill in
Dor N,
the ECO start/stop function switches off the engine automatically.
The ECO start/stop function is operational
and the ¤symbol is displayed in green in
the multifunction display, if:
R the indicator lamp in the ECO button is lit
green
R the outside temperature is within the range
that is suitable for the system
R the engine is at normal operating temper-
ature
R the set temperature for the vehicle interior
has been reached
R the battery is sufficiently charged
R the system detects that the windscreen is
not misted up when the air-conditioning
system is switched on
R the bonnet is closed
R the driver's door is closed and the driver's
seat belt is fastened
If the conditions for automatic engine switch- off are not all fulfilled, the ¤symbol is lit
yellow.
AMG vehicles: the AMG menu in the multi-
function display additionally shows the Stop/ Stop/
Start inactive
Start inactive message.
i If you shift the transmission from
Rto D,
the ECO start/stop function is available
again once the ¤symbol reappears in
green in the multifunction display.
i All of the vehicle's systems remain active
when the engine is switched off automati-
cally. Driving
163Driving and parking Z
Page 196 of 417
If DISTRONIC PLUS no longer detects a vehi-
cle in front, it may unexpectedly accelerate to the speed stored.
This speed can:
R be too high for a filter lane or a slip road
R be so high in the right lane that you pass
vehicles driving on the left (left-hand drive
countries)
R be so high in the left lane that you pass
vehicles driving on the right (right-hand
drive countries)
If there is a change of drivers, advise the new driver of the speed stored.
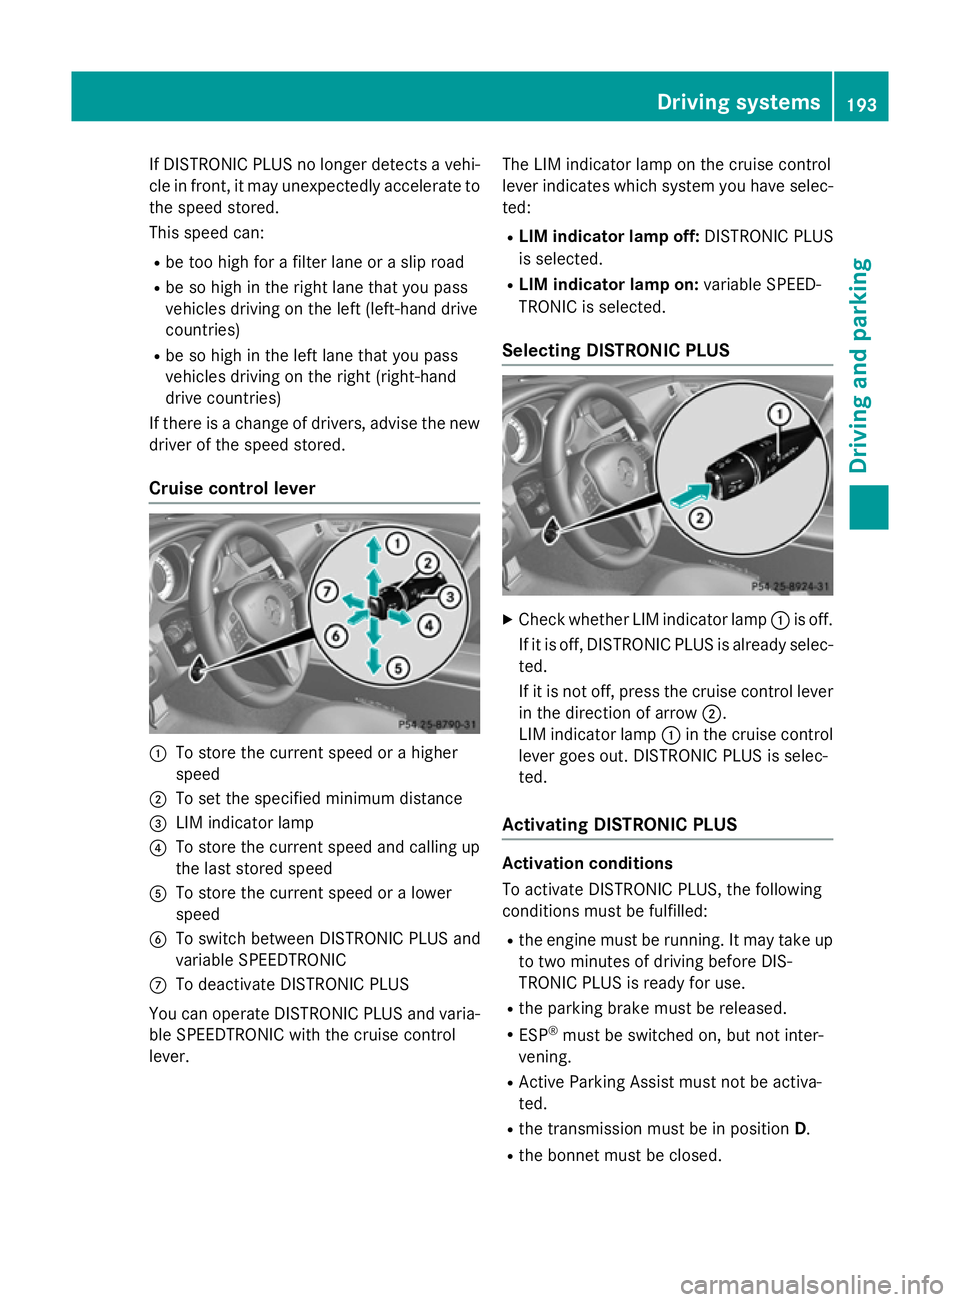
Cruise control lever :
To store the current speed or a higher
speed
; To set the specified minimum distance
= LIM indicator lamp
? To store the current speed and calling up
the last stored speed
A To store the current speed or a lower
speed
B To switch between DISTRONIC PLUS and
variable SPEEDTRONIC
C To deactivate DISTRONIC PLUS
You can operate DISTRONIC PLUS and varia- ble SPEEDTRONIC with the cruise control
lever. The LIM indicator lamp on the cruise control
lever indicates which system you have selec-
ted:
R LIM indicator lamp off: DISTRONIC PLUS
is selected.
R LIM indicator lamp on: variable SPEED-
TRONIC is selected.
Selecting DISTRONIC PLUS X
Check whether LIM indicator lamp :is off.
If it is off, DISTRONIC PLUS is already selec- ted.
If it is not off, press the cruise control lever
in the direction of arrow ;.
LIM indicator lamp :in the cruise control
lever goes out. DISTRONIC PLUS is selec-
ted.
Activating DISTRONIC PLUS Activation conditions
To activate DISTRONIC PLUS, the following
conditions must be fulfilled:
R the engine must be running. It may take up
to two minutes of driving before DIS-
TRONIC PLUS is ready for use.
R the parking brake must be released.
R ESP ®
must be switched on, but not inter-
vening.
R Active Parking Assist must not be activa-
ted.
R the transmission must be in position D.
R the bonnet must be closed. Driving systems
193Driving and parking Z