2014 MERCEDES-BENZ CLA-Class fuel cap
[x] Cancel search: fuel capPage 11 of 358

Rear view camera .......................... 186
Speed Limit Assist ........................
.190
Driving tips
Automatic transmission ................. 149
Brakes .......................................... .162
Break-in period .............................. 140
Checking brake lining thickness .... 164
DISTRONIC PLUS ........................... 174
Downhill gradient ........................... 162
Drinking and driving ....................... 161
Driving abroad ............................... 108
Driving in winter ............................ .165
Driving on flooded roads ................ 165
Driving on wet roads ..................... .165
Exhaust check ............................... 161
Fuel ................................................ 161
General .......................................... 160
Hydroplaning ................................. 165
Icy road surfaces ........................... 165
Limited braking efficiency on sal-
ted roads ....................................... 163
Snow chains .................................. 317
Symmetrical low bea m.................. 108
Wet road surface ........................... 163
DVD audio (on-board computer) ...... 202
DVD video (on-board computer) ...... 203E
EASY-VARIO-PLUS system Cargo compartment enlargement .. 259
EBD (electronic brake force distri-
bution) Display message ............................ 216
Function/note s................................ 71
ECO display
Function/note s............................. 161
On-board computer ....................... 200
ECO start/stop function
Automatic engine start .................. 144
Automatic engine switch-off .......... 143
Deactivating/activating ................. 144
General information ....................... 143
Important safety notes .................. 143
Introduction ................................... 143
Electronic Stability Program
see ESP ®
(Electronic Stability Program) Emergency release
Driver's door .................................... 83
Trunk ............................................... 86
Vehicle ............................................. 83
Emergency Tensioning Devices
Activation ......................................... 41
Function ........................................... 55
Safety guideline s............................. 42
Emissions control
Service and warranty information .... 22
Engine
Check Engine warning lamp ........... 251
Display message ............................ 230
ECO start/stop function ................ 143
Engine number ............................... 347
Irregular running ............................ 145
Jump-starting ................................. 305
Starting problems .......................... 145
Starting the engine with the
SmartKey ....................................... 142
Switching off .................................. 158
Tow-starting (vehicle) ..................... 310
Engine electronics
Problem (malfunction) ................... 145
Engine jump starting
see Jump starting (engine)
Engine oil
Adding ........................................... 284
Additives ........................................ 350
Checking the oil level ..................... 283
Checking the oil level using the
dipstick .......................................... 284
Display message ............................ 231
Filling capacity ............................... 350
Notes about oil grade s................... 349
Notes on oil level/consumption .... 283
Temperature (on-board com-
puter) ............................................. 210
Viscosity ........................................ 350
ESP ®
(Electronic Stability Pro-
gram) 4ETS ................................................ 68
AMG menu (on-board computer) ... 211
Characteristics ................................. 68
Deactivating/activating (AMG
vehicles) .......................................... 69 Index
9
Page 12 of 358

Deactivating/activating (except
AMG vehicles) ................................ 205
Deactivating/activating (notes;
except AMG vehicles) ...................... 69
Display message ............................ 214
ETS .................................................. 68
ETS/4ETS ........................................ 68
Function/note s................................ 67
General notes .................................. 67
Important safety information ........... 68
Trailer stabilization ........................... 71
Warning lamp ................................. 247
ETS/4ETS (Electronic Traction Sys-
tem) ...................................................... 68
ETS (Electronic Traction System) ....... 68
Exhaust check ................................... 161
Exhaust pipe (cleaning instruc-
tions) .................................................. 292
Exterior lighting Setting options .............................. 108
see Lights
Exterior mirrors
Adjusting ....................................... 103
Dipping (automatic) ....................... 104
Folding in/out (automatically )....... 104
Folding in/out (electrically) ........... 103
Folding in when locking (on-board
computer) ...................................... 210
Out of position (troubleshooting) ... 104
Setting ........................................... 104
Storing settings (memory func-
tion) ............................................... 105
Storing the parking position .......... 104
Eyeglasses compartment ................. 257F
Filler cap see Fuel filler flap
Filling capacities (Technical data) ... 347
Flat tire MOExtended tire s.......................... 297
Preparing the vehicle ..................... 296
TIREFIT kit ...................................... 298
Floormats ........................................... 279
Fog lamps Extended rang e.............................. 112
Switching on/of f........................... 109 Front fog lamps
Display message ............................ 227
Switching on/of f........................... 109
Front windshield
see Windshield
Fuel
Additives ........................................ 349
Consumption statistics .................. 199
Displaying the current consump-
tion ................................................ 200
Displaying the range ...................... 200
Driving tips .................................... 161
Fuel gaug e....................................... 31
Grade (gasoline )............................ 348
Important safety notes .................. 348
Premium-grade unleaded gaso-
line ................................................. 348
Problem (malfunction) ................... 157
Refueling ........................................ 155
Tank content/reserve fue l............. 348
Fuel filler flap
Opening ......................................... 156
Fuel level
Calling up the range (on-board
computer) ...................................... 200
Fuel tank
Capacity ........................................ 348
Problem (malfunction) ................... 157
Fuses
Allocation chart ............................. 311
Before changing ............................. 310
Fuse box in the engine compart-
ment .............................................. 310
Fuse box in the front-passenger
footwell .......................................... 311
Important safety notes .................. 310 G
Garage door opener Clearing the memory ..................... 277
General notes ................................ 274
Important safety notes .................. 275
Opening/closing the garage doo r..2 77
Programming (button in the rear-
view mirror) ................................... 275
Gear indicator (on-board com-
puter) ................................................. .210 10
Index
Page 158 of 358

!
Overfilling the fuel tank could damage the
fuel system.
! Take care not to spill any fuel on painted
surfaces. You could otherwise damage the
paintwork.
! Use a filter when refueling from a fuel can.
Otherwise, the fuel lines and/or injection
system could be blocked by particles from
the fuel can.
Do not get into the vehicle again during the
refueling process. Otherwise, electrostatic
charge could build up again.
If you overfill the fuel tank, fuel could spray
out when the fuel pump nozzle is removed.
For further information on fuel and fuel quality (Y page 348). Refueling
General information The fuel filler flap is unlocked or locked auto-
matically when you open or close the vehicle
with the SmartKey.
The position of the fuel filler cap is displayed
00D4 in the instrument cluster. The arrow on
the filling pump indicates the side of the vehi-
cle.
Opening the fuel filler flap 0043
To open the fuel filler flap
0044 Tire pressure table
0087 To insert the fuel filler cap
0085 Fuel type to be used X
Switch the engine off.
X Remove the SmartKey from the ignition
lock.
X Press the fuel filler flap in the direction of
arrow 0043.
The fuel filler flap swings up.
X Turn the fuel filler flap counter-clockwise
and remove it.
X Insert the fuel filler cap into holder on the
inside of fuel filler flap 0087.
X Completely insert the filler neck of the fuel
pump nozzle into the tank, hook in place
and refuel.
X Only fill the tank until the pump nozzle
switches off.
i Do not add any more fuel after the pump
stops filling for the first time. Otherwise,
fuel may leak out.
Closing the fuel filler flap X
Replace the cap on the filler neck and turn
clockwise until it engages audibly.
X Close the fuel filler flap.
i Close the fuel filler flap before locking the
vehicle.
i If you are driving with the fuel filler cap
open, the 00B6reserve fuel warning lamp
flashes. A message appears in the multi-
function display (Y page 231).
In addition, the 00B9Check Engine warning
lamp may light up (Y page 251).
For further information on warning and indi- cator lamps in the instrument cluster, see
(Y page 251). 156
RefuelingDriving and parking
Page 234 of 358

Display messages
Possible causes/consequences and
0050
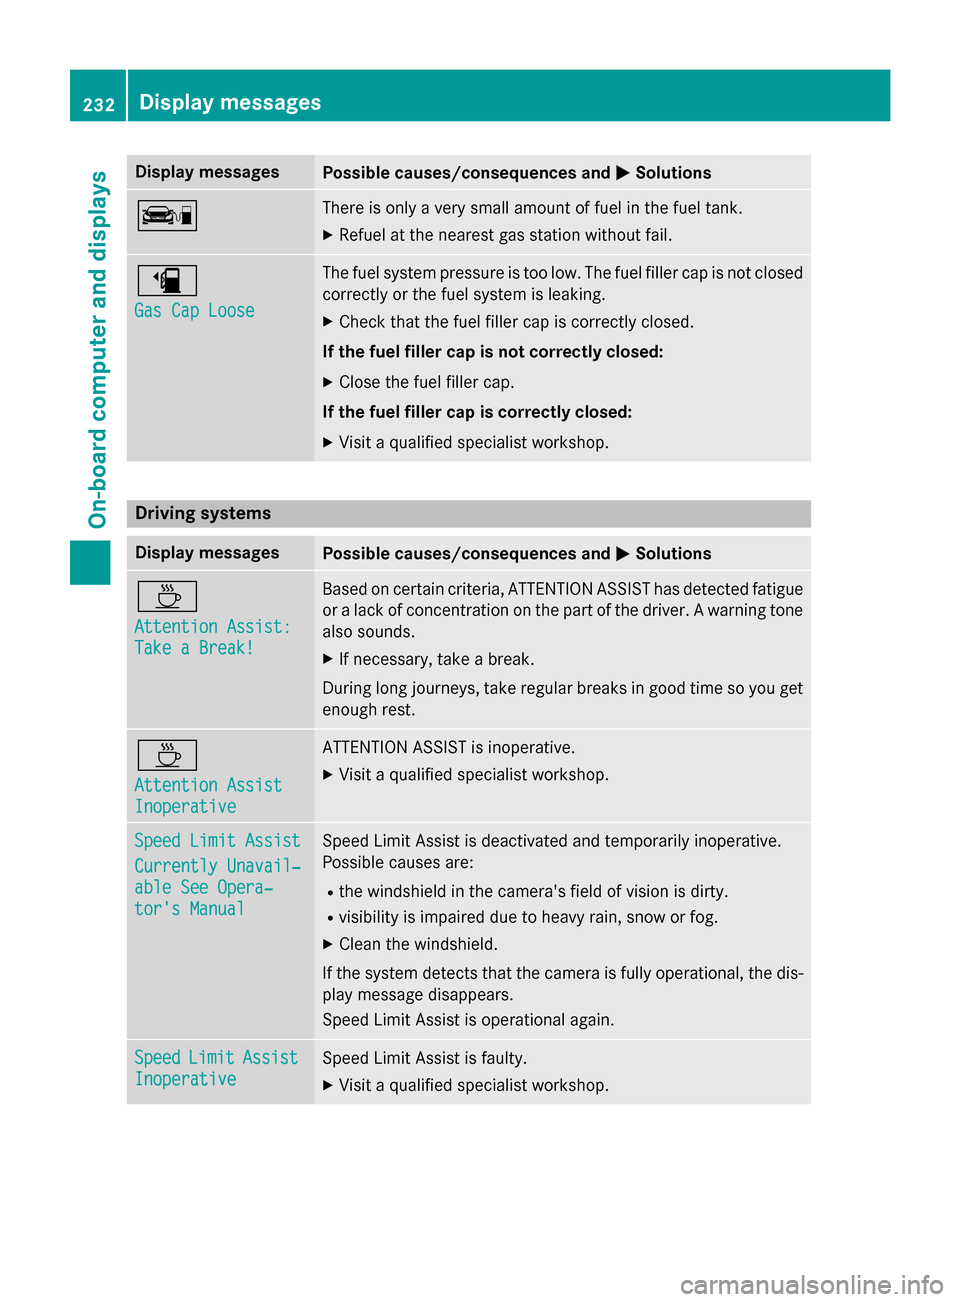
0050Solutions 00D5 There is only a very small amount of fuel in the fuel tank.
X Refuel at the nearest gas station without fail. 00D4
Gas Cap Loose Gas Cap Loose The fuel system pressure is too low. The fuel filler cap is not closed
correctly or the fuel system is leaking.
X Check that the fuel filler cap is correctly closed.
If the fuel filler cap is not correctly closed: X Close the fuel filler cap.
If the fuel filler cap is correctly closed: X Visit a qualified specialist workshop. Driving systems
Display messages
Possible causes/consequences and
0050
0050Solutions 00AD
Attention Assist: Attention Assist:
Take a Break! Take a Break! Based on certain criteria, ATTENTION ASSIST has detected fatigue
or a lack of concentration on the part of the driver. A warning tone also sounds.
X If necessary, take a break.
During long journeys, take regular breaks in good time so you get enough rest. 00AD
Attention Assist Attention Assist
Inoperative Inoperative ATTENTION ASSIST is inoperative.
X Visit a qualified specialist workshop. Speed Limit Assist
Speed Limit Assist
Currently Unavail‐ Currently Unavail‐
able See Opera‐ able See Opera‐
tor's Manual tor's Manual Speed Limit Assist is deactivated and temporarily inoperative.
Possible causes are:
R the windshield in the camera's field of vision is dirty.
R visibility is impaired due to heavy rain, snow or fog.
X Clean the windshield.
If the system detects that the camera is fully operational, the dis-
play message disappears.
Speed Limit Assist is operational again. Speed Speed
Limit
LimitAssist
Assist
Inoperative
Inoperative Speed Limit Assist is faulty.
X Visit a qualified specialist workshop. 232
Display
messagesOn-board computer and displays
Page 253 of 358

Engine
Problem
Possible causes/consequences and
0050
0050Solutions 00B9
The yellow Check
Engine warning lamp
lights up while the
engine is running.
There may be a malfunction, for example:
R in the engine management
R in the fuel injection system
R in the exhaust system
R in the ignition system
R in the fuel system
The emission limit values may be exceeded and the engine may be
in emergency mode.
X Have the vehicle checked as soon as possible at a qualified
specialist workshop.
i In some states, you must immediately visit a qualified special-
ist workshop as soon as the yellow Check Engine warning lamp
lights up. This depends on the locally applicable legal require-
ments. If in doubt, check whether such legal regulations apply in the state in which you are currently driving. 00D4
The yellow reserve fuel
warning lamp lights up
while the engine is run-
ning.
The fuel level has dropped into the reserve range.
X Refuel at the nearest gas station. 00D4
The yellow reserve fuel
warning lamp flashes
while the engine is run-
ning.
The fuel system pressure is too low. The fuel filler cap is not closed
correctly or the fuel system is leaking.
X Check that the fuel filler cap is correctly closed.
X If the fuel filler cap is not correctly closed: close the fuel filler
cap.
X If the fuel filler cap is closed: visit a qualified specialist work-
shop. 00AC
The red coolant warn-
ing lamp lights up while
the engine is running
and the coolant tem-
perature gauge is at the start of the scale. The temperature sensor for the coolant temperature gauge is
defective.
The coolant temperature is no longer being monitored. There is a risk of engine damage if the coolant temperature is too high.
X Pull over and stop the vehicle safely and switch off the engine,
paying attention to road and traffic conditions. Do not continue
driving under any circumstances.
X Secure the vehicle against rolling away (Y page 157).
X Consult a qualified specialist workshop. Warning and indicator lamps in the instrument cluster
251On-board computer and displays Z
Page 303 of 358

X
Correct the tire pressure if it is still at least
130 kP a(1.3 bar/19 psi). See the Tire and
Loading Information placard on the driver's side B-pillaro r the tire pressure table in the
fuel filler flap for values.
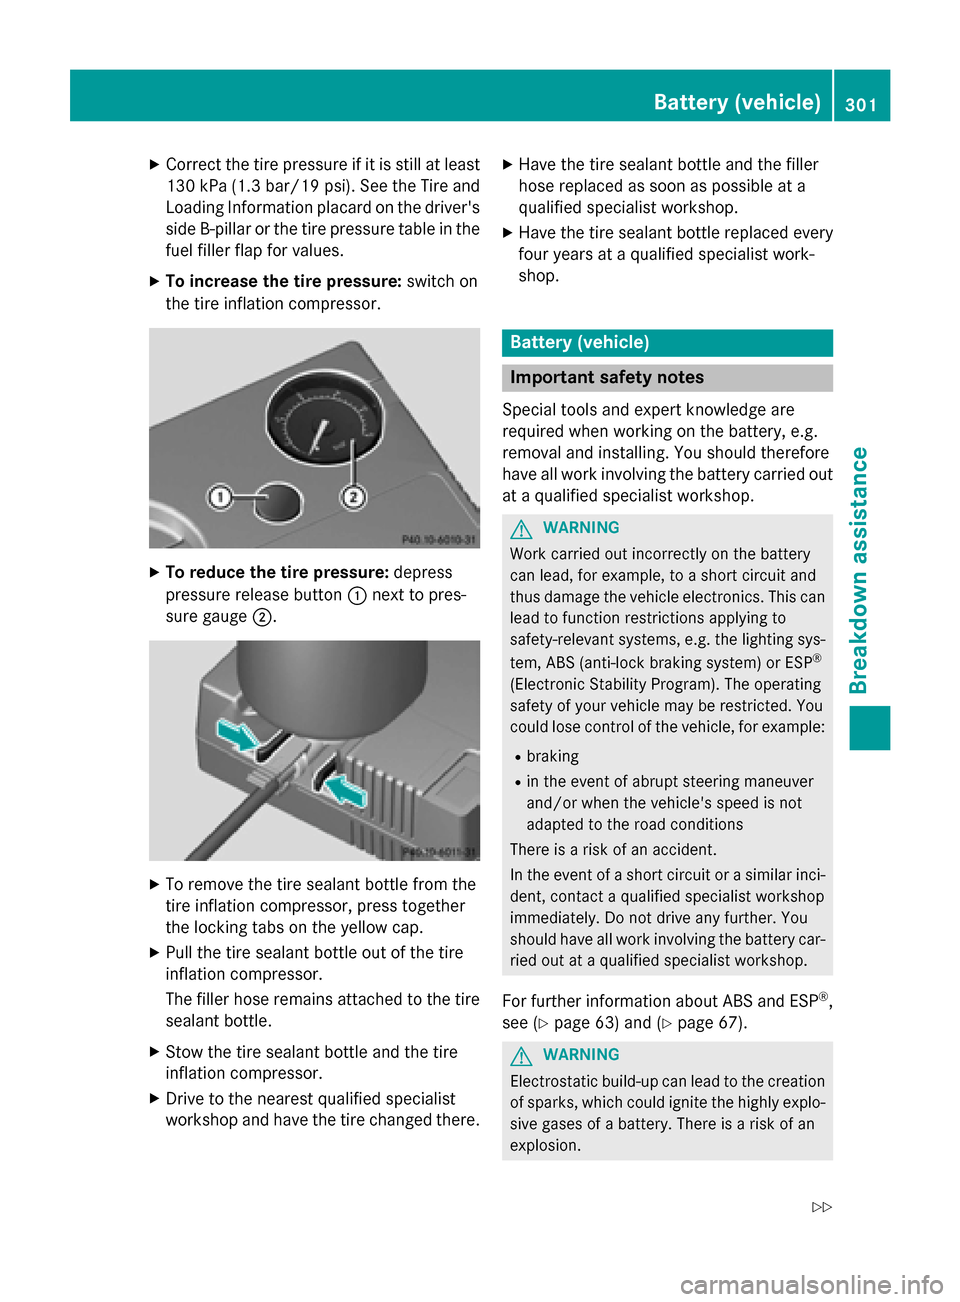
X To increase the tire pressure: switch on
the tire inflation compressor. X
To reduce the tire pressure: depress
pressure release button 0043next to pres-
sure gauge 0044. X
To remove the tire sealant bottle from the
tire inflation compressor, press together
the locking tabs on the yellow cap.
X Pull the tire sealant bottle out of the tire
inflation compressor.
The filler hose remains attached to the tire
sealant bottle.
X Stow the tire sealant bottle and the tire
inflation compressor.
X Drive to the nearest qualified specialist
workshop and have the tire changed there. X
Have the tire sealant bottle and the filler
hose replaced as soon as possible at a
qualified specialist workshop.
X Have the tire sealant bottle replaced every
four years at a qualified specialist work-
shop. Battery (vehicle)
Important safety notes
Special tools and expert knowledge are
required when working on the battery, e.g.
removal and installing. You should therefore
have all work involving the battery carried out
at a qualified specialist workshop. G
WARNING
Work carried out incorrectly on the battery
can lead, for example, to a short circuit and
thus damage the vehicle electronics. This can lead to function restrictions applying to
safety-relevant systems, e.g. the lighting sys-
tem, ABS (anti-lock braking system) or ESP ®
(Electronic Stability Program). The operating
safety of your vehicle may be restricted. You
could lose control of the vehicle, for example:
R braking
R in the event of abrupt steering maneuver
and/or when the vehicle's speed is not
adapted to the road conditions
There is a risk of an accident.
In the event of a short circuit or a similar inci- dent, contact a qualified specialist workshop
immediately. Do not drive any further. You
should have all work involving the battery car-
ried out at a qualified specialist workshop.
For further information about ABS and ESP ®
,
see (Y page 63) and (Y page 67). G
WARNING
Electrostatic build-up can lead to the creation of sparks, which could ignite the highly explo-
sive gases of a battery. There is a risk of an
explosion. Battery (vehicle)
301Breakdown assistance
Z
Page 307 of 358

Jump-starting
For the jump-starting procedure, use only the jump-starting connection point, consisting of a positive terminal and a ground point, in the engine compartment. G
WARNING
Battery acid is caustic. There is a risk of injury.
Avoid contact with the skin, eyes or clothing. Do not inhale any battery gases. Do not lean over the battery. Keep children away from batteries. Wash battery acid immediately with water and seek
medical attention. G
WARNING
During charging and jump-starting, explosive gases can escape from the battery. There is a risk of an explosion.
Particularly avoid fire, open flames, creating sparks and smoking. Ensure there is sufficient ven-
tilation while charging and jump-starting. Do not lean over a battery. G
WARNING
During the charging process, a battery produces hydrogen gas. If a short circuit occurs or sparks
are created, the hydrogen gas can ignite. There is a risk of an explosion.
R Make sure that the positive terminal of a connected battery does not come into contact with
vehicle parts.
R Never place metal objects or tools on a battery.
R It is important that you observe the described order of the battery terminals when connecting
and disconnecting a battery.
R When jump-starting, make sure that the battery poles with identical polarity are connected.
R It is particularly important to observe the described order when connecting and disconnecting
the jumper cables.
R Never connect or disconnect the battery terminals while the engine is running. G
WARNING
A discharged battery can freeze at temperatures below freezing point. When jump-starting the
vehicle or charging the battery, gases can escape from the battery. There is a risk of an explosion.
Allow the frozen battery to thaw out before charging it or jump-starting.
! Avoid repeated and lengthy starting attempts. Otherwise, the catalytic converter could be
damaged by the non-combusted fuel.
If, at low temperatures, the indicator lamps/warning lamps in the instrument cluster do not
light up, it is highly likely that the discharged battery has frozen. In this case you may neither
jump-start the vehicle nor charge the battery. The service life of a thawed-out battery may be
shorter. The starting characteristics can be impaired, particularly at low temperatures. Have
the thawed-out battery checked at a qualified specialist workshop. Jump-starting
305Breakdown assistance Z
Page 321 of 358

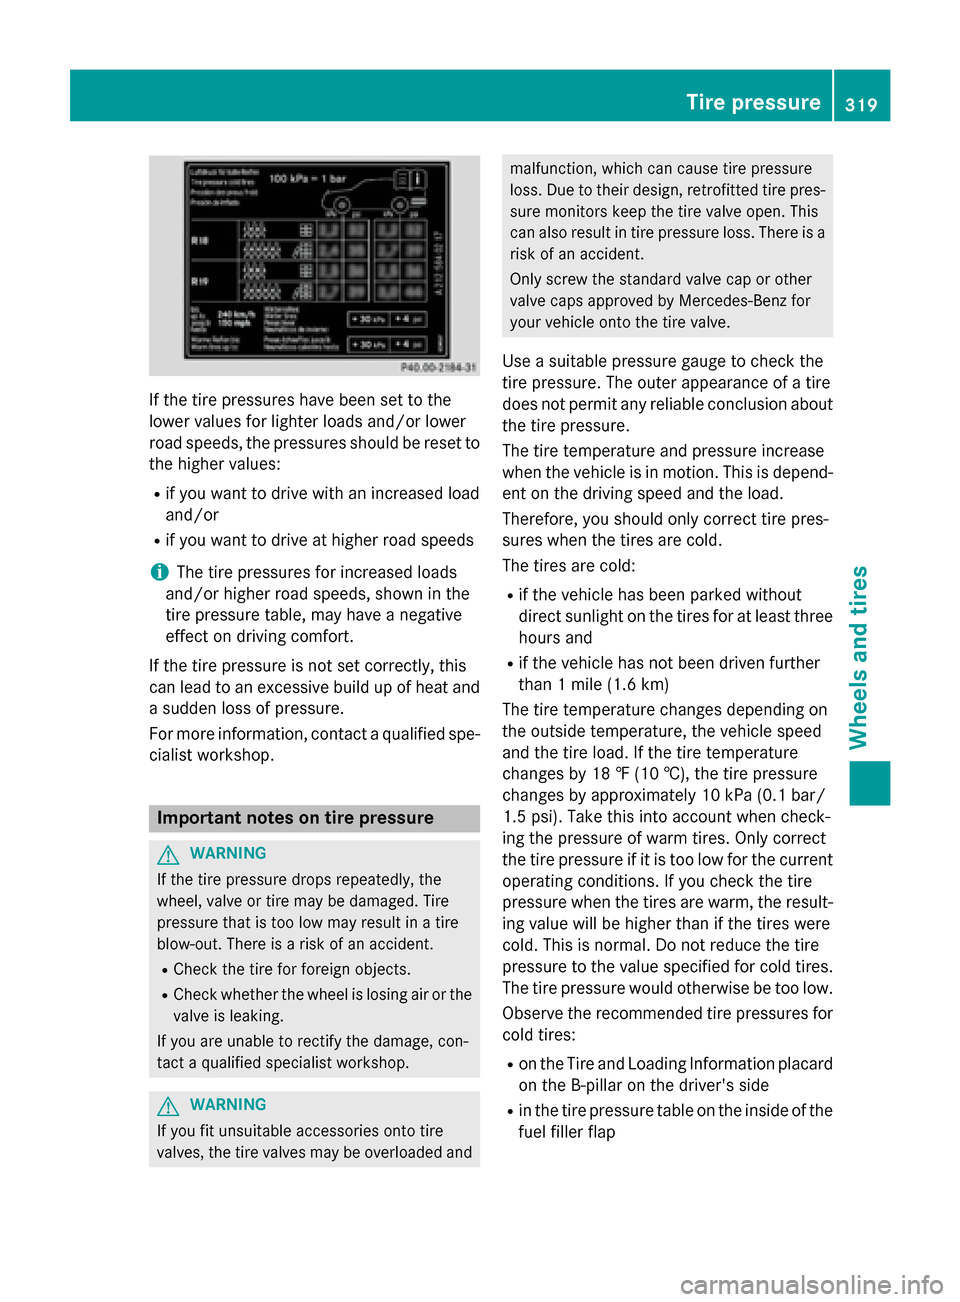
If the tire pressures have been set to the
lower values for lighter loads and/or lower
road speeds, the pressures should be reset to
the higher values:
R if you want to drive with an increased load
and/or
R if you want to drive at higher road speeds
i The tire pressures for increased loads
and/or higher road speeds, shown in the
tire pressure table, may have a negative
effect on driving comfort.
If the tire pressure is not set correctly, this
can lead to an excessive build up of heat and
a sudden loss of pressure.
For more information, contact a qualified spe- cialist workshop. Important notes on tire pressure
G
WARNING
If the tire pressure drops repeatedly, the
wheel, valve or tire may be damaged. Tire
pressure that is too low may result in a tire
blow-out. There is a risk of an accident. R Check the tire for foreign objects.
R Check whether the wheel is losing air or the
valve is leaking.
If you are unable to rectify the damage, con-
tact a qualified specialist workshop. G
WARNING
If you fit unsuitable accessories onto tire
valves, the tire valves may be overloaded and malfunction, which can cause tire pressure
loss. Due to their design, retrofitted tire pres-
sure monitors keep the tire valve open. This
can also result in tire pressure loss. There is a
risk of an accident.
Only screw the standard valve cap or other
valve caps approved by Mercedes-Benz for
your vehicle onto the tire valve.
Use a suitable pressure gauge to check the
tire pressure. The outer appearance of a tire
does not permit any reliable conclusion about the tire pressure.
The tire temperature and pressure increase
when the vehicle is in motion. This is depend-
ent on the driving speed and the load.
Therefore, you should only correct tire pres-
sures when the tires are cold.
The tires are cold:
R if the vehicle has been parked without
direct sunlight on the tires for at least three
hours and
R if the vehicle has not been driven further
than 1 mile (1.6 km)
The tire temperature changes depending on
the outside temperature, the vehicle speed
and the tire load. If the tire temperature
changes by 18 ‡ (10 †), the tire pressure
changes by approximately 10 kPa (0.1 bar/
1.5 psi). Take this into account when check-
ing the pressure of warm tires. Only correct
the tire pressure if it is too low for the current operating conditions. If you check the tire
pressure when the tires are warm, the result-ing value will be higher than if the tires were
cold. This is normal. Do not reduce the tire
pressure to the value specified for cold tires.
The tire pressure would otherwise be too low.
Observe the recommended tire pressures for
cold tires:
R on the Tire and Loading Information placard
on the B-pilla ron the driver's side
R in the tire pressure table on the inside of the
fuel filler flap Tire pressure
319Wheels and tires Z