2014 MERCEDES-BENZ CL-Class stop start
[x] Cancel search: stop startPage 214 of 494

Only in audio DVD mode
X To pause playback: switch on audio DVD
mode (Y page 210).
X Select Ëby sliding VÆand turning
cVd the COMAND controller and press
W to confirm.
The Ë display changes to Ì.
X To continue playback: selectÌand
press Wto confirm.
Playback continues from the point where it
was interrupted. The Ìdisplay changes
to Ë.
Stop function This function is only available in audio DVD
mode.
X
Switch on audio DVD mode (Y page 210).
X To interrupt playback: selectÉby
sliding VÆand turning cVdthe COMAND
controller and press Wto confirm.
The Ë display changes to Ì.É
remains highlighted.
X To continue playback: selectÌand
press Wto confirm.
Playback continues from the point where it
was interrupted.
X To stop playback: while playback is
interrupted, select Éagain and press
W to confirm.
or
X Select Éand confirm by pressing W
twice in rapid succession.
Ì is highlighted.
X To restart playback: selectÌand
press Wto confirm.
Playback starts at the beginning of the
DVD. Selecting CD/audio DVD/MP3 discs Selecting via the media list
X
In CD/audio DVD and MP3 mode: select
Media by sliding
VÆor turning cVdthe
COMAND controller and press Wto
confirm.
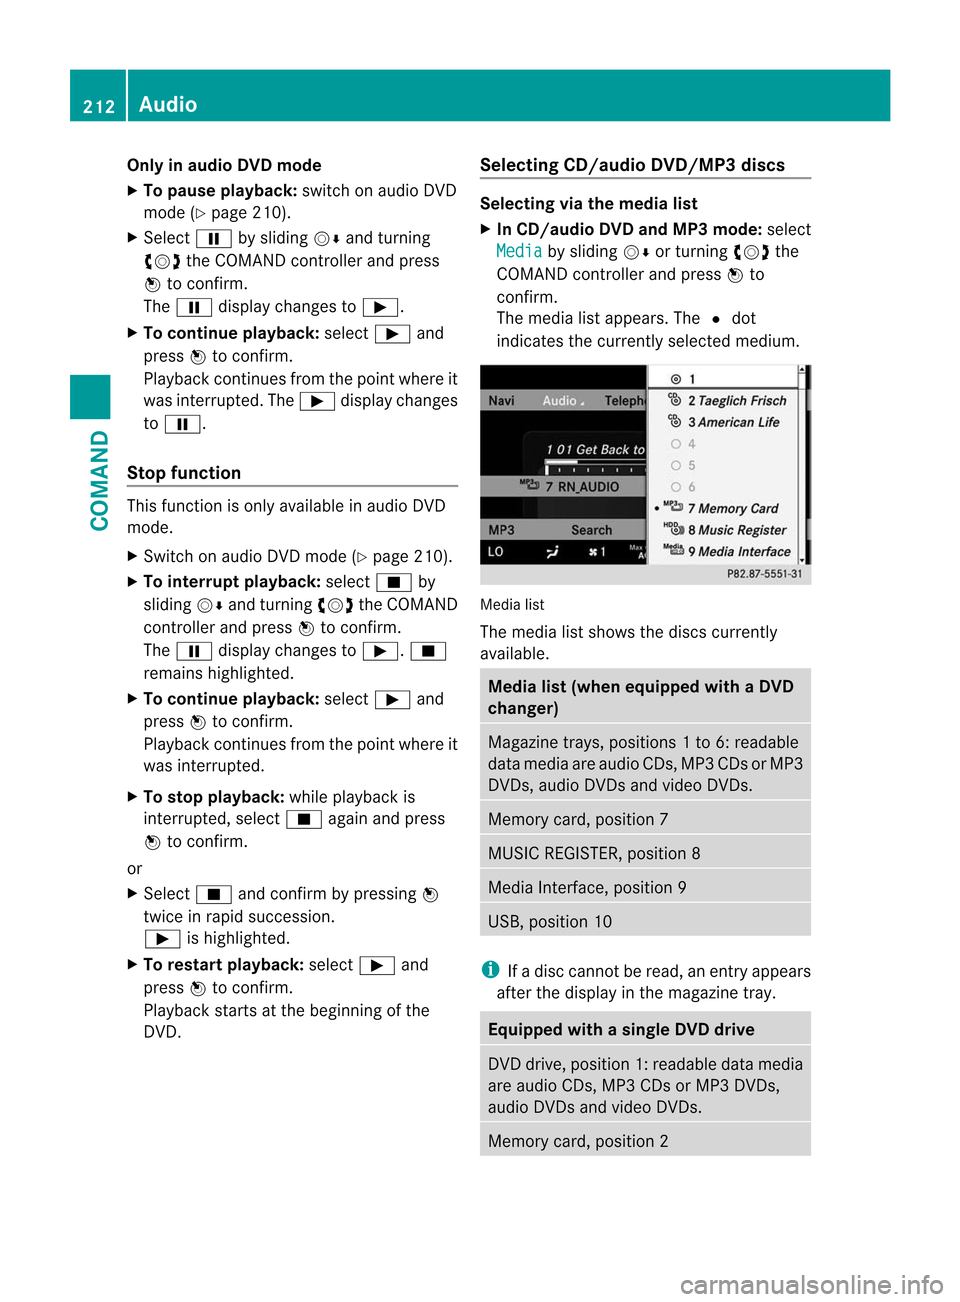
The media list appears. The #dot
indicates the currently selected medium. Media list
The media list shows the discs currently
available.
Media list (when equipped with a DVD
changer)
Magazine trays, positions
1to 6: readable
data media are audio CDs, MP3 CDs or MP3
DVDs, audio DVDs and video DVDs. Memory card, position 7
MUSIC REGISTER, position 8
Media Interface, position 9
USB, position 10
i
If a disc cannot be read, an entry appears
after the display in the magazine tray. Equipped with a single DVD drive
DVD drive, position 1: readable data media
are audio CDs, MP3 CDs or MP3 DVDs,
audio DVDs and video DVDs.
Memory card, position 2212
AudioCOMAND
Page 232 of 494

authorized Mercedes-Ben
zCenter. This will
allow you to play video DVDs with a
differen tregion code, provided that they
are produced in accordance with the PAL
or NTSC standard. The region code can be
changed up to five times.
Function restrictions Depending on the DVD, it is possible that
certain functions or actions will be
temporarily blocked or may not function at all.
As soon as you try to activate these functions
or actions, you will see the Ksymbol in the
display.
Inserting and removing DVDs X
Proceed as described in the "Inserting and
ejecting CDs and DVDs" section
(Y page 209).
Activating video DVD mode Option 1
X
Insert a video DVD.
COMAND loads the medium inserted and
starts to play it.
Option 2
X Select Video in the main function bar by
sliding ZVand turning cVdthe COMAND
controller and press Wto confirm.
Video DVD mode is switched on.
Hiding/showing the navigation menu X
To show: turncVd or slide ZVÆthe
COMAND controller.
i This function is not available while the
DVD's own menu (Y page 232) is being
displayed.
X To hide: slideZVÆ the COMAND
controller.
or
X Wait for approximately eight seconds. Navigation menu displayed
:
Data medium type
; Current track
= Current scene
? Track time
A To show the menu
Showing/hiding the menu This function is not available while the DVD's
own menu (Y
page 232) is being displayed.
X To show: pressWthe COMAND
controller.
or
X Select Menu while the navigation menu is
shown and press Wto confirm.
X To hide: slideZVthe COMAND controller
and confirm Full Screen by pressing
W. Menu shown
:
Video DVD options
; Pause function
= Stop function
? Full-screen function 230
VideoCOMAND
Page 233 of 494

A
Media selection
B Sound settings
Fast forward/rewind X
Slide XVY and hold the COMAND
controller until the desired position has
been reached.
You see the navigation menu.
Selecting avideo DVD X
Press Wthe COMAND controller to show
the menu.
X Select Media by sliding
VÆand turning
cVd the COMAND controller and press
W to confirm.
The media list appears. The #dot
indicates the current medium being played.
Video DVDs are indicated by the ýicon. :
ý symbol for a video DVD
; Video DVD currently playing
X Select DVD-V by turning
cVdthe COMAND
controller and press Wto confirm.
COMAN Dloads the video DVD and starts
playback.
i If you select a CD, an audio DVD or an
MP3 medium, you switch to the respective
audio mode. You can find further
information about the media list on
(Y page 212). Stop function X
Press Wthe COMAND controller to show
the menu.
X To interrupt playback: selectÉby
turning cVdthe COMAND controller and
press Wto confirm.
The Ë display changes to Ì.The
video image is hidden.
X To continue playback: selectÌand
press Wto confirm.
Playback continues from the point where it
was interrupted.
X To stop playback: while playback is
interrupted, select Éagain and press
W to confirm.
or
X During playback, confirm Éby pressing
W twice in quick succession.
Selection is at Ì.
X To restart playback: confirmÌby
pressing W.
Playback restarts from the beginning.
Pause function X
Press Wthe COMAND controller to show
the menu.
X To pause: selectËby turning cVdthe
COMAND controller and press Wto
confirm.
The Ë display changes to Ì.
X To continue playback: selectÌand
press Wto confirm.
The menu is hidden.
Selecting ascene/chapter If the film is divided into scenes or chapters,
you can select them directly while the film is
running, or skip forwards step-by-step. Some
DVDs do no
tpermit this at certain points (e.g.
during the opening credits). Video
231COMAND Z
Page 237 of 494

gradually. This enables you to determine
whether the system is able to play the
music at high volume without distorting it. Vehicle
Vehicle functions
General information In this menu, you can set the following vehicle
functions:
R
ECO
R multicontour seat settings
R rear window blind
R EASY-ENTRY/EXIT feature
R exterior lighting delayed switch-off
R interior lighting delayed switch-off
R ambient lighting
R automatic folding mirror function
R locator lighting
R automatic locking feature
R trunk lid opening height restriction
You can open the "Vehicle" menu in one of
two ways.
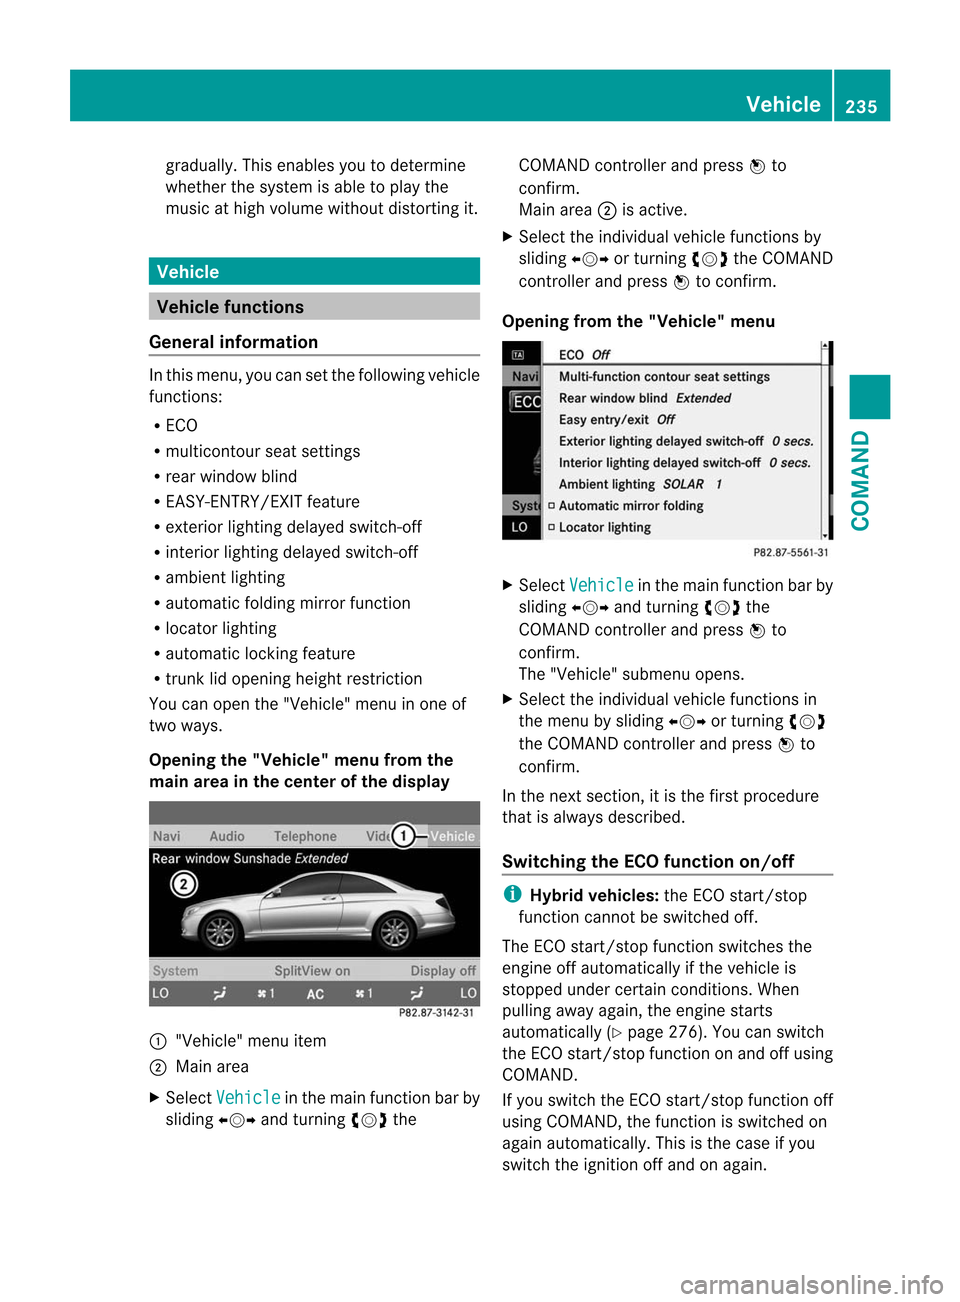
Opening the "Vehicle" menu from the
main area in the center of the display :
"Vehicle" menu item
; Main area
X Select Vehicle in the main function bar by
sliding XVYand turning cVdthe COMAND controller and press
Wto
confirm.
Main area ;is active.
X Select the individual vehicle functions by
sliding XVYor turning cVdthe COMAND
controller and press Wto confirm.
Opening from the "Vehicle" menu X
Select Vehicle in the main function bar by
sliding XVYand turning cVdthe
COMAND controller and press Wto
confirm.
The "Vehicle" submenu opens.
X Select the individual vehicle functions in
the menu by sliding XVYor turning cVd
the COMAND controller and press Wto
confirm.
In the next section, it is the first procedure
that is always described.
Switching the ECO function on/off i
Hybrid vehicles: the ECO start/stop
function cannot be switched off.
The ECO start/stop function switches the
engine off automatically if the vehicle is
stopped under certain conditions. When
pulling away again, the engine starts
automatically (Y page 276). You can switch
the ECO start/stop function on and off using
COMAND.
If you switch the ECO start/stop function off
using COMAND, the function is switched on
again automatically. This is the case if you
switch the ignition off and on again. Vehicle
235COMAND Z
Page 238 of 494

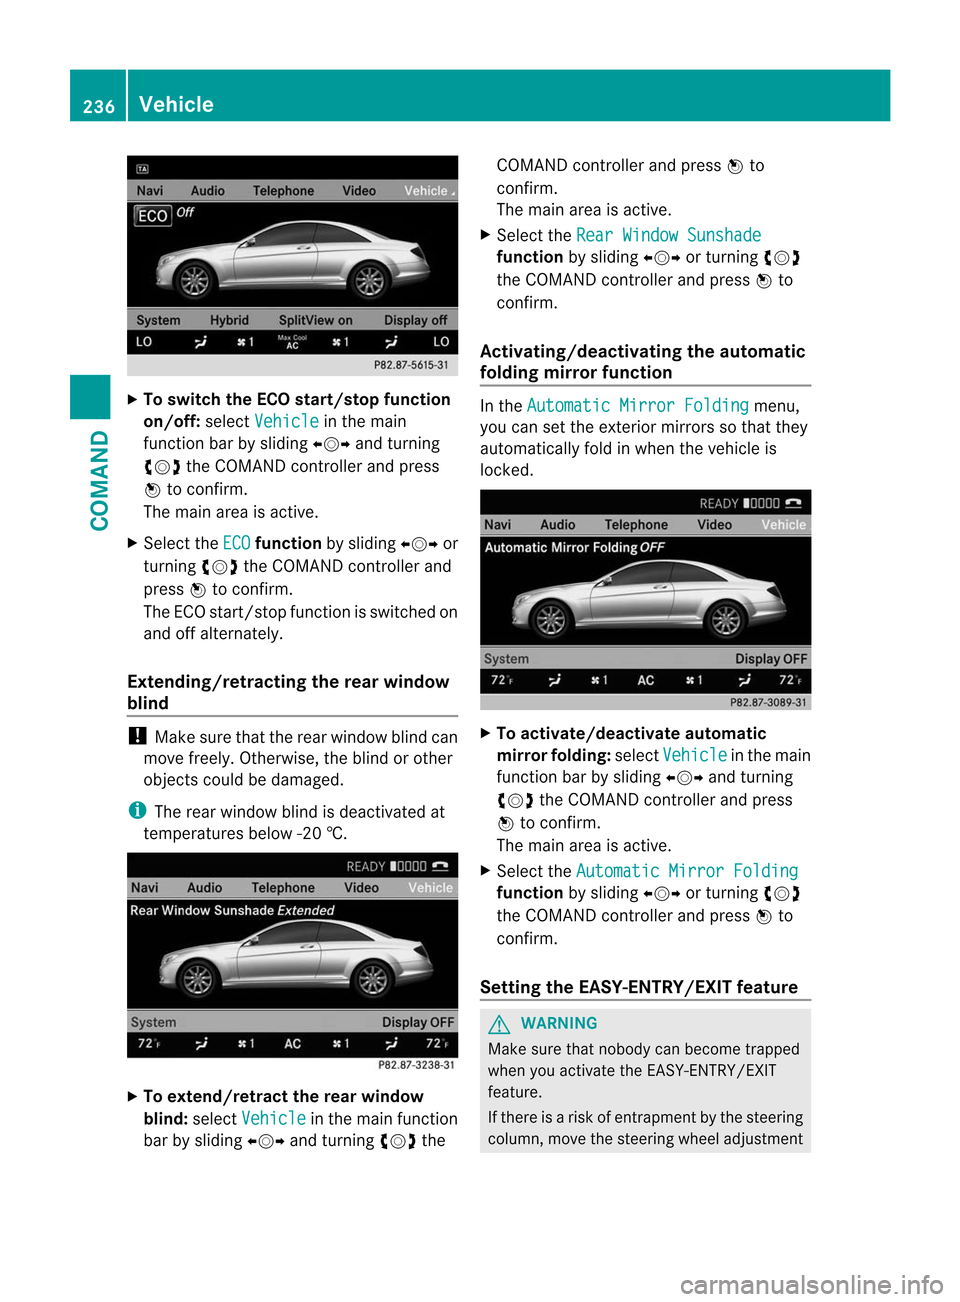
X
To switch the ECO start/stop function
on/off: selectVehicle in the main
functio nbar by sliding XVYand turning
cVd the COMAND controller and press
W to confirm.
The main area is active.
X Select the ECO function
by sliding XVYor
turning cVdthe COMAND controller and
press Wto confirm.
The ECO start/stop function is switched on
and off alternately.
Extending/retracting the rea rwindow
blind !
Make sure that the rear window blind can
move freely. Otherwise, the blind or other
objects could be damaged.
i The rear window blind is deactivated at
temperatures below -2 0†.X
To extend/retract the rear window
blind: selectVehicle in the main function
ba rb y sliding XVYand turning cVdthe COMAND controller and press
Wto
confirm.
The main area is active.
X Selec tthe Rear Window Sunshade function
by sliding XVYor turning cVd
the COMAND controller and press Wto
confirm.
Activating/deactivating the automatic
folding mirror function In the
Automatic Mirror Folding menu,
you can set the exterior mirrors so that they
automatically fold in when the vehicle is
locked. X
To activate/deactivate automatic
mirror folding: selectVehicle in the main
function bar by sliding XVYand turning
cVd the COMAND controller and press
W to confirm.
The main area is active.
X Select the Automatic Mirror Folding function
by sliding XVYor turning cVd
the COMAND controller and press Wto
confirm.
Setting the EASY-ENTRY/EXIT feature G
WARNING
Make sure that nobody can become trapped
when you activate the EASY-ENTRY/EXIT
feature.
If there is a risk of entrapmentb y the steering
column, move the steering wheel adjustment 236
VehicleCOMAND
Page 253 of 494

X
Turn the light switch to $orc.
or
X If the rear fog lamp is switched on: press
the light switch in to the stop.
Low-beam headlamps X
To switch on the low-beam headlamps:
turn the SmartKey in the ignition lock to
position 2or start the engine.
X Turn the light switch to L.
The T indicator lamp on the light switch
lights up.
X To switch off the low-beam
headlamps: turn the light switch to $.
Daytime running lamps Daytime running lamps in Canada
The daytime running lamps function is
required by law in Canada. It cannot therefore
be deactivated.
X Turn the light switch to $orc.
With the engine running: depending on the
ambient light, the daytime running lamps or
the low-beam headlamps are switched on.
When the low-beam headlamps are
switched on, the Tindicator lamp on
the light switch lights up.
When the engine is running and the vehicle is
stationary or if the electronic parking brake is
applied: if you move the selector lever from a
drive position to P, the daytime running
lamps/low-beam headlamps go out after
three minutes.
When the engine is running, the vehicle is
stationary and in high ambient light
brightness: if you turn the light switch
to T, you turn on the daytime running
lamps and parking lamps.
If the engine is running and you turn the light
switch to L, the manual settings take
precedence over the daytime running lamps. Daytime running lamps in the USA
In the USA, the daytime running lamps are
deactivated upon delivery from the factory.
X
To activate the daytime running
lamps: activate the daytime running lamps
function in the on-board computer
(Y page 349).
X Turn the light switch to $orc.
With the engine running: depending on the
ambient light, the daytime running lamps or
the low-beam headlamps are switched on.
When the low-beam headlamps are
switched on, the Tindicator lamp on
the light switch lights up.
If the engine is running and you turn the light
switch to TorL, the manual settings
take precedence over the daytime running
lamps.
Automatic headlamp mode X
To switch on automatic headlamp
mode: turn the light switch to c.
SmartKey in position 1in the ignition lock:
the parking lamps are switched on or off
automatically depending on the brightness
of the ambient light.
With the engine running: depending on the
brightness of the ambient light, the daytime
running lamps 10
or the parking lamps and
low-beam headlamps are switched on or off
automatically.
When the low-beam headlamps are
switched on, the Tindicator lamp on
the light switch lights up. G
WARNING
If the light switch is set to c, the low-beam
headlamps will not come on automatically if
it is foggy. This could endanger you and
others. Therefore, turn the light switch to
L in fog.
10 Only if daytime running lamps have been activated via the on-board computer. Exterior lighting
251Lights and windshield wipers
Z
Page 261 of 494

Changing the windshiel
dwiper blades Moving the wiper blades to
avertical
position
Vehicles without KEYLESS-GO
X Turn the SmartKey to position 1or 2in the
ignitio nlock.
X Set the windshield wipers to
position °.
X When the wiper arms have reached a
vertical position, turn the SmartKey to
position 0and remove it from the ignition
lock.
Vehicles with KEYLESS-GO
X Switch off the engine.
X Remove your foot from the brake pedal.
X Set the windshield wipers to
position °.
X Press the Start/Stop button repeatedly
until the windshield wipers start.
X When the wiper arms have reached a
vertical position, press the Start/Stop
button.
Removing the wiper blades
X Fold the wiper arm away from the
windshield until it engages.
X Set the wiper blade at right angles to the
wiper arm. X
Remove the wiper blade from the retaining
pin on the wiper arm in the direction of the
arrow. Installing the wiper blades
X
Push the new wiper blade ontot he
retaining pin on the wiper arm in the
opposite direction to the arrow.
Make sure that the wiper blade slides fully
onto the retaining pin on the wiper arm.
X Turn the wiper blade parallel to the wiper
arm.
X Fold the wiper arm back onto the
windshield. Problems with the windshield wipers
The windshield wipers are obstructed Leaves or snow, for example, may be
obstructing the windshield wiper movement.
The wiper motor has been deactivated.
X
For safety reasons, you should remove the
SmartKey from the ignition lock.
or
X Switch off the engine using the Start/Stop
button and open the driver's door.
X Remove the cause of the obstruction.
X Switch the windshield wipers back on.
The windshield wipers are inoperative The windshield wiper drive is malfunctioning.
X
Select another wiper speed on the
combination switch.
X Have the windshield wipers checked at a
qualified specialist workshop.
The spray nozzles are misaligned The windshield washer fluid from the spray
nozzles no longer hits the center of the
windshield. The spray nozzles are misaligned.
X
Have the spray nozzles adjusted at a
qualified specialist workshop. Windshield wipers
259Lights and windshield wipers Z
Page 275 of 494

could lose control of the vehicle and hit
someone or something .Only shift into gear
when the engine is idling normally and when
your right foo tis firmly on the brake pedal.
! Warm up the engine quickly. Do not use
the engine's full performance until it has
reached operating temperature.
Only shift the automatic transmission to
the desired drive position when the vehicle
is stationary.
Where possible, avoid spinning the drive
wheels when pulling away on slippery
roads. You could otherwise damage the
drive train.
! CL 63 AMG: at low engine oil
temperatures below 68 ‡(+20 †), the
maximu mengine speed is restricted in
order to protect the engine .To protec tthe
engine and maintain smooth engine
operation, avoid driving at full throttle when
the engine is cold. Key positions
SmartKey g
To remove the SmartKey
1 Power supply for some consumers, such
as the windshield wipers
2 Ignition (power supply for all consumers)
and drive position
3 To start the engine
i The SmartKey can be turned in the
ignition lock even if it is not the correct SmartKey for the vehicle. The ignition is not
switched on. The engine cannot be started.
KEYLESS-GO General information
Vehicles with KEYLESS-GO are equipped with
aS
martKey featuring an integrated KEYLESS-
GO function and a detachable Start/Stop
button.
The Start/Stop button must be inserted into
the ignitio nlock and the SmartKey must be in
the vehicle.
Pressing the Start/Stop button several times
in succession corresponds to the different
SmartKey positions in the ignition lock. This
is only the case if you are not depressing the
brake pedal.
If you depress the brake pedal and press the
Start/Stop button, the engine starts
immediately.
The Start/Stop button can be removed from
the ignition lock. Then, you can insert the
SmartKey into the ignition lock.
i You do not have to remove the Start/Stop
button from the ignition lock when you
leave the vehicle. However, you should
always take the SmartKey with you when
leaving the vehicle. The vehicle can be
started with the Start/Stop button and the
electrical equipment can be operated while
the SmartKey is in the vehicle. :
Start/Stop button
; Ignition lock Driving
273Driving and parking Z