2014 MERCEDES-BENZ C-Class ESP
[x] Cancel search: ESPPage 250 of 270

radiation. This laser radiation could damage
your retina. There is a risk of injury.
Never open the housing. Always have main-
tenance and repair work carried out at a quali- fied specialist workshop. General notes
DVD playback conditions Playback problems may occur when playing
copied discs. There is a large variety of discs, DVD authoring software, writing software and writers available. This variety means that
there is no guarantee that the Rear Seat
Entertainment System will be able to play
video DVDs that you have copied yourself.
Further information can be found under video
(Y page 227). Information regarding
COMAND also applies to the Rear Seat Enter- tainment System.
Function restrictions Depending on the DVD, it is possible that cer-
tain functions or actions described in this
section will be temporarily blocked or may not
function at all. As soon as you try to activate
these functions or actions, you will see the 0047
symbol in the display. Switching to video DVD mode
X Insert a video DVD (Y page 244).
The Rear Seat Entertainment System loads the disc.
If disc mode was the last mode selected, it
will now be active.
If it was not, switch on video DVD mode as described in the following instruction.
X Select Disc Discin the menu using the
006300590065 buttons on the remote
control and confirm by pressing the 008B
button.
If the video DVD fulfills the playback crite-
ria, the film either starts automatically or the menu stored on the DVD appears. If the
DVD menu appears, you must start the film
manually.
X Select the corresponding menu item in the
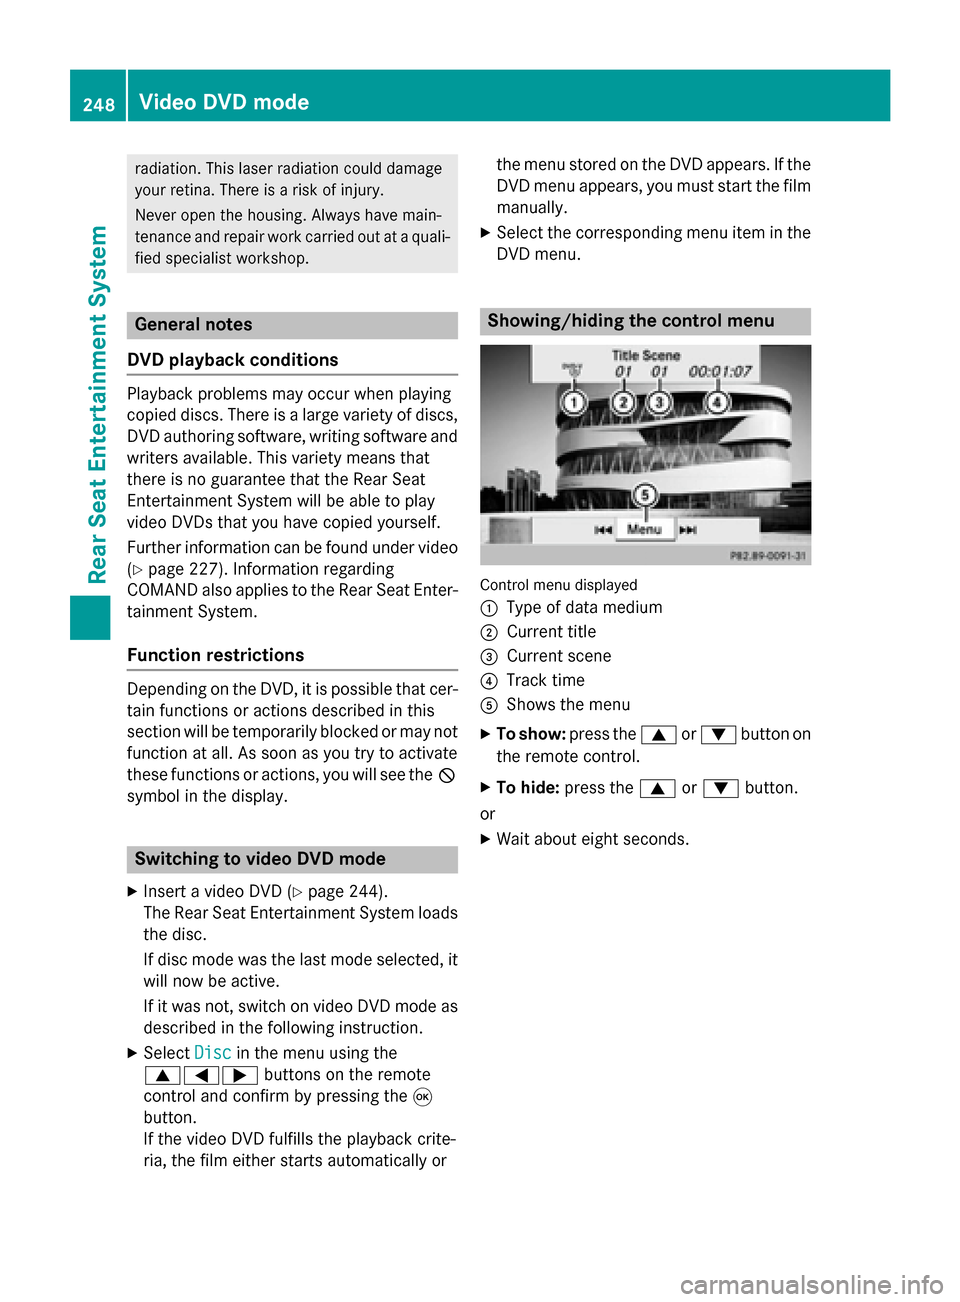
DVD menu. Showing/hiding the control menu
Control menu displayed
0043
Type of data medium
0044 Current title
0087 Current scene
0085 Track time
0083 Shows the menu
X To show: press the0063or0064 button on
the remote control.
X To hide: press the 0063or0064 button.
or
X Wait about eight seconds. 248
Video DVD modeRear Seat Entertainment System
Page 252 of 270

Skipping forwards/backwards
X
Press the 0059or0065 button on the
remote control.
or
X Press the 0048or0049 button.
The navigation menu (Y page 228) appears
for approximately eight seconds.
Selecting a scene/chapter directly These examples illustrate how to select
scene/chapter 5.
X Option 1: while the film is playing, press
the 007E button on the remote control.
X Press the corresponding number key, such
as 5.
X Option 2: while the film is playing, press
the 008Bbutton on the remote control and
show the menu.
X Select DVD-V
DVD-V and press the 008Bbutton to
confirm.
X Select DVD Functions
DVD Functions and press the008B
button to confirm.
X Select Scene Scene Selection
Selection and press the 008B
button to confirm.
X Select 5
5using the 0063or0064 button and
press the 008Bbutton to confirm.
In both cases, playback will begin from the
fifth scene/chapter after a brief pause. Selecting a film/track
Option 1:
X Press the 008Bbutton on the remote control
and show the menu.
X Select DVD-Video
DVD-Video and press the 008Bbutton
on the remote control to confirm. X
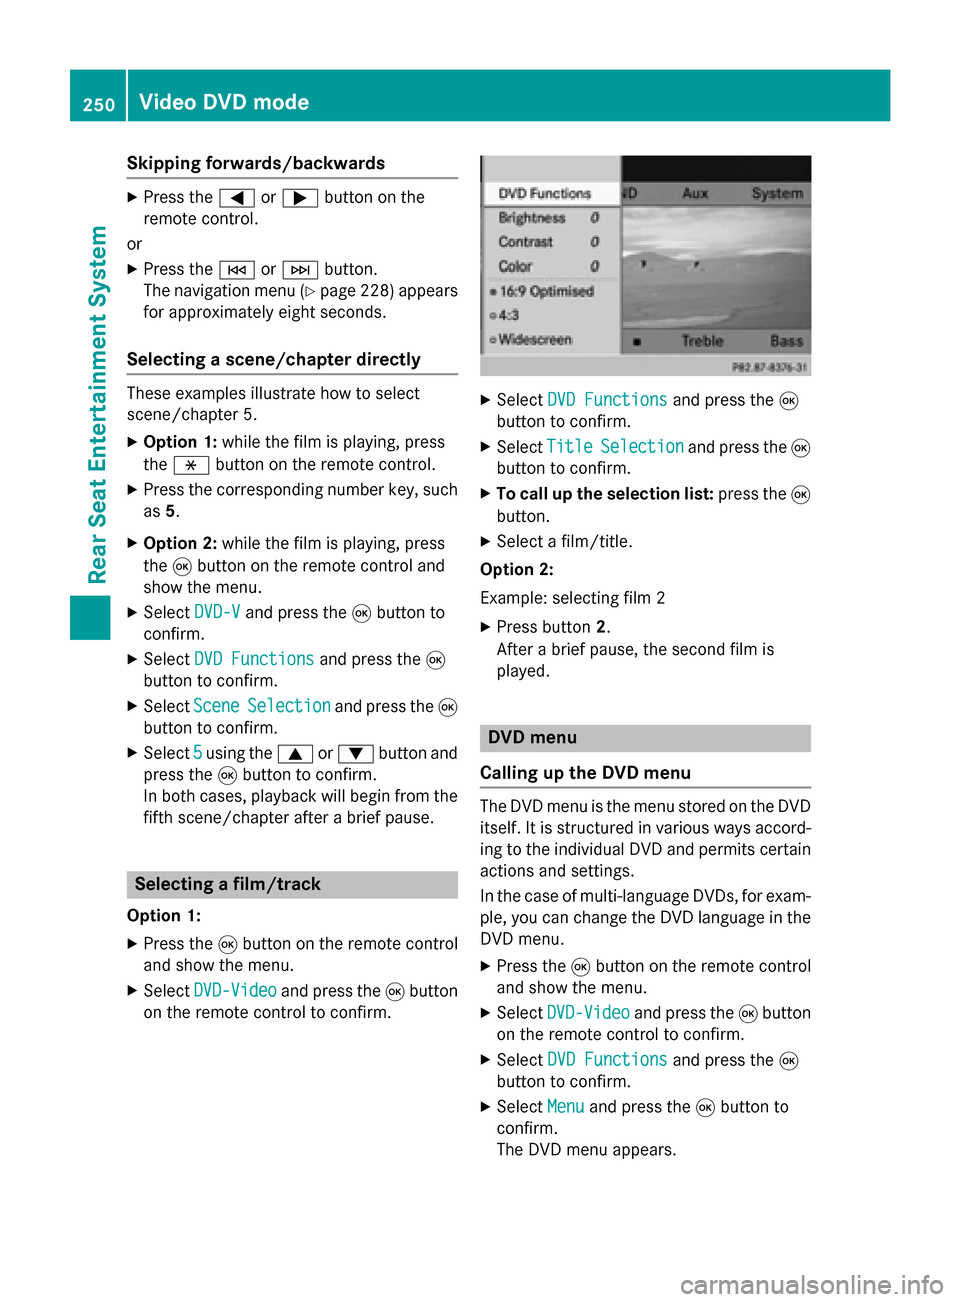
Select DVD Functions
DVD Functions and press the008B
button to confirm.
X Select Title
Title Selection
Selection and press the 008B
button to confirm.
X To call up the selection list: press the008B
button.
X Select a film/title.
Option 2:
Example: selecting film 2
X Press button 2.
After a brief pause, the second film is
played. DVD menu
Calling up the DVD menu The DVD menu is the menu stored on the DVD
itself. It is structured in various ways accord-
ing to the individual DVD and permits certain
actions and settings.
In the case of multi-language DVDs, for exam- ple, you can change the DVD language in the
DVD menu.
X Press the 008Bbutton on the remote control
and show the menu.
X Select DVD-Video DVD-Video and press the 008Bbutton
on the remote control to confirm.
X Select DVD Functions
DVD Functions and press the008B
button to confirm.
X Select Menu
Menu and press the 008Bbutton to
confirm.
The DVD menu appears. 250
Video DVD modeRear Seat Entertainment System
Page 253 of 270

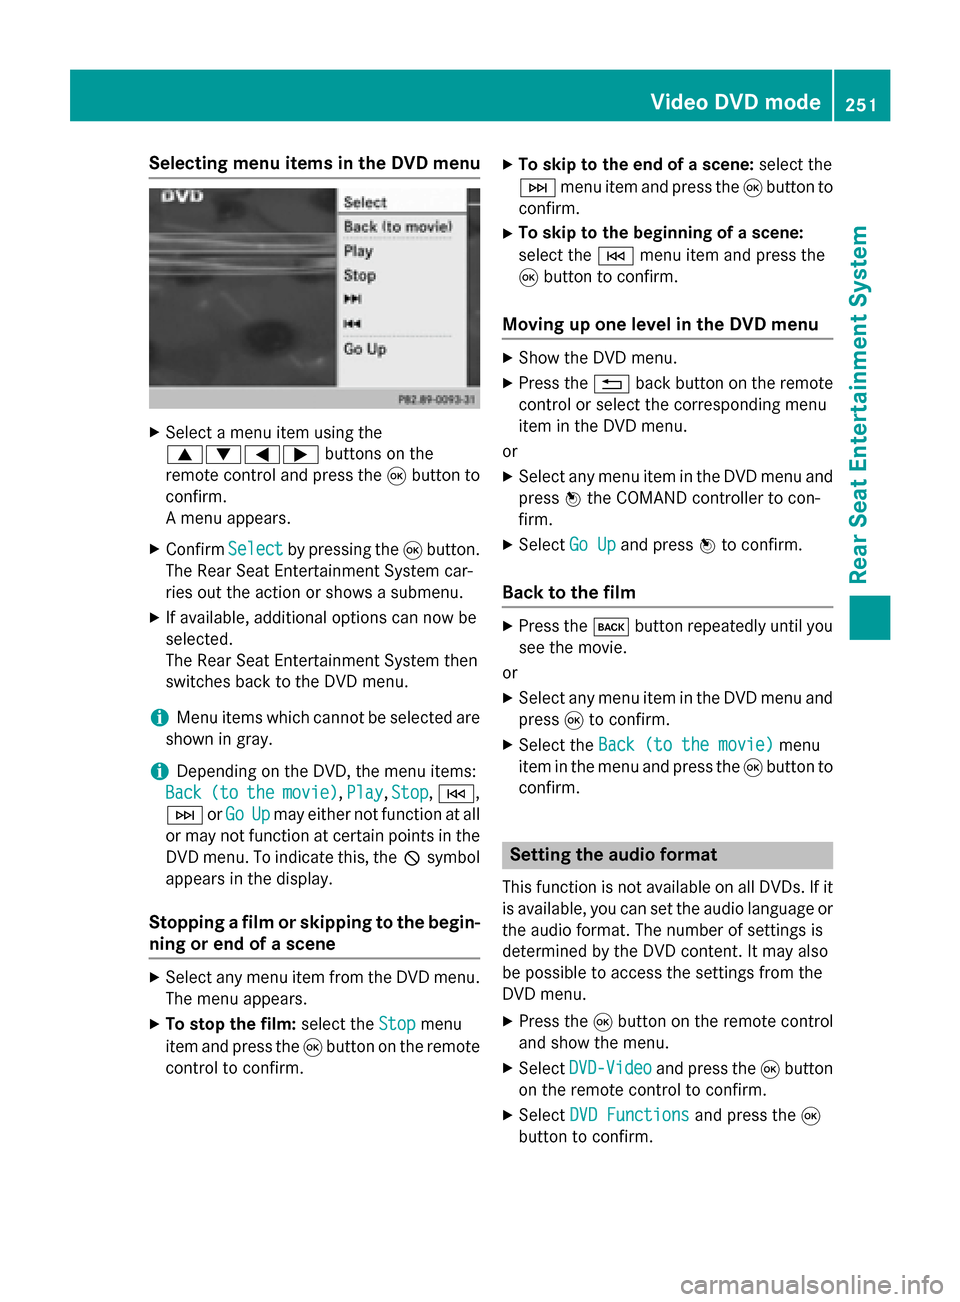
Selecting menu items in the DVD menu
X
Select a menu item using the
0063006400590065 buttons on the
remote control and press the 008Bbutton to
confirm.
A menu appears.
X Confirm Select Selectby pressing the 008Bbutton.
The Rear Seat Entertainment System car-
ries out the action or shows a submenu.
X If available, additional options can now be
selected.
The Rear Seat Entertainment System then
switches back to the DVD menu.
i Menu items which cannot be selected are
shown in gray.
i Depending on the DVD, the menu items:
Back
Back (to (tothe
themovie)
movie), Play
Play,Stop
Stop,0048,
0049 orGo
Go Up
Upmay either not function at all
or may not function at certain points in the
DVD menu. To indicate this, the 0047symbol
appears in the display.
Stopping a film or skipping to the begin- ning or end of a scene X
Select any menu item from the DVD menu.
The menu appears.
X To stop the film: select theStop
Stop menu
item and press the 008Bbutton on the remote
control to confirm. X
To skip to the end of a scene: select the
0049 menu item and press the 008Bbutton to
confirm.
X To skip to the beginning of a scene:
select the 0048menu item and press the
008B button to confirm.
Moving up one level in the DVD menu X
Show the DVD menu.
X Press the 0038back button on the remote
control or select the corresponding menu
item in the DVD menu.
or
X Select any menu item in the DVD menu and
press 0098the COMAND controller to con-
firm.
X Select Go Up Go Upand press 0098to confirm.
Back to the film X
Press the 003Dbutton repeatedly until you
see the movie.
or
X Select any menu item in the DVD menu and
press 008Bto confirm.
X Select the Back (to the movie)
Back (to the movie) menu
item in the menu and press the 008Bbutton to
confirm. Setting the audio format
This function is not available on all DVDs. If it
is available, you can set the audio language or the audio format. The number of settings is
determined by the DVD content. It may also
be possible to access the settings from the
DVD menu.
X Press the 008Bbutton on the remote control
and show the menu.
X Select DVD-Video
DVD-Video and press the 008Bbutton
on the remote control to confirm.
X Select DVD Functions DVD Functions and press the008B
button to confirm. Video DVD mode
251Rear Seat Entertainment System Z
Page 256 of 270

X
To select a folder: press the0064button
on the remote control.
X Highlight one of the two folder symbols
with the 0059or0065 button and press 008B
to confirm.
Depending on your selection, the previous
or next folder is selected and the first track
is played.
Additional setting option:
R Adjusting the sound settings (Y page 242)
Video DVD mode X
To hide a menu: confirmMenu Menuwith the 008B
button.
The video image is played in full screen
mode.
Additional setting options: R Adjusting the brightness, contrast and
color (Y page 242)
R Changing the picture format (Y page 243)
R Adjusting the sound settings (Y page 242)AUX mode
Introduction
You can connect one external video source to each of the displays of the Rear Seat Enter-
tainment System (AUX display) and also one
external video source to the rear-compart-
ment CD/DVD drive (AUX drive) with a sound
and video signal.
Please see the corresponding operating
instructions for information on how to oper-
ate the external video source.
For further details about external video sour- ces, please consult an authorized Mercedes-
Benz Center. Connecting AUX equipment
AUX drive The AUX drive jacks are located on the
CD/DVD drive next to the CD/DVD eject but-
ton (Y page 238).
Displaying AUX The AUX display jacks are on the side of the
screen (Y
page 237).
Audio and video connection X
Insert the audio plugs for the left and right
signals into the corresponding Land R
jacks.
X Insert the video plug into the Vjack. Activating AUX mode
AUX drive X
Select Aux Auxin the menu using the
006300590065 buttons on the remote
control and press the 008Bbutton to confirm.
The AUX menu appears.
X Select Source Source from the AUX menu and
press the 008Bbutton to confirm.
X Select Disc Drive Aux
Disc Drive Aux and press the008B
button to confirm.
You will hear and see the content of the
external video source if it is connected to
the CD/DVD drive and switched to play-
back. If no video image is available from the AUX source connected, you will see an
audio menu.
Displaying AUX X
Select the screen by turning the scroll
wheel on the remote control (Y page 237)254
AUX modeRear Seat Entertainment System
Page 264 of 270

X
Select a preset that contains an entry by
turning 00790052007Aor sliding 009700520064the COMAND
controller and press 0098to confirm.
The weather data for the selected area is
displayed.
X Rapid selection: if there is an entry avail-
able in the weather memory, e.g. when the
daily forecast is shown, briefly press a num- ber key, such as 0082.
The weather data for the selected area is
displayed. Weather map
Calling up the weather map
Example: weather map
X Select Map
Mapin the information chart by turn-
ing 00790052007A the COMAND controller and press
0098 to confirm.
The weather map is shown on a 500-mi or
500-km scale.
i For the map display, you can activate the
topographic map style (Y page 112).Moving the weather map
X Slide 009500520096,009700520064 or009100520078 the COMAND
controller.
The weather map moves in the correspond-
ing direction under the crosshair. Changing the scale
X
As soon as you turn 00790052007Athe COMAND
controller, you see the scale bar.
X Turn 00790052007A until the desired scale is set. Showing/hiding the menu in the
weather map
X
To show: press0098the COMAND controller
in the weather map.
X To hide: slide up00970052the COMAND con-
troller. 262
Weather mapSIRIUS Weather
Page 267 of 270

Displaying storm characteristics
Conditions: theStorm Characteristics
Storm Characteristics
layer is active (Y page 263)and weather data
is available.
The example shows hail showers and tornadic
storms together with direction and speed of
propagation.
The storms legend can be called up
(Y page 267). Example: weather map with information on a
cyclone
X Slide 009500520096,009700520064 or009100520078 the COMAND
controller and move the crosshair onto a
corresponding symbol.
X Press 0098the COMAND controller.
The following information is shown (if availa-
ble):
R characteristics of the storm cell
R date and time of observation (time stamp)
R directional movement speed and path
i The directional movement speed is the
speed at which the storm cell moves. Example: weather map showing weather fronts
Conditions: theAtmospheric Pressure Atmospheric Pressure
layer is switched on (Y page 263)and weather
data is available.
The example shows the position of high and
low-pressure areas (H, L), weather fronts and
isobars.
i Isobars are lines that show where the air
pressure is the same. Legend: weather fronts
0043
Cold front (blue line with blue triangles)
0044 Warm front (red line with red semi-circles)
0087 Stationary front (red-blue line with red
semi-circles and blue triangles)
0085 Occlusion (violet line with a violet semi-
circle and triangles) Weather map
265SIRIUS Weather
Page 270 of 270

The time stamp shows when the weather data
was created by the weather station.
A time stamp corresponds to the time at the
vehicle's current position. The changeover
from summer time to standard time is per-
formed automatically.
X Display the menu on the weather map
(Y page 262).
X Select Map Options
Map Options by turning00790052007Athe
COMAND controller and press 0098to con-
firm.
X Select Time Stamp
Time Stamp and press0098to con-
firm. Changing to the information chart
X Display the menu on the weather map
(Y page 262).
X Select Display Weather
Display Weather and press0098to
confirm. 268
Weather mapSIRIUS Weather