Page 241 of 270

Cordless headphones
Overview X
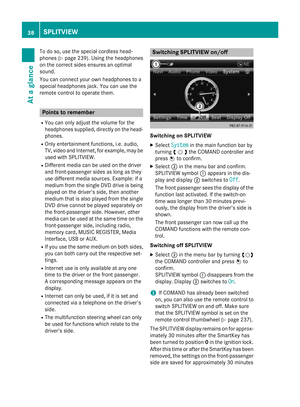
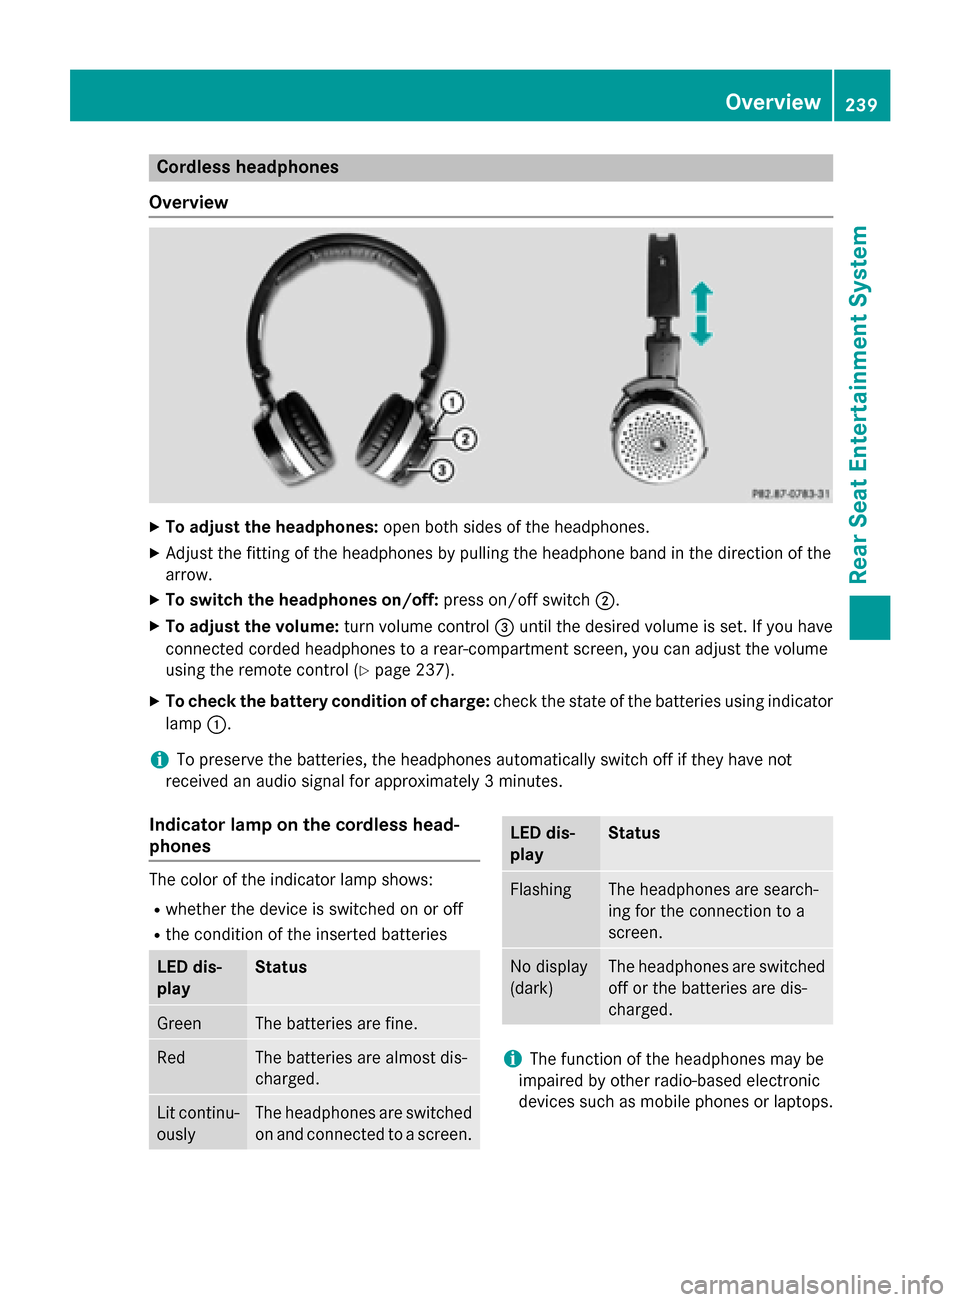
To adjust the headphones: open both sides of the headphones.
X Adjust the fitting of the headphones by pulling the headphone band in the direction of the
arrow.
X To switch the headphones on/off: press on/off switch0044.
X To adjust the volume: turn volume control0087until the desired volume is set. If you have
connected corded headphones to a rear-compartment screen, you can adjust the volume
using the remote control (Y page 237).
X To check the battery condition of charge: check the state of the batteries using indicator
lamp 0043.
i To preserve the batteries, the headphones automatically switch off if they have not
received an audio signal for approximately 3 minutes.
Indicator lamp on the cordless head-
phones The color of the indicator lamp shows:
R whether the device is switched on or off
R the condition of the inserted batteries LED dis-
play Status
Green The batteries are fine.
Red The batteries are almost dis-
charged.
Lit continu-
ously The headphones are switched
on and connected to a screen. LED dis-
play Status
Flashing The headphones are search-
ing for the connection to a
screen.
No display
(dark) The headphones are switched
off or the batteries are dis-
charged. i
The function of the headphones may be
impaired by other radio-based electronic
devices such as mobile phones or laptops. Overview
239Rear Seat Entertainment System Z
Page 242 of 270

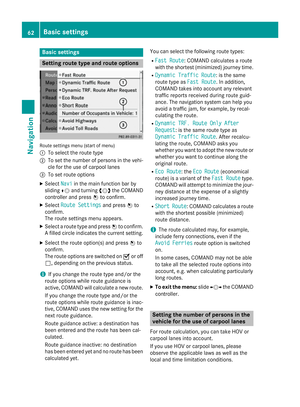
Selecting the screen for the head-
phones
X
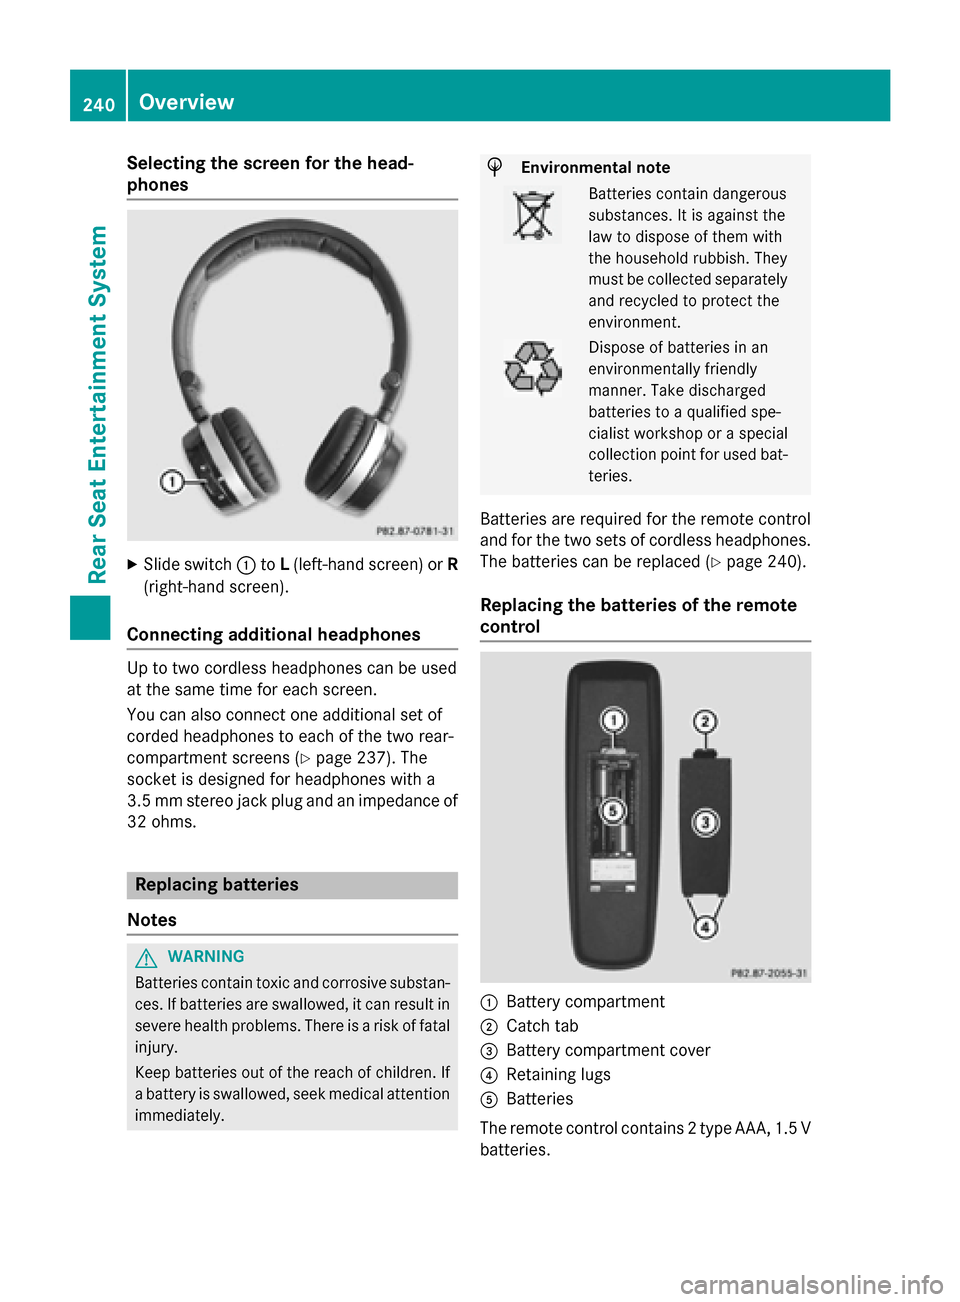
Slide switch 0043toL(left-hand screen) or R
(right-hand screen).
Connecting additional headphones Up to two cordless headphones can be used
at the same time for each screen.
You can also connect one additional set of
corded headphones to each of the two rear-
compartment screens (Y page 237). The
socket is designed for headphones with a
3.5 mm stereo jack plug and an impedance of 32 ohms. Replacing batteries
Notes G
WARNING
Batteries contain toxic and corrosive substan- ces. If batteries are swallowed, it can result in
severe health problems. There is a risk of fatal injury.
Keep batteries out of the reach of children. If
a battery is swallowed, seek medical attention immediately. H
Environmental note Batteries contain dangerous
substances. It is against the
law to dispose of them with
the household rubbish. They
must be collected separately
and recycled to protect the
environment. Dispose of batteries in an
environmentally friendly
manner. Take discharged
batteries to a qualified spe-
cialist workshop or a special
collection point for used bat-
teries.
Batteries are required for the remote control
and for the two sets of cordless headphones. The batteries can be replaced (Y page 240).
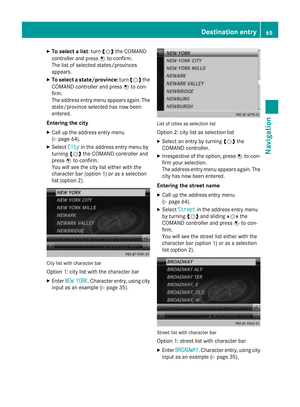
Replacing the batteries of the remote
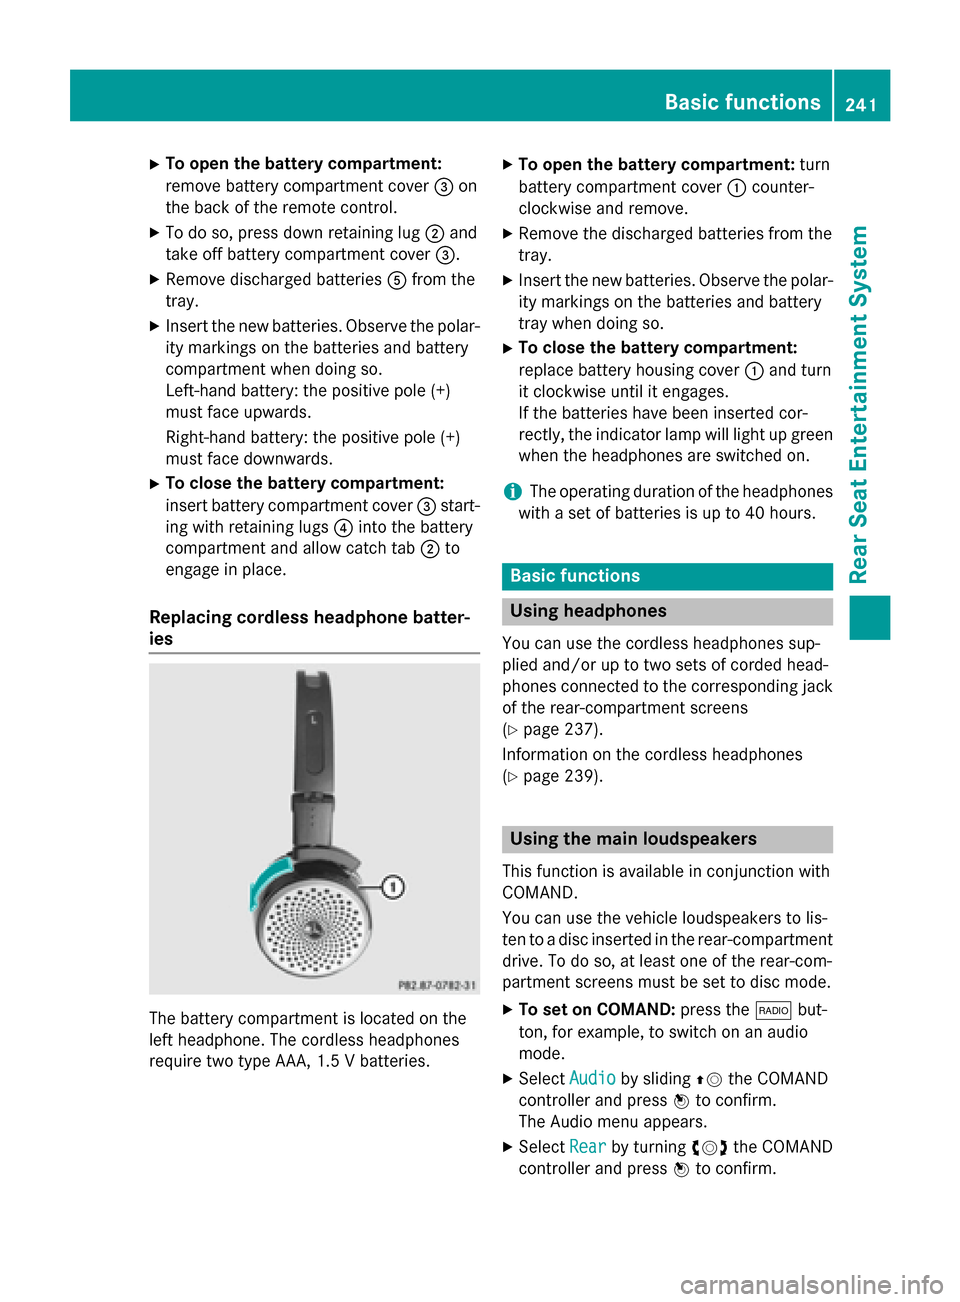
control 0043
Battery compartment
0044 Catch tab
0087 Battery compartment cover
0085 Retaining lugs
0083 Batteries
The remote control contains 2 type AAA, 1.5 V
batteries. 240
OverviewRear Seat Entertainment System
Page 243 of 270

X
To open the battery compartment:
remove battery compartment cover 0087on
the back of the remote control.
X To do so, press down retaining lug 0044and
take off battery compartment cover 0087.
X Remove discharged batteries 0083from the
tray.
X Insert the new batteries. Observe the polar-
ity markings on the batteries and battery
compartment when doing so.
Left-hand battery: the positive pole (+)
must face upwards.
Right-hand battery: the positive pole (+)
must face downwards.
X To close the battery compartment:
insert battery compartment cover 0087start-
ing with retaining lugs 0085into the battery
compartment and allow catch tab 0044to
engage in place.
Replacing cordless headphone batter-
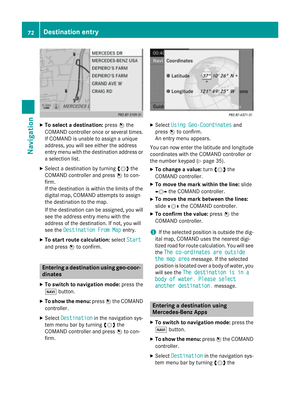
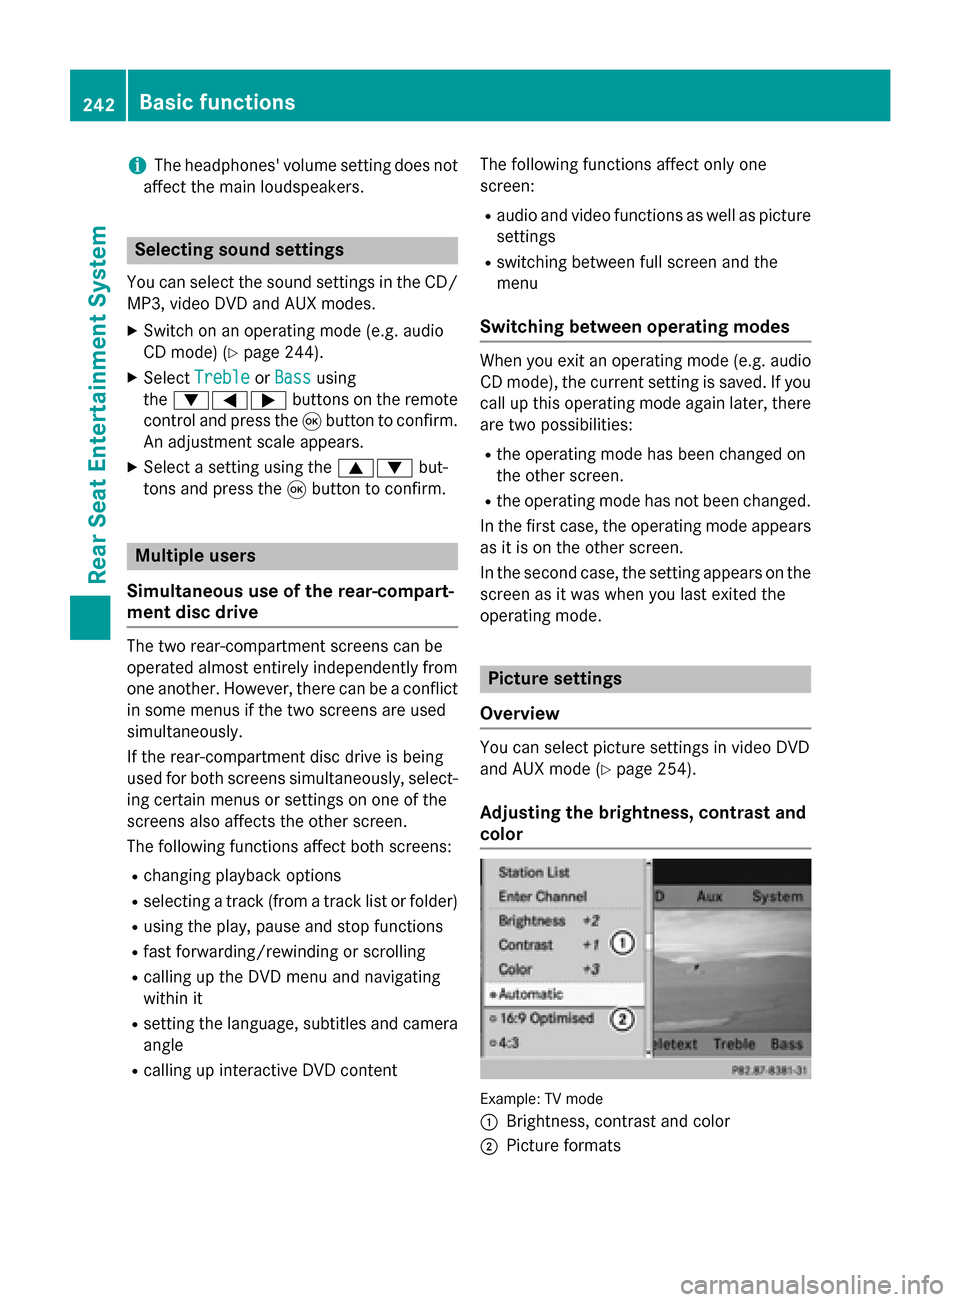
ies The battery compartment is located on the
left headphone. The cordless headphones
require two type AAA, 1.5 V batteries. X
To open the battery compartment: turn
battery compartment cover 0043counter-
clockwise and remove.
X Remove the discharged batteries from the
tray.
X Insert the new batteries. Observe the polar-
ity markings on the batteries and battery
tray when doing so.
X To close the battery compartment:
replace battery housing cover 0043and turn
it clockwise until it engages.
If the batteries have been inserted cor-
rectly, the indicator lamp will light up green
when the headphones are switched on.
i The operating duration of the headphones
with a set of batteries is up to 40 hours. Basic functions
Using headphones
You can use the cordless headphones sup-
plied and/or up to two sets of corded head-
phones connected to the corresponding jack
of the rear-compartment screens
(Y page 237).
Information on the cordless headphones
(Y page 239). Using the main loudspeakers
This function is available in conjunction with
COMAND.
You can use the vehicle loudspeakers to lis-
ten to a disc inserted in the rear-compartment drive. To do so, at least one of the rear-com-
partment screens must be set to disc mode.
X To set on COMAND: press the002Abut-
ton, for example, to switch on an audio
mode.
X Select Audio Audioby sliding 00970052the COMAND
controller and press 0098to confirm.
The Audio menu appears.
X Select Rear
Rear by turning 00790052007Athe COMAND
controller and press 0098to confirm. Basic functions
241Rear Seat Entertainment System Z
Page 244 of 270

i
The headphones' volume setting does not
affect the main loudspeakers. Selecting sound settings
You can select the sound settings in the CD/
MP3, video DVD and AUX modes.
X Switch on an operating mode (e.g. audio
CD mode) (Y page 244).
X Select Treble
Treble orBass
Bass using
the 006400590065 buttons on the remote
control and press the 008Bbutton to confirm.
An adjustment scale appears.
X Select a setting using the 00630064but-
tons and press the 008Bbutton to confirm. Multiple users
Simultaneous use of the rear-compart-
ment disc drive The two rear-compartment screens can be
operated almost entirely independently from
one another. However, there can be a conflict
in some menus if the two screens are used
simultaneously.
If the rear-compartment disc drive is being
used for both screens simultaneously, select- ing certain menus or settings on one of the
screens also affects the other screen.
The following functions affect both screens:
R changing playback options
R selecting a track (from a track list or folder)
R using the play, pause and stop functions
R fast forwarding/rewinding or scrolling
R calling up the DVD menu and navigating
within it
R setting the language, subtitles and camera
angle
R calling up interactive DVD content The following functions affect only one
screen:
R audio and video functions as well as picture
settings
R switching between full screen and the
menu
Switching between operating modes When you exit an operating mode (e.g. audio
CD mode), the current setting is saved. If youcall up this operating mode again later, there
are two possibilities:
R the operating mode has been changed on
the other screen.
R the operating mode has not been changed.
In the first case, the operating mode appears as it is on the other screen.
In the second case, the setting appears on the
screen as it was when you last exited the
operating mode. Picture settings
Overview You can select picture settings in video DVD
and AUX mode (Y
page 254).
Adjusting the brightness, contrast and
color Example: TV mode
0043
Brightness, contrast and color
0044 Picture formats 242
Basic functionsRear Seat Entertainment System
Page 245 of 270

X
Switch on video DVD mode (Y page 247).
X To show the menu: press the008Bbutton on
the remote control.
or
X While the navigation menu is shown,
(Y page 228) select Menu Menuand press the 008B
button to confirm.
X Select DVD-Video
DVD-Video using
the 006400590065 buttons and press the
008B button to confirm.
X Select Brightness
Brightness, Contrast
ContrastorColor
Color
using the 00630064 buttons and press the
008B button to confirm.
An adjustment scale appears.
X Select a setting using the 00630064but-
tons and press the 008Bbutton to confirm. Changing the picture format
X To show the menu: press the008Bbutton on
the remote control.
or X While the navigation menu is shown,
(Y page 228) select Menu
Menu and press the 008B
button to confirm.
X Select DVD-Video
DVD-Video using
the 006400590065 buttons and press the
008B button to confirm.
The dot in front of one of the menu items
16:9 16:9 Optimized
Optimized ,4:3
4:3 orWidescreen
Widescreen indi-
cates the format currently selected.
X Select a format using the 00630064but-
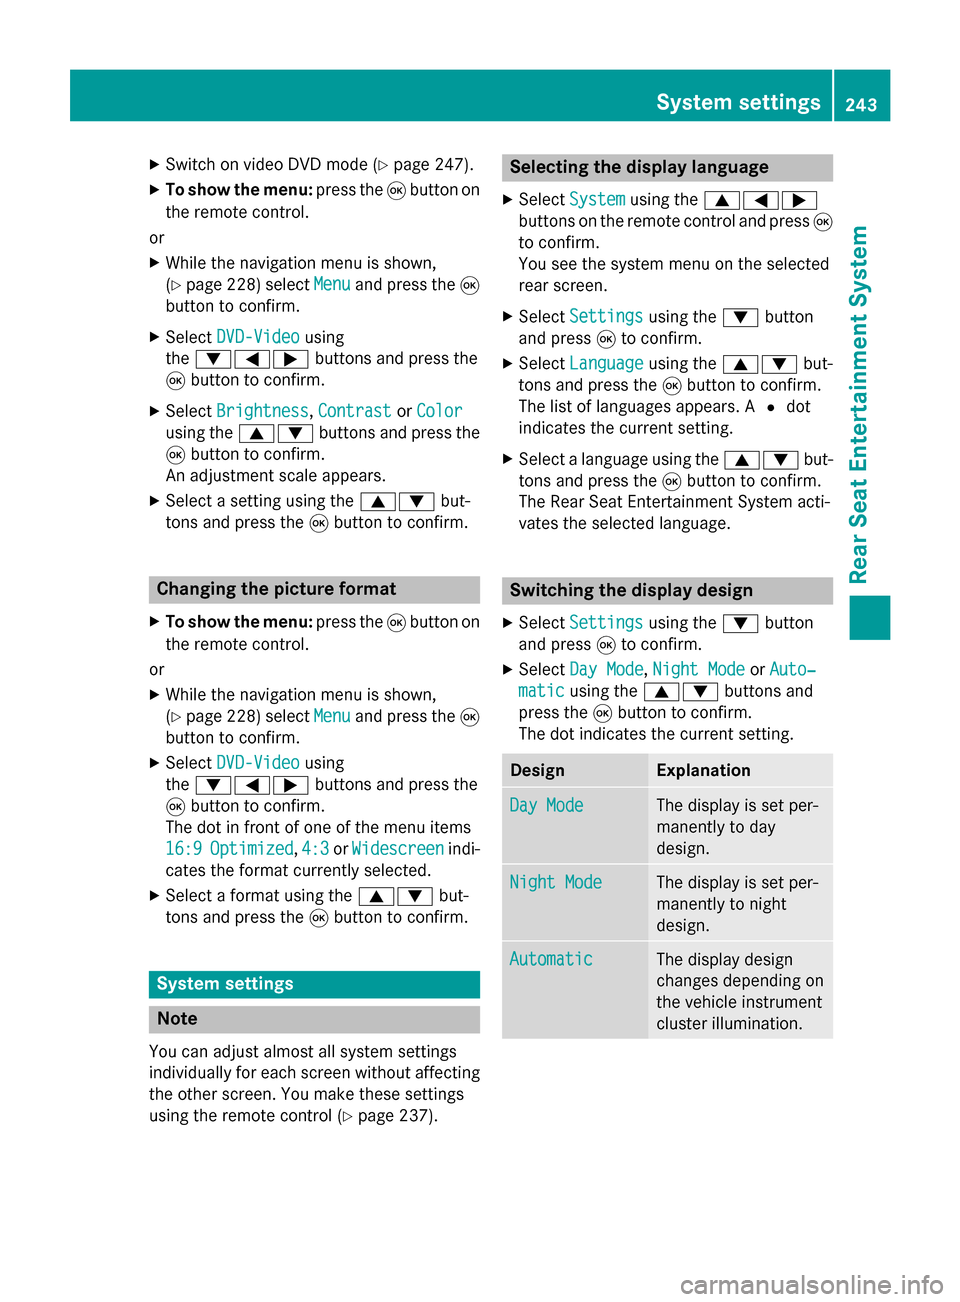
tons and press the 008Bbutton to confirm. System settings
Note
You can adjust almost all system settings
individually for each screen without affecting
the other screen. You make these settings
using the remote control (Y page 237). Selecting the display language
X Select System System using the 006300590065
buttons on the remote control and press 008B
to confirm.
You see the system menu on the selected
rear screen.
X Select Settings Settings using the0064button
and press 008Bto confirm.
X Select Language
Language using the00630064 but-
tons and press the 008Bbutton to confirm.
The list of languages appears. A 0036dot
indicates the current setting.
X Select a language using the 00630064but-
tons and press the 008Bbutton to confirm.
The Rear Seat Entertainment System acti-
vates the selected language. Switching the display design
X Select Settings Settings using the0064button
and press 008Bto confirm.
X Select Day Mode Day Mode, Night Mode
Night Mode orAuto‐
Auto‐
matic
matic using the 00630064 buttons and
press the 008Bbutton to confirm.
The dot indicates the current setting. Design Explanation
Day Mode
Day Mode The display is set per-
manently to day
design.
Night Mode Night Mode The display is set per-
manently to night
design.
Automatic Automatic The display design
changes depending on
the vehicle instrument
cluster illumination. System settings
243Rear Seat Entertainment System Z
Page 246 of 270

Setting the brightness
X Select Settings
Settings using the0064button
and press 008Bto confirm.
X Select Brightness
Brightness using the00630064
buttons and press the 008Bbutton to confirm.
A scale appears.
X Adjust the brightness using the 00630064
buttons and press the 008Bbutton to confirm.
The brightness bar moves up or down. The picture becomes lighter or darker in
accordance with the scale. Showing/hiding the picture
X To hide the picture: selectDisplay Off Display Off
in the system menu using the 00640065
buttons on the remote control and press
the 008Bbutton to confirm.
The picture is hidden.
X To display the picture: press the008Bbut-
ton. CD/audio DVD and MP3 mode
Important safety notes
G
WARNING
The CD/DVD drive is a class 1 laser product. If you open the housing of the CD/DVD drive,
there is a risk of exposure to invisible laser
radiation. This laser radiation could damage
your retina. There is a risk of injury.
Never open the housing. Always have main-
tenance and repair work carried out at a quali- fied specialist workshop. General notes
You will find information on the following top- ics in the Audio section:
R notes on CDs/DVDs (Y page 204)
R notes on MP3 mode (Y page 202)
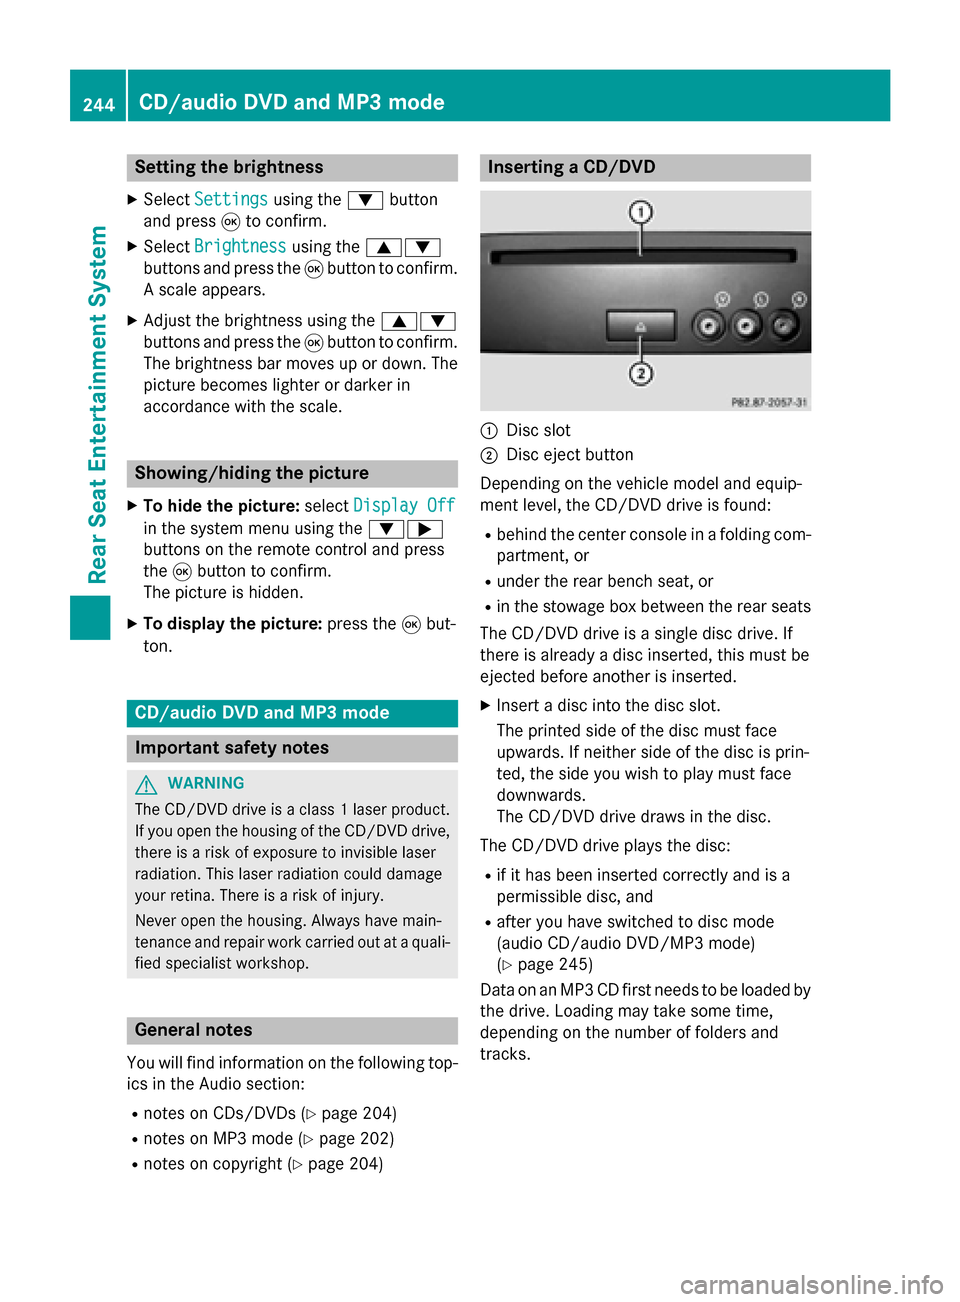
R notes on copyright (Y page 204) Inserting a CD/DVD
0043
Disc slot
0044 Disc eject button
Depending on the vehicle model and equip-
ment level, the CD/DVD drive is found:
R behind the center console in a folding com-
partment, or
R under the rear bench seat, or
R in the stowage box between the rear seats
The CD/DVD drive is a single disc drive. If
there is already a disc inserted, this must be
ejected before another is inserted.
X Insert a disc into the disc slot.
The printed side of the disc must face
upwards. If neither side of the disc is prin-
ted, the side you wish to play must face
downwards.
The CD/DVD drive draws in the disc.
The CD/DVD drive plays the disc:
R if it has been inserted correctly and is a
permissible disc, and
R after you have switched to disc mode
(audio CD/audio DVD/MP3 mode)
(Y page 245)
Data on an MP3 CD first needs to be loaded by the drive. Loading may take some time,
depending on the number of folders and
tracks. 244
CD/audio DVD and MP3 modeRear Seat Entertainment System
Page 247 of 270

Switching to audio CD, audio DVD or
MP3 mode
X Insert a CD/DVD (Y page 244).
The Rear Seat Entertainment System loads the inserted disc.
X Select Disc
Disc in the menu using the
006300590065 buttons on the remote
control and confirm by pressing the 008B
button.
The corresponding mode is switched on.
The Rear Seat Entertainment System plays
the disc.
i Variable bit rates in MP3 tracks can result
in the elapsed time shown being different
from the actual elapsed time. Selecting a track
Selecting by skipping to a track X
To skip forwards or backwards to a
track: press the 0059or0065 button on
the remote control.
or
X Press the 0048or0049 button.
The skip forward function skips to the next track.
If the elapsed track time has passed 8 sec- onds, the function skips back to the begin-
ning of the track. If the elapsed time is
shorter, it will skip to the start of the pre-
vious track.
If the Random Tracks Random Tracks orRandom Folder
Random Folder
playback option has been selected, the
track order is random.
Selecting by track list In audio CD mode, the track list contains all
tracks on the disc currently playing. In audio
DVD mode, the track list contains all tracks in
the currently active group.
In MP3 mode, the track list shows all tracks in the currently active folder as well as the folder structure, allowing you to select any track on
the MP3 CD.
X Select Track List
Track List (audio CD/DVD mode)
or Folder Folder (MP3 mode) using
the 006400590065 buttons on the remote
control, and confirm by pressing the 008B
button.
or
X Press the 008Bbutton when the display/
selection window is active.
The track list appears. The 0036dot indicates
the current track.
X Select a track using the 00630064buttons
and press the 008Bbutton to confirm.
Making a selection by entering the track number directly X
Press the 007Ebutton on the remote con-
trol.
The track entry display appears.
Example: track 2
X Press number button 2.
Example: track 12
X Press the corresponding number keys in
rapid succession.
X Wait for approximately three seconds after
making the entry.
You will hear the track which has been
entered. The corresponding basic menu
then reappears.
i It is not possible to enter numbers that
exceed the number of tracks on the CD or in
the currently active folder. Fast forwarding/rewinding
X With the display/selection window active,
press the 0059or0065 button on the CD/audio DVD and MP3 mode
245Rear Seat Entertainment System Z
Page 248 of 270

remote control repeatedly until you reach
the desired position.
or
X Press and hold the 0048or0049 button
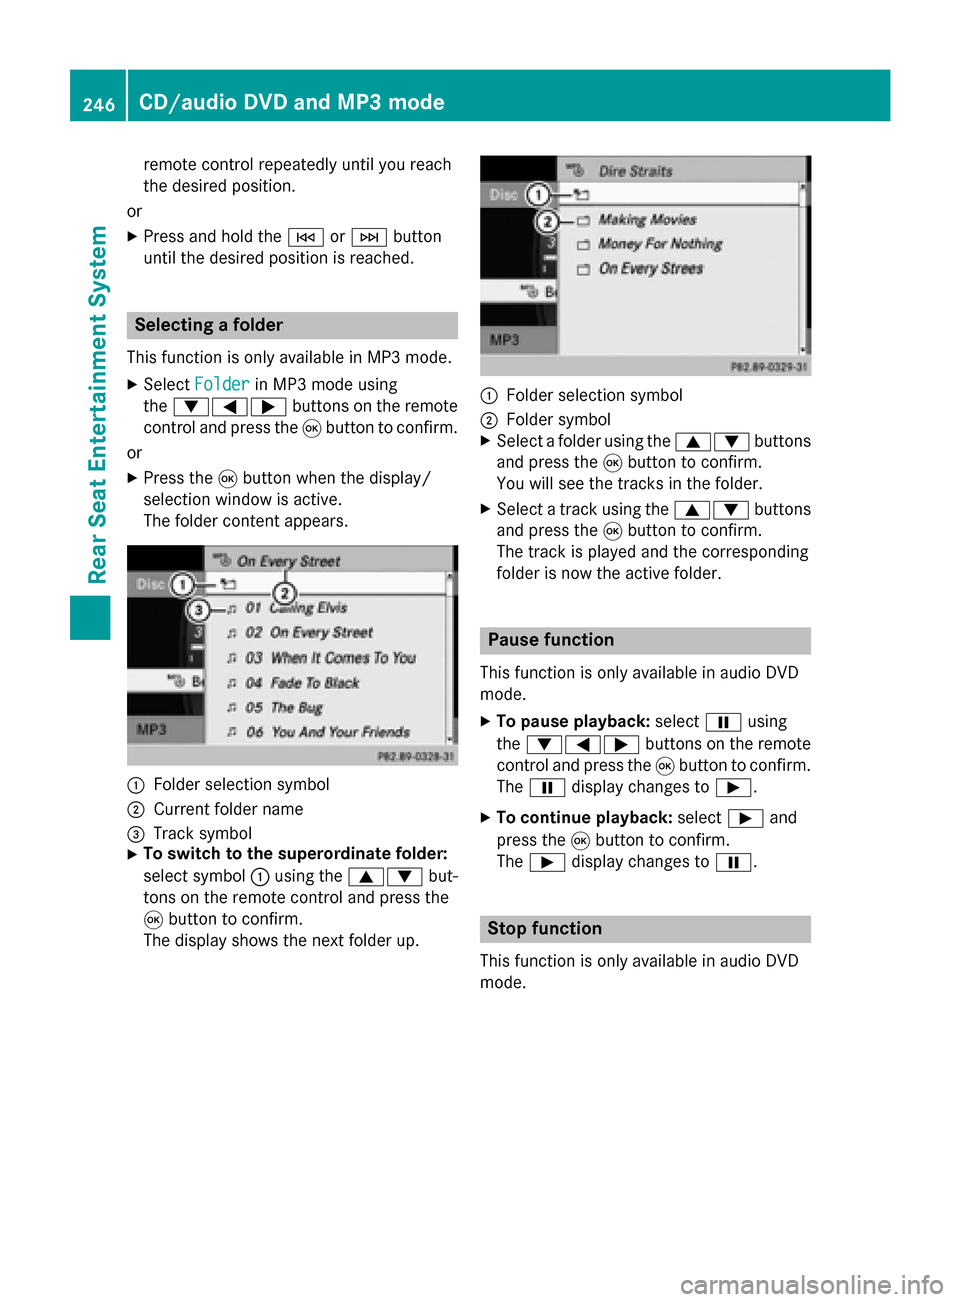
until the desired position is reached. Selecting a folder
This function is only available in MP3 mode.
X Select Folder Folder in MP3 mode using
the 006400590065 buttons on the remote
control and press the 008Bbutton to confirm.
or
X Press the 008Bbutton when the display/
selection window is active.
The folder content appears. 0043
Folder selection symbol
0044 Current folder name
0087 Track symbol
X To switch to the superordinate folder:
select symbol 0043using the 00630064 but-
tons on the remote control and press the
008B button to confirm.
The display shows the next folder up. 0043
Folder selection symbol
0044 Folder symbol
X Select a folder using the 00630064buttons
and press the 008Bbutton to confirm.
You will see the tracks in the folder.
X Select a track using the 00630064buttons
and press the 008Bbutton to confirm.
The track is played and the corresponding
folder is now the active folder. Pause function
This function is only available in audio DVD
mode. X To pause playback: select00CFusing
the 006400590065 buttons on the remote
control and press the 008Bbutton to confirm.
The 00CF display changes to 00D0.
X To continue playback: select00D0and
press the 008Bbutton to confirm.
The 00D0 display changes to 00CF. Stop function
This function is only available in audio DVD
mode. 246
CD/audio DVD and MP3 modeRear Seat Entertainment System