2014 MERCEDES-BENZ C-Class start stop button
[x] Cancel search: start stop buttonPage 54 of 270

Calling up drive status regulator (ABC)
X Press 0066.
X In the system menu, slide 00970052the
COMAND controller up until the display/
selection window is selected.
X Slide 009500520096 the COMAND controller repeat-
edly until the driving conditions menu
(ABC) appears.
The corresponding displays appear in the
COMAND display.
Details on the displays:
R for all vehicles except AMG vehicles, see
the separate vehicle Operator's Manual
R for AMG vehicles, see the separate vehicle
Operator's Manual. Exiting the display
X Slide 009500520096 the COMAND controller until
the desired display (clock or fuel consump-
tion) is shown. Seat functions
Overview
Using the 0050button next to the COMAND
controller or the Seat menu item in the sys-
tem menu, you can call up different setting
functions. The following settings depend on
the type of seat and the vehicle model series:
R Seat cushion length
R Backrest side bolsters
R Lumbar
R Balance
R Seat cushion side bolsters
R Dynamics
R Massage
i You can also store and recall the current
seat function settings using the memory
button and the corresponding memory
position switch; see the separate vehicle
Operator's Manual. The massage function cannot be started or
stopped using the memory button. Selecting the seat
First select the seat which you wish to adjust.
This function is not available for all vehicles.
X Press the 0050or0066 button.
X Select Seat Seatand press 0098to confirm.
X To switch to the lower line, for both options
slide 00520064the COMAND controller.
X Select Driver's Seat
Driver's Seat orPassenger
Passenger
Seat
Seat by turning 00790052007Athe COMAND con-
troller and press 0098to confirm. Adjustment functions
Adjusting the seat cushion length The availability of this function depends on
the type of seat and the vehicle model series.
This function allows you to adjust the height
of the seat cushion.52
Seat functionsVehicle functions
Page 89 of 270

Search & Send is a service assisting you in
entering destinations for the navigation sys-
tem. This mbrace service can send a destina-
tion address directly from the Google Maps ®
website to the navigation system of your vehi-
cle. Selecting and sending a destination
address
Please also refer to the notes about address
entry online: maps.google.com.
X Call up the maps.google.com website and
enter the destination address in the
address entry field.
X Click the corresponding button to send the
destination address to the e-mail address
registered with mbrace.
X Enter the e-mail address you specified
when setting up your mbrace account into
the corresponding field in the "Send" dialog
window.
X Click "Send". Calling up destination addresses
X
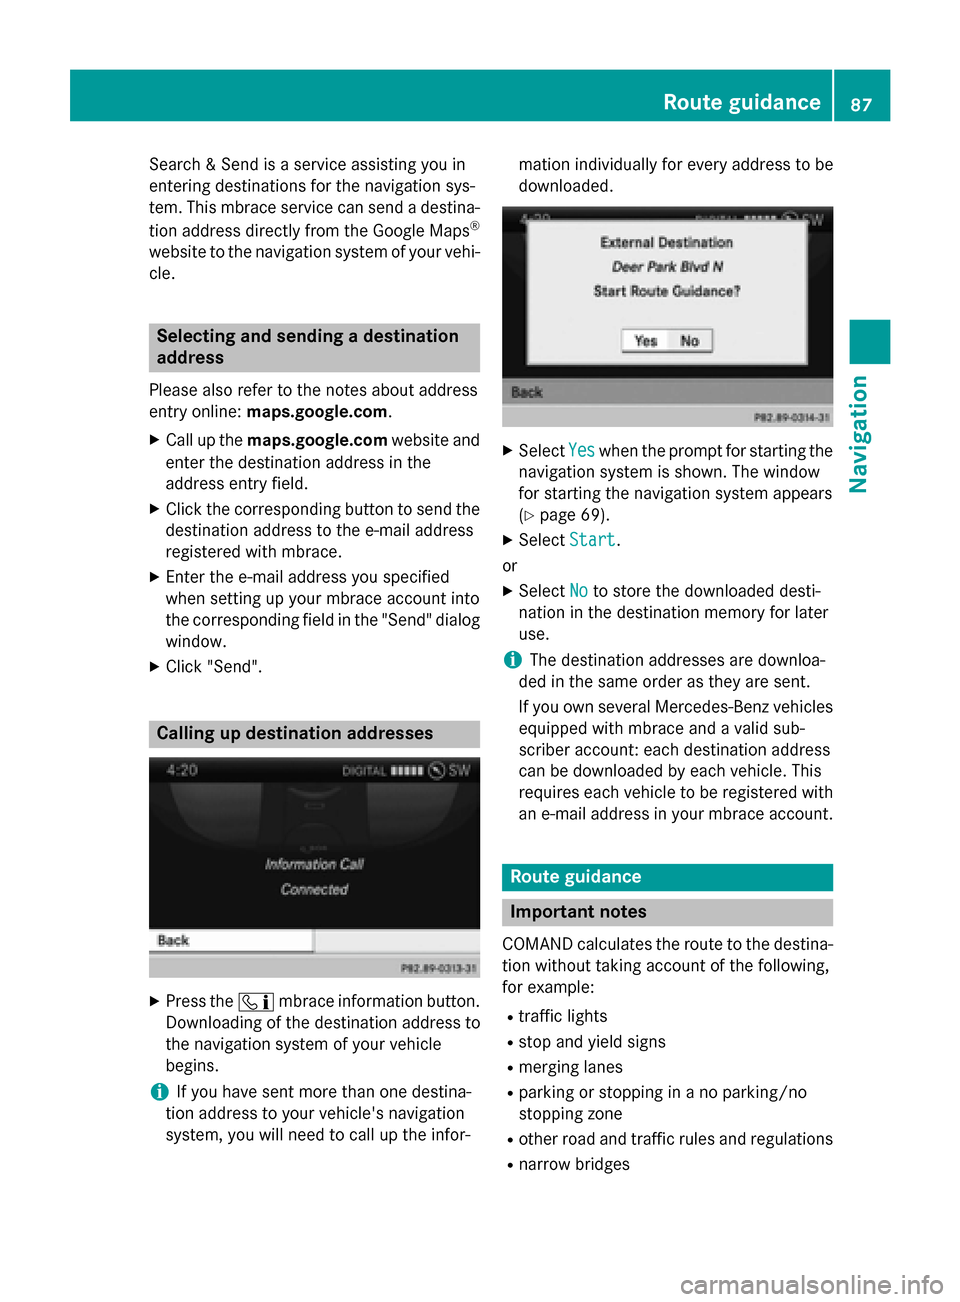
Press the 00D9mbrace information button.
Downloading of the destination address to
the navigation system of your vehicle
begins.
i If you have sent more than one destina-
tion address to your vehicle's navigation
system, you will need to call up the infor- mation individually for every address to be
downloaded.
X
Select Yes Yeswhen the prompt for starting the
navigation system is shown. The window
for starting the navigation system appears
(Y page 69).
X Select Start
Start.
or
X Select No Noto store the downloaded desti-
nation in the destination memory for later
use.
i The destination addresses are downloa-
ded in the same order as they are sent.
If you own several Mercedes-Benz vehicles equipped with mbrace and a valid sub-
scriber account: each destination address
can be downloaded by each vehicle. This
requires each vehicle to be registered with
an e-mail address in your mbrace account. Route guidance
Important notes
COMAND calculates the route to the destina- tion without taking account of the following,
for example:
R traffic lights
R stop and yield signs
R merging lanes
R parking or stopping in a no parking/no
stopping zone
R other road and traffic rules and regulations
R narrow bridges Route guidance
87Navigation Z
Page 96 of 270

Menu functions
X To select the next or previous alterna-
tive route: selectNext NextorPrevious
Previous and
press 0098to confirm.
X To start route guidance using the selec-
ted alternative route: selectStart
Start and
press 0098to confirm.
COMAND begins route guidance on the
selected alternative route. Route information
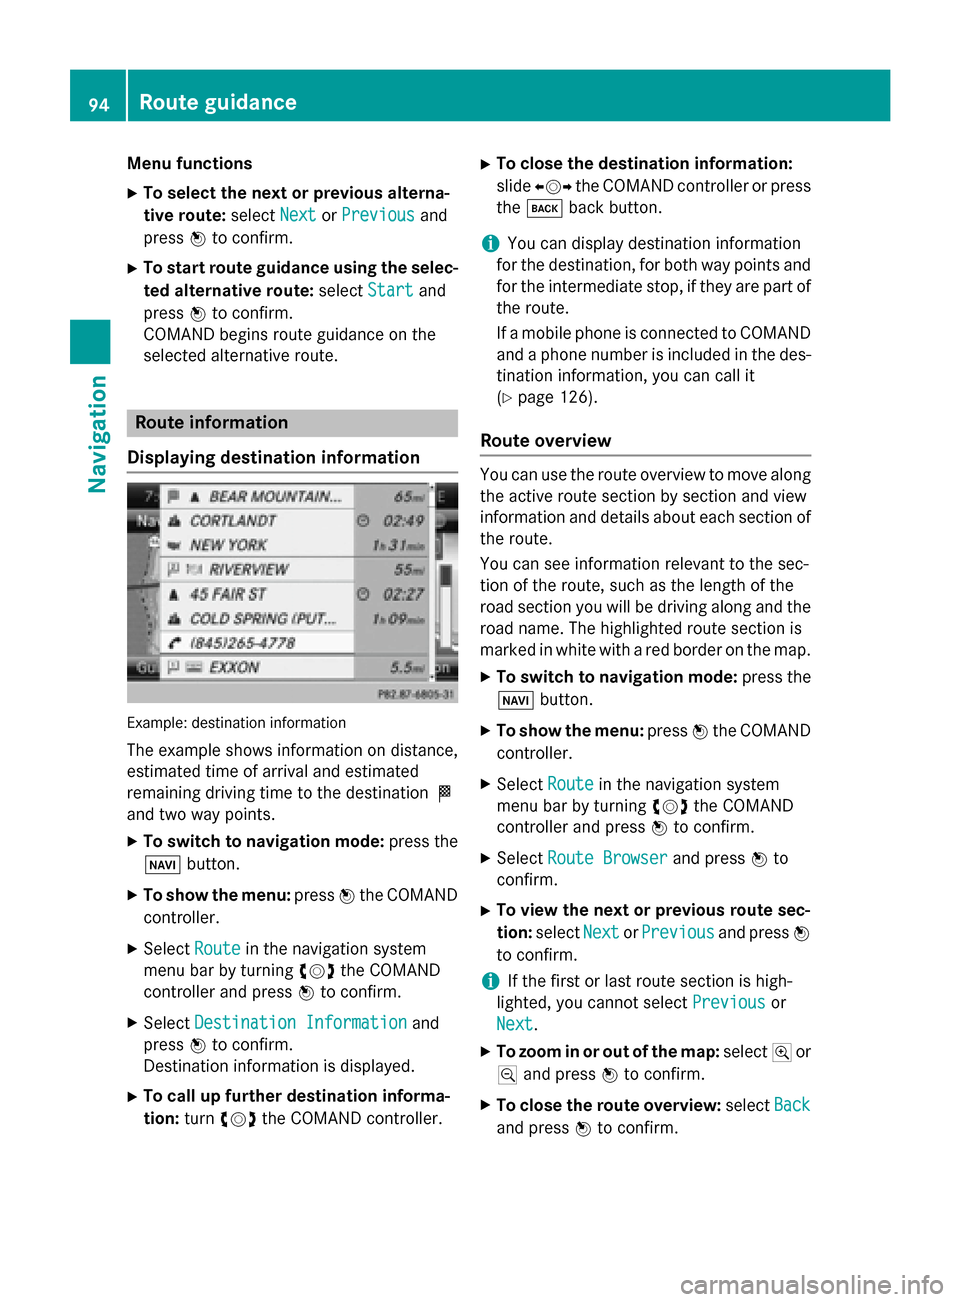
Displaying destination information Example: destination information
The example shows information on distance,
estimated time of arrival and estimated
remaining driving time to the destination 004B
and two way points.
X To switch to navigation mode: press the
00BE button.
X To show the menu: press0098the COMAND
controller.
X Select Route Routein the navigation system
menu bar by turning 00790052007Athe COMAND
controller and press 0098to confirm.
X Select Destination Information
Destination Information and
press 0098to confirm.
Destination information is displayed.
X To call up further destination informa-
tion: turn00790052007A the COMAND controller. X
To close the destination information:
slide 009500520096 the COMAND controller or press
the 003D back button.
i You can display destination information
for the destination, for both way points and
for the intermediate stop, if they are part of the route.
If a mobile phone is connected to COMANDand a phone number is included in the des- tination information, you can call it
(Y page 126).
Route overview You can use the route overview to move along
the active route section by section and view
information and details about each section of the route.
You can see information relevant to the sec-
tion of the route, such as the length of the
road section you will be driving along and the road name. The highlighted route section is
marked in white with a red border on the map.
X To switch to navigation mode: press the
00BE button.
X To show the menu: press0098the COMAND
controller.
X Select Route Routein the navigation system
menu bar by turning 00790052007Athe COMAND
controller and press 0098to confirm.
X Select Route Browser Route Browser and press0098to
confirm.
X To view the next or previous route sec-
tion: select Next NextorPrevious
Previous and press0098
to confirm.
i If the first or last route section is high-
lighted, you cannot select Previous
Previousor
Next
Next.
X To zoom in or out of the map: select004Aor
0049 and press 0098to confirm.
X To close the route overview: selectBack
Back
and press 0098to confirm. 94
Route guidanceNavigation
Page 97 of 270

Route demonstration
You can see the route before starting your
journey. This function is only available when
the vehicle is stationary.
X To switch to navigation mode: press the
00BE button.
X To show the menu: press0098the COMAND
controller.
X Select Route Routein the navigation system
menu bar by turning 00790052007Athe COMAND
controller and press 0098to confirm.
X Select Route Demonstration
Route Demonstration and press
0098 to confirm.
The map with the crosshair appears.
X To get to the destination: press0098to
confirm the highlighted symbol.
X To stop the route demonstration: con-
firm the 00CFsymbol by pressing 0098. Example: route display stopped
0043
Road name and city display when route
display has been stopped
0044 Distance of the crosshair from current
vehicle position
X To get to the current vehicle position:
press 0098to confirm the symbol for the cur-
rent vehicle position.
X To change the map scale: selectScale Scale
and press 0098to confirm.
The scale bar appears.
X Turn 00790052007A the COMAND controller and
press 0098to confirm. Recording the route
Notes If you have activated COMAND and the SD
memory card has been inserted, you should
not take it out of the slot.
You can store up to 100 routes.
When you record a route, COMAND uses so-
called support points and displays the route
as a series of lines. If the route is then calcu-
lated, COMAND attempts to align the recor-
ded route with the digital map.
The support points of the route may not be on
a digitized road.
This is often the case for routes that have
been calculated using map data from other
sources. Route guidance
95Navigation Z
Page 98 of 270

Calling up the Routes menu
X
Insert the SD memory card (Y page 196).
X To switch to navigation mode: press the
00BE button.
X To show the menu: press0098the COMAND
controller.
X Select Destination
Destination in the navigation sys-
tem menu bar by turning 00790052007Athe
COMAND controller and press 0098to con-
firm.
X Select Routes
Routes .
Starting/ending recording X
Call up the Routes menu (Y page 96).
X To start recording : selectStart
Start
Recording
Recording in the Routes menu by turning
00790052007A the COMAND controller and press 0098
to confirm.
During the recording, the recorded route is
shown behind the current vehicle position
with gray strokes (symbol for tire tracks). X
To end recording: selectStop StopRecording Recording
in the Routes menu by turning 00790052007Athe
COMAND controller and press 0098to con-
firm.
Displaying and editing the recorded
route X
Insert the SD memory card (Y page 196).
X Call up the Routes menu (Y page 96).
X Select List Listin the Routes menu by turning
00790052007A the COMAND controller and press 0098
to confirm.
Previously recorded routes are displayed. X
Select a route and press 0098to confirm.
The map appears with a menu. The recor-
ded route is shown in the map with a blue
dotted line.
X To view a demonstration of the route on
the map: selectDemo
Demo by turning 00790052007Athe 96
Route guidanceNavigation
Page 191 of 270

X
Directly in the station presets: press0098
the COMAND controller when the display/
selection window is active.
or X Select Presets
Presets by sliding 00520064and turning
00790052007A the COMAND controller and press 0098
to confirm.
In both cases, the station presets appear.
The 0036dot indicates under which preset
the currently selected station is stored.
X Select a preset by turning 00790052007Athe
COMAND controller and press and hold 0098
until you hear a tone.
The station is stored under the preset.
Storing station automatically This function automatically stores stations
with adequate reception under the presets.
The search starts at the lowest frequency.
COMAND stores any stations found, begin-
ning with preset 1. When the highest fre-
quency is reached or 10 stations have been
found, the storing process ends. Any stations stored manually under the presets will be lost.
COMAND may not occupy all memory slots
when storing.
X Option 1: press0098the COMAND controller
when the display/selection window is
active.
The channel preset memory appears.
X Option 2: selectPresets
Presets by sliding 00520064
and turning 00790052007Athe COMAND controller
and press 0098to confirm.
The channel preset memory appears.
X Irrespective of the option, select Autos‐
Autos‐
tore
tore and press 0098to confirm.
In both cases, COMAND searches for sta-
tions that can be received. You will see a
message to this effect. The available sta-
tions are automatically stored in the preset
positions.
X To cancel storing: selectCancel
Cancel and
press 0098to confirm. Weather Band
Activating X
Press the 002Afunction button repeatedly
until the Weather Band is switched on.
or
X Select the currently set waveband FM
FM orAM AM
by sliding 00520064and turning 00790052007Athe
COMAND controller and press 0098to con-
firm.
X Select WB WBfrom the menu and press 0098to
confirm.
Searching for a channel X
Quick select: turn00790052007A or slide 009500520096the
COMAND controller while the display/
selection window is active.
or X Press the 0048or0049 button.
Channel search scans up or down and
stops at the next channel found.
Selecting a channel from the channel
list X
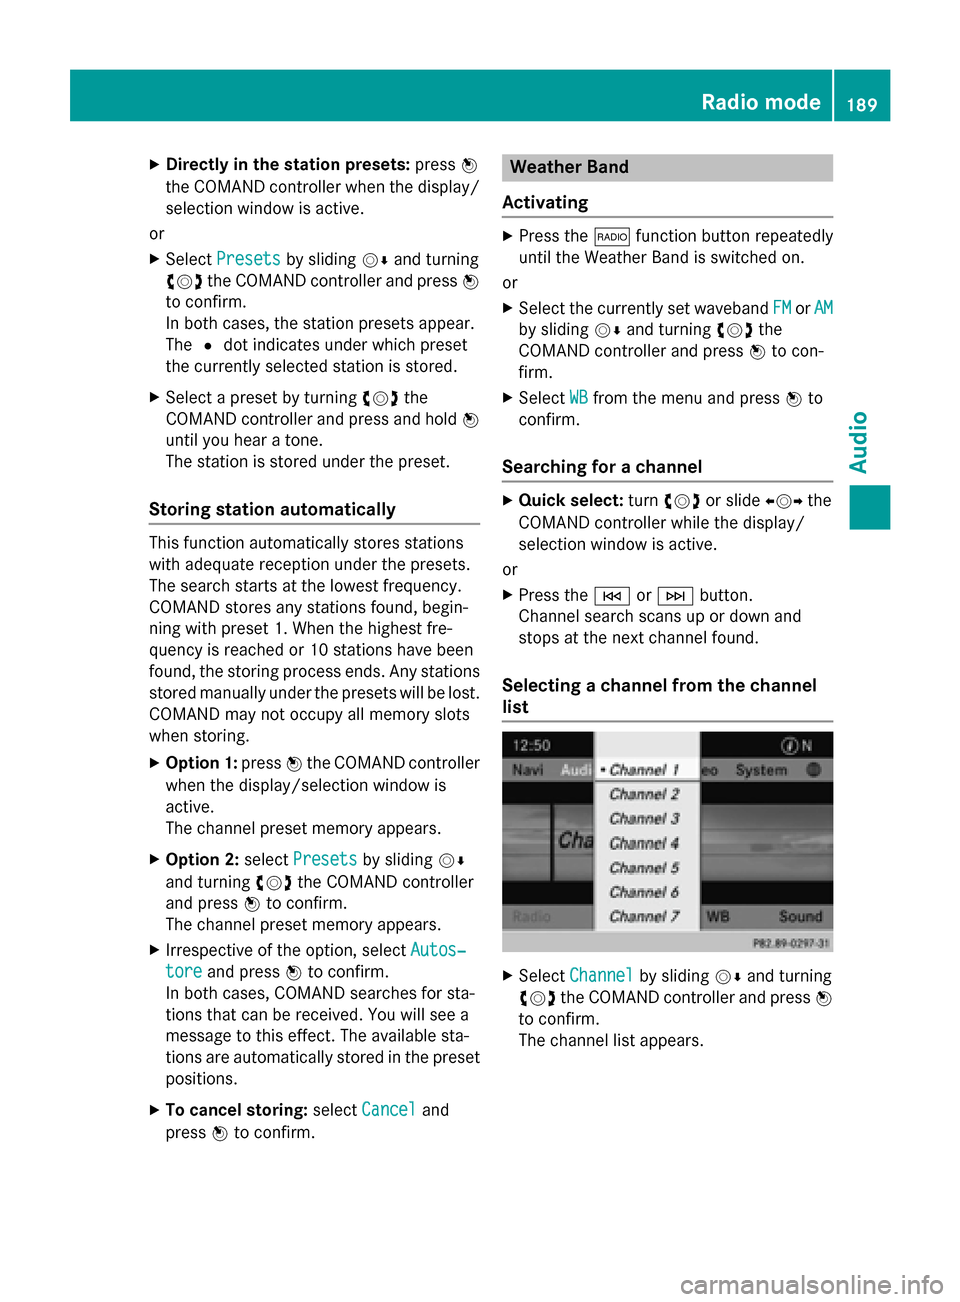
Select Channel Channel by sliding 00520064and turning
00790052007A the COMAND controller and press 0098
to confirm.
The channel list appears. Radio
mode
189Audio
Page 217 of 270

X
Select Delete
Delete and press 0098to confirm.
A prompt appears asking whether you
really wish to deauthorize this device.
X Select Yes
YesorNo
No.
If you select Yes
Yes, the device will be deleted
from the Bluetooth ®
device list.
If you select No
No, the process will be can-
celed.
i Before re-authorizing the Bluetooth ®
audio device, you should also delete the
device name MB Bluetooth
MB Bluetooth from your
Bluetooth ®
audio device's Bluetooth ®
list.
See the Bluetooth ®
audio device's operat-
ing instructions. Switching to Bluetooth
®
audio mode
The Bluetooth ®
audio basic display Example: Bluetooth
®
audio basic display
0043 Track name
0044 Current playback settings (no symbol for
"Normal track sequence")
0087 Album name
0085 Sound settings
0083 Media list
0084 Artist
006B To stop 00DBor start 00D0playback
006C To connect a Bluetooth ®
audio device, to
increase the volume on COMAND
006D Bluetooth ®
audio data medium type
006E Data medium position in the media list
i If the Bluetooth ®
audio device connected
supports metadata and corresponding data is available, then the artist, track and album
name can be displayed.
Using the Bluetooth ®
audio basic dis-
play X
Connect Bluetooth ®
audio devices
(Y page 212)
or X Reconnect the Bluetooth ®
audio device
(Y page 214).
COMAND activates the Bluetooth ®
audio
device. The basic display appears and the
device starts playing.
Using the DISC button X
Press the 003Abutton one or more times.
By pressing the 003Abutton repeatedly, you
can switch modes in the following order:
R CD/MP3 (disc)
R Memory card mode
R MUSIC REGISTER
R USB storage device
R Media Interface or audio AUX mode
R Bluetooth ®
audio mode
Using the media list X
Select Bluetooth Audio Bluetooth Audio in the media list
by turning 00790052007Athe COMAND controller
and press 0098to confirm (Y page 198).
COMAND activates the connected device.
You will see a message to this effect. The
basic display then appears. Starting/stopping playback
X To start playback: select00D0by sliding
00520064 and turning 00790052007Athe COMAND con-
troller and press 0098to confirm.
Playback starts. 00DBis selected. Bluetooth
®
audio mode 215Audio Z
Page 218 of 270

X
To stop playback: select00DBby turning
00790052007A the COMAND controller and press 0098
to confirm.
A message appears. 00D0is selected.
X To continue playback: select00D0by
turning 00790052007Athe COMAND controller and
press 0098to confirm.
A message appears. 00DBis selected. Restarting playback after stopping
During the search for mobile phones , the
connection with the Bluetooth ®
audio device
is terminated (Y page 127). In the Bluetooth ®
audio basic display (Y page 215), you will see
the No
No Bluetooth Bluetooth Audio
Audio Device
Device Connec‐
Connec‐
ted
ted message and the Connect
ConnectLast
LastDevice
Device
menu item cannot be selected.
When the search is finished, the Bluetooth ®
audio device can be reconnected. X Confirm Connect Last Device
Connect Last Device by press-
ing 0098.
Depending on the Bluetooth ®
audio device
used, playback starts immediately or you
must start playback manually.
In this case, you will see the Bluetooth Bluetooth
Audio Device Paused
Audio Device Paused message. X
To start playback: select00D0by turning
00790052007A the COMAND controller and press 0098
to confirm.
Playback resumes from the beginning. Selecting a track
The function is not supported by all Blue-
tooth ®
audio devices.
X To skip forward or back to a track: press
the 0048 or0049 button on COMAND.
or
X Press the 0063or0064 button briefly on
the multifunction steering wheel.
X Rapid scroll: press and hold the 0063
or 0064 button on the multifunction steer-
ing wheel until the desired track is reached.
If you press and hold the 0063or0064
button, the rapid scrolling speed is
increased. Selecting playback options
If the Bluetooth ®
audio device supports the
corresponding function, the following options
are available:
R Normal Track Sequence Normal Track Sequence
The tracks are played in the normal order
(e.g. track 1, 2, 3, etc.).
Audio data playback is determined by the
order in which the tracks are written to the
data carrier. Alphabetical order is the most
common. Once all the tracks in a folder 216
Bluetooth ®
audio modeAudio