2014 MAZDA MODEL CX-9 ignition
[x] Cancel search: ignitionPage 302 of 600

Black plate (302,1)
qPower/Volume/Display/Sound Controls
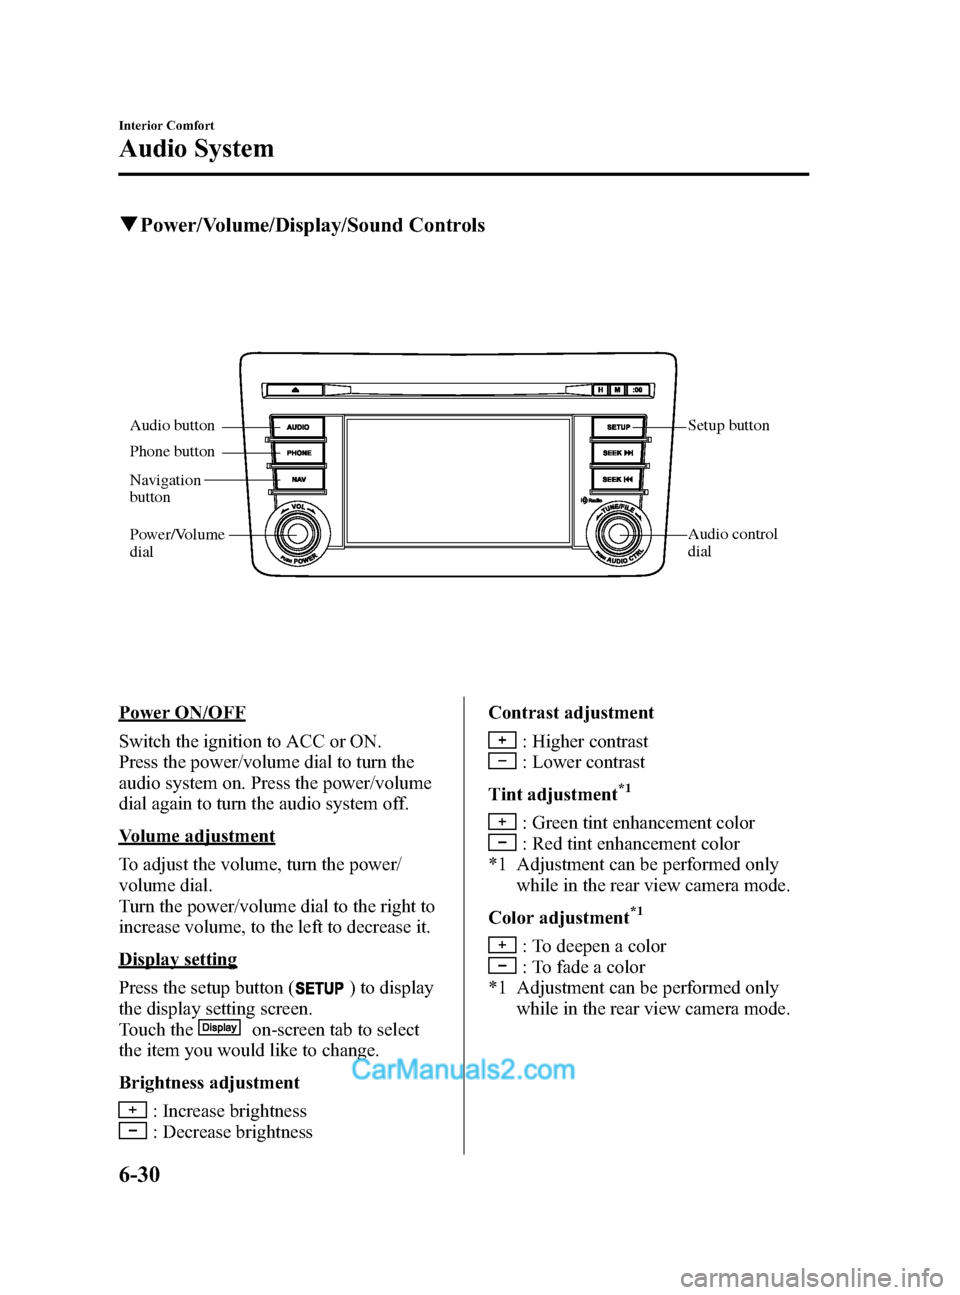
Audio button Setup button
Audio control
dial
Phone button
Navigation
button
Power/Volume
dial
Power ON/OFF
Switch the ignition to ACC or ON.
Press the power/volume dial to turn the
audio system on. Press the power/volume
dial again to turn the audio system off.
Volume adjustment
To adjust the volume, turn the power/
volume dial.
Turn the power/volume dial to the right to
increase volume, to the left to decrease it.
Display setting
Press the setup button (
) to display
the display setting screen.
Touch the
on-screen tab to select
the item you would like to change.
Brightness adjustment
: Increase brightness
: Decrease brightness Contrast adjustment
: Higher contrast
: Lower contrast
Tint adjustment
*1
: Green tint enhancement color
: Red tint enhancement color
*1 Adjustment can be performed only while in the rear view camera mode.
Color adjustment
*1
: To deepen a color
: To fade a color
*1 Adjustment can be performed only while in the rear view camera mode.
6-30
Interior Comfort
Audio System
CX-9_8DA3-EA-13G_Edition2 Page302
Monday, September 9 2013 4:8 PM
Form No.8DA3-EA-13G
Page 312 of 600

Black plate (312,1)
NOTE
Do not perform the following operation while
“Updating Channels XXX %” ,
“ Updating Receiver ”is displayed. Otherwise,
the updating procedure will be canceled.
lTurning off the audio powerlSwitching to other modeslSwitching the ignition off
When the SIRIUS mode is switched to
another mode, or when the power is
turned off, the present channel which is
being received is stored as the last
channel.
Channel up
Turn the manual tuning dial to the right or
press the seek up button (
).
Channel down
Turn the manual tuning dial to the left or
press the seek down button (
).
NOTE
The channel is continuously switched to the
next or previous channel while the seek tuning
button (
,) is continuously pressed.
Unsubscribed channel
When a channel which has been preset
becomes unsubscribed or the current
channel being listened to becomes
unsubscribed, the following is displayed:
“ Call 888-539-SIRIUS”
“ to subscribe ”
NOTE
When the subscription contract is canceled, all
of the channels including channel 184 appear
as unsubscribed.
Preset channel programming
1. Select the desired channel to be programmed. 2. Long-press any of the preset on-screen
buttons.
NOTE
Six stations can be stored in each bank,
SIRIUS1, SIRIUS2 and SIRIUS3 for
convenient access to your favorite stations.
Preset channel call-up
Touch the preset on-screen button for the
channel which you want to select.
NOTE
In the initial setting, all channels are preset to
184.
Selection from channel list
Receivable channels can be displayed on
the channel list screen. You can easily
select the channel you want to listen from
the list. Each category can be also
displayed.
1. Touch the
on-screen button.
2. Touch the channel you want to listen from the list.
NOTE
Currently available channels (including
parental locked channels) are all displayed in
the list.
(Select from category list)
1. Touch the
on-screen
button on the channel list screen.
2. Touch the category name which you want to select from the list.
NOTE
A category can be set only when a channel
which belongs to a category is being received.
6-40
Interior Comfort
Audio System
CX-9_8DA3-EA-13G_Edition2 Page312
Monday, September 9 2013 4:8 PM
Form No.8DA3-EA-13G
Page 322 of 600

Black plate (322,1)
qSetup
You can customize settings in the setup
display as follows:
Display
Refer to Power/Volume/Display/Sound
Controls on page 6-30.
Sound
Refer to Power/Volume/Display/Sound
Controls on page 6-30.
Language
1. Press the setup button (
).
2. Touch the
on-screen tab to
display the language setting screen.
3. Touch the desired language from the list.
4. Touch the
on-screen button.
NOTE
Only the available languages are displayed.
Audio Control Switch
Operation
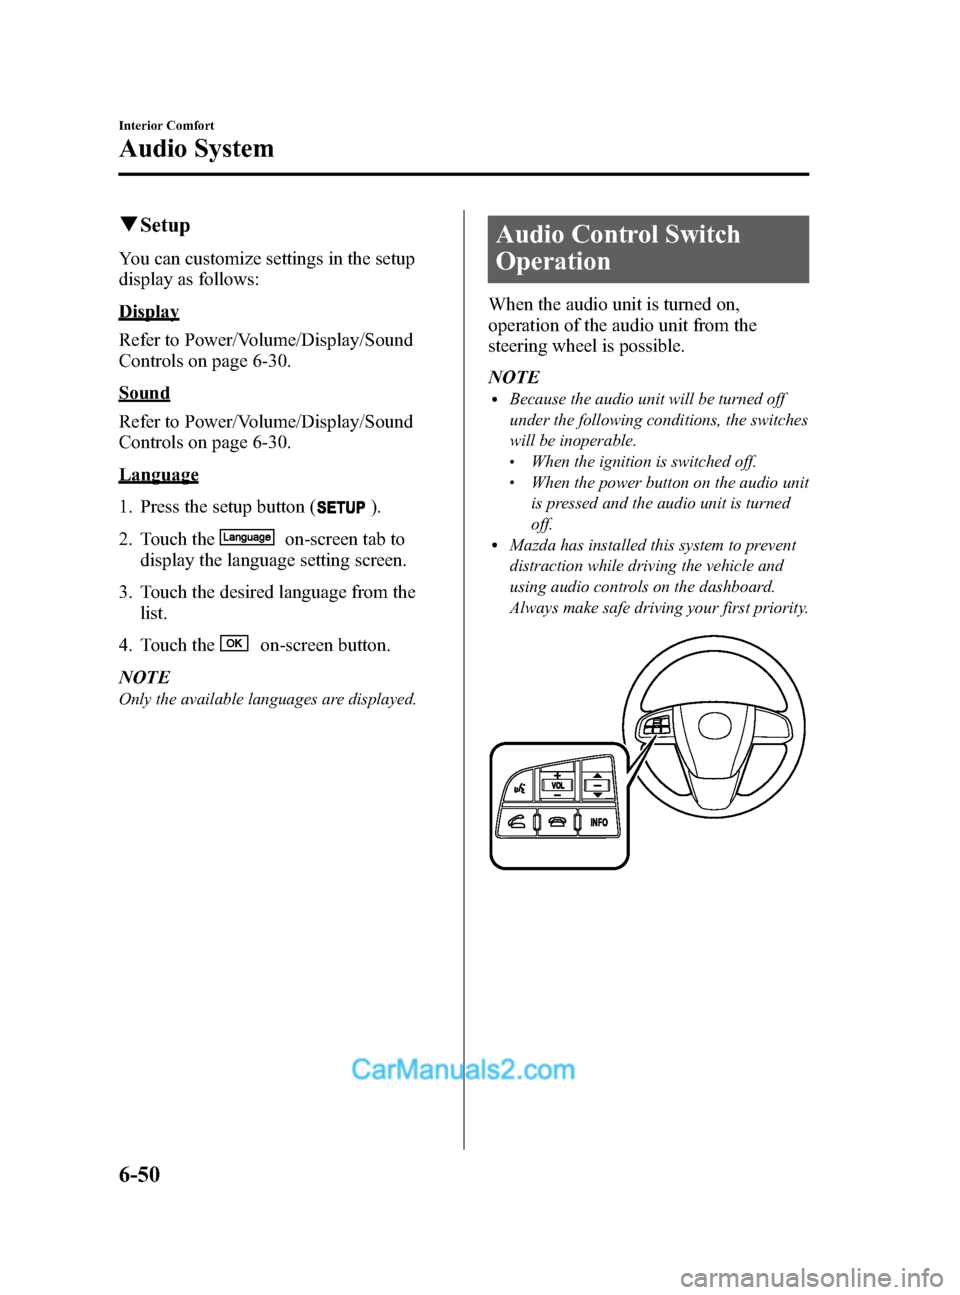
When the audio unit is turned on,
operation of the audio unit from the
steering wheel is possible.
NOTE
lBecause the audio unit will be turned off
under the following conditions, the switches
will be inoperable.
lWhen the ignition is switched off.lWhen the power button on the audio unit
is pressed and the audio unit is turned
off.
lMazda has installed this system to prevent
distraction while driving the vehicle and
using audio controls on the dashboard.
Always make safe driving your first priority.
6-50
Interior Comfort
Audio System
CX-9_8DA3-EA-13G_Edition2 Page322
Monday, September 9 2013 4:8 PM
Form No.8DA3-EA-13G
Page 326 of 600

Black plate (326,1)
NOTElInsert the plug to the auxiliary jack*1/USB
port securely.
lInsert or pull out the plug with the plug
perpendicular to the auxiliary jack*1/USB
port hole.
lInsert or remove the plug by holding its
base.
*1 With auxiliary jack
q How to use AUX mode
1. Switch the ignition to ACC or ON.
2. Press the power/volume dial to turn the
audio system on.
3. Press the audio button (
)to
display the audio screen.
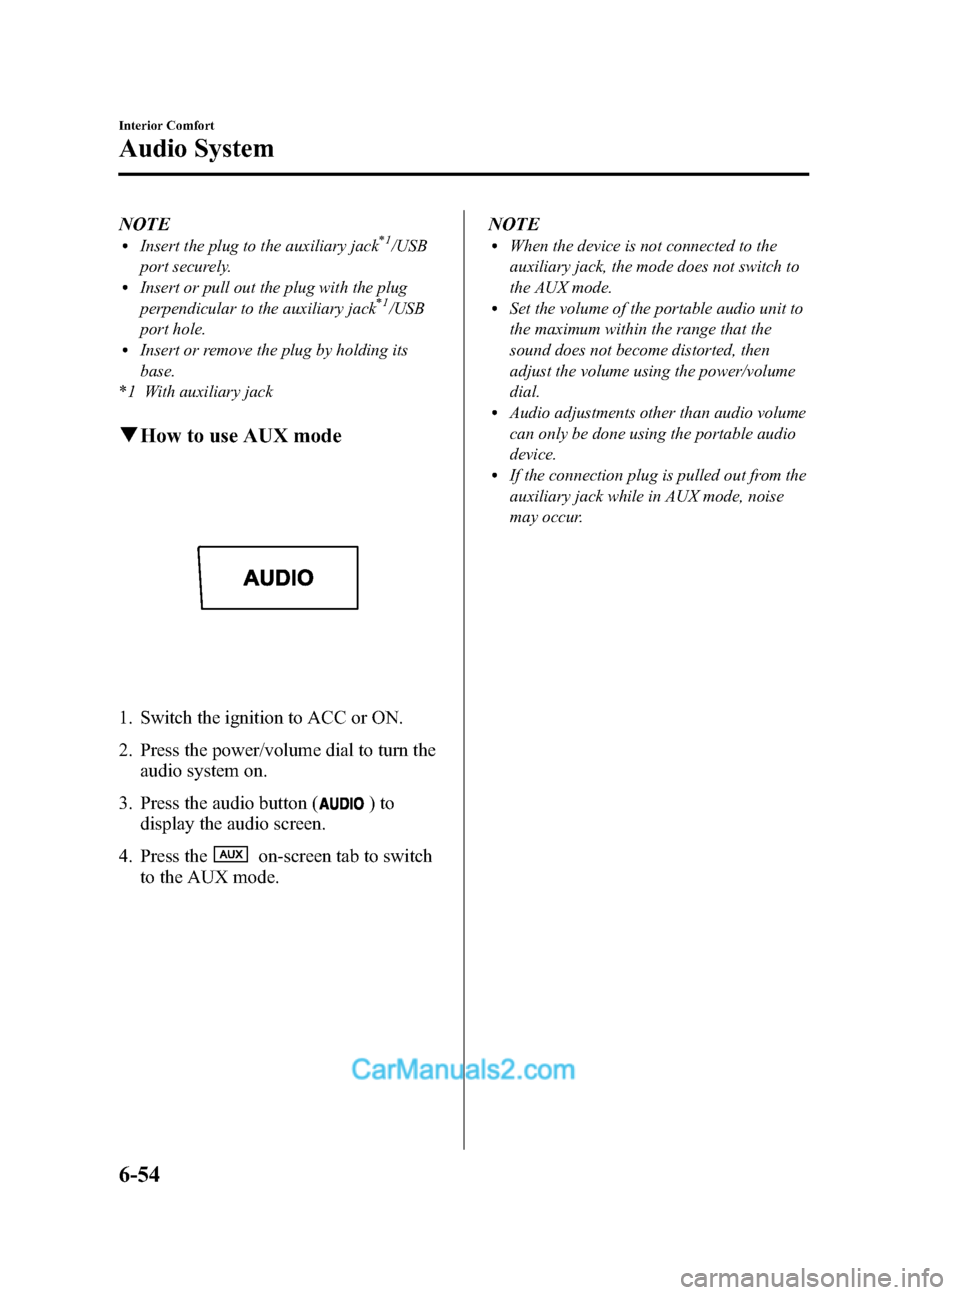
4. Press the
on-screen tab to switch
to the AUX mode. NOTE
lWhen the device is not connected to the
auxiliary jack, the mode does not switch to
the AUX mode.
lSet the volume of the portable audio unit to
the maximum within the range that the
sound does not become distorted, then
adjust the volume using the power/volume
dial.
lAudio adjustments other than audio volume
can only be done using the portable audio
device.
lIf the connection plug is pulled out from the
auxiliary jack while in AUX mode, noise
may occur.
6-54
Interior Comfort
Audio System
CX-9_8DA3-EA-13G_Edition2 Page326
Monday, September 9 2013 4:8 PM
Form No.8DA3-EA-13G
Page 328 of 600

Black plate (328,1)
qHow to use USB mode
Audio button
Power/Volume
dial Track up/Fast-
forward button
File dial
Track down/
Reverse button
Type
Playable data
USB mode MP3/WMA/AAC file
Playback
1. Switch the ignition to ACC or ON.
2. Press the power/volume dial to turn the audio system on.
3. Press the audio button (
)to
display the audio screen.
4. Touch the
on-screen tab to
switch to USB mode and start
playback. NOTE
lSome devices such as smart phones may
require a setting change to allow USB
operation.
lWhen a USB device is not connected to the
USB port, the mode does not switch to the
USB mode even if the
on-screen tab
is touched.
lDo not remove the USB device while in the
USB mode. Otherwise, the data could be
damaged.
Pause
Touch the
on-screen button to
pause playback.
Touch the
on-screen button while
playback is paused to cancel the pause.
6-56
Interior Comfort
Audio System
CX-9_8DA3-EA-13G_Edition2 Page328
Monday, September 9 2013 4:8 PM
Form No.8DA3-EA-13G
Page 332 of 600

Black plate (332,1)
qHow to use iPod mode
Audio button
Power/Volume
dial Track up/Fast-
forward button
File dial
Track down/
Reverse button
The connectable iPods are as follows:liPod classicliPod nano: 4/5/6GliPod touch*1: 2/3/4GliPhone*1: 3GS/4/4S
*1 Only iPod function
NOTE
The iPod functions on the iPod cannot be
operated while it is connected to the unit
because the unit controls the iPod functions.
Playback
1. Switch the ignition to ACC or ON.
2. Press the power/volume dial to turn the audio system on.
3. Press the audio button (
)to
display the audio screen. 4. Touch the
on-screen tab to
switch to the iPod mode and start
playback.
NOTE
lWhen the iPod is connected to the USB
port, the
on-screen tab changes to
the
on-screen tab.lDo not remove the iPod while in the iPod
mode. Otherwise, the data could be
damaged.
Pause
Touch the
on-screen button to
pause playback. Touch the
on-
screen button while playback is paused to
cancel the pause.
6-60
Interior Comfort
Audio System
CX-9_8DA3-EA-13G_Edition2 Page332
Monday, September 9 2013 4:8 PM
Form No.8DA3-EA-13G
Page 350 of 600

Black plate (350,1)
Inserting the disc
Insert the disc into the disc slot with the
label-side up.
Disc slot
CAUTION
Insert the disc with its label-side
(decorated side) facing upward. If the
disc is inserted upside-down, it may
cause a malfunction.
NOTE
If a disc is inserted while the Rear
Entertainment System is turned off but the
display is open, and when the ignition is
switched to ACC or ON, the system
automatically turns on and starts playback.
Ejecting the disc
Press the eject button to eject the disc.
Eject button
NOTElWhen the eject button is pressed, the disc is
ejected halfway.
lA disc can be ejected with the Rear
Entertainment System turned off.
q Picture Adjustment
The brightness (BRIGHT), color
adjustment (TINT), color density
(COLOR), and contrast (CONTRAST) of
the screen can be adjusted.
Press the picture adjust button
(PICTURE) on the remote controller to
change to the picture adjustment mode.
The picture mode changes in the order of
BRIGHT →TINT →COLOR
→ CONTRAST →OFF each time the
button is pressed in this mode.
Press the picture adjust button (
)or(),
positioned to top/bottom of the picture
adjustment mode button (PICTURE), to
adjust each picture mode.
NOTE
lIf the picture adjustment mode is on and no
operation has been done for about 5
seconds, the mode is canceled
automatically.
lIf the picture is no longer adjustable by
pressing the picture adjust button (
)or
(
), it indicates that the adjustment value
has reached the maximum/minimum value.
Adjusting the brightness
1. Press the picture adjustment mode button (PICTURE) and select the
BRIGHT mode.
2. Press the picture adjust button (
)or
(
) to adjust.
lPicture adjust button (): Brighten
6-78
Interior Comfort
Rear Entertainment System
CX-9_8DA3-EA-13G_Edition2 Page350
Monday, September 9 2013 4:9 PM
Form No.8DA3-EA-13G
Page 360 of 600

Black plate (360,1)
DVD video, DVD audio,
Video CD, Audio CD and
MP3/WMA CD Playback
(Disc Mode)
DVD video, DVD audio, Video CD,
Audio CD, and MP3/WMA CD can be
played in the Disc mode.
CAUTION
For safe driving, adjust the volume
while driving so that ambient sound
can be heard.
NOTE
lDo not use the Rear Entertainment System
for a long period with the engine off. The
vehicle battery could run down.
lTo listen to the Rear Entertainment System
sound from the vehicle speakers, change the
audio sound to the Rear Entertainment
System sound.
Refer to Sound Output from Vehicle
Speakers on page 6-83.
lTo listen to audio other than from the
speakers of the rear entertainment system, it
is necessary to use the wireless headphones
that are included. For headphone
specification, refer to
“ Operation Tips for Headphones ”(page
6-73).
lThe cooling fan of this unit may activate if
the temperature of the unit is high, however,
this does not indicate a malfunction.
q Basic Operation
Power ON/OFF
Turning on the power
The Rear Entertainment System
automatically turns on when any of the
following operations are done with the
ignition switched to ACC or ON.
lThe display is open and a disc is
inserted.
lThe POWER button on the remote
controller is pressed.
Turning off
The Rear Entertainment System turns off
when any of the following operations are
done.
lThe POWER button on the remote
controller is pressed.
lThe ignition is switched off.lThe display is closed.
Playback
The top menu or disc menu may be
displayed on the monitor screen when a
disc is played. From these menus, the disc
functions can be performed.
Refer to Assist Functions (DVD video,
DVD audio, video CD and audio CD) on
page 6-91.
NOTE
lFor some discs, the top menu or disc menu
may be displayed automatically after
playback.
lRefer to the instruction manual attached to
the disc for the top menu or disc menu.
When no disc is inserted
1. Switch the ignition to ACC or ON.
2. Insert the disc into the disc slot. After the disc is inserted, the playback
starts.
6-88
Interior Comfort
Rear Entertainment System
CX-9_8DA3-EA-13G_Edition2 Page360
Monday, September 9 2013 4:9 PM
Form No.8DA3-EA-13G