2014 KIA Sedona reset
[x] Cancel search: resetPage 28 of 382
319
Features of your vehicle
How to reset the power sliding doorand power tailgate
If the battery has been discharged or dis-
connected, the related fuse has been
replaced or disconnected, and the power
sliding door or power tailgate doesn't
work properly, the power sliding door and
power tailgate must be reset as follows:
1. Put the shift lever in the P (Park) for automatic transaxle.
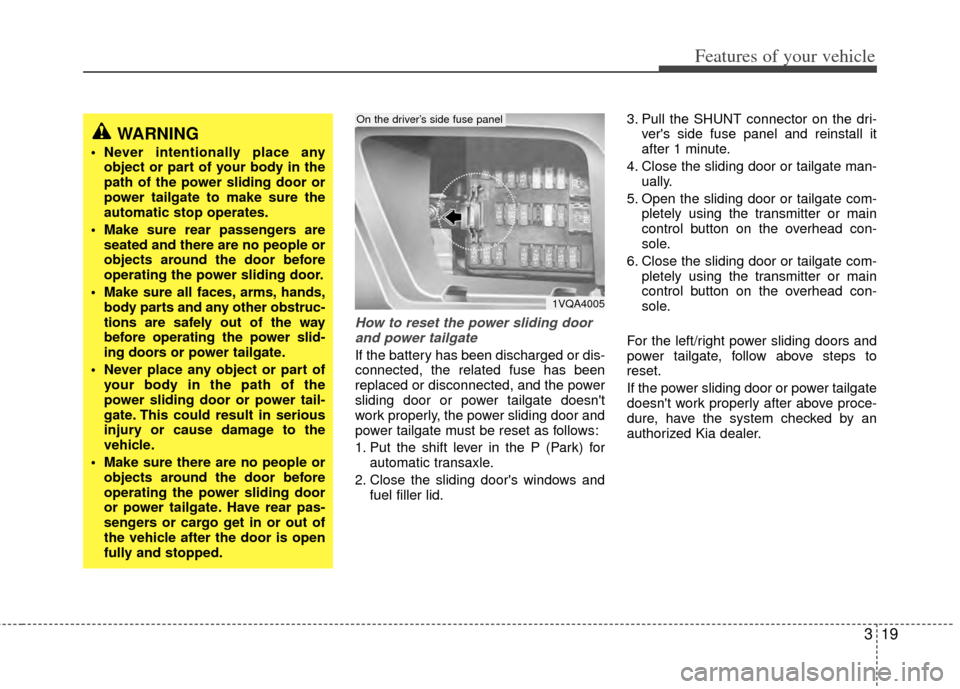
2. Close the sliding door's windows and fuel filler lid. 3. Pull the SHUNT connector on the dri-
ver's side fuse panel and reinstall it
after 1 minute.
4. Close the sliding door or tailgate man- ually.
5. Open the sliding door or tailgate com- pletely using the transmitter or main
control button on the overhead con-
sole.
6. Close the sliding door or tailgate com- pletely using the transmitter or main
control button on the overhead con-
sole.
For the left/right power sliding doors and
power tailgate, follow above steps to
reset.
If the power sliding door or power tailgate
doesn't work properly after above proce-
dure, have the system checked by an
authorized Kia dealer.
WARNING
Never intentionally place any object or part of your body in the
path of the power sliding door or
power tailgate to make sure the
automatic stop operates.
Make sure rear passengers are seated and there are no people or
objects around the door before
operating the power sliding door.
Make sure all faces, arms, hands, body parts and any other obstruc-
tions are safely out of the way
before operating the power slid-
ing doors or po wer tailgate.
Never place any object or part of your body in the path of the
power sliding door or power tail-
gate. This could result in serious
injury or cause damage to the
vehicle.
Make sure there are no people or objects around the door before
operating the power sliding door
or power tailgate. Have rear pas-
sengers or cargo get in or out of
the vehicle after the door is open
fully and stopped.
1VQA4005
On the driver’s side fuse panel
Page 37 of 382
Features of your vehicle
28
3
Automatic power window down
(driver’s window)
Depressing the power window switch
momentarily to the second detent posi-
tion (9) completely lowers the driver’s
window even when the switch is
released. To stop the window at the
desired position while the window is in
operation, pull up the switch momentarily
to the opposite direction of the window
movement.
If the power window is not operated cor-
rectly, the automatic power window sys-
tem must be reset as follows:
1. Turn the ignition key to ON position.
2. Close driver’s window and continue
pulling up on driver’s power window
switch for at least 1 second after the
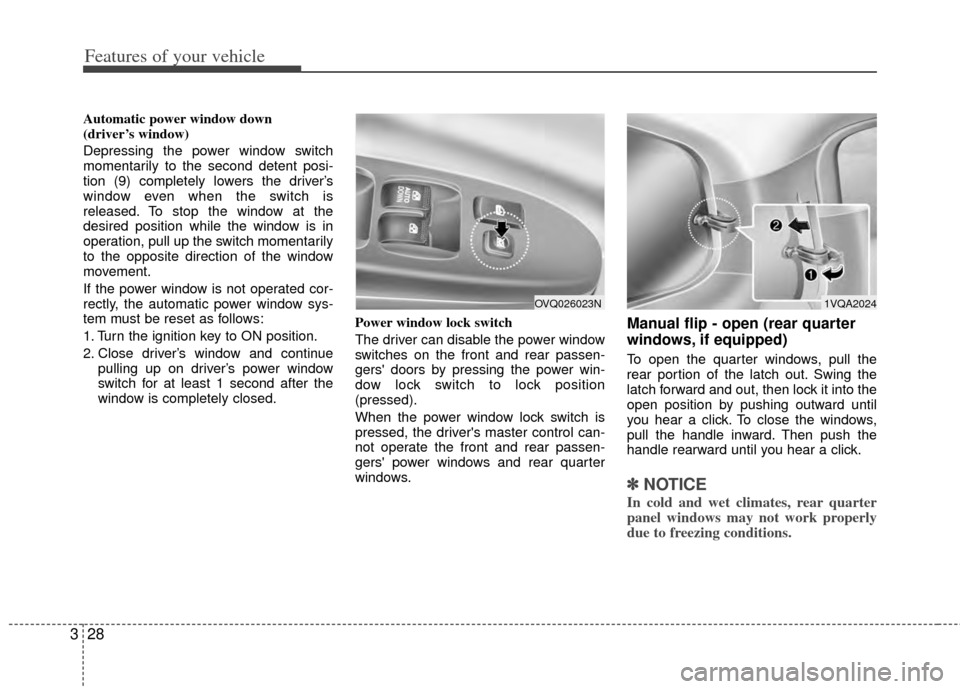
window is completely closed. Power window lock switch
The driver can disable the power window
switches on the front and rear passen-
gers' doors by pressing the power win-
dow lock switch to lock position
(pressed).
When the power window lock switch is
pressed, the driver's master control can-
not operate the front and rear passen-
gers' power windows and rear quarter
windows.
Manual flip - open (rear quarter
windows, if equipped)
To open the quarter windows, pull the
rear portion of the latch out. Swing the
latch forward and out, then lock it into the
open position by pushing outward until
you hear a click. To close the windows,
pull the handle inward. Then push the
handle rearward until you hear a click.
✽ ✽
NOTICE
In cold and wet climates, rear quarter
panel windows may not work properly
due to freezing conditions.
1VQA2024OVQ026023N
Page 45 of 382
Features of your vehicle
36
3
Resetting the sunroof
Whenever the vehicle battery is discon-
nected or discharged, you have to reset
your sunroof system as follows:
1. Turn the ignition key to the ON posi-
tion.
2. According to the position of the sun- roof, do as follows.
1) in case that the sunroof has closedcompletely or been tilted :
Press the tilt button until the sun-
roof has tilted upward completely.
2) in case that the sunroof has slide- opened:
Press and hold the close button
(for more than 5 seconds) until the
sunroof has closed completely.
Press the tilt button until the sun-
roof has tilted upward completely.
3. Release the tilt button. 4. Press and hold the tilt button (for
more than 10 seconds) until the sun-
roof has returned to the original posi-
tion of tilt after it is raised a little high-
er than the maximum tilt position.
Then, release the button.
5. Press and hold the tilt button (for more than 5 seconds) until the sun-
roof is operated as follows;
TILT DOWN → SLIDE OPEN →
SLIDE CLOSE
Then, release the button.
When this is complete, the sunroof sys-
tem is reset.
Page 47 of 382
Features of your vehicle
38
3
(Continued)
seatback upright and the lap por-
tion of the safety belt snug and
low across the hips. This is the
best position to protect you in
case of an accident.
In order to avoid unnecessary and perhaps severe airbag
injuries, always sit as far back as
possible from the steering wheel
so that your chest is at least 250
mm (10 inches) away from the
steering wheel.
WARNING- Driver’s seat
Never attempt to adjust seat whilethe vehicle is moving. This could
result in loss of control, and an
accident causing death, serious
injury, or property damage.
Do not allow anything to interfere with the normal position of the
seatback. Storing items against a
seatback or in any other way
interfering with proper locking of
a seatback could result in serious
or fatal injury in a sudden stop or
collision.
(Continued)
WARNING - Uprighting
seat
When you return the seatback to its
upright position, hold the seatback
and return it slowly and be sure
there are no other occupants
around the seat. If the seatback is
returned without being held and
controlled, the back of the seat
could spring forward resulting in
accidental injury to a person struck
by the seatback.
WARNING- Rear Seatback
The rear seatback must besecurely latched. If not, passen-
gers and objects could be thrown
forward resulting in serious
injury or death in the event of a
sudden stop or collision.
Luggage and other cargo should be laid flat in the cargo area. If
objects are large, heavy, or must
be piled, they must be secured.
Under no circumstances should
cargo be piled higher than the
seatbacks.
(Continued)
(Continued)Failure to follow these warnings
could result in serious injury or
death in the event of a sudden
stop, collision or rollover.
No passenger should ride in the cargo area or sit or lie on folded
seatbacks while the vehicle is
moving. All passengers must be
in seats and restrained properly
while riding.
When resetting the seatback to the upright position, make sure it
is securely latched by pushing it
forward and backwards.
To avoid the possibility of burns, do not remove the carpet in the
cargo area. Emission controls
beneath this floor generate high
exhaust temperatures.
Use extreme caution so that hands or other objects are not
caught in the seat mechanisms
while the seat is moving.
Do not put a cigarette lighter on the floor or seat. When you oper-
ate the seat, gas may gush out of
the lighter and cause fire.
Page 126 of 382
3117
Features of your vehicle
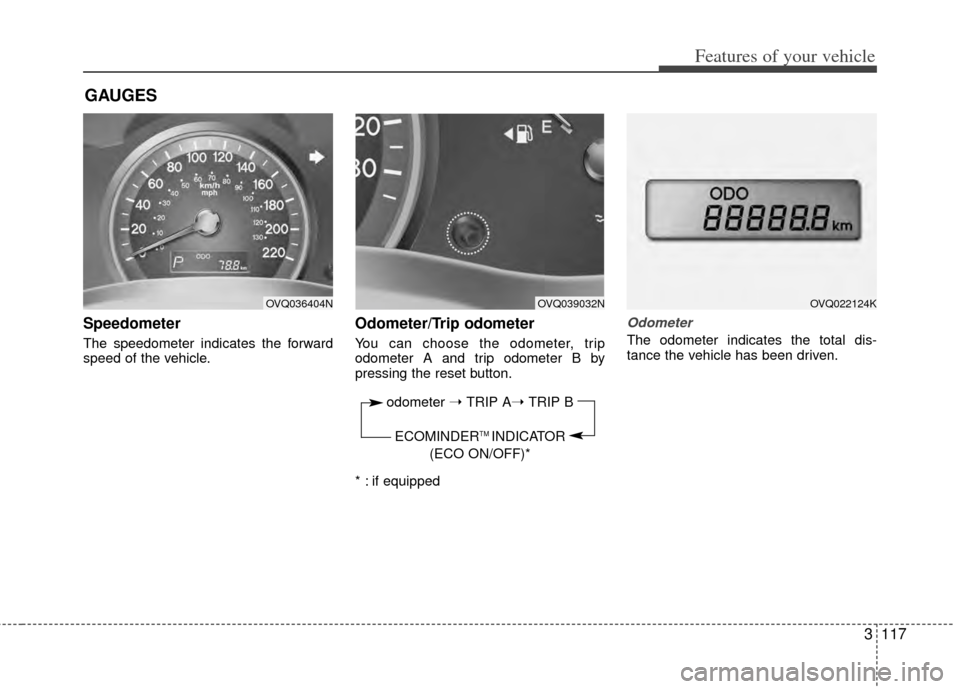
Speedometer
The speedometer indicates the forward
speed of the vehicle.
Odometer/Trip odometer
You can choose the odometer, trip
odometer A and trip odometer B by
pressing the reset button.
* : if equipped
Odometer
The odometer indicates the total dis-
tance the vehicle has been driven.
GAUGES
OVQ036404NOVQ039032N
odometer ➝ TRIP A➝ TRIP B
ECOMINDER
TM INDICATOR
(ECO ON/OFF)*
OVQ022124K
Page 127 of 382
Features of your vehicle
118
3
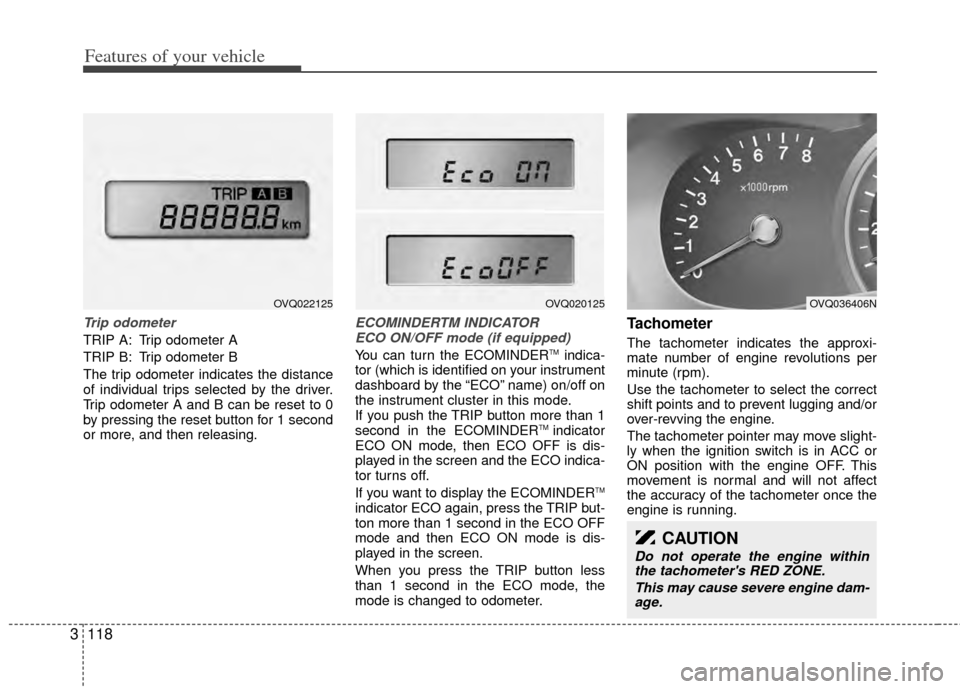
Trip odometer
TRIP A: Trip odometer A
TRIP B: Trip odometer B
The trip odometer indicates the distance
of individual trips selected by the driver.
Trip odometer A and B can be reset to 0
by pressing the reset button for 1 second
or more, and then releasing.
ECOMINDERTM INDICATOR
ECO ON/OFF mode (if equipped)
You can turn the ECOMINDERTMindica-
tor (which is identified on your instrument
dashboard by the “ECO” name) on/off on
the instrument cluster in this mode.
If you push the TRIP button more than 1
second in the ECOMINDER
TM indicator
ECO ON mode, then ECO OFF is dis-
played in the screen and the ECO indica-
tor turns off.
If you want to display the ECOMINDER
TM
indicator ECO again, press the TRIP but-
ton more than 1 second in the ECO OFF
mode and then ECO ON mode is dis-
played in the screen.
When you press the TRIP button less
than 1 second in the ECO mode, the
mode is changed to odometer.
Tachometer
The tachometer indicates the approxi-
mate number of engine revolutions per
minute (rpm).
Use the tachometer to select the correct
shift points and to prevent lugging and/or
over-revving the engine.
The tachometer pointer may move slight-
ly when the ignition switch is in ACC or
ON position with the engine OFF. This
movement is normal and will not affect
the accuracy of the tachometer once the
engine is running.
CAUTION
Do not operate the engine within the tachometer's RED ZONE.
This may cause severe engine dam-age.
OVQ036406NOVQ020125OVQ022125
Page 130 of 382

3121
Features of your vehicle
The trip computer is a microcomputer-
controlled driver information system that
displays information related to driving,
including compass, distance to empty,
driving time, average fuel consumption
and outside temperature on the display
when the ignition switch is in ON posi-
tion. All stored driving information is reset
if the battery is disconnected.
Mode selection
The compass is always displayed until
the display is turned off.
Push the MODE button to select distance
to empty, driving time, average fuel con-
sumption and outside temperature func-
tions.
Compass (if equipped)
The vehicle compass displays the direc-
tion the vehicle is heading.
Heading display
- E : East
- W : West
- S : South
- N : North
ex) NE : North East
✽ ✽NOTICE
If new vehicle is first driven, perform
calibration procedure as follows.
TRIP COMPUTER (IF EQUIPPED)
OVQ020318Driving time (ET)
Average fuel consumption
(AVG)
Outside temperature
OFF
Distance to empty (RANGE)
1VQA2211
Page 132 of 382
3123
Features of your vehicle
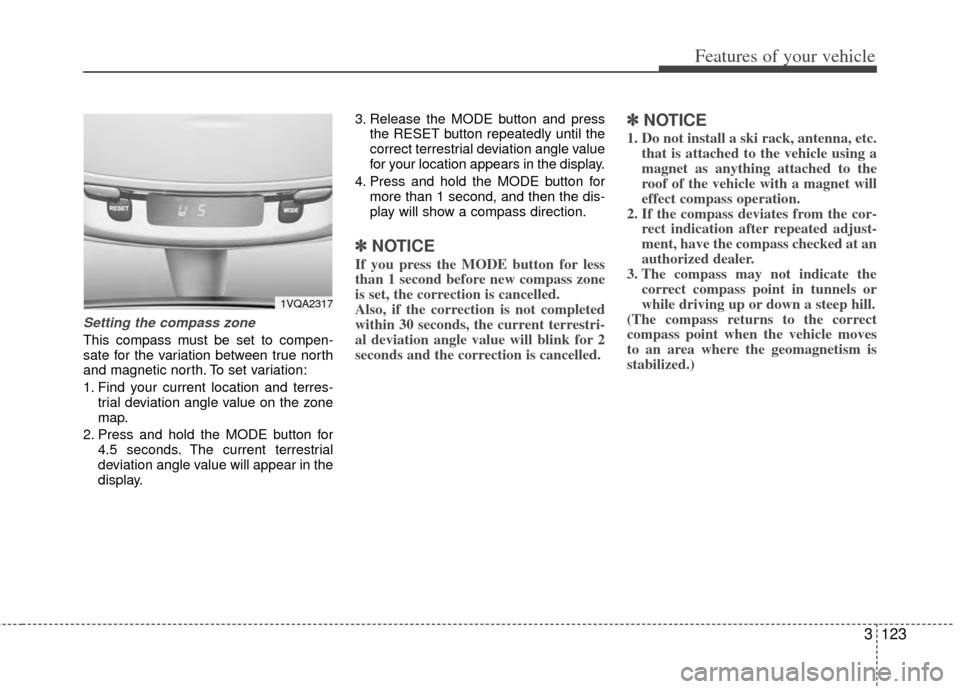
Setting the compass zone
This compass must be set to compen-
sate for the variation between true north
and magnetic north. To set variation:
1. Find your current location and terres-trial deviation angle value on the zone
map.
2. Press and hold the MODE button for 4.5 seconds. The current terrestrial
deviation angle value will appear in the
display. 3. Release the MODE button and press
the RESET button repeatedly until the
correct terrestrial deviation angle value
for your location appears in the display.
4. Press and hold the MODE button for more than 1 second, and then the dis-
play will show a compass direction.
✽ ✽NOTICE
If you press the MODE button for less
than 1 second before new compass zone
is set, the correction is cancelled.
Also, if the correction is not completed
within 30 seconds, the current terrestri-
al deviation angle value will blink for 2
seconds and the correction is cancelled.
✽ ✽NOTICE
1. Do not install a ski rack, antenna, etc.
that is attached to the vehicle using a
magnet as anything attached to the
roof of the vehicle with a magnet will
effect compass operation.
2. If the compass deviates from the cor- rect indication after repeated adjust-
ment, have the compass checked at an
authorized dealer.
3. The compass may not indicate the correct compass point in tunnels or
while driving up or down a steep hill.
(The compass returns to the correct
compass point when the vehicle moves
to an area where the geomagnetism is
stabilized.)
1VQA2317