2014 KIA Sedona brakes
[x] Cancel search: brakesPage 6 of 382
13
Introduction
Gasoline containing alcohol and
methanol
Gasohol, a mixture of gasoline and
ethanol (also known as grain alcohol),
and gasoline or gasohol containing
methanol (also known as wood alcohol)
are being marketed along with or instead
of leaded or unleaded gasoline. Pursuant
to EPA regulations, ethanol may be used
in your vehicle. Do not use gasohol con-
taining more than 10% ethanol, and do
not use gasoline or gasohol containing
any methanol. Ethanol provides less
energy than gasoline and it attracts
water, and it is thus likely to reduce your
fuel efficiency and could lower your MPG
results. Methanol may cause drivability
problems and damage to the fuel sys-
tem. Discontinue using gasohol of any
kind if drivability problems occur. Vehicle
damage or drivability problems may not
be covered by the manufacturer's war-
ranty if they result from the use of:
1. Gasoline or gasohol containingmethanol.
2. Leaded fuel or leaded gasohol.
Fuel Additives
Kia recommends that you use good qual-
ity gasolines treated with detergent addi-
tives such as TOP TIER Detergent
Gasoline, which help prevent deposit for-
mation in the engine. These gasolines
will help the engine run cleaner and
enhance performance of the Emission
Control System. For more information on
TOP TIER Detergent Gasoline, please
go to the website (www
.toptiergas.com).
For customers who do not use TOP Tier
Detergent Gasoline regularly, and have
problems starting or the engine does not
run smoothly, additives that you can buy
separately may be added to the gasoline.
If TOP TIER Detergent Gasoline is not
available, one bottle of additive added to
the fuel tank at every 12,000 km or every
engine oil change is recommended.
Additives are available from your author-
ized Kia dealer along with information on
how to use them. Do not mix other addi-
tives. No special break-in period is needed. By
following a few simple precautions for the
first 1,000 km (600 miles) you may add to
the performance, economy and life of
your vehicle.
Do not race the engine.
Do not maintain a single speed for long
periods of time, either fast or slow.
Varying engine speed is needed to
properly break-in the engine.
Avoid hard stops, except in emergen- cies, to allow the brakes to seat prop-
erly.
Avoid full-throttle starts.
CAUTION
Never use gasohol which contains methanol. Discontinue use of anygasohol product which impairs dri-vability.
VEHICLE BREAK-IN PROCESS
Page 100 of 382
391
Features of your vehicle
Air bag system components
The main components of your SRS are:
To indicate that your vehicle isequipped with air bags, the corre-
sponding air bag covers are marked
with “SRS AIR BAG”.
- Driver’s air bag
- Passenger’s air bag
- Side air bag
- Curtain air bag
A diagnostic system that continually monitors the system operation.
An indicator light to warn you of a pos- sible problem with the system. Emergency power backup in case your
car’s electrical system is disconnected
in a crash.
The SRS uses a collection of sensors to
gather information about the driver’s seat
position, the driver’s and front passenger’s
safety belt usage and impact severity.
The driver’s seat position sensor, which
is installed on the seat track, determine if
the seat is fore or aft of a reference posi-
tion. Similarly, the safety belt usage sen-
sors determine if the driver and front pas-
senger’s safety belts are fastened. These
sensors provide the ability to control the
SRS deployment based on how close the
driver’s seat is to the steering wheel,
whether or not the safety belts are fas-
tened, and the severity of the impact.
(Continued)
If the driver brakes the vehicle heavily prior to an impact, unbelt-
ed occupants will be thrown for-
ward. If the front passenger is not
wearing the safety belts, they will
be directly in front of the storage
compartment when deployment
occurs. In that situation, serious
injury or death is possible.
Never allow front passenger to put their hands, feet or face on or
close to the instrument panel. In
the event of air bag deployment,
such a mispositioned occupant
would be likely to suffer severe
injury or death.
Never allow children, pregnant women or weak persons to sit in
the front passenger seat. Do not
put child restraint system on the
front passenger's seat either.
They may be seriously injured by
the air bag inflation when air bag
deploys.
(Continued)(Continued)
Do not put objects or stickers onthe instrument panel. Do not
apply any accessory to the front
windshield. Do not install after-
market mirrors or accessories on
the factory-installed rearview mir-
ror. Any of these could interfere
with the deployment of the air bag
or could hit your body at high
speed and cause severe bodily
injury and even death.
Page 138 of 382

3129
Features of your vehicle
Engine oil pressure
warning
This warning light indicates the engine oil
pressure is low.
If the warning light illuminates while dri-
ving:
1. Drive safely to the side of the road andstop.
2. With the engine off, check the engine oil level. If the level is low, add oil as
required.
If the warning light remains on after
adding oil or if oil is not available, call an
Authorized Kia Dealer.
Parking brake & brake
fluid warning
Parking brake warning
This light is illuminated when the parking
brake is applied with the ignition switch in
the START or ON position. The warning
light should go off when the parking
brake is released while engine is run-
ning.
Low brake fluid level warning
If the warning light remains on, it may
indicate that the brake fluid level in the
reservoir is low.
If the warning light remains on:
1. Drive carefully to the nearest safe location and stop your vehicle.
2. With the engine stopped, check the brake fluid level immediately and add
fluid as required. Then check all brake
components for fluid leaks.
3. Do not drive the vehicle if leaks are found, the warning light remains on or
the brakes do not operate properly.
Have it towed to any Authorized Kia
Dealer for a brake system inspection
and necessary repairs. To check bulb operation, check whether
the parking brake and brake fluid warning
light illuminates when the ignition switch
is in the ON position.
Parking start warning chime
If you drive over 10 km/h (6 mph) with the
parking brake applied, the parking start
warning chime will sound.
Front fog light indicator
(if equipped)
This light comes on when the front fog
lights are ON.
Shift pattern indicators
(if equipped)
The individual indicators illuminate to
show the automatic transaxle shift lever
selection.
CAUTION
If the engine is not stopped imme-
diately after the engine oil pressurewarning light is illuminated, severedamage could result.
WARNING
Driving the vehicle with a warning
light on is dangerous. If the brake
warning light remains on, have the
brakes checked and repaired imme-
diately by an authorized Kia Dealer.
Page 264 of 382
Driving your vehicle
64
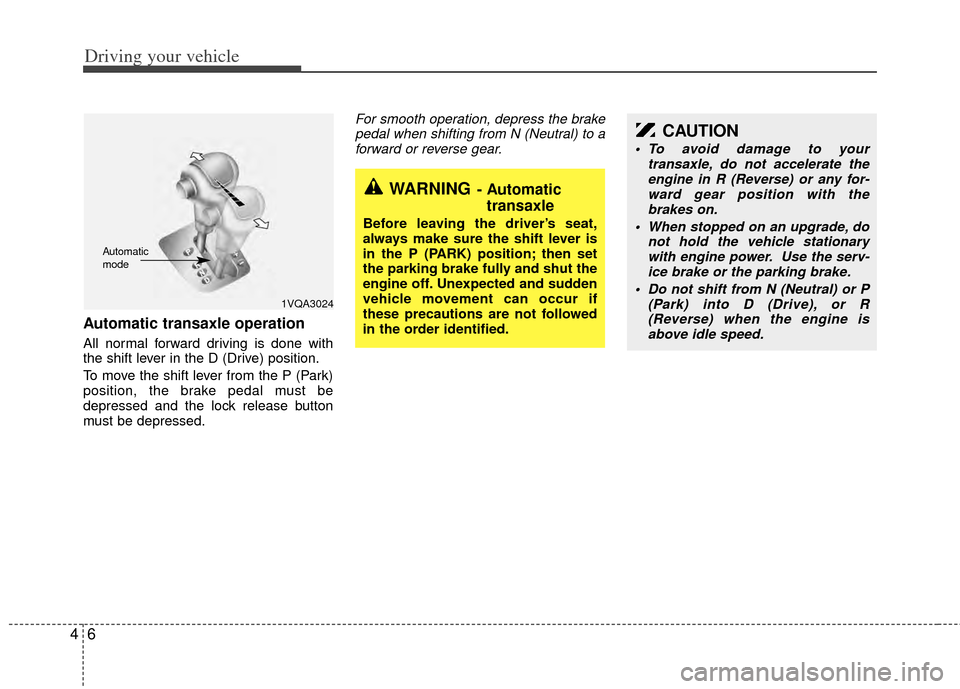
Automatic transaxle operation
All normal forward driving is done with
the shift lever in the D (Drive) position.
To move the shift lever from the P (Park)
position, the brake pedal must be
depressed and the lock release button
must be depressed.
For smooth operation, depress the brakepedal when shifting from N (Neutral) to aforward or reverse gear.
WARNING- Automatic transaxle
Before leaving the driver’s seat,
always make sure the shift lever is
in the P (PARK) position; then set
the parking brake fully and shut the
engine off. Unexpected and sudden
vehicle movement can occur if
these precautions are not followed
in the order identified.
1VQA3024
Automatic
mode
CAUTION
To avoid damage to your
transaxle, do not accelerate theengine in R (Reverse) or any for- ward gear position with thebrakes on.
When stopped on an upgrade, do not hold the vehicle stationarywith engine power. Use the serv- ice brake or the parking brake.
Do not shift from N (Neutral) or P (Park) into D (Drive), or R(Reverse) when the engine is above idle speed.
Page 265 of 382
47
Driving your vehicle
Transaxle ranges
P (park)
Always come to a complete stop before
shifting into P (Park). This position locks
the transaxle and prevents the front
wheels from rotating.
R (reverse)
Use this position to drive the vehicle
backward.
N (neutral)
The wheels and transaxle are not locked.
The vehicle will roll freely even on the
slightest incline unless the parking brake
or service brakes are applied.
D (drive)
This is the normal forward driving posi-
tion. The transaxle will automatically shift
through a 6-gear sequence, providing the
best fuel economy and power.
For extra power when passing another
vehicle or climbing grades, depress the
accelerator fully, at which time the
transaxle will automatically downshift to
the next lower gear.
✽ ✽NOTICE
Always come to a complete stop before
shifting into D (Drive).
(Continued)
Never leave a child unattended in
a vehicle.
CAUTION
The transaxle may be damaged ifyou shift into P (Park) while the vehicle is in motion.
CAUTION
Always come to a complete stopbefore shifting into or out of R (Reverse); you may damage thetransaxle if you shift into R while the vehicle is in motion, except asexplained in “Rocking the Vehicle”,in this manual.
WARNING
Shifting into P (Park) while the vehicle is in motion will cause the
drive wheels to lock which will
cause you to lose control of the
vehicle.
Do not use the P (Park) position in place of the parking brake.
Always make sure the shift lever
is latched in the P (Park) position
so that it cannot be moved unless
the lock release button is pushed
in, AND set the parking brake
fully.
Before leaving the driver’s seat, always make sure the shift lever
is in the P (PARK) position. Set
the parking brake fully, shut the
engine off and take the key with
you. Unexpected and sudden
vehicle movement can occur if
you do not follow these precau-
tions in the order specified.
(Continued)
Page 267 of 382
49
Driving your vehicle
Moving up a steep grade from a
standing start
To move up a steep grade from a stand-
ing start, depress the brake pedal, shift
the shift lever to D (Drive). Select the
appropriate gear depending on load
weight and steepness of the grade, and
release the parking brake. Depress the
accelerator gradually while releasing the
service brakes.
When accelerating from a stop on a
steep hill, the vehicle may have a ten-
dency to roll backwards. Shifting the
shift lever into 2 (Second Gear) while
in Sports mode will help prevent the
vehicle from rolling backwards.
Shift lock system
For your safety, the automatic transaxle
has a shift lock system which prevents
shifting the transaxle out of P (Park)
unless the brake pedal is depressed.
To shift the transaxle out of P (Park):
1. Depress and hold the brake pedal.
2. Start the engine or turn the ignition tothe ON position.
3. Depress the lock release button and move the shift lever.
If the brake pedal is repeatedly
depressed and released with the shift
lever in the P (Park) position, a chattering
noise near the shift lever may be heard.
This is a normal condition.
Shift-lock override
If the shift lever should fail to move from
the P (Park) position with the brake pedal
depressed, continue depressing the
brake, then do the following:
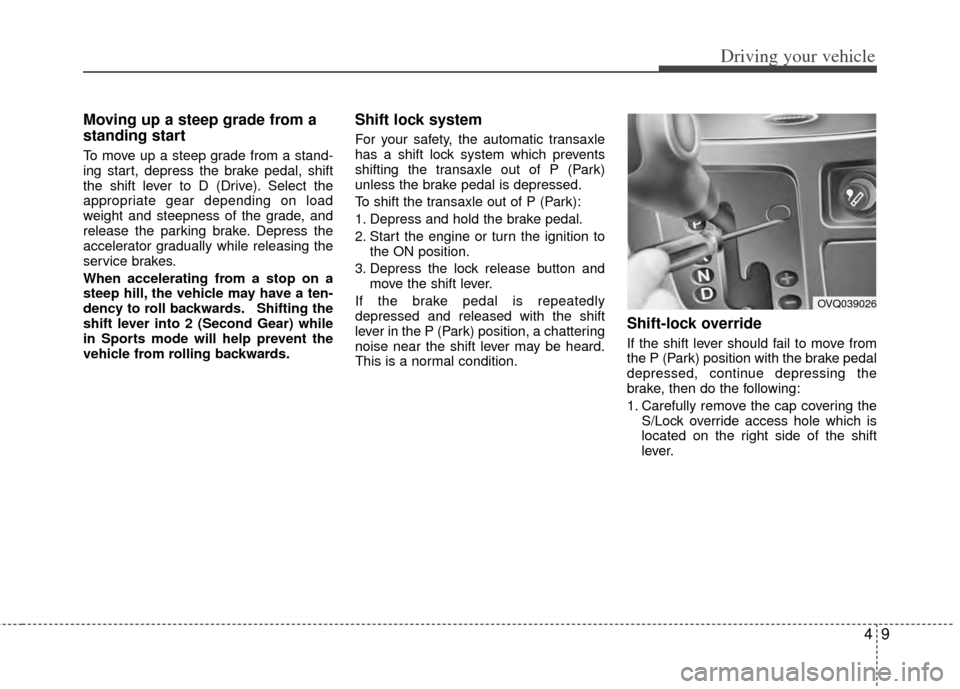
1. Carefully remove the cap covering the S/Lock override access hole which is
located on the right side of the shift
lever.
OVQ039026
Page 272 of 382
Driving your vehicle
14
4
Power brakes
Your vehicle has power-assisted brakes
that adjust automatically through normal
usage.
In the event that the power-assisted
brakes lose power because of a stalled
engine or some other reason, you can
still stop your vehicle by applying greater
force to the brake pedal than you nor-
mally would. The stopping distance, how-
ever, will be longer.
When the engine is not running, the
reserve brake power is partially depleted
each time the brake pedal is applied. Do
not pump the brake pedal when the
power assist has been interrupted.
Pump the brake pedal only when neces-
sary to maintain steering control on slip-
pery surfaces.
In the event of brake failure
If service brakes fail to operate while the
vehicle is in motion, you can make an
emergency stop with the parking brake.
The stopping distance, however, will be
much greater than normal.
BRAKE SYSTEM
(Continued)
When descending a long or steep
hill, shift to a lower gear and
avoid continuous application of
the brakes. Continuous brake
application will cause the brakes
to overheat and could result in a
temporary loss of braking per-
formance.
Wet brakes may result in the vehi- cle not slowing down at the usual
rate and pulling to one side when
the brakes are applied. Applying
the brakes lightly will indicate
whether they have been affected
in this way. Always test your
brakes in this fashion after driv-
ing through deep water. To dry the
brakes, apply them lightly while
maintaining a safe forward speed
until brake performance returns
to normal.
Always, confirm the position of the brake and accelerator pedal
before driving. If you don't check
the position of the accelerator
and brake pedal before driving,
you may depress the accelerator
instead of the brake pedal. It may
cause a serious accident.
WARNING- Parking brake
Applying the parking brake while
the vehicle is moving at normal
speeds can cause a sudden loss of
control of the vehicle. If you must
use the parking brake to stop the
vehicle, use great caution in apply-
ing the brake.
WARNING- Brakes
Do not drive with your foot rest-ing on the brake pedal. This will
create abnormal high brake tem-
peratures, excessive brake lining
and pad wear, and increased
stopping distances.
(Continued)
Page 273 of 382
415
Driving your vehicle
Disc brakes wear indicator
Your vehicle has disc brakes.
When your brake pads are worn and new
pads are required, you will hear a high-
pitched warning sound from your front
brakes or rear brakes (if equipped). You
may hear this sound come and go or it
may occur whenever you depress the
brake pedal.
Please remember that some driving con-
ditions or climates may cause a brake
squeal when you first apply (or lightly
apply) the brakes. This is normal and
does not indicate a problem with your
brakes.
Parking on curbed streets
When parking your vehicle on an uphillgrade, park as close to the curb as
possible and turn the front wheels
away from the curb so that the front
wheels will contact the curb if the vehi-
cle moves backward.
When parking your vehicle on a down- hill grade, park as close to the curb as
possible and turn the front wheels
toward the curb so that the front
wheels will contact the curb if the vehi-
cle moves forward.
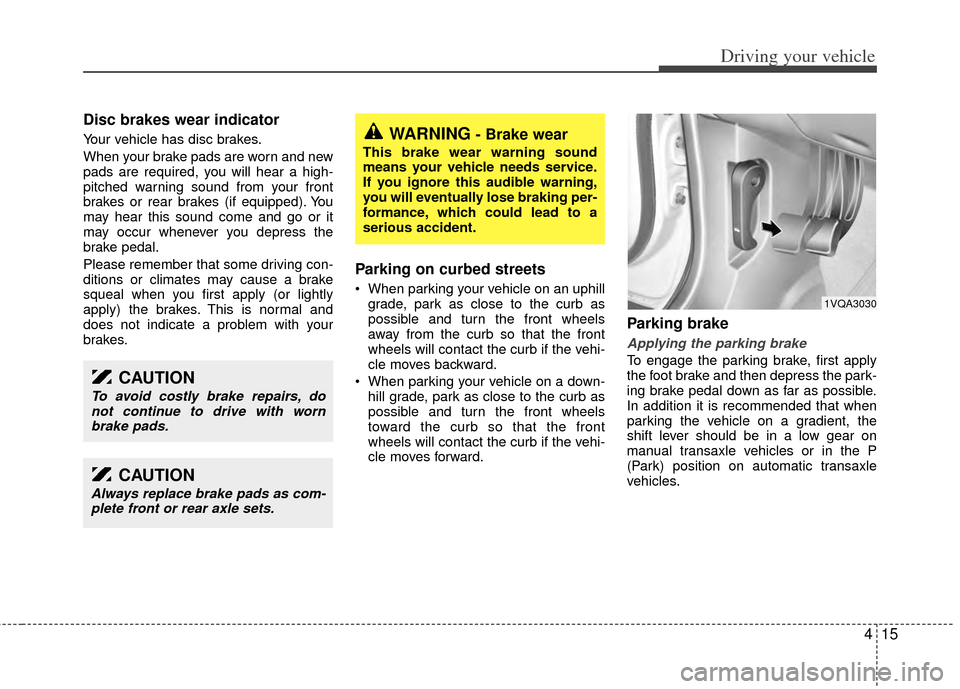
Parking brake
Applying the parking brake
To engage the parking brake, first apply
the foot brake and then depress the park-
ing brake pedal down as far as possible.
In addition it is recommended that when
parking the vehicle on a gradient, the
shift lever should be in a low gear on
manual transaxle vehicles or in the P
(Park) position on automatic transaxle
vehicles.
WARNING- Brake wear
This brake wear warning sound
means your vehicle needs service.
If you ignore this audible warning,
you will eventually lose braking per-
formance, which could lead to a
serious accident.
CAUTION
Always replace brake pads as com-plete front or rear axle sets.
CAUTION
To avoid costly brake repairs, donot continue to drive with wornbrake pads.
1VQA3030